Do not use in wet locations
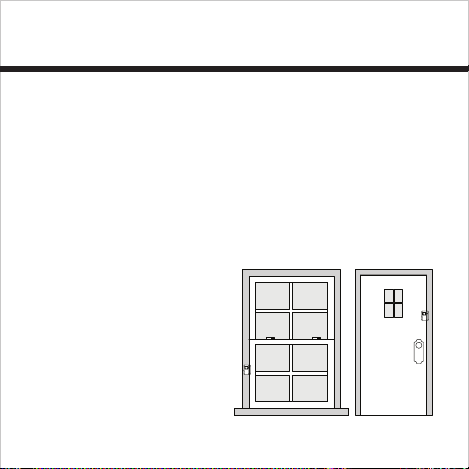
Personal Security
Window or Door Alarm
User Manual


Window or Door Alarm
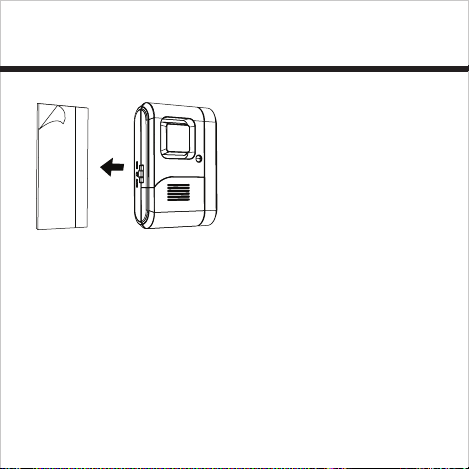
Activating Batteries
Before attempting to use the Window/
Door Alarm, you must activate the batteries
installed. Slide open the battery door and
locate the battery isolation tape. Hold the
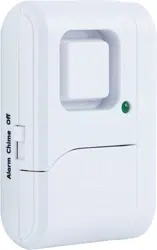
Chime/Off/Alarm
Switch
Battery
Compartment
Window or
Door Alarm
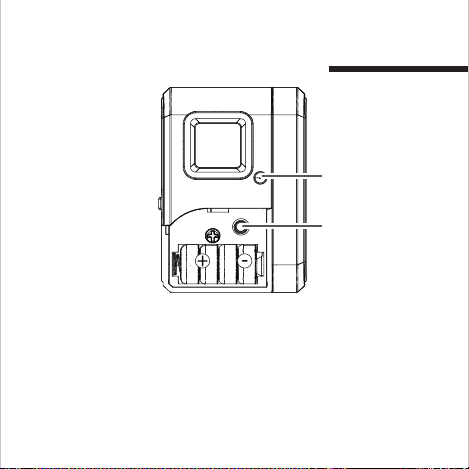
Indicator Light
Battery
Test
Button
Magnet
BATTERY
TEST

4
batteries in place while pulling the battery
isolation tape out. Once the isolator tape is
removed the alarm is active.
Low Battery Indicator
The alarm has a low battery indicator light.
Push the ‘Battery Test’ button located inside
the battery compartment. If the green light
illuminates when the button is pressed, the
batteries are still good. If the light fails to
illuminate, replace all batteries.
INSTALLING BATTERIES
The alarm requires (4) LR44 (or 357) button
batteries (included). Average battery life for

5
typical usage is up to one year.
1. Slide cover off the battery compartment
located on the front of the main unit.
2. Insert (4) LR44 button batteries noting
polarity.
3. Replace battery compartment cover.
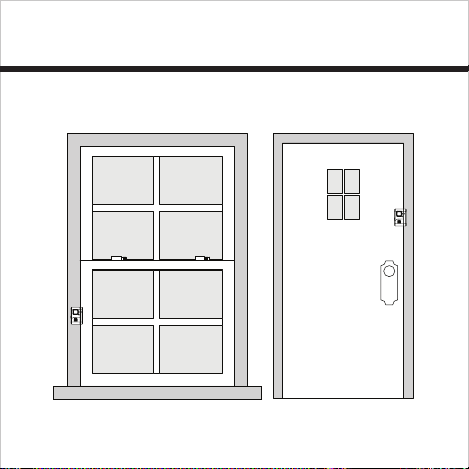
INSTALLATION
NOTE: The magnet must be placed on the
right side of the alarm. The arrows on the
alarm and the magnet must align.
1. Locate a postion on the window or door
to be protected that allows easy access to

6
the OFF/CHIME/ALARM switch. Make sure
switch is in OFF position. Make sure the
surface you are mounting to is clean and
dry. For best results, clean the mounting
surface with a mixture of 50% isopropyl
alcohol and 50% water.
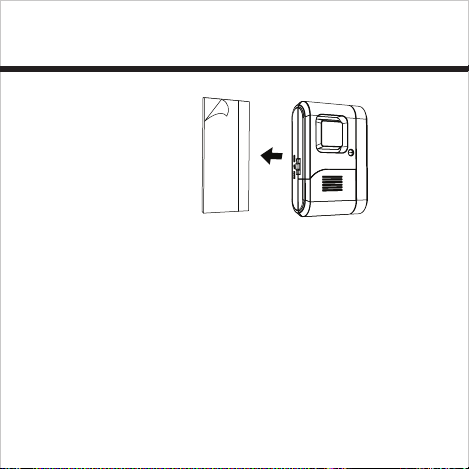
2. Peel the protective covering from one side
of the double-sided tape and then apply to
the back of the alarm. Remove protective
covering from the back side of the double-
sided tape and lightly mount the alarm or
the magnet on the part of the entry that
opens (i.e. the window or door itself)
7
Window and Door Prefered Mounting Method
8
Alarm
Double-sided
tape
3. Mount the other piece of the unit on the
stationary part of the entry way (i.e. the
window or door frame). Ensure that when
the door or window is closed, the gap
between the two pieces of the alarm unit is
less than 1/2” (preferably less).
4. Once correct placement is established, apply
pressure to secure double-sided tape.

9
OPERATION
1. To arm the unit, locate the
OFF/CHIME/ALARM switch on the side.
Slide the switch to the desired position.
When in the ALARM position, if the
protected window or door is opened
(causing the alarm to be separated from
the magnet by more than 1/2"), the
alarm siren will sound continuously until
disarmed or when the door or window is
closed (and the gap between the alarm
and the magnet is less than 1/2”).
When in the chime position, if the door or

10
window is opened, the chime will sound.
It will sound once again when the door or
window is closed and reopened.
2. To disarm the unit toggle the switch to OFF
position. Make sure the window, door or
cabinet is closed before rearming. NOTE:
To test, a cloth can be used to cover the
alarm to reduce risk of hearing damage.
CARE AND MAINTENANCE
To clean the unit housing, use a soft cloth
slightly dampened with water and wipe dry.

11
Do not use chemical agents as this may
damage and discolor the unit.
WARNING
Limitations of Alarm Products
This product should be tested periodically to make sure
it is working properly. The product, if used properly, may
reduce the risk of burglary, robbery, or other adverse
events. However, JASCO is not an insurer, this product is
neither insurance nor a guarantee that such an event will be
prevented, and users should protect themselves with proper
insurance. JASCO makes no representation that this product
cannot be compromised or circumvented, that it will provide
an adequate warning, or that it will prevent any personal
injuries, property damage, or other losses. Like any alarm
product, including expensive commercial systems, it may be
bypassed, it is subject to compromise, and it may fail to warn
for a variety of reasons, including, but not limited to: improper
installation or positioning; improper maintenance; tampering;

12
dead or improperly installed batteries; sensing limitations;
component failures; receivers; for infrared products,
intrusions may be outside of a product’s designed range and
certain environmental conditions may impact performance
and audible alarm signals may be outside of hearing range,
muted by doors, walls, and floors, unheard by deep sleepers
or the hearing-impaired, or overwhelmed by other sounds.
WARNING
Risk of personal injury
• Prolonged exposure to alarm siren may cause permanent
hearing loss
Battery Warning
• Remove batteries before storing the Alarm for extended
periods
• Batteries may leak harmful liquids or ignitable materials or
explode causing injury and product damage
• Do not mix old and new or other battery types
• Replace all batteries at the same time
• Replace fully discharged batteries immediately
For indoor use only; do not use in wet locations.

13
This Jasco product comes with a 90 day limited warranty.
Please contact Customer Service at 800-654-8483 between
7:30AM—5:00PM CST or via our website (www.jascoproducts.
com) if the unit should prove defective within the warranty
period.
is a trademark of the General Electric Company and is
used under license to Jasco Products Company LLC, 10 E.
Memorial Road, Oklahoma City, OK 73114.
3555
56789-3
11/07/2012
Seguridad Personal
Alarma Para Puertas
O Ventanas
Manual Del Usuario
No utilizar en lugares húmedos

BATTERY
TEST
Alarma para puertas o ventanas
Interruptor de
Campana/Apagado
/ Alarma
Compartimento para baterías
Alarma para
puertas o
ventanas
Luz indicadora
Botón de
prueba de
baterías
Imán
Activación de baterías
Antes de intentar de utilizar la ventana/
puerta de alarma, debe activar las baterías
instaladas. Deslice la puerta de la batería y

4
localizar la cinta de aislamiento de batería.
Mantenga las baterías en su lugar mientras
extraer la cinta de aislamiento de batería. Una
vez que se quita la cinta de aislador la alarma
está activa.
Indicador de batería baja
La alarma tiene una luz indicadora de batería
baja. Oprima el botón de “prueba de batería”
que se encuentra dentro del compartimento
para baterías. Si la luz verde se enciende al
presionar el botón, las baterías están bien.
Si la luz no se enciende, debe reemplazar las
baterías.
CÓMO INSTALAR LAS BATERÍAS
La alarma funciona con cuatro (4) baterías

5
LR44 (o 357) que vienen incluidas. La vida
promedio de las baterías es de hasta un año
para una utilización normal.
1. Retire la tapa del compartimento para
baterías que se encuentra en la parte
frontal de la unidad principal.
2. Inserte (4) baterías LR44 de acuerdo con la
polaridad.
3. Vuelva a colocar la tapa del
compartimento para baterías.
INSTALACIÓN
NOTA: El imán debe ser colocado en el lado
derecho de la alarma. Las flechas de la alarma

6
y del imán deben corresponder.
1. Ubique una posición en la ventana o en
la puerta que va a ser protegida y que le
permita tener un fácil acceso al interruptor
de APAGADO / CAMPANA / ALARMA.
Cerciórese de que el interruptor esté en
posición de APAGADO. Cerciórese también
de que la superficie en la que va a montar
la alarma esté limpia y seca. Para mejores
resultados, limpie la superficie con una
mezcla de 50% de alcohol isopropílico y
50% de agua.
Despegue un lado de la cinta doble faz y
péguela a la parte trasera de la alarma.
7
Despegue el otro lado de la cinta doble faz
y monte suavemente la alarma o imán a la
parte de la ventana o de la puerta que se
abre.
2. Monte la otra pieza de la unidad en la
parte fija (es decir, en el marco de la
puerta o de la ventana). Cerciórese de que
cuando la puerta
o la ventana
esté cerrada, el
espacio entre
las dos piezas
de la alarma
sea menor a
Método recomendado para montar la alarma en la puerta y ventana.
8
½” (preferiblemente
menos).
3. Una vez que se
ha establecido la
ubicación correcta,
presione para asegurar
la cinta doble faz.
MODO DE OPERACIÓN
1. Para activar la unidad, ubique el
interruptor de APAGADO / CAMPANA /
ALARMA a un lado. Ponga el interruptor
en la posición deseada. Cuando esté en
la posición de ALARMA, si la ventana o
AlarmaCinta
doble faz

9
puerta protegida se abre (lo que hace
que la alarma esté separada del imán
más de ½”), la sirena de la alarma sonará
continuamente hasta que sea desactivada
o hasta que la puerta o ventana sea
cerrada (y el espacio entre la alarma y el
imán sea menor a ½”).
Cuando esté en la posición de campana,
si la puerta o la ventana se abre, la
campana sonará. Sonará una vez más
cuando la puerta o la ventana sea cerrada
y se vuelva a abrir.
2. Para desactivar la unidad, ponga el

10
interruptor en posición de APAGADO.
Cerciórese de que la ventana, puerta o
gabinete esté cerrado antes de volver a
activar. NOTA: Al hacer una prueba, utilice
un pedazo de paño para cubrir la alarma y
reducir el riesgo de daño auditivo.
CUIDADO Y MANTENIMIENTO
Para limpiar la parte exterior de la alarma,
pásele un paño levemente humedecido y
luego un paño seco. No utilice químicos
porque pueden dañar y desteñir la unidad.

11
ADVERTENCIA
Limitaciones de las alarmas
Este producto debe ser revisado periódicamente para
garantizar que esté funcionando bien. Si el producto es
utilizado adecuadamente, puede reducir el riesgo de robo
y otros eventos adversos. Sin embargo, JASCO no es una
aseguradora, este producto no es un seguro ni una garantía
de que se podrá evitar tal evento, y los usuarios deben
protegerse con un seguro adecuado. JASCO no asegura
que este producto no pueda ser dañado o evadido, que
proporcione una alerta adecuada ni que evite lesiones
personales, daños a la propiedad u otras pérdidas. Al igual
que cualquier producto de alarma, incluyendo los costosos
sistemas comerciales, puede ser evadido, dañado y podría
no dar la alerta por varias razones, entre otras: instalación
o ubicación no adecuada, mantenimiento inadecuado,
sabotaje, baterías insuficientes o mal instaladas, limitaciones
en el sensor, fallas de los componentes, receptores; para los

12
productos infrarrojos, las intrusiones pueden estar por fuera
del rango diseñado para el producto y algunas condiciones
ambientales podrían afectar el desempeño, y las señales
audibles de la alarma podrían estar por fuera del rango
del alcance auditivo, podrían ser silenciadas por puertas,
paredes y pisos, no escuchadas por personas con sueño
profundo o con problemas auditivos o absorbidas por otros
sonidos.
ADVERTENCIA
Riesgo de lesiones personales
• La exposición prolongada a la sirena de la alarma puede
ocasionar una pérdida permanente de la audición.
Advertencia sobre las baterías
• Retire las baterías antes de guardar la alarma por períodos
largos de tiempo.
• Las baterías pueden filtrar líquidos nocivos o materiales
combustibles o explotar y provocar daños personales y al
producto.
• No mezcle baterías nuevas y viejas y otros tipos de baterías.

13
• Reemplace todas las baterías al mismo tiempo
• Reemplace inmediatamente las baterías descargadas.
Únicamente para ser utilizado en interiores: no utilizar en
lugares húmedos.
Este producto de Jasco tiene una garantía limitada de 90
días. Contacte el Servicio al Cliente en 800-654-8483, entre
las 7:30 a.m. y las 5:00 p.m. CST o visite nuestro sitio web
(www.jascoproducts.com) si la unidad sale defectuosa
durante el período de garantía.
es una marca registrada de General Electric Company y
se utiliza bajo licencia a Jasco Products Company LLC, 10 E.
Memorial Road, Oklahoma City, OK 73114.
3555
56789-3
11/07/2012