
Loading ...
Loading ...
Loading ...
ENGLISH
9
Installing Blade (Fig. Q)
1. Place blade insulator
18
with the raised sides toward
the blade onto the bolt shaft, making sure it aligns with
the double D shape on the bolt shaft.
2. Place the blade in between the raised sides of the
insulator
18
, making sure that the lettering on the
blade is away from the insulator.
3. Screw the blade bolt into the bolt shaft and tighten the
blade bolt as firmly as possible by hand.
4. Position piece of wood
14
to keep blade from turning
as shown in Fig. O.
5. Use a 9/16 inch wrench to securely tighten the blade
bolt by turning the wrench clockwise.
Fig. Q
15
16
Blade Sharpening
KEEP BLADE SHARP FOR BEST MOWER PERFORMANCE.
A DULL BLADE DOES NOT CUT GRASS CLEANLY OR
MULCH PROPERLY.
USE PROPER EYE PROTECTION WHILE REMOVING,
SHARPENING, AND INSTALLING BLADE. ENSURE THAT
THE MOWER IS UNPLUGGED.
Sharpening the blade twice during a mowing season is
usually sufficient under normal circumstances. Sand causes
the blade to dull quickly. If your lawn has sandy soil, more
frequent sharpening may be required.
REPLACE BENT OR DAMAGED BLADE IMMEDIATELY.
When sharpening the blade:
1. Make sure blade remains balanced.
2. Sharpen blade at the original cutting angle.
3. Sharpen cutting edges on both ends of blade, removing
equal amounts of material from both ends.
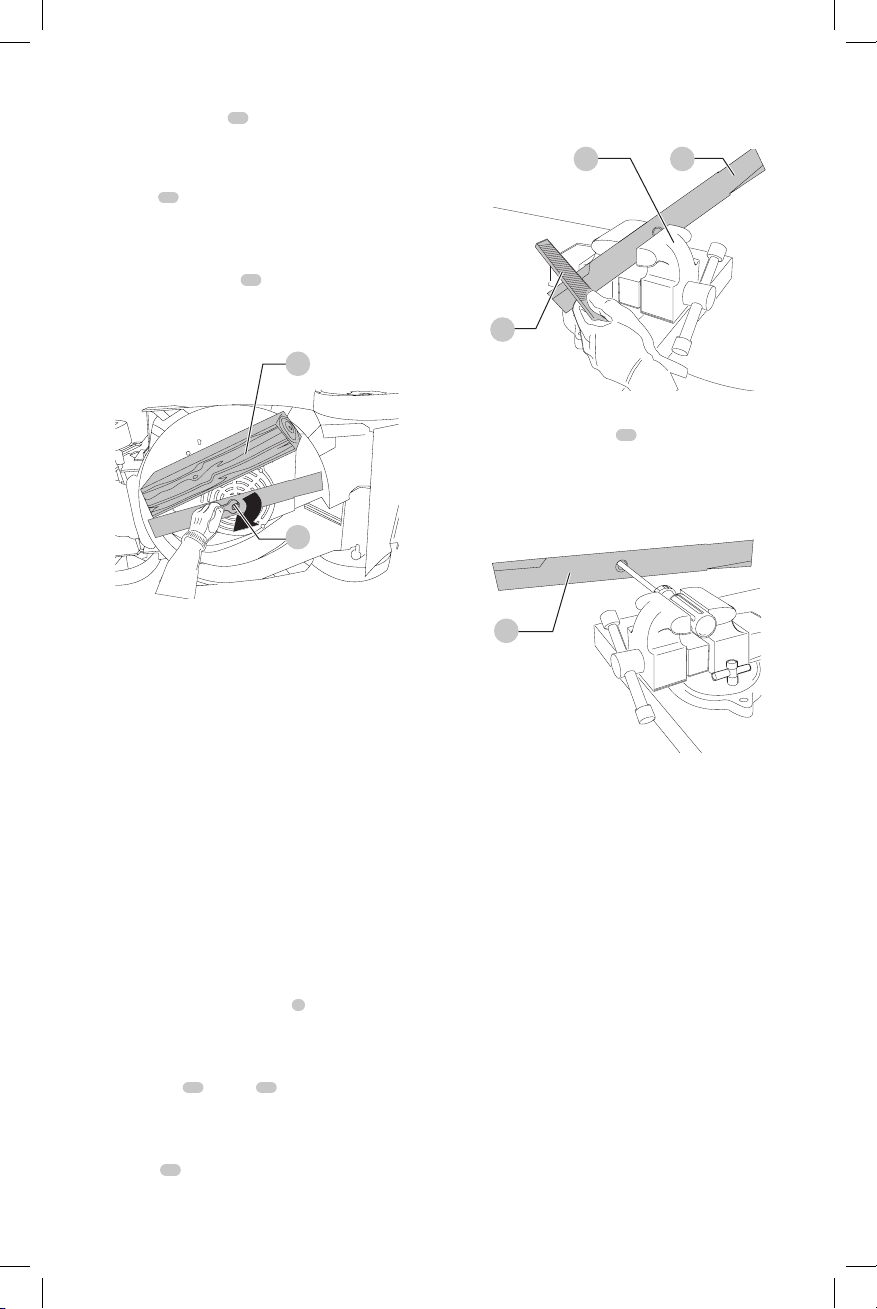
To sharpen blade in a vise (Fig. R):
1. Be sure the comfort grip handle
2
is released, the blade
has stopped and the mower is unplugged.
2. Remove blade from mower. See instructions for
removing and installing blade.
3. Secure blade
17
in a vise
19
.
4. Wear proper eye protection and gloves and be careful
not to cut yourself.
5. Carefully file the cutting edges of the blade with a fine
tooth file
20
or sharpening stone, maintaining the
original cutting edge.
6. Check balance of blade. See instructions for blade
balancing.
7. Replace blade on mower and tighten securely.
Fig. R
19
20
17
Blade Balancing (Fig. S)
1. Check balance of blade
17
by placing center hole in
blade over a nail or round shank screwdriver, clamped
horizontally in a vise.
2. If either end of the blade rotates downward, file that
end. Blade is properly balanced when neither end drops.
Fig. S
17
MAINTENANCE
WARNING: To reduce the risk of serious personal
injury, turn unit off and disconnect it from
power source before making any adjustments or
removing/installing attachments or accessories.
An accidental start-up can causeinjury.
Cleaning
WARNING: Blow dirt and dust out of all air vents with
clean, dry air at least once a week. To minimize the risk
of eye injury, always wear ANSI Z87.1 approved eye
protection when performingthis.
WARNING: Never use solvents or other harsh
chemicals for cleaning the non-metallic parts of
the tool. These chemicals may weaken the plastic
materials used in these parts. Use a cloth dampened
only with water and mild soap. Never let any liquid
get inside the tool; never immerse any part of the tool
into aliquid.
Loading ...
Loading ...
Loading ...