Loading ...
Loading ...
Loading ...
4
5
1. When jack is not in use, lifting arm and handle sleeve should be
in fully down position to keep their machined surfaces free from
corrosion.
2. Keepjackcleanandwelllubricatedatpointsillustratedingure4.
3.Forbestresults,useonlyhydraulicuidwitharatingofSAE10for
rells.Checkuidlevelwithjackinfullydownposition.Fluidlevel
shouldbeuptobottomofoilllplug
4. Regularly check for loose, worn or damaged parts and repair or
replace as necessary.
5. Replace worn or damaged parts with
Performance Tool
®
replacement parts.
Besurethatonlyqualiedpersonnel
perform repairs.
* Illustrations and photographs are intended for reference only.
Actual merchandise may vary slightly from illustration.
Your Performance Tool hydraulic jack was constructed with quality
materials and workmanship and will give you many years of trouble free
use when cared for as described in the "Care & Maintenance" section on
page 3. However, as with any mechanical device, periodic adjustments
are necessary to maintain a peak level of performance. Should your
jack be displaying any of the following symptoms, the simple procedures
shown below will correct the problem.
CARE & MAINTENANCE
TROUBLESHOOTING
OPERATION
Before using your jack:
Insert lower bar section into handle sleeve.
(See Fig. 1) Secure bar to handle sleeve with
handle set screw. Turn bar counter-clockwise
to open release valve. Pump jack handle
about 6 full strokes to assure complete distri-
butionofhydraulicuid.(SeeFig.2)
To raise:
Turn bar clockwise to close release valve.
Make certain that load is on center of saddle.
Pump to raise load to desired height. Transfer
load to jack stands or other appropriate supports
before working under load. (See Fig. 3)
To lower:
Raise load enough to remove jack stands.
Slowly turn release valve counter-clockwise just enough to allow
controlled descent. (Never turn counter-clockwise more than 3 full turns)
Fig. 1
Fig. 2
Fig. 3
Fig. 4
1
2
3
4
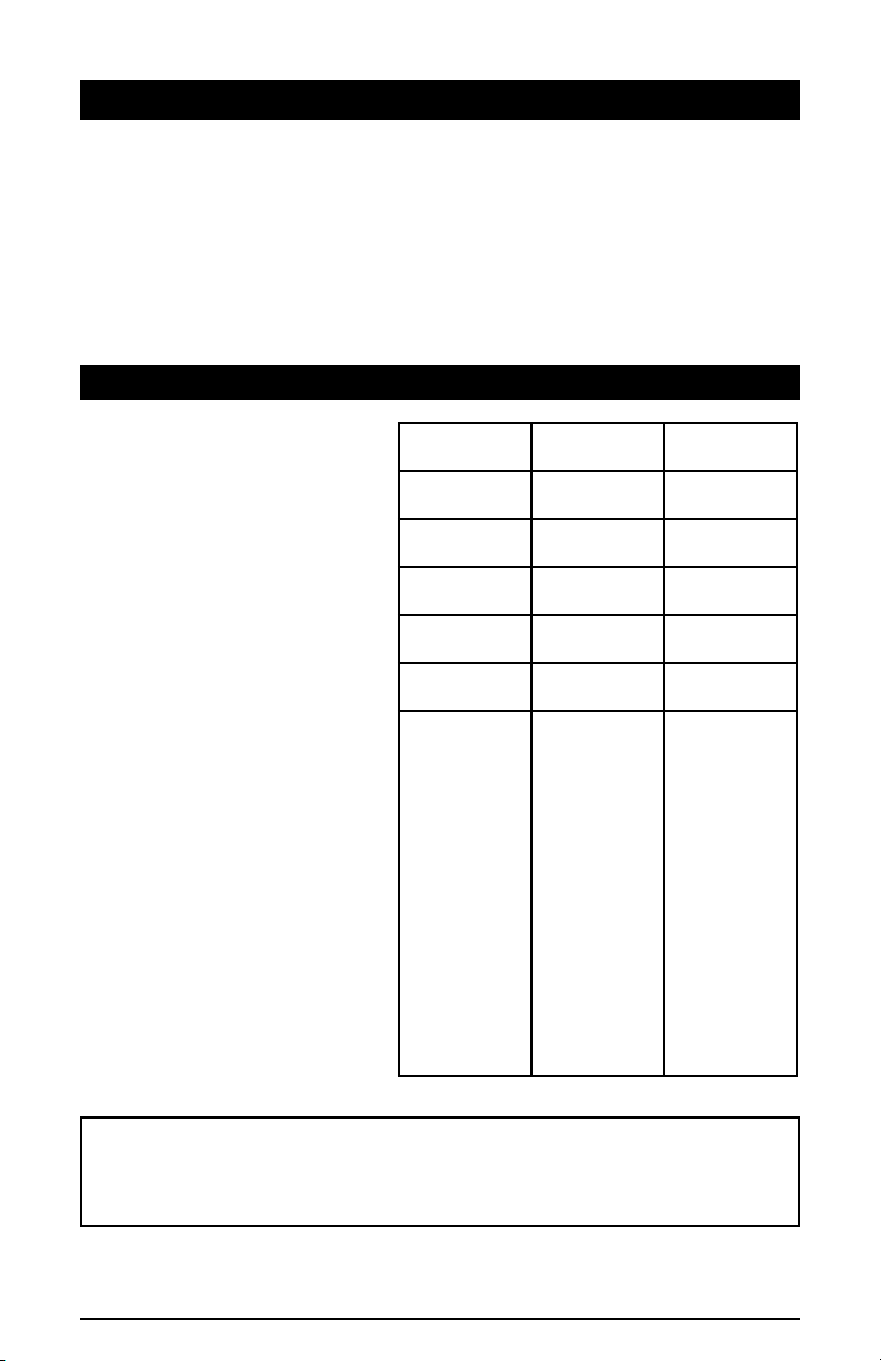
WARNING - Remove jack from service before making adjustments
NOTE:
Problems listed above with more than one solution may have a combination of causes.
Please be sure that all solutions listed for each problem have been checked to eliminate
possibility of further trouble. Sometimes solutions may need to be repeated for best results.
● ● ●
●
● ●
● ●
●
●
Power unit may
be low in fluid.
With jack on level
surface and in
down position,
remove filler plug
and add clean
hydraulic jack fluid
to level of filler.
Power unit may
be air bound.
Open the release
valve a minimum
of 2 full turns.
Pump the handle
a minimum of 20
full strokes to
purge air from the
system.
Valve may not be
closing
completely.
To seat valves:
a.) Close release
valve.
b.) With jack in
fully lowered
position,
manually raise
lifting arm as
high as
possible.
c.) Open release
valve and
allow jack to
descend to
lowered
position
Will not lift load
Will not hold load
Will not lift to full height
Pump feels "spongy" under load
Handle raises under load
Handle lowers under load
Loading ...
Loading ...
Loading ...