Loading ...
Loading ...
Loading ...
8
OPERATING INSTRUCTIONS
BEFORE USE
• Before connecting the appliance to the power supply, let the unit stand upright for 1 hour, which will reduce
the possibility of the cooling system malfunctioning due to improper handling.
• Clean your unit thoroughly before putting into use. (Refer to “CARE AND MAINTENANCE”.)
• Use the parts diagram on page 6 to insure proper positioning of internal components.
USING YOUR ICE MAKER
1. Clean your ice maker thoroughly.
2. Open the cover, remove the ice basket and pour normal tap water into tank. Keep water level below the
level mark.
3. Plug in the unit and the power indicator light will blink.
4. Press “POWER” on the control panel to begin the ice making cycle. The power indicator light will light.
5. Select the size of the ice cube by pressing the “SELECT” button. If ambient temperature is below 60°F, it is
recommended to select small size to avoid ice sticking together.
6. While the icemaker is on, check water level periodically. If water pump cannot inject water, the ice maker
will stop automatically, and the “WATER” indicator will be on. Press the “POWER” button, fill water up to
the level mark and press “POWER” again. Allow 3 minutes for the refrigerant to settle before restarting.
7. The ice maker automatically stops working when the ice basket is full and the “ICE FULL” indicator will be
illuminated.
WARNING: Direct or reflected sunlight may cause the infrared sensor to malfunction. If the unit doesn't stop
making ice, even when full, move the unit where there is no sunlight.
Change water in the water reservoir every 24 hours to ensure a reasonable hygiene level. If unit is not in use, drain
all water in the tank reservoir.
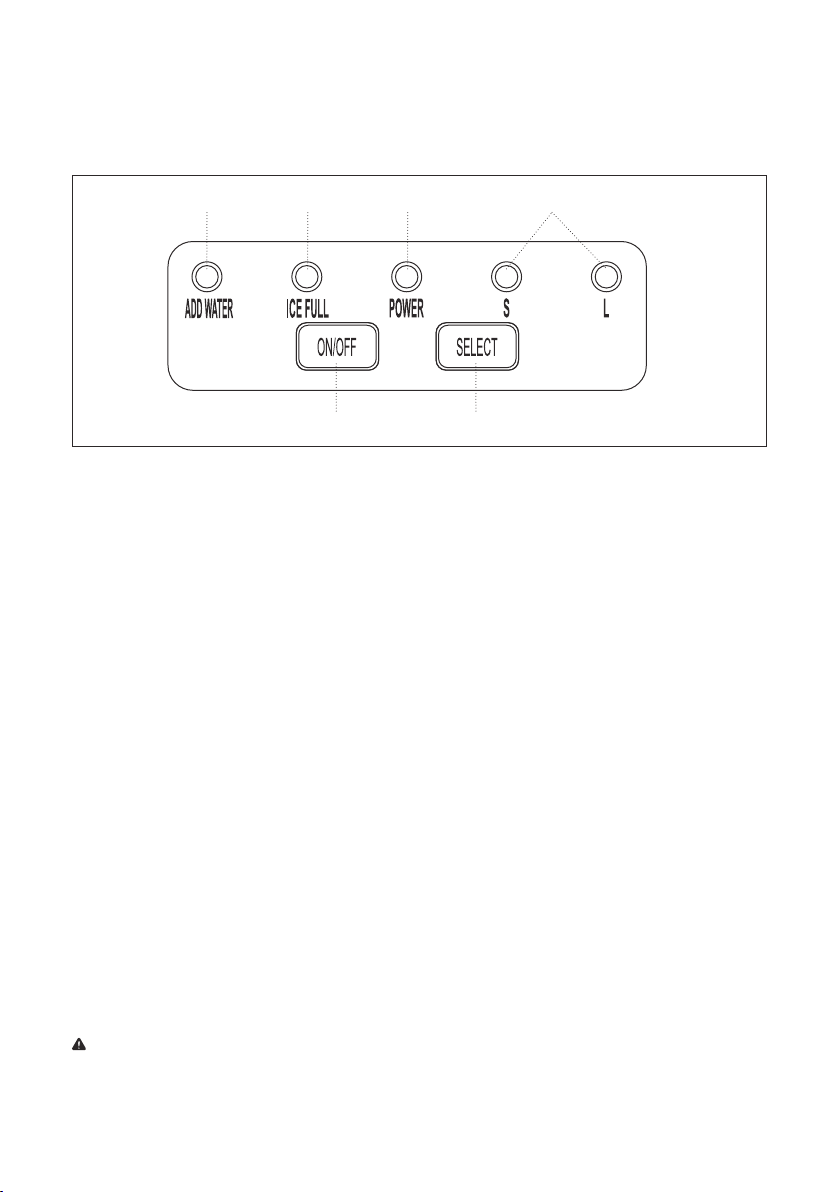
a. Button to turn on/off the unit
b. Button to select ice cube size
CONTROL PANEL
Figure 3
c. Power Indicator
d. Ice Full Indicator
e. Water Shortage Indicator
f. Selected ice size: Small or large
ab
e d c f
Loading ...
Loading ...
Loading ...