Loading ...

HOW TO TEST RUN
Steps To Test Run Before Installation
IMPORTANT!
Wear gloves to protect against sharp edges.
PLEASE FOLLOW THESE INSTRUCTIONS TO TEST THE
RANGE HOOD BEFORE INSTALLATION FOR ANY DEFECTS
OR SHIPPING DAMAGE:
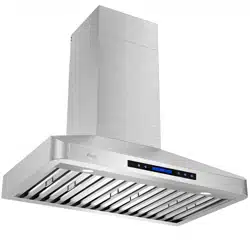
1. This range hood model is packed in 2 packages.
Take out the range hood and its accessories from
both packages carefully.
2. Place the range hood on a flat stable surface,
remove the baffle filter and check for any dents or
damages on the range hood body.
3. Remove the loosen parts if there's any.
4. Assemble the Blower portion to the Hood Body, and
connect the motor's wiring to the Control Panel's
Cable.
5. Plug the range hood into a 120V AC power source.
Press the power button once and then any of the
speed buttons to turn it on.
6. Check each speed variation and pay attention to
the noise level to make sure there isn't any unusual
noise besides it coming from the wind blowing.
Press the Light Button to check the lights.
7. Verify all functions, as instructed in Page 9, are
working properly.
8. Refer to Range Hood Troubleshooting in Page 11 for
general issues and solutions.
Assembling the 36" RH-WT-36 Model
• The
36" model
is packed in 2 packages. Please
assemble both portions of the hood using the
supplied
Corner Brackets
and
Screws
from inside
the hood body before installing the range hood (See
diagram below).
Please read all instructions carefully before proceeding
further to prevent the risk of fire, electric shock, personal
injury or damage to the range hood. This manual
provides a general insight on the installation and may
not include solutions for all possible issues that may
occur.
In case of this manual destroyed or lost, please visit
https://www.awoco.com and download a digital version.
Installation Overview
1. Unpack the range hood and check for any physical
damage on the body.
2. Test run the range hood and check if all functions
are working properly. Refer to Page 9 for
functionalities.
DO NOT
install the range hood if it's defective. Contact
the seller immediately.
3. If all is fine, install the range hood as instructed in
this manual. Refer to Page 7.
4. Test run the range hood again when the installation
is finished. Refer to Page 11 for troubleshooting.
Possible Tools Needed:
• Marker / Pencil;
• Jig Saw or Reciprocating Saw;
• Screwdrivers or Power Drill;
• Level;
• Measuring Tape;
• Knife:
• Duct / Foil Tape;
• Screws.
2 PEOPLE ARE REQUIRED FOR THE INSTALLATION.
Internal View of the Hood, from the Hood Bottom to the Top
Front Panel
Blower
Bracket
How to install the Bracket:
1. Align the Bracket to the corner.
2. Insert and tighten the screws.
Loading ...
Loading ...
Loading ...
