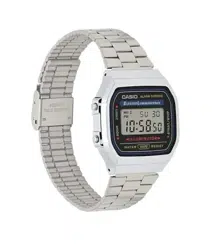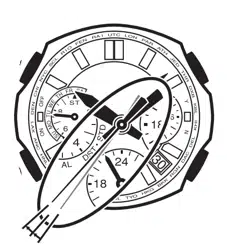
5SERS'UIDE
MA1108-EB

1
Thank you for purchasing this CASIO watch. To ensure that it can
provide you with the years of service for which it is designed, be sure
to read this manual carefully and follow the instructions contained
herein.
Pay particular attention to the Safety Precautions on the following
pages. Be sure the read the Safety Precautions before trying to use
this watch.
Be sure to keep all user documentation handy for future reference.
Note that the watch illustrations in this manual are intended for ••
reference only, and so the actual watch may appear somewhat
different than depicted by an illustration.
Features
l Solar charging
l Radio-controlled atomic timekeeping
l Stopwatch
l Countdown Timer
l World Time
l Alarm
l Auto hand home position correction
Be sure to charge the watch sufficiently before using it!
Your watch runs on electrical power generated from light, which
is stored by a rechargeable battery.
To ensure stable operation, make sure that the watch is exposed
to light as much as possible as described in this manual.
See “Solar Charging” for more information about required
charging times.
2
Safety Precautions
Symbols
This manual and the watch itself use various symbols that are
intended to ensure safe operation of the watch, to prevent injury to
you and others, and to protect against material damage and loss.
The following explains the meanings of the symbols.
Example Symbols
The symbol indicates something you need to
exercise caution about. The symbol to the left indicates
an electric shock precaution.
The symbol indicates something you must not do.
The symbol to the left indicates that you should not try
to disassemble something.
The symbol indicates something you must do. The
symbol to the left indicates that you must unplug the
power cord from the power outlet.
3
Danger!
Disregarding information with this label
creates the risk of death or serious personal
injury.
Warning!
Disregarding information with this label
could possibly create the risk of death or
serious personal injury.
Caution!
Disregarding information with this label
could possibly create the risk of personal
injury or material loss.
4
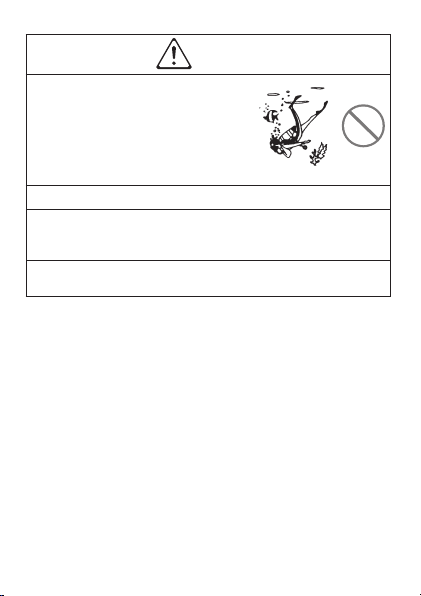
Warning!
Do not use this watch while scuba
diving (aqualung).
This watch is not a diving watch. ••
Improper use of this watch can lead to
serious accident.
Battery
Whenever removing the button type battery, take care to ensure
that the battery is not swallowed accidentally.
Special care is required where young children are present.
Keep batteries out of the reach of small children. Should a battery
ever be swallowed accidentally, contact a physician immediately.

5
Caution!
User Maintenance
A dirty or rusty case or band can soil the sleeve of your clothing.
Be sure to keep the case and band clean at all times. Rust tends
to form easily after the watch is exposed to seawater and then left
without cleaning.

6
Caution!
Skin Irritation
Since the watch and the band come into direct contact with the
skin, the following conditions may cause irritation of the skin.
1. When a wearer is allergic to metal or leather
2. When the watch or band is rusty dirty, sweaty, etc.
3. When the wearer is in poor physical condition
Tightening the band too tightly can cause you to sweat and ••
make it difficult for air to pass under the band, which can lead to
skin irritation. Do not over-tighten the band.
The bacterial and odor resistant band suppresses the formation ••
of organisms and bacteria due to sweat, and related odors. It
does not protect against skin rash.
Should you ever notice any abnormality, immediately stop using ••
the watch and consult a physician.

7
Caution!
Never try to take the watch apart!
Never try to take the watch apart. Doing so creates
the risk of personal injury and malfunction of the watch.
8
Caution!
Use of the Watch
To avoid unexpected accidents, always check around you to
ensure you are in a safe place before looking at the display of the
watch. Looking at the watch while running or jogging on the open
road, while riding a bicycle, or operating a motor vehicle can lead
to accidents. Take care to avoid running into others.
Take care to avoid breaking your fingernails when fastening and
unfastening the band. Particular care is required by people with
long fingernails.
To avoid unexpected injury or skin irritation due to allergic reaction,
do not wear the watch while sleeping.

9
Caution!
Use of the Watch
When picking up or otherwise coming into contact with a child,
remove the watch from your wrist to avoid injury to the child or
causing irritation of the child’s skin.
10
Before using the watch...
Expose the watch to light.
Your watch runs on electrical power generated from light, which is
stored by a rechargeable battery. Long-term storage of the watch
can cause power to run low, so be sure to expose the watch to light
before using it for the first time. See page 18 for more information.
Low Battery Alert
When battery power is low, the second hand of the watch will jump
at 2-second intervals in the Timekeeping Mode to let you know that
charging is required. See page 20 for more information.
*UMPSEVERYTWOSECONDS
Power Saving
Power Saving causes the watch to enter a sleep state automatically,
which stops movement of the analog hands in order to save power
whenever the watch is left in the dark.
The watch will exit the sleep state if you expose it to light or perform
any button operation.

11
Though the hands are stopped, the watch continues to keep time
internally.
Note that the watch also may enter the sleep state if its face is
blocked from light by your sleeve.
The watch does not enter the sleep state if it is in the Stopwatch
Mode or Countdown Timer Mode.
How the sleep state works
Sleep Level 1
Sleep Level 1 is triggered whenever the watch is left in the dark for
about one hour any time between the hours of 10 p.m. and 6 a.m. At
this time, watch functions will operate as described below.
The second hand will stop at its current position.
The hour hand, 24-hour time hands, minute hand, and date
indicator will continue to operate normally.
Auto Receive is performed normally.
Alarms and the hourly time signal will continue to operate normally.
At this time, watch functions will operate as described below.
Sleep Level 2
Sleep Level 2 is triggered whenever the watch is left in the dark while
in Sleep Level 1 for six or seven days.
The hour hand, 24-hour time hand, minute hand, and World Time
will stop at their current positions.
World Time timekeeping will stop at the point the current time in
the Timekeeping Mode reached 0:00.
Auto Receive will be disabled.
Alarms and the hourly time signal will be disabled.
Date display will continue to operate normally.

12
Contents
Safety Precautions ...............................................2
Symbols ........................................................................2
Example Symbols ........................................................2
Before using the watch... ...................................10
Expose the watch to light. .........................................10
Power Saving .............................................................10
Modes and Indicators ........................................16
Solar Charging ....................................................18
How a Radio-controlled Watch Works ...............24
What is a radio-controlled watch? ............................24
Calibration Signal .......................................................25
Reception Ranges ......................................................27
Reception Time ...........................................................30
Positioning the Watch for Best Reception ...............30
Receiving a Calibration Signal ..................................31
Auto receive ................................................................32
Using Manual Receive ...............................................34
To cancel a manual receive operation ............................... 36
To check the result of the last receive operation ............. 37

13
Calibration Signal Reception Precautions ..............38
Troubleshooting ........................................................39
Stopwatch ...........................................................42
To start or stop an elapsed time operation ....................... 42
To measure elapsed time .................................................... 44
To measure split times ........................................................ 44
Countdown Timer ...............................................46
To set the countdown timer start time .............................. 47
To use the countdown timer ............................................... 48
To stop the time up alert ..................................................... 49
World Time...........................................................50
To search for a city .............................................................. 51
Summer Time ..............................................................52
To switch between standard time and
summer time manually ....................................................... 53
Home Time/World Time Swapping ............................54
City Code List .............................................................56
Alarm ...................................................................58
To set the alarm time ........................................................... 59
To turn the alarm on or off .................................................. 60
To stop the time up alert ..................................................... 60
Configuring Home City Settings .......................62
Configuring Time and Date Settings Manually
....66

14
Auto Hand Home Position Correction ..............73
To trigger the auto hand home position correction
operation manually ............................................................. 74
Manual Home Position Correction ....................75
Specifications .....................................................82
Operating Precautions .......................................84
Battery .................................................................89
User Maintenance ..............................................90

15
16
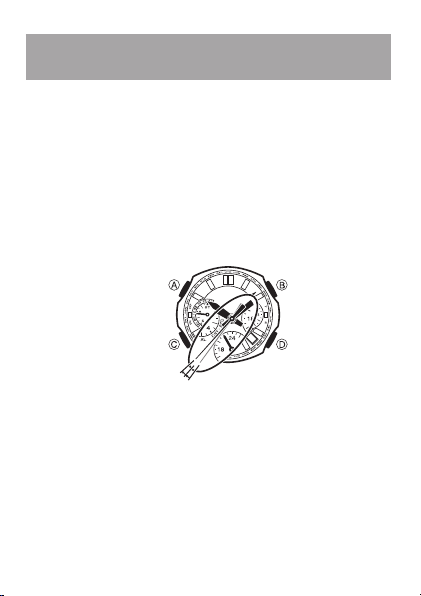
4IMEKEEPING-ODE
7ORLD4IME-ODE
!LARM-ODE
3TOPWATCH-ODE
#OUNTDOWN4IMER-ODE
BUTTON
BUTTON
BUTTON
BUTTON
3ECONDHAND
"OTTOMDIALHAND#URRENTHOURINHOURFORMAT
$AY
,EFTDIALHAND
$AYOFTHE
WEEKMODE
#URRENTTIME
)NDICATESHOURAND
MINUTEINALLMODES
2IGHTDIALHANDS
7ORLD4IME
3TOPWATCHTIMEHOURS
ANDMINUTES
!FTERINDICATING34
INDICATESSECONDS
FORSTOPWATCHTIMING
)NDICATES42
#OUNTDOWN4IMERHOURS
ANDMINUTES
0
0
00
#ITYCODE
)NDICATES34$OR$34
7ORLD4IME
)NDICATES!,
!LARMTIME
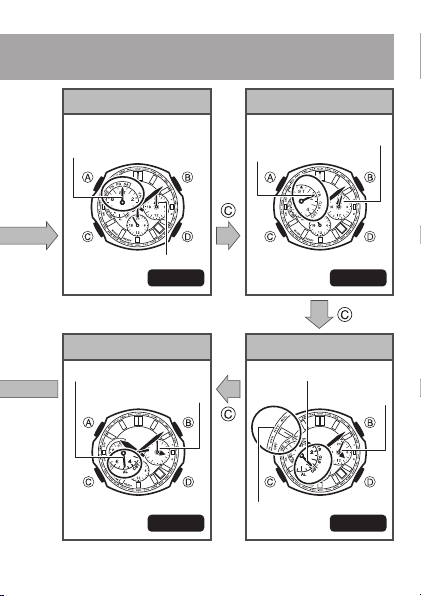
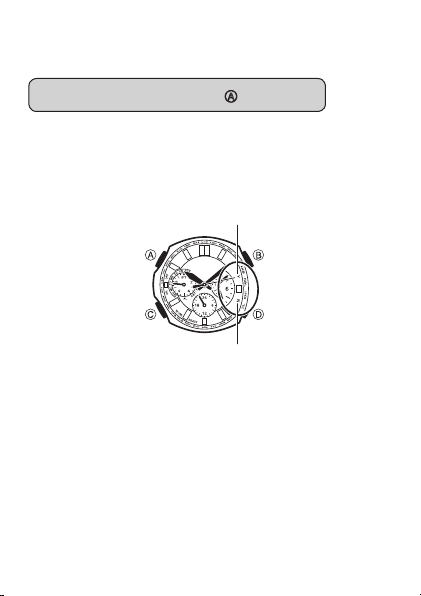
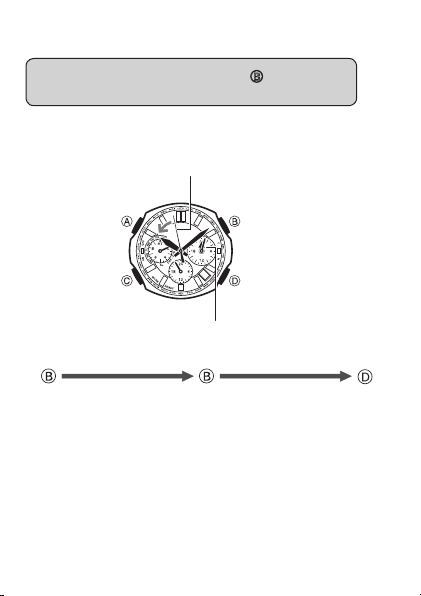
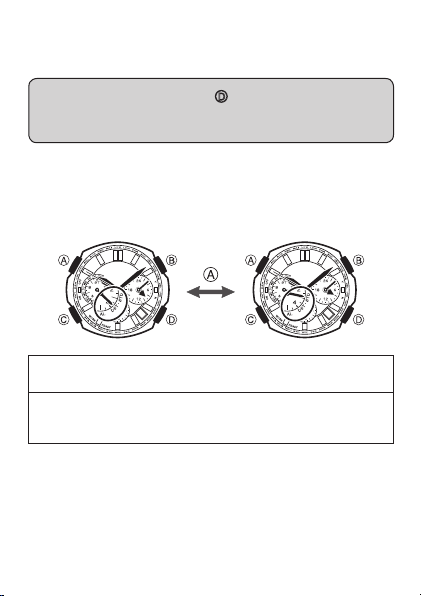
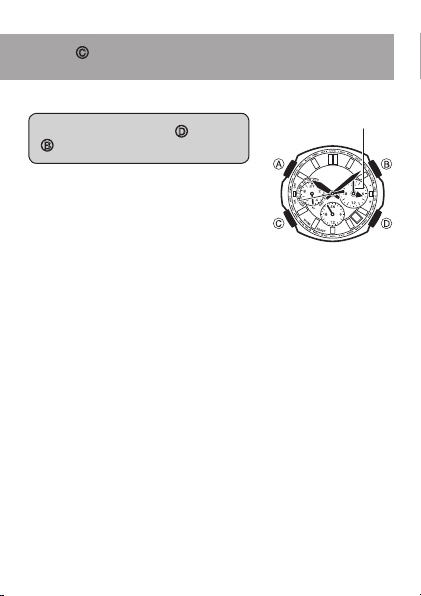
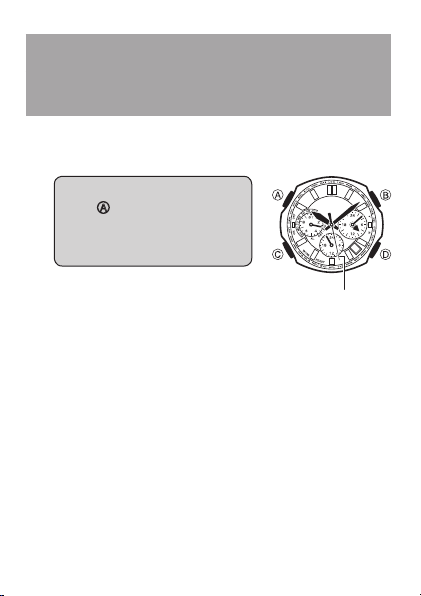
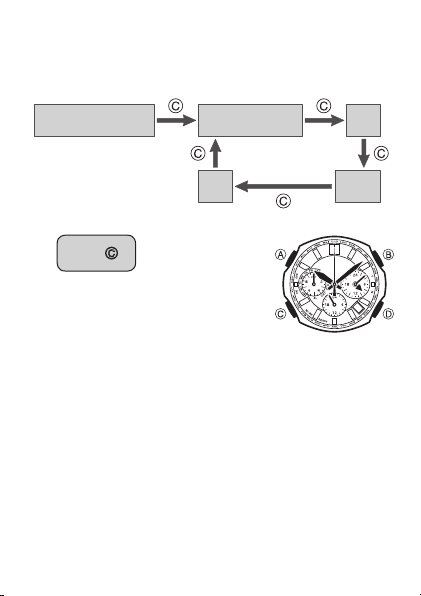
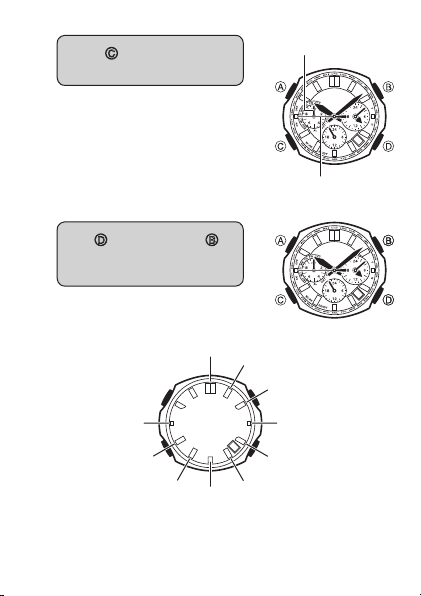
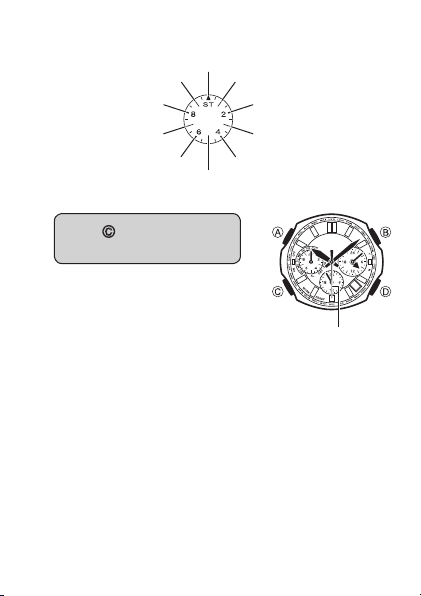
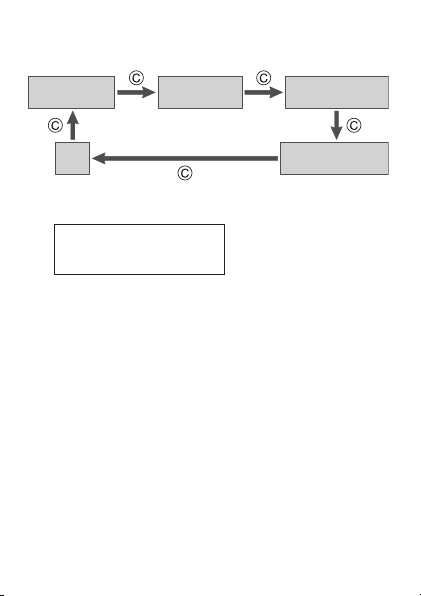
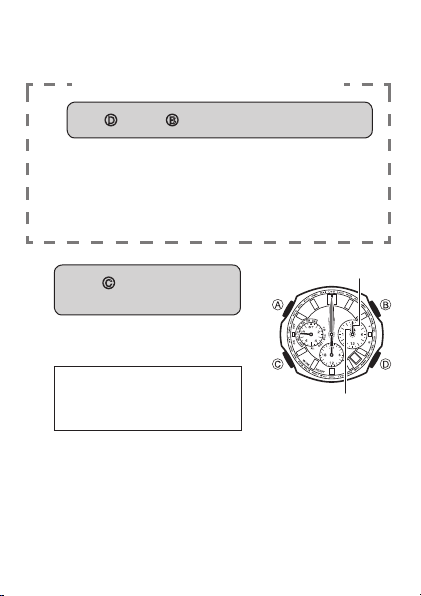
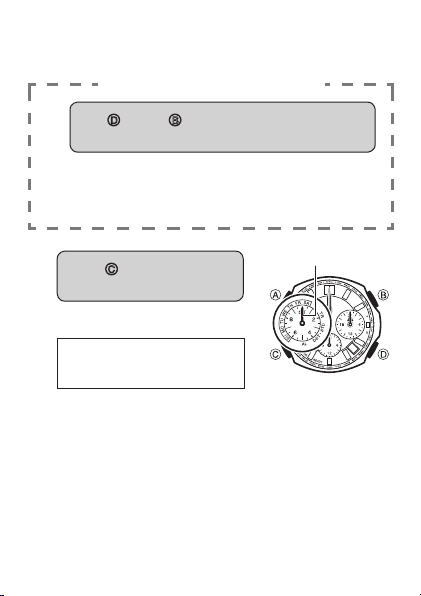
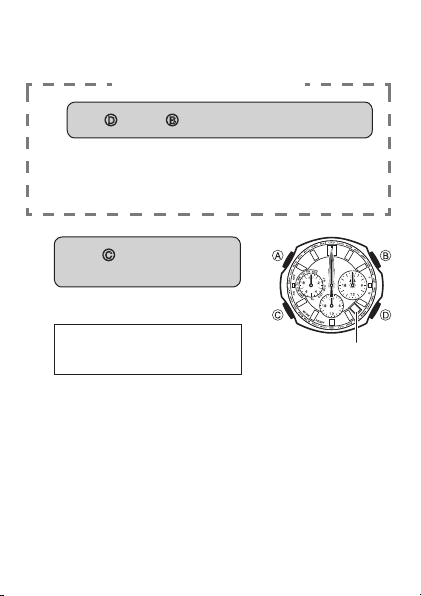
Modes and Indicators
Each press of C cycles through modes in the sequence shown
below.
Stopping at a mode for about one second will cause the display to ••
change to the data for that mode.
Operating a button while the hands are moving at high speed may ••
cause the hands to stop temporarily.
A•• button
Press once to view the last receive result (page 37).••
Any time except while the watch is performing auto hand home ••
position correction, holding down C for about two seconds will
return directly to the Timekeeping Mode.
See page 24 for more information.••
17
4IMEKEEPING-ODE
7ORLD4IME-ODE
!LARM-ODE
3TOPWATCH-ODE
#OUNTDOWN4IMER-ODE
BUTTON
BUTTON
BUTTON
BUTTON
3ECONDHAND
"OTTOMDIALHAND#URRENTHOURINHOURFORMAT
$AY
,EFTDIALHAND
$AYOFTHE
WEEKMODE
#URRENTTIME
)NDICATESHOURAND
MINUTEINALLMODES
2IGHTDIALHANDS
7ORLD4IME
3TOPWATCHTIMEHOURS
ANDMINUTES
!FTERINDICATING34
INDICATESSECONDS
FORSTOPWATCHTIMING
)NDICATES42
#OUNTDOWN4IMERHOURS
ANDMINUTES
0
0
00
#ITYCODE
)NDICATES34$OR$34
7ORLD4IME
)NDICATES!,
!LARMTIME
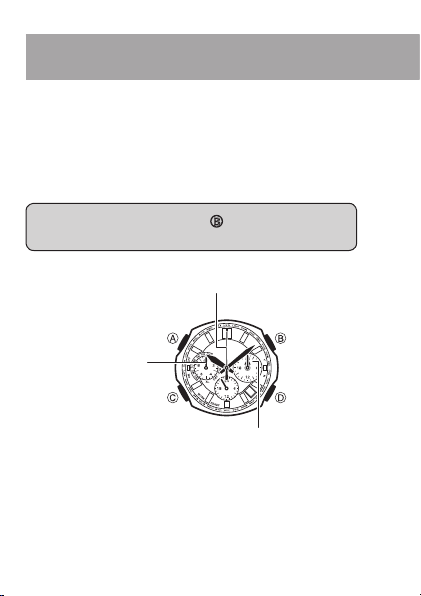
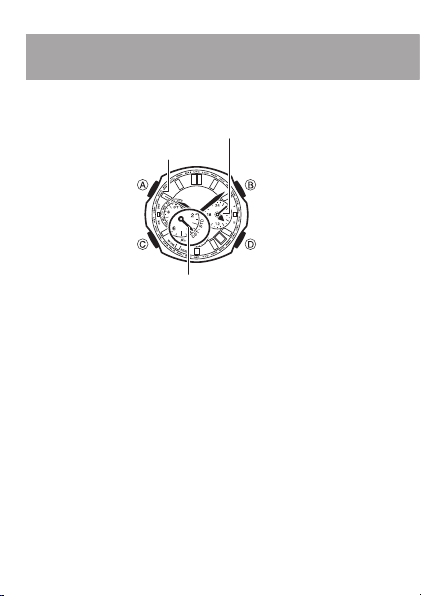
Modes and Indicators
The shape and markings of the face depend on the watch ••
model.
18
Solar Charging
Your watch runs on electrical power generated from light, which is
stored by a rechargeable battery.
To ensure stable operation, make sure that the watch is exposed to
light as much as possible.
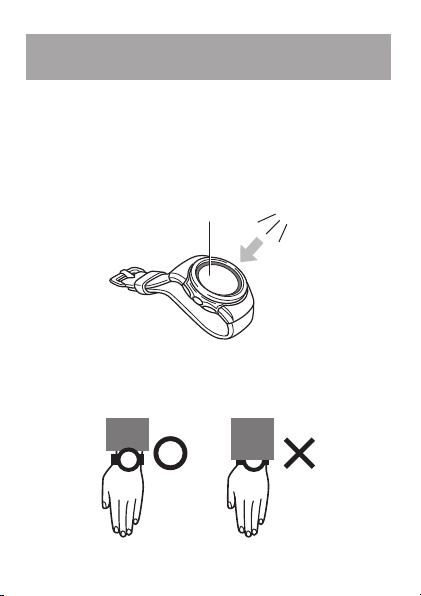
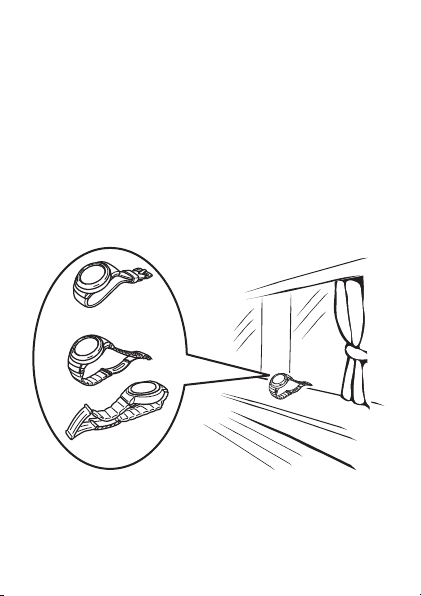
Whenever you are not wearing the watch on your wrist, position ••
it so the face (solar cell) is pointed in the direction of a source of
bright light. Leave the watch under fluorescent lighting, near a
window, etc.
,IGHT
3OLARCELL
The solar cell is located in the watch’s face. When wearing the ••
watch, try to keep your clothing from blocking its face. Charging
efficiency is reduced significantly even if the face of the watch is
covered only partially by your sleeve.
19
How the solar cell and battery work
While the watch is exposed to light...
,IGHT
0OWERSUPPLIEDTOWATCH
3OLARCELL
#ONVERTSLIGHTTOPOWER
%LECTRICALENERGY
#HARGE
2ECHARGEABLE
BATTERY
While the watch is not exposed to light...
0OWERSUPPLIEDTOWATCH
$ISCHARGE
2ECHARGEABLE
BATTERY
Your watch continues to operate even when it is not exposed to light.
Leaving the watch in the dark can run down its battery and cause
functions to become disabled.

20
Charging Precautions
Avoid charging the watch in the following locations, and
anywhere else where the watch may become very hot.
On the dashboard of an automobile parked in the sun••
Very close to an incandescent light source or other sources ••
of heat
In a location exposed to direct sunlight for long periods ••
Depending on the light source you are using, the case of the
watch may become quite hot when charging. Take care to guard
against burn injury after charging.
Low Battery Alert
When battery power is low, the second hand of the watch will jump
at 2-second intervals in the Timekeeping Mode to let you know that
charging is required.
Important!
The following functions are disabled when battery power is low.
Auto receive and manual receive••
Alarm beeper••
Timer countdown (If a countdown is in progress when the ••
battery goes low, it continues. However, time up alert does
not sound.)
Even if the battery level drops to point that all functions become ••
disabled, you still will be able to recharge the battery and use the
watch again.
When you recharge the battery after it drops to a level where ••
functions become disabled, the hands will move automatically
back to the current time setting.
Try to keep the watch exposed to light as much as possible during ••
normal use.
21
(OME0OSITION
3TOPPED
,OW"ATTERY!LERT
.ORMAL/PERATION
3ECONDHANDJUMPSEVERY
TWOSECONDS!TMIDNIGHT
THEDATEINDICATORWILL
CHANGETOWHICHISTHE
HOMEPOSITION
!LLHANDSSTOPATOCLOCK
HOMEPOSITIONS
7HENBATTERYRUNSLOW
)FPOWERDROPSEVENMORE
(ANDSSTOPATOCLOCK
-OVESEVERY
SECOND
*UMPSEVERY
TWOSECONDS

22
Recover Mode
If you use the alarm, calibration signal receive or any other function
that puts a large load on the battery, the hands will stop temporarily.
During this time all watch functions will be disabled.
Normal operation will return after the battery recovers.
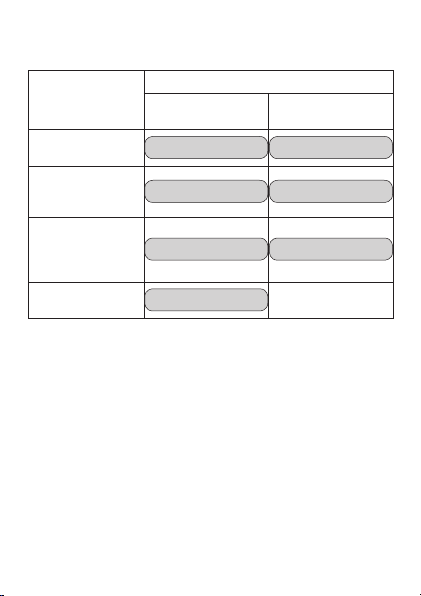
Charging Guide
The tables in this section provide some guidelines about the ••
amount of time required each day to ensure stable operation
of the watch.
The values in this section are base on approximately four minutes ••
of signal reception and 10 seconds of alarm operation per day.
Exposure Level (Brightness) Approximate Charging Time
Outdoor Sunlight (50,000 lux) 8 minutes
Sunlight through a Window
(10,000 lux)
30 minutes
Daylight through a Window on an
Overcast Day (5,000 lux)
48 minutes
Indoor Fluorescent Lighting
(500 lux)
8 hours
Stable operation is enabled by frequent charging.••
23
Approximate Charge Times Required to Advance to a Higher ••
Level
Exposure Level
(Brightness)
Approximate Charging Time
Until Hand
Movement Restarts
Until Full Charge
Outdoor Sunlight
(50,000 lux)
2 hours 23 hours
Sunlight through a
Window
(10,000 lux)
6 hours 85 hours
Daylight through
a Window on an
Overcast Day
(5,000 lux)
8 hours 138 hours
Indoor Fluorescent
Lighting (500 lux)
92 hours
– – –
Note that the above charging times are for reference only. Actual ••
charging time depends on a variety of environmental factors.
24
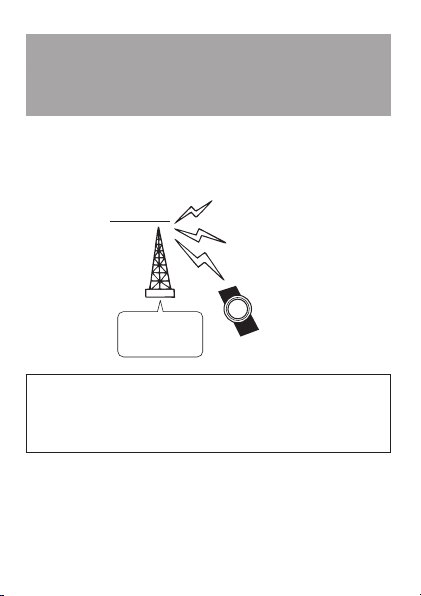
How a Radio-controlled
Watch Works
What is a radio-controlled watch?
A radio-controlled watch is designed to receive a time calibration
signal that contains standard time data and adjust its current time
setting accordingly.
#ESIUM
ATOMICCLOCK
4RANSMITTER
,ONGWAVETIME
CALIBRATIONSIGNAL
7ATCH
After the watch receives the Standard Time signal, it performs
internal calculations to determine the current time. Because of
this, there may be an error of up to one second in the displayed
time.

25
Calibration Signal
The Japanese calibration signal (Call Sign: JJY) is maintained ••
by the National Institute of Information and Communications
Technology (NICT). It is transmitted 24 hours a day from Mt.
Otakadoya (40 kHz) located in Tamura-gun, Fukushima Prefecture,
and from Mt. Hagane (60 kHz) located on the border between
Saga Prefecture and Fukuoka Prefecture.
The Chinese time calibration signal (BPC) is maintained by ••
National Time Service center (NTSC) of China and is transmitted
from Shangqiu.
The U.S. calibration signal (Call Sign: WWVB) is transmitted by the ••
National Institute of Standards and technology from Fort Collins,
Colorado.
The U.K. calibration signal (Call Sign: MSF) is transmitted by the ••
National Physical Laboratory (NPL) from Anthorn, which is located
near Anthorn, Cumbria.
The German calibration signal (Call Sign: DCF77) is transmitted ••
by Physikalisch - Technische Bundesanstalt (PTB) in Mainflingen,
which is located southeast of Frankfurt.
Time calibration signal frequencies and transmitter locations are ••
subject to change.

26
Note that transmission of the Japanese calibration signal may
be interrupted occasionally due to maintenance, lightning, etc.
For more information, visit the website of the Japan Standard
Time Group of the National Institute of Information and
Communications Technology (NICT) at the following URL.
http://jjy.nict.go.jp
Note that the above URL is subject to change. ••

27
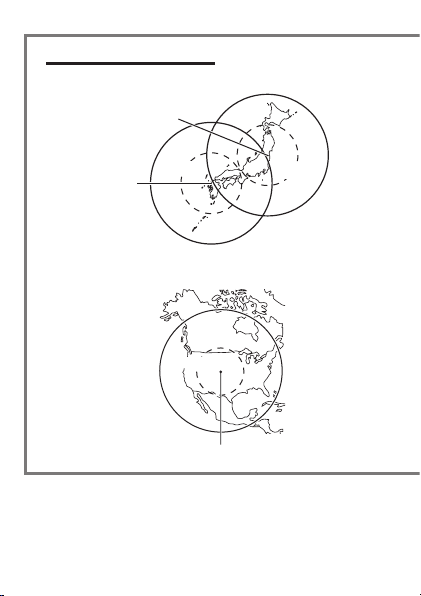
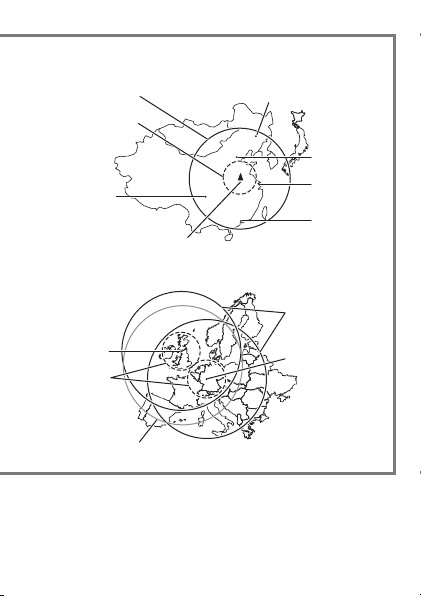
Reception Ranges
The table below shows the time calibration signal that the watch
receives when a particular city code is selected as your Home City.
For information about the Home City setting, see page 62. See ••
page 56 for details on city codes.
Home City
(Supports signal reception)
Receivable Transmitter
TYO Japan (JJY)
HKG
Chinese Time Calibration Signal
(BPC)
(HNL), (ANC), LAX, DEN,
CHI, NYC
United States (WWVB)
LON, PAR, ATH U.K. (MSF) and Germany (DCF77)
City codes in parentheses indicate areas where reception may be ••
possible when conditions are good.
28
KM
-T(AGANE
K(Z
-T/TAKADOYA
K(Z
KM
KM
KM
4RANSMITTER,OCATIONS
KM
KM
&ORT#OLLINS
*APAN**9 #HINA"0#
5NITED3TATES776" %NGLAND-3&'ERMANY$#&
KM
KM #HANGCHUN
"EIJING
3HANGHAI
(ONG+ONG
KM
KM
-AINFLINGEN
!NTHORN
4HESIGNALTRANSMITTEDOUTOF!NTHORN
MAYBERECEIVABLEWITHINTHISRANGE
#HENGDU
3HANGQIU
Certain conditions can make reception impossible even when the ••
watch is within one of the reception ranges shown above. Signals
become weaker outside of the smaller circles indicated by dashed
lines in the nearby maps, so the reception environment has a
greater effect on signal reception.
29
KM
-T(AGANE
K(Z
-T/TAKADOYA
K(Z
KM
KM
KM
4RANSMITTER,OCATIONS
KM
KM
&ORT#OLLINS
*APAN**9 #HINA"0#
5NITED3TATES776" %NGLAND-3&'ERMANY$#&
KM
KM #HANGCHUN
"EIJING
3HANGHAI
(ONG+ONG
KM
KM
-AINFLINGEN
!NTHORN
4HESIGNALTRANSMITTEDOUTOF!NTHORN
MAYBERECEIVABLEWITHINTHISRANGE
#HENGDU
3HANGQIU
The following also can affect signal reception: geographic ••
contours, structures, weather, climate, time of day (afternoon,
evening), noise.
30
Reception Time
A receive operation can take anywhere from about two to seven
minutes.
Under certain conditions, a receive operation can take as long as ••
14 minutes.
Positioning the Watch for Best
Reception
Remove the watch from your wrist and place it somewhere so
its top (12 o’clock side, where the antenna is located) is facing
approximately in the direction of the signal transmitter. Keep the
watch away from metal objects.
2ESINBAND
-ETALBAND
Orienting the watch so it is sideways to the transmitter makes it ••
more difficult for it to receive the signal.
Do not move the watch while it is receiving the calibration signal. ••
31
Important!
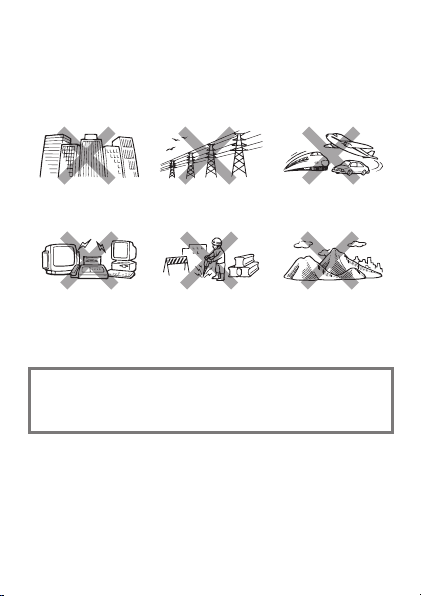
Reception is difficult and may even be impossible in the locations
described below. Avoid such locations when performing signal
reception.
You should think of your watch as operating like a radio or TV ••
when it is receiving the calibration signal.
Among or near
buildings
Near high-voltage
lines
Inside an automobile,
train, plane, or other
vehicle
Next to a TV, speaker,
fax, computer,
cellphone, or other
household appliances
or office equipment
At a construction
site, airport, or
other location
where there is radio
interference
Near mountains
If you are experiencing problems with reception, move away
from the types of locations described above to a location with
better reception, and try again.
Receiving a Calibration Signal
There are two methods you can use in order to receive the time
calibration signal.
Auto Receive: Six times a day (five times for the China signal)••
Manual Receive: Hold down •• A in the Timekeeping Mode.

32
Auto receive
You will need to perform the operations described below before ••
you can use Auto Receive.
In the Timekeeping Mode, select a Home City that supports ••
reception of your local time calibration signal. See pages 27 to
29, and page 62 for more information.
Put the watch into the Timekeeping Mode or World Time Mode. ••
See “Modes and Indicators” on page 16.
During the Auto Receive times, position the watch correctly for ••
best reception. See “Auto Receive Start Times” (below) and
“Positioning the Watch for Best Reception” on page 30.
Home City
Auto Receive Start Times Auto Receive Start Times
1 2 3 4 5 6
TYO Standard Time Midnight 1:00 a.m. 2:00 a.m. 3:00 a.m. 4:00 a.m. 5:00 a.m.
HKG Standard Time 1:00 a.m. 2:00 a.m. 3:00 a.m. 4:00 a.m. 5:00 a.m.
HNL, ANC, LAX,
DEN, CHI, NYC
Standard Time
Summer time
Midnight 1:00 a.m. 2:00 a.m. 3:00 a.m. 4:00 a.m. 5:00 a.m.
LON
Standard Time 1:00 a.m. 2:00 a.m. 3:00 a.m. 4:00 a.m. 5:00 a.m. Midnight*
Summer time 2:00 a.m. 3:00 a.m. 4:00 a.m. 5:00 a.m. Midnight* 1:00 a.m.*
PAR
Standard Time 2:00 a.m. 3:00 a.m. 4:00 a.m. 5:00 a.m. Midnight* 1:00 a.m.*
Summer time 3:00 a.m. 4:00 a.m. 5:00 a.m. Midnight* 1:00 a.m.* 2:00 a.m.*
ATH
Standard Time 3:00 a.m. 4:00 a.m. 5:00 a.m. Midnight* 1:00 a.m.* 2:00 a.m.*
Summer time 4:00 a.m. 5:00 a.m. Midnight* 1:00 a.m.* 2:00 a.m.* 3:00 a.m.*
* Following day

33
Calibration signal reception will start automatically whenever the ••
current time in the Timekeeping mode (page 16) reaches one
of the Auto Receive Start Times shown below. Auto receive can
be performed up to six times a day, but any time a signal receive
operation is successful, no more auto receive operations are
performed that day. Note that the Auto Receive Start Times differ
according to the current Home City setting and the summer time
setting.
Summer time, or Daylight Saving Time (DST) as it is called in ••
some countries, calls for setting clocks ahead one hour from
standard time during the summer season.
Note that the start and end of daylight time, and whether it is used ••
at all depends on each country and geographic area.
Home City
Auto Receive Start Times Auto Receive Start Times
1 2 3 4 5 6
TYO Standard Time Midnight 1:00 a.m. 2:00 a.m. 3:00 a.m. 4:00 a.m. 5:00 a.m.
HKG Standard Time 1:00 a.m. 2:00 a.m. 3:00 a.m. 4:00 a.m. 5:00 a.m.
HNL, ANC, LAX,
DEN, CHI, NYC
Standard Time
Summer time
Midnight 1:00 a.m. 2:00 a.m. 3:00 a.m. 4:00 a.m. 5:00 a.m.
LON
Standard Time 1:00 a.m. 2:00 a.m. 3:00 a.m. 4:00 a.m. 5:00 a.m. Midnight*
Summer time 2:00 a.m. 3:00 a.m. 4:00 a.m. 5:00 a.m. Midnight* 1:00 a.m.*
PAR
Standard Time 2:00 a.m. 3:00 a.m. 4:00 a.m. 5:00 a.m. Midnight* 1:00 a.m.*
Summer time 3:00 a.m. 4:00 a.m. 5:00 a.m. Midnight* 1:00 a.m.* 2:00 a.m.*
ATH
Standard Time 3:00 a.m. 4:00 a.m. 5:00 a.m. Midnight* 1:00 a.m.* 2:00 a.m.*
Summer time 4:00 a.m. 5:00 a.m. Midnight* 1:00 a.m.* 2:00 a.m.* 3:00 a.m.*
* Following day
34
When reception is successful
After a receive operation is complete, the watch will return to regular
timekeeping, which will show the newly adjusted time.
When reception fails
This will cause the watch to return to regular timekeeping without
adjusting the time setting.
Using Manual Receive
Hold down A for about two seconds in the Timekeeping Mode.
You will need to perform the operations described below before ••
you can perform Manual Receive.
In the Timekeeping Mode, select a Home City that supports ••
reception of your local time calibration signal. See pages 27 to 29,
and page 62 for more information.
Put the watch into the Timekeeping Mode. See “Modes and ••
Indicators” on page 16.
Position the watch correctly as shown under “Positioning the Watch ••
for Best Reception” on page 30.
In the Timekeeping Mode,
hold down
A for about two
seconds.
The second hand will indicate the result ••
of the reception, and then move to
READY (R for some models).
The hour and minute hands will continue ••
to operate normally during signal
reception.
2%!$9OR2

35
While reception is in progress...
The second hand will indicate the current ••
reception status.
READY (or R): Unstable reception
WORK (or W): Stable reception
Keep the watch in a location where ••
reception is stable while a receive
operation is in progress.
Do not move the watch while signal ••
reception is in progress (second hand
at “WORK”).
Even under optimum reception ••
conditions, it can take about 10 seconds
for reception to stabilize.
Use the second hand position to check the status of a receive ••
operation and to determine the best location for signal reception.
Note that weather, the time of day, surroundings, and other factors ••
all can affect reception.
The hour and minute hands will continue to operate normally ••
during signal reception.
7/2+OR7
36
When reception is complete...
When signal reception is successful, ••
the second hand will move to YES (Y
for some models) and the current time
setting will be adjusted according to the
received information. Next, the watch will
return to regular timekeeping.
If signal reception is not successful, ••
the second hand will move to NO (N
for some models). Then after about five
seconds the watch will return to regular
timekeeping.
To cancel a manual receive operation ■
Press any button.
./OR.
9%3OR9
37
To check the result of the last receive ■
operation
In the Timekeeping Mode, press A.
The second hand will move to YES (or Y) if the last receive ••
operation was successful or to NO (or N) if the last receive
operation was unsuccessful.
Press •• A once to return to regular timekeeping.
If you do not perform any operation for about five seconds, the ••
watch will return automatically to regular timekeeping.
./OR.5NSUCCESSFUL
9%3OR93UCCESSFUL

38
Calibration Signal Reception
Precautions
Auto receive can be performed while the watch is in the ••
Timekeeping Mode or World Time Mode only.
The receive operation is disabled under any of the following ••
conditions.
When a timer operation is in progress ••
When the battery is dead••
When the watch is in the recover mode••
Pressing any button while auto receive is in progress will cause ••
the watch to exit the receive operation.
Make sure you are within the range of a calibration signal ••
transmitter before performing the receive operation. Remember
that geographic contours, nearby buildings, the season, or the time
of day can make reception impossible even when you are within
range of the transmitter.
Proper reception may be impossible if there is something blocking ••
the signal. If reception is unsuccessful, try again.
You will need to adjust the current time manually when using this ••
watch in an area that is not covered by receivable time calibration
signal.
When the watch is unable to adjust its time using the calibration ••
signal for some reason, timekeeping accuracy is as noted in the
specifications at the back of this manual.
Strong electrostatic charge can cause timekeeping error. ••
Receive is cancelled if an alarm operation starts while it is being ••
performed.
The watch’s calendar shows dates up to the year 2099. Attempting ••
a receive operation after that causes an error.

39
Troubleshooting
1 The watch cannot receive the time calibration signal.
Is there something in the immediate area that may be interfering ••
with reception?
Even if you are within the reception range of a transmitter,
electrical noise or objects between you and the transmitter can
interfere with reception. Avoid such areas during signal reception.
See page 31 for more information.
Are you within the reception range of a transmitter? ••
See page 27 for information about areas where the watch can
receive the signal.
Are your Home City settings configured correctly? ••
Select the correct Home City code using the procedure under
“Configuring Home City Settings” on page 62.
Is the signal being transmitted? ••
Transmission of time calibration signals may be interrupted
occasionally due to maintenance, lightning, etc.
Is a timer operation in progress? ••
Auto receive cannot be performed while a timer operation is in
progress.
2 Time calibration signal reception is successful, but the
hourly time signal and current time are slightly off.
After the watch receives the time calibration signal, it performs ••
an internal decoding process before updating its time setting.
Because of this, the time setting may be off slightly (within one
second).
40
3 Time calibration signal reception is successful, but the
current time setting is wrong.
Are your Home City settings configured correctly? ••
Select the correct Home City code using the procedure under
“Configuring Home City Settings” on page 62.
Are the home positions of the hands off? ••
Strong magnetism or impact can cause the hands and/or date of
the watch to be off. Normally the watch adjusts the hand and date
positions automatically once every hour. You also can perform
manual hand adjustment, when required. See “Auto Hand Home
Position Correction” on page 73 and “Manual Home Position
Correction” on page 75 for more information.
If you cannot receive the calibration signal or if the time setting is ••
incorrect after signal reception, check the setup of the watch.
The following are the watch’s factory default settings, which are ••
configured automatically whenever you have the battery of the
watch replaced.
Home City TYO Tokyo
Summer time STD Standard Time
For more information about summer time, see page 52.

41
42
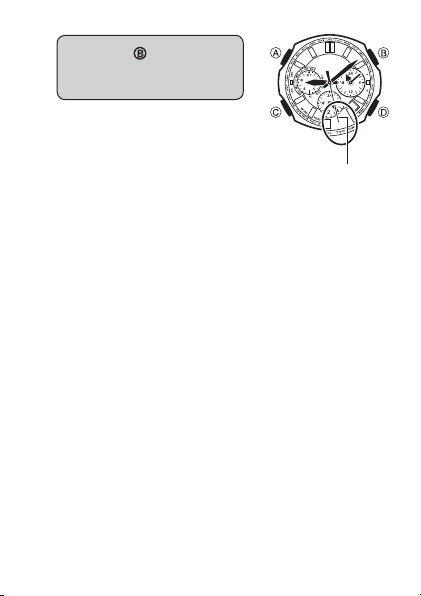
Stopwatch
The stopwatch measures elapsed time in units of 1/20 second
up to 23 hours, 59 minutes, 59.95 seconds (24 hours). When
the maximum limit is reached, the elapsed time returns to zero
automatically and timing continues from there.
To start or stop an elapsed time ■
operation
In the Stopwatch Mode, press B to start and stop the
stopwatch.
Press •• B to start and stop the stopwatch.
v3TART
v3TOP
3TOPWATCHSECONDHAND
v3PLIT
v2ESET
3TOPWATCHTIMEHOURSANDMINUTES
3TOPWATCH
SECOND

43
Stopwatch
Pressing •• D during an elapsed time operation stops the
hands at the split time. Elapsed time measurement continues
internally. After about five seconds, the hands will return to
normal elapsed time indication.
1/20-second timing is performed only for the first 30 seconds ••
after you start or restart an elapsed time operation. The
left dial (1/20-second) hand also jumps to the 1/20-second
position when you stop an elapsed time operation.
Pressing •• D while the stopwatch is stopped will reset
stopwatch to zero.
The following operations are not possible while the watch’s ••
hands are moving during a stopwatch elapsed time operation.
Split, reset
Use the
C button to enter the Stopwatch Mode as shown
under “Modes and Indicators” on page 16.
44
To measure elapsed time ■
3TART 3TOP 2ESET
To measure split times ■
3TART 3PLIT
.ORMAL
MEASUREMENT
RESUMED
AFTERSECONDS
3TOP 2ESET
Pressing •• D again while a split time is indicated will cause the
hands to jump to a new (current) split time.
Pressing •• B while a split time is indicated will stop the elapsed
time operation, causing the hands to jump to the stop time.
Cumulative Elapsed Time Measurement
Pressing B to restart the stopwatch without resetting it will resume
the elapsed time operation from where it was last stopped.

45

46
Countdown Timer
The Countdown Timer lets you set a start time of up to 24 hours ••
in 1-minute steps, and then countdown from there in one-second
steps.
The watch beeps for 10 seconds when the end of the countdown ••
is reached.
When the end of the countdown is reached, the watch switches ••
automatically to measurement of the time elapsed since the end of
the countdown (in units of one second).
When the maximum limit (24 hours) of the elapsed time ••
measurement operation is reached, the elapsed time operation
continues from zero.
v3TART
v3TOP
v4IMERSTARTTIME
nMINUTE
#OUNTDOWNTIMERSECONDHAND
)NDICATESTO42
v4IMERSTARTTIME
MINUTE
v2ESET
#OUNTDOWN4IMERHOURSANDMINUTES
47
Countdown Timer
To set the countdown timer start time ■
1.
With the countdown timer stopped in the Countdown
Timer Mode, press
D.
2.
Use D (+) and A (–) to change the countdown timer
start time.
Holding down either button will cause the hands to move at ••
high speed. Once started, high-speed hand movement will
continue even if you release the button. To stop high-speed
hand movement, press any button.
Use the
C button to enter the Countdown Timer Mode as
shown under “Modes and Indicators” on page 16.
48
To use the countdown timer ■
In the Countdown Timer Mode, press B to start and
stop the countdown timer.
The right dial hands count down the time in one-second steps. ••
The right dial hands move counterclockwise during countdown ••
timer operation.
v3TART
v3TOP
#OUNTDOWNTIMERSECONDHAND
v2ESET
#OUNTDOWN4IMERHOURSANDMINUTES
3TART 3TOP 2ESET

49
Pressing •• D while the countdown timer is stopped resets the
displayed time to the start time.
Pressing •• B while the countdown timer is stopped will restart
the countdown.
When the end of the countdown is reached, the watch will ••
beep and start an elapsed time operation. The right dial hands
move clockwise during the elapsed time operation. Pressing
B will stop the elapsed time operation. Pressing D while an
elapsed time operation is stopped will reset the countdown
timer to its start time.
The countdown timer cannot be reset to its starting time while ••
the right dial hands are moving during a countdown timer
operation.
To stop the time up alert ■
Pressing any button while the alert is sounding will stop it.
50
World Time
World time lets you display the current time in any one of 29 cities
(29 time zones) around the world.
#ITYCODE
7ORLD4IME
)NDICATES34$STANDARDTIME
$34SUMMERTIMESETTING
v
(OME4IME7ORLD4IME
SWAPPING
(OLDDOWNSECONDS
v
34$$34SWITCHING
(OLDDOWN
SECONDS
v
3CROLLSCITIES
If the current time is not correct, check your current Home City ••
settings and make adjustments as required (page 62).
The following operations are not possible while the watch’s hands ••
are moving to the current time for a newly selected city code.
A Button: STD/DST switching
B Button: Home Time/World Time swapping
51
World Time
To search for a city ■
In the World Time Mode, press
D to move the second hand
(which is pointing at the
currently selected city code)
clockwise.
About one second after you release ••
D, the hands of the watch will move
to the current time in the zone of the
city code indicated by the second
hand.
CLOCKWISE
Use the C button to enter the World Time Mode as shown
under “Buttons and Indicators” on page 16.

52
Summer Time
Summer time, or Daylight Saving Time (DST) as it is known in some
countries, calls for setting clocks ahead one hour from standard time
(STD) during the summer season.
Note that the start and end of daylight time, and whether it is used ••
at all depends on each country and geographic area.
53
To switch between standard time and ■
summer time manually
In the World Time Mode, press D to move the second
hand clockwise to the city code of the city whose STD/DST
setting you want to change.
Hold down •• A for about two seconds to toggle the currently
selected city between STD (standard time) and DST (summer
time).
You can specify STD or DST individually for each World Time city. ••
Note, however, that you cannot change the setting of the UTC
zone.
SECONDS
Standard time••
The left dial hand points to STD (standard time).
Summer time••
The left dial hand points to DST (summer time). Summer time is
one hour ahead of standard time.
54
Home Time/World Time Swapping
Use the procedure below to swap the city you currently have
selected in the World Time Mode with your Home city.
Example: To swap your Home City Tokyo (TYO) with the World
Time City New York (NYC)
Home City World Time City
Before swapping Tokyo (TYO) New York (NYC)
After swapping New York (NYC) Tokyo (TYO)
1.
In the World Time Mode,
press
D to move the
second hand clockwise to
the city code of the city you
want to use as your new
Home City.
.9#SELECTED
55
2.
Hold down B for about
three seconds until the
watch beeps.
This will make the World Time ••
City you selected in step 1 (New
York) your new Home City.
Your previous Home City (Tokyo) ••
will be your new World Time City.
Important!
If you are using the watch in Japan, be sure to select TYO (Tokyo) as
your Home City. Selecting another city code will make it impossible
to receive the time calibration signal, which will cause the watch’s
time setting to be off.
3ECONDHAND
MOVESTO49/

56
City Code List
City
Code
UTC
Offset
City Name
UTC 0
Coordinated
Universal Time
LON 0 London
PAR +1 Paris
ATH +2 Athens
JED +3 Jeddah
THR +3.5 Tehran
DXB +4 Dubai
KBL +4.5 Kabul
KHI +5 Karachi
DEL +5.5 Delhi
DAC +6 Dhaka
RGN +6.5 Yangon
BKK +7 Bangkok
HKG +8 Hong Kong
TYO +9 Tokyo
City
Code
UTC
Offset
City Name
ADL +9.5 Adelaide
SYD +10 Sydney
NOU +11 Noumea
WLG +12 Wellington
PPG –11 Pago Pago
HNL –10 Honolulu
ANC –9 Anchorage
LAX –8 Los Angeles
DEN –7 Denver
CHI –6 Chicago
NYC –5 New York
SCL –4 Santiago
RIO –3 Rio de Janeiro
FEN –2
Fernando de
Noronha
RAI –1 Praia
The contents of the above table are current as of March 2008.••
Time differentials in the above table are in accordance with ••
Coordinated Universal Time (UTC).
The rules governing UTC offsets and summer time are determined ••
by each individual country.

57
58
Alarm
The watch will beep for 10 seconds when the Timekeeping Mode
time reaches the currently set alarm time.
The alarm will sound when the current time in the Timekeeping ••
Mode matches the alarm time.
If you do not perform any operation for about two or three minutes ••
in the Alarm Mode, the watch will return automatically to the
Timekeeping Mode.
h!,vINDICATED
!LARM/./&&
v!LARMTIMEnMINUTEv4OGGLESALARM
ONOROFF
v!LARMTIMEMINUTE
!LARMTIME
59
Alarm
To set the alarm time ■
In the Alarm Mode, use D (+) and
B (–) to change the alarm setting.
Holding down either button will cause ••
the hands to move at high speed. Once
started, high-speed hand movement will
continue even if you release the button.
To stop high-speed hand movement,
press any button.
!LARMTIME
n
Use the C button to enter the Alarm Mode as shown under
“Modes and Indicators” on page 16.
60
To turn the alarm on or off ■
In the Alarm Mode, press A to toggle the alarm on and off.
/. /&&
To stop the time up alert ■
Pressing any button while the alert is sounding will stop it.

61
62
Configuring Home
City Settings
Use the procedure in this section to configure your Home City (the
place where you normally use the watch) and standard/summer time
settings.
Use the Timekeeping Mode to configure Home City and standard/••
summer time settings.
1.
In the Timekeeping Mode,
keep
A depressed (for
about five seconds) as the
second hand goes through
the sequence described
below.
Moves to the city code of the ••
current Home City setting.
Moves to the last signal reception ••
result (“Y” or “N”), then to “Ready”
(or “R” for some models), and
then back to the city code of the currently selected Home
City.
The watch will exit the setting screen automatically if you do ••
not perform any operation for about two or three minutes.
Any changes you have made to settings up to that point will
be saved.
3ECONDHAND
63
Each press of •• C cycles through available settings in the
sequence shown below.
v(OME#ITY
v34$$34SETTING
(OURANDMINUTE 9EAR
$AY -ONTH
For information about configure time and date settings, see
“Configuring Time and Date Settings Manually” (page 66).
2.
Press D to move the
second hand clockwise
until it points at the city
you want to select as your
Home City.
CLOCKWISE

64
3.
Press B to toggle between
standard time (STD) and
summer time (DST).
You will not be able to change the ••
STD/DST setting while the watch’s
hands are moving to the current time
for a newly selected city code. Wait
until the hands stop moving.
Standard time••
The left dial hand points to STD (standard time).
Summer time••
The left dial hand points to DST (summer time).
Summer time is one hour ahead of standard time.
The watch will adjust the STD/DST setting automatically when it ••
receives a time calibration signal while any one of the following city
codes is selected as the Home City.
LON, PAR, ATH, TYO, ANC, LAX, DEN, CHI, NYC
The watch will not adjust the DST setting automatically while either
of city codes shown below is selected as the Home City. In this
case, you will need to change between standard time and summer
time manually.
HKG, HNL

65
If you want to proceed with adjusting the current time and date ••
setting, continue from step 2 under “Configuring Time and Date
Settings Manually” (page 67). If you do go the date and time
adjustment procedure, note that you will not be able to return
directly to this Home City and summer time setting procedure. To
return to this procedure, you will need to press A to exit the time
and date setting procedure, and then perform this procedure from
step 1, above.
4.
When everything is the way you want, press A.
This will apply your settings and return to regular ••
timekeeping. The second hand will move to and start
timekeeping from the appropriate seconds count in
accordance with the watch’s internal timekeeping.
66
Configuring Time and
Date Settings Manually
You can use the following procedures to adjust the time and date
settings when the watch is unable to receive a time calibration signal
for some reason.
1.
In the Timekeeping Mode,
keep
A depressed (for about
five seconds) as the second
hand goes through the
sequence described below.
Moves to the city code of the current ••
Home City setting.
Moves to the last signal reception ••
result (“Y” or “N”), then to “Ready”
(or “R” for some models), and then
back to the city code of the currently
selected Home City.
The watch will exit the setting screen automatically if you do ••
not perform any operation for about two or three minutes.
Any changes you have made to settings up to that point will
be saved.
3ECONDHAND
67
Each press of •• C cycles through available settings in the
sequence shown below. For information about the STD (standard
time)/DST (summer time) setting, see “Configuring Home City
Settings” (page 62).
v(OME#ITY
v34$$34SETTING
(OURANDMINUTE 9EAR
$AY -ONTH
2.
Press C.
The second hand will move to ••
12 o’clock, and the left dial hand will
move to “0” (“60” for some models).

68
3.
Use D (+) and B (–) to
change the time setting in
one-minute increments.
Holding down either button will ••
cause the hands to move at high
speed. Once started, high-speed
hand movement will continue even
if you release the button. To stop
high-speed hand movement, press
any button.
Check the hour (24-hour) to make sure that the time is set ••
properly (1:00 a.m. = 1 o’clock, 1:00 p.m. = 13 o’clock).
n
69
4.
Press C to advance to the
year setting.
The year setting consists of a tens ••
digit and a ones digit setting.
5.
Use D (ones digit) and B
(tens digit) to change the
year setting.
D•• : Increases the ones digit by 1.
9EARONESDIGIT
9EARTENSDIGIT
70
B•• : Increases the tens digit by 10.
6.
Press C to advance to the
month setting.
-OVESTOTHECURRENT
MONTHSETTING
71
7.
Press D to move the second hand clockwise to the
next month.
$EC
*UN
*AN
&EB
.OV
!UG
/CT
*UL
-AY
!PR
3EP -AR
8.
Press C to advance to the
day setting.
72
9.
Use D (+) and B (–) to
change the day setting in
one-day increments.
10.
When everything is the way
you want, press
A.
This will reset the seconds count ••
to zero and return to regular
timekeeping.
For best timekeeping accuracy, ••
press A on a time signal from the
TV or radio.
The day of the week is calculated automatically. ••
n

73
Auto Hand Home
Position Correction
Strong magnetism or impact can cause the hands and/or date of the
watch to be off, even if the watch is able to perform the signal receive
operation. Auto hand home position correction corrects the hand
position automatically.
Auto correction is performed in the Timekeeping Mode only. ••
However, auto correction is never performed while a countdown
timer operation is in progress.
The auto correction operation corrects the positions of the second, ••
minute, and hour hands. Home position correction of the dial
hands and date can be performed manually, using the procedure
under “Manual Home Position Correction” (page 75).
Each hour, the watch performs automatic correction of the hand ••
positions from –55 minutes to +5 minutes.
You also can trigger the auto hand home position correction ••
operation manually, if you want. See “To trigger the auto hand
home position correction operation manually” (page 74) for more
information.
The auto hand home position correction operation can take up to ••
three and a half minutes to complete.
If hand positions are off by one hour or more, correct them using ••
the procedure under “To trigger the auto hand home position
correction operation manually” (page 74) or “Manual Home
Position Correction” (page 75).
74
To trigger the auto hand home position ■
correction operation manually
Perform the following procedure when the time setting is off.••
In the Timekeeping Mode, hold
down
D for about six seconds
until the second hand completes
one full revolution.
Though the watch will beep and second ••
hand will stop momentarily about three
seconds after you hold down D, do
not release the button yet. Wait until the
second hand completes a full revolution
before you release D.
The watch will perform hand home position correction
automatically, which takes up to three and a half minutes to
complete. Do not operate the watch during that time. The watch
will return to regular timekeeping after auto hand home time
correction is complete.
To interrupt an ongoing correction operation and return to regular ••
timekeeping, press D again.
If you release •• D when the watch beeps and the second hand
momentarily stops after three seconds, the watch will go into
manual home position correction, which is described under
“Manual Home Position Correction” (page 75). If this happens,
press A to return to regular timekeeping and then perform the
above operation again.
The manually triggered auto home position correction operation
performs the following two steps.
The hands will move automatically in order to determine their 1.
home positions.
After auto home position correction is complete (about three 2.
and a half minutes), the watch will return to regular timekeeping
automatically.
75
Manual Home
Position Correction
Strong magnetism or impact can cause the hands and/or date of the
watch to be off, even if the watch is able to perform the signal receive
operation. If this happens, perform the following home position
correction procedure.
Hand home position correction is not required if the time and date ••
settings are correct.
You also can use auto hand home position correction (page 73) to ••
correct the home positions of the second, minute, and hour hands.
1.
In the Timekeeping Mode,
hold down
D for about
three seconds until the
watch beeps and the second
hand stops. Release
D at
this time.
If you do not perform any operation ••
for about two or three minutes, the
watch will return automatically to regular timekeeping. Any
settings you have configured up to that point will be saved.
3ECONDHAND
76
Each press of •• C cycles through available settings in the
sequence shown below.
3ECONDHAND
(OURAND
MINUTEHANDS
2IGHTDIALHANDS
7ORLD4IME
,EFTDIALHAND
DAYOFTHEWEEK
$AY
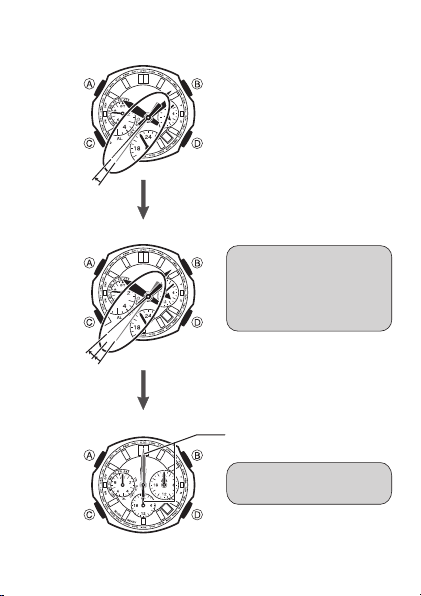
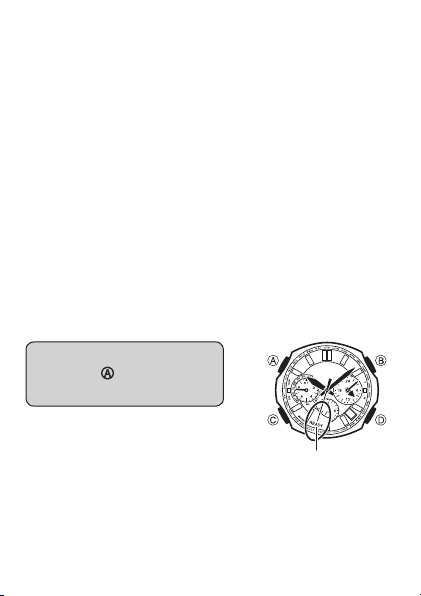
2. Check the second hand position.
Home Position
Second Hand: 12 o’clock
If the second is at its proper home position, advance to step 4. ••
The watch will return to regular timekeeping automatically if you ••
do not perform any operation for about two or three minutes. Any
changes you have configured to settings up to that point will be
saved.

77
If the second hand home position is off
3.
Use D to adjust the second hand position.
The second hand moves clockwise only. Keep pressing ••
the button until the second hand is at its proper home
position.
Holding •• D will cause the hand to start to move at high
speed. To stop high-speed hand movement, press any
button.
4.
Press C to change to hour
and minute hand correction.
This will cause the hour and minute ••
hands (and the bottom dial hand) to
move to their home positions.
Home Positions
Hour hand: 12 o’clock
Minute hand: 12 o’clock
Bottom dial hand: 12 o’clock
-INUTE
HAND
(OUR
HAND
"OTTOMDIALHAND
78
If the hour, minute, and bottom dial hands all are at their ••
proper home positions, advance to step 6.
If the hour and minute hands are off
5.
Use D (+) and B (–) to adjust the hands.
Holding down either button will cause the hands to ••
move at high speed. Once started, high-speed hand
movement will continue even if you release the button.
To stop high-speed hand movement, press any button.
The position of the bottom dial hand is synchronized ••
automatically with the hour and minute hands.
6.
Press C to advance to right
dial correction.
This will cause the hour and minute ••
hands of the right dial to move to
their home positions.
Home Positions
Hour hand: 12 o’clock
Minute hand: 12 o’clock
-INUTEHAND
(OURHAND
79
If the right dial hands are at their proper home positions, ••
advance to step 8.
If the right dial hands are off
7.
Use D (+) and B (–) to adjust the right dial
hands.
Holding down either button will cause the hands to ••
move at high speed. Once started, high-speed hand
movement will continue even if you release the button.
To stop high-speed hand movement, press any button.
8.
Press C to change to left
dial correction.
This causes the left dial hand to ••
move to its home position.
Home Position
Left dial hand: 12 o’clock
,EFTDIALHAND
80
If left dial hand is at its proper home position, advance to ••
step 10.
If the left dial hand is off
9.
Use D (+) and B (–) to adjust the left dial hand.
Holding down either button will cause the hand to ••
move at high speed. Once started, high-speed hand
movement will continue even if you release the button.
To stop high-speed hand movement, press any button.
10.
Press C to change to day
correction.
This causes the day to move to its ••
home position.
Home Position
Day: 1
$AY
81
If the day is at its proper home position, advance to step 12.••
If the day is off
11.
Use D (+) and B (–) to adjust the day.
Holding down either button will cause the day to scroll ••
at high speed. Once started, high-speed day scrolling
will continue even if you release the button. To stop high-
speed hand movement, press any button.
12.
Press A to exit home
position correction
and return to regular
timekeeping.
If you press •• C instead of A, the
watch will return to step 1 (second
hand home position adjustment) of this procedure.
Check to make sure that the time, day, and day of the week are
being indicated correctly.

82
Specifications
Quartz Oscillation Frequency: 32,768Hz
Accuracy: Within an average of ±15 seconds per month when time
calibration signal reception is not performed
Basic Functions: Hour, minute (moves every 10 seconds), second;
24-hour timekeeping; date; day of the week
Radio-controlled Watch Functions: Auto receive; manual receive
Last reception result
Auto standard time/summer time switching
Auto transmitter selection (for JJY, MSF/DCF77)
Transmitters
Call Signs: JJY (40kHz/60kHz), BPC (68.5kHz),
WWVB (60kHz), MSF (60kHz), DCF77
(77.5kHz)
Stopwatch: Measuring unit: 1/20 second
Measuring Capacity: 23:59'59.95" (24 hours)
Measurement Functions: Elapsed time, split times,
cumulative time

83
Countdown Timer: Setting Unit: 1 minute
Measurement Range: 24 hours
Countdown Unit: 1 second
Beeper: 10 seconds
Auto switching to elapsed time measurement
(1-second units) when the end of a countdown
timer operation is reached
World Time: Current time in 29 cities (29 time zones) around the
globe, summer time, Home City
Alarm: Setting Units: Hour, minute
Beeper: 10 seconds
Other: Auto hand home position adjustment; auto return to regular
timekeeping; Power Saving
Main Element: Tuning fork type high-performance quartz oscillator;
one-chip CMOS-LSI
Battery: Rechargeable battery
Battery Operating Time: 5 months
(no exposure to light; 10 seconds alarm
beeper operation and one signal reception
of approximately 4 minutes per day)

84
Operating Precautions
Water Resistance ■
The following applies to watches with WATER RESIST or WATER ••
RESISTANT marked on the back cover.
Water
resistance
Under
Daily Use
Enhanced Water Resistance Under
Daily Use
5
Atmospheres
10
Atmospheres
20
Atmospheres
Marking
On watch front or
on back cover
No
BAR mark
5BAR 10BAR 20BAR
Example of
Daily Use
Hand washing,
rain
Yes Yes Yes Yes
Water-related
work, swimming
No Yes Yes Yes
Windsurfing No No Yes Yes
Skin diving No No Yes Yes
Do not use this watch for scuba diving or other types of diving that ••
requires air tanks.
Watches that do not have WATER RESIST or WATER RESISTANT ••
marked on the back cover are not protected against the effects of
sweat. Avoid using such a watch under conditions where it will be
exposed to large amounts of sweat or moisture, or to direct splashing
with water.
Even if a watch is water-resistant, do not operate its buttons or crown ••
while the watch is submersed in water or wet.
Even if a watch is water-resistant, avoid wearing it in the bath or in ••
areas where detergents (soap, shampoo, etc.) are being used. Such
conditions can reduce water resistance.
After submersion in seawater, use plain water to rinse all salt and ••
dirt from the watch.
In order to maintain water resistance, have the gaskets of your watch ••
replace periodically (about once every two or three years).

85
A trained technician will know how to check your watch for proper ••
water resistance whenever you have its battery replaced. Battery
replacement requires the use of special tools. Always request battery
replacement from your original retailer or from an authorized CASIO
service center.
Some water-resistant watches come with fashionable leather bands. ••
Avoid swimming, washing, or any other activity that causes direct
exposure of a leather band to water.
The inside surface of the watch glass may fog when the watch is ••
exposed to a sudden drop in temperature. No problem is indicated
if the fogging clears up relatively quickly. If the fogging does not
clear or if water has gotten into the watch, take the watch in for
repair immediately.
Continued use of the watch with water inside can result in damage to ••
electronic and mechanical components, the face of the watch, etc.
Band ■
Tightening the band too tightly can cause you to sweat and make it ••
difficult for air to pass under the band, which can lead to skin irritation.
Do not fasten the band too tightly. There should be enough room
between the band and your wrist so you can insert your finger.
Deterioration, rust, or corrosion of the band can cause it to break, ••
which may result in the watch falling off your wrist and becoming
lost. Always take good care of you band and keep it clean.
Should you notice any loss of flexibility, breakage, discoloration,
looseness or other problem with the band, immediately contact your
original retailer or an authorized CASIO service center to have it
checked, repaired, or replaced. Note that you will be charged for any
repair or replacement of the band. Request band replacement (for
which you will be charged) from your original retailer or an authorized
CASIO service center.

86
Temperature ■
Never leave the watch on the dashboard of a car, near a heater, or in ••
any other location that is subject to very high temperatures. Do not
leave the watch where it will be exposed to very low temperatures,
either. Temperature extremes can cause the watch to lose or gain
time, to stop, or otherwise malfunction.
Impact ■
Your watch is designed to withstand impact incurred during normal ••
daily use and light activity such as playing catch, tennis, etc. Dropping
the watch or otherwise subjecting it to strong impact, however, can
lead to malfunction. Note that watches with shock-resistant designs
(G-SHOCK, Baby-G, G-ms) can be worn while operating a chain saw
or engaging in other activities that generate strong vibration, or while
engaging in strenuous sports activities (motocross, etc.)
Magnetism ■
The hands of analog and combination (analog-digital) watches are ••
moved by a motor that uses magnetic force. When such a watch is
close to a device (audio speakers, magnetic necklace, cell phone,
etc.) that emits strong magnetism, the magnetism can cause
timekeeping to slow down, speed up, or stop, resulting in the incorrect
time being displayed.
Electrostatic Charge ■
Exposure to very strong electrostatic charge can cause the watch ••
to display the wrong time. Very strong electrostatic charge even can
damage electronic components.
Chemicals ■
Do not allow the watch to come into contact with thinner, gasoline, ••
solvents, oils, or fats, or with any cleaners, adhesives, paints,
medicines, or cosmetics that contain such ingredients. Doing so can
cause discoloration of or damage to the case, resin band, leather,
and other parts.

87
Storage ■
If you do not plan to use the watch for a long time, wipe it thoroughly ••
free of all dirt, sweat, and moisture, and store it in a cool, dry
place.
Resin Components ■
Allowing the watch to remain in contact with other items or storing it ••
together with other items while it is wet for long periods can cause
the color of the other items to transfer to the resin components of
the watch. Be sure to dry off the watch thoroughly before storing it
and make sure it is not in contact with other items.
Leaving the watch where it is exposed to direct sunlight (ultraviolet ••
rays) for long periods or failure to clean dirt from the watch for long
periods can cause it to become discolored.
Friction caused by certain conditions (frequent external force, ••
sustained rubbing, impact, etc.) can cause discoloration of painted
components.
If there are printed figures on the band, strong rubbing of the printed ••
area can cause discoloration.
Failure to clean dirt from the watch for long periods can cause ••
fluorescent color to fade. Wash dirt off with water as soon as possible
and then dry the watch.
Semi-transparent resin parts can become discolored due to sweat and ••
dirt, and if exposed to high temperatures for long periods.
Contact an authorized CASIO service center to have resin ••
components replaced. Note that you will be charged for replacement
costs.
Natural Leather and Imitation Leather ■
Bands
Allowing the watch to remain in contact with other items or storing it ••
together with other items while it is wet for long periods can cause the
color of the other items to transfer to the natural leather or imitation
leather band of the watch. Be sure to dry off the watch thoroughly
before storing it and make sure it is not in contact with other items.

88
Leaving a leather band where it is exposed to direct sunlight ••
(ultraviolet rays) for long periods or failure to clean dirt from a leather
band for long periods can cause it to become discolored.
Important!
Subjecting a natural leather or imitation leather band to rubbing or ••
dirt can cause color transfer and discoloration.
Metal Components ■
Failure to clean dirt from a metal band can lead to formation of rust, ••
even if the band is stainless steel or plated. If the watch is exposed
to sweat or water, wipe it thoroughly with a soft, absorbent cloth and
then store it in a well-ventilated location to dry.
To clean the band, use a soft toothbrush or similar tool to scrub it with ••
a weak solution of water and a mild neutral detergent, or with soapy
water. Take care to avoid getting solution on the watch case.
Bacteria and Odor Resistant Band ■
The bacteria and odor resistant band protects against odor generated ••
by the formation of bacteria from sweat, which ensures comfort and
hygiene. In order to ensure maximum bacteria and odor resistance,
keep the band clean. Use an absorbent soft cloth to wipe the band
clean of dirt, sweat, and moisture. The bacteria and odor resistant
band suppresses the formation of organisms and bacteria. It does
not protect against rash due to allergic reaction, etc.
Note that CASIO COMPUTER CO., LTD. assumes no
responsibility for any damage or loss suffered by you or any third
party arising through the use of this watch or its malfunction.

89
Battery
The special rechargeable battery used by your watch is not intended ••
to be removed or replaced by you. Use of a rechargeable battery
other than the special one specified for this watch can damage
the watch.
The rechargeable battery is charged when the solar cell is exposed ••
to light, and so regular periodic replacement is not required. However,
charging and discharging of the battery over the years leads naturally
to a loss in its ability to sustain a charge and shortens its operating
time. If this happens, contact your original retailer or authorized
CASIO service center.

90
User Maintenance
Caring for Your Watch ■
A dirty or rusty case or band can soil the sleeve of your clothing, ••
cause skin irritation, and even interfere with watch performance.
Be sure to keep the case and band clean at all times. Rust tends
to form easily after the watch is exposed to seawater and then left
without cleaning.
Sometimes a smudge like pattern may appear on the surface of a ••
resin band. This will not have any affect on your skin or clothing. Wipe
the band with a cloth to clean it.
Keep a leather band clean by wiping it with a dry cloth. Both resin ••
bands and leather band can become worn and cracked over time
when subjected to normal daily use.
Should your band become badly cracked or worn, be sure to have ••
it replaced with a new one. Request band replacement from your
original retailer or an authorized CASIO service center. Note that
you will be charged for band replacement costs, even if your watch
is still covered by its warranty.
Remember that you wear your watch next to your skin, just like a ••
piece of clothing. Because of this, you should always keep your watch
clean. Use a soft absorbent cloth to wipe off any dirt, sweat, water,
or other foreign matter from the case and band.

91
Dangers of Poor Watch Care ■
Rust
Though the stainless steel used for the watch is highly rust-resistant, ••
rust can form if the watch is not cleaned after it becomes dirty.
Failure of oxygen to come into contact with the metal because it is
dirty causes breakdown of the oxidization layer on the metal surface,
which leads to the formation of rust.
Even if the surface of the metal appears clean, sweat and rust in ••
crevasses can soil the sleeves of clothing, cause skin irritation, and
even interfere with watch performance.
Premature Wear
Leaving sweat or water on a resin band or storing it an area subject to ••
high moisture can lead to premature wear, cuts, and breaks.
Skin Irritation
Individuals with sensitive skin or in poor physical condition may ••
experience skin irritation when wearing a watch. Such individuals
should keep their leather band or resin band particularly clean, or
switch to a metal band. Should you ever experience a rash or other
skin irritation, immediately remove the watch and contact a skin
care professional.