Loading ...
OS-2X
Radio Replacement Interface with OnStar Retention for
General Motors Vehicles
Pacic Accessory Corporation
®
| Ontario, Ca. 91761| Ph. 866-931-8021 | [email protected]
©2014 Pacic Accessory Corporation
www.pac-audio.com
Rev. 050714
Pacific Accessory Corporation
SWC Output Connector
• The OS-2X provides a SWC output connector attached to the
OS-RADPWRAUDIO harness. For ease of installation, all necessary
connections for a SWI-X, ECL2, JACK, PS or RC have made for you.
• When using this SWC output connector the radio specic SWC
interface must be programmed for version 2 (refer to SWC interface
programming instructions for exact programming sequence).
• Both loops should also remain in tact.
• During steering wheel button assignment programming each button
should be pressed and held for 1 second after the SWC interface LED
goes out with the exception of the Speak button.
• The speak button should be pressed for less than 1 second and
released.
• Pressing the Speak button for longer than 1.5 SEC will activate
OnStar.
Connect to SWC
Interface. Program
for Version 2.
Connect to Radio
Specific SWC
Interface
Page 2
Installation Steps
1. Make all connections as described in the chart on page1.
2. Factory installed ampliers will determine the audio output connection. If the vehicle has a factory installed amplier use the
factory amplier audio location. If a factory installed amplier is not present use the non-amplied factory audio location.
3. If the vehicle is equipped with a Premium BOSE system, connect the subwoofer and center channel RCA inputs to the
aftermarket radios. If the aftermarket radio to be installed does not have a dedicated center channel or sub output do not
use this cable. To ensure best sound performance channel summing is not recommended. Use this cable according to the
outputs that are available.
4. Plug the CMX chime module in if necessary (If the vehicle chimes when the radio is removed the CMX is not necessary).
PLEASE NOTE: In order to get the best possible sound out of the CMX please mount it in a place free and clear of any
obstructions, preferably as close as possible to the bottom of the dash pointing down toward the oor of the vehicle.
5. The Mute loop (if not cut) will turn the accessory output off when an OnStar® or Bluetooth call is made or received. If the
aftermarket radio has a mute input cut this loop and connect the inner brown wire (next to the blue/white wire) to the mute
input.
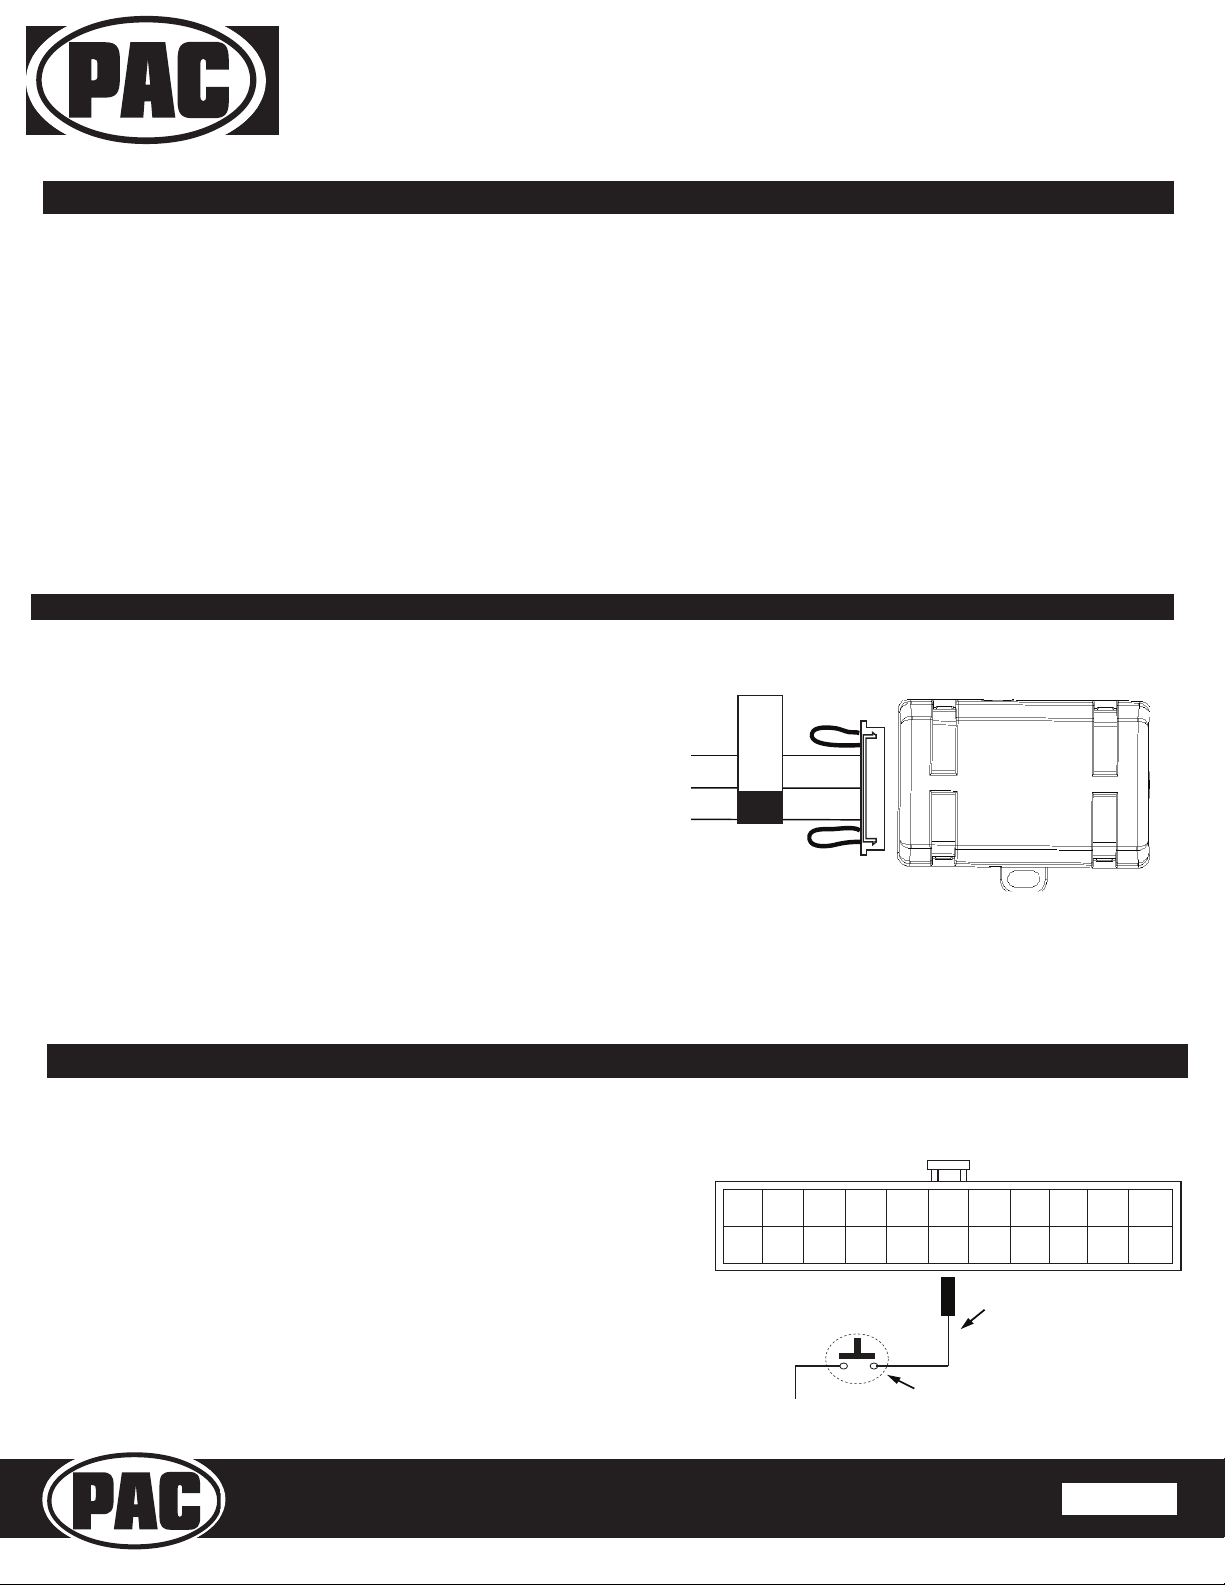
• If SWC buttons are not present a SPST switch (not included) can be
used to control the OnStar® audio level during an OnStar® connection.
• Connect the Blue wire in pin 6 to one side of a SPST normally open
momentary switch.
• The other side of the SPST switch will be connect to 12 volt constant.
• When OnStar® is active pressing the switch will change the audio level
10 steps.
22
11 1
Level
Switch
blue
SPST N.O. switch (not included)
Connect to radio side 12 volt
constant wire
Blue wire
Wire insertion side view of
OS-5 RADPWRAUDIO
Connector
OnStar Volume Adjustment for Vehicles w/o SWC
Loading ...