
Operating instructions
Fridge-freezer
To avoid the risk of accidents or damage to the appliance it is essen-
tial to read these instructions before it is installed and used for the
first time.
en-GB M.-Nr. 12 072 660

Contents
2
Warning and Safety instructions...................................................................... 4
Caring for the environment .............................................................................. 16
Installation.......................................................................................................... 17
Installation site..................................................................................................... 17
Climate range ................................................................................................. 18
Ventilation requirements...................................................................................... 18
Installing several refrigeration appliances ........................................................... 19
Changing the door hinging.................................................................................. 19
Wall spacers........................................................................................................ 19
Installing the refrigeration appliance ................................................................... 20
Aligning the refrigeration appliance................................................................ 20
Appliance dimensions ......................................................................................... 21
Electrical connection ........................................................................................... 23
Saving energy .................................................................................................... 24
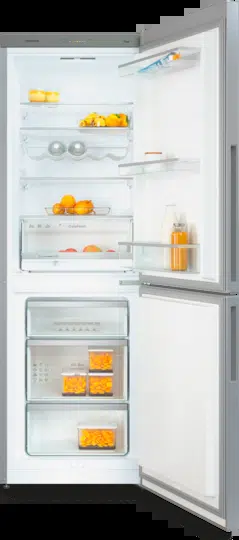
Guide to the appliance...................................................................................... 26
Appliance overview ............................................................................................. 26
Adjusting the interior fittings................................................................................ 29
Moving the door shelf/bottle shelf.................................................................. 29
Adjusting or removing the bottle holder......................................................... 29
Moving the shelves......................................................................................... 29
Moving the charcoal filters ............................................................................. 30
Moving the bottle rack.................................................................................... 30
XXLbox freezer drawer .................................................................................. 30
Accessories supplied .......................................................................................... 31
Optional accessories........................................................................................... 31
Switching on and off ......................................................................................... 32
Before using for the first time.............................................................................. 32
Switching the refrigeration appliance on............................................................. 32
The correct temperature................................................................................... 34
Temperature display ............................................................................................ 35
Setting the temperature....................................................................................... 35
Possible temperature settings ............................................................................. 35
Using Super freeze ............................................................................................ 36
Storing food in the refrigerator section........................................................... 37
Different storage zones ....................................................................................... 37
Temperature indicator for the coldest area .................................................... 38
Food which is not suitable for storage in the refrigerator section ....................... 39

Contents
3
Notes on buying food.......................................................................................... 39
Storing food correctly.......................................................................................... 40
Storing food in the DailyFresh drawer............................................................. 41
Freezing and storing food................................................................................. 44
Freezing fresh food.............................................................................................. 44
Maximum freezing capacity ........................................................................... 44
Storing frozen food.............................................................................................. 44
Home freezing ..................................................................................................... 45
Storage time for frozen food................................................................................ 46
Cooling drinks quickly ......................................................................................... 47
Using accessories ............................................................................................... 47
Making ice cubes ........................................................................................... 47
Defrosting........................................................................................................... 48
Cleaning and care ............................................................................................. 51
Cleaning agents................................................................................................... 51
Preparing the refrigeration appliance for cleaning .............................................. 52
Cleaning the inside of the appliance ................................................................... 52
Removing and dismantling accessories for cleaning.......................................... 53
Cleaning the front of the appliance and the side panels..................................... 55
Cleaning the door seal ........................................................................................ 55
Cleaning the ventilation gaps .............................................................................. 55
After cleaning ...................................................................................................... 56
Problem solving guide ...................................................................................... 57
Noises................................................................................................................. 64
Service................................................................................................................ 65
Contact in the event of a fault ............................................................................. 65
EPREL database ................................................................................................. 65
Warranty .............................................................................................................. 65
Warning and Safety instructions
4
This refrigeration appliance complies with current safety require-
ments. Inappropriate use can, however, lead to personal injury and
material damage.
Please read the operating and installation instructions carefully be-
fore using the refrigeration appliance for the first time. They con-
tain important information on safety, installation, use and mainten-
ance. This is to protect yourself from injury, and from damaging
your refrigeration appliance.
In accordance with standard IEC60335-1, Miele expressly and
strongly advises that you read and follow all information provided
on installing the refrigeration appliance, as well as the safety notes
and warnings.
Miele cannot be held liable for injury or damage caused by non-
compliance with these instructions.
Keep these operating and installation instructions in a safe place
and pass them on to any future owner.
Correct application
This refrigeration appliance is intended for use in the home and in
similar environments, for example
– in shops, offices and similar work settings
– by the guests in hotels, motels, bed & breakfasts and other typical
home settings.
This refrigeration appliance is not intended for outdoor use.
This appliance is intended for domestic use only for cooling and
storing food and drink as well as for storing deep frozen food, freez-
ing fresh food and for making ice.
Any other usage is not supported by the manufacturer and could be
dangerous.

Warning and Safety instructions
5
This refrigeration appliance is not suitable for storing and keeping
cool medicines, blood plasma, laboratory preparations or similar
substances or products that are subject to the Medical Device Dir-
ective. Incorrect use of the refrigeration appliance for such purposes
may cause deterioration of the items stored. The refrigeration appli-
ance is also not suitable for use in areas where there is a risk of ex-
plosion.
Miele cannot be held liable for damage caused by improper or incor-
rect use or operation of the appliance.
The appliance can only be used by people with reduced physical,
sensory or mental capabilities, or lack of experience and knowledge,
if they are supervised whilst using it, or have been shown how to use
it in a safe way and recognise and understand the consequences of
incorrect operation.
Safety with children
Children under 8 years of age must be kept away from the refri-
geration appliance unless they are constantly supervised.
Children 8 years and older may only use the appliance unsuper-
vised if they have been shown how to use it in a safe way and recog-
nise and understand the consequences of incorrect operation.
Children must not be allowed to clean or maintain the appliance
unsupervised.
Please supervise children in the vicinity of the appliance and do
not let them play with it.
Danger of suffocation! Whilst playing, children could become en-
tangled in packaging (such as plastic wrapping) or pull it over their
head and suffocate. Keep packaging material away from children.
Warning and Safety instructions
6
Technical safety
The coolant circuit has been checked for leaks. The refrigeration
appliance complies with statutory safety requirements and the ap-
propriate EU directives.
This refrigeration appliance contains the refrigerant isobutane
(R600a), a natural gas which is environmentally friendly but flam-
mable. The refrigerant does not damage the ozone layer and does
not contribute to the greenhouse effect.
The use of this refrigerant has, however, led to a slight increase in
the noise level of the appliance. In addition to the noise of the com-
pressor, you might be able to hear the refrigerant flowing around the
cooling circuit. Unfortunately, this cannot be avoided, but it does not
affect the performance of the refrigeration appliance.
When transporting and installing the refrigeration appliance, ensure
that no parts of the cooling circuit are damaged. Splashes of refri-
gerant can damage the eyes.
In the event of damage:
- Avoid naked flames or anything which creates a spark.
- Disconnect the refrigeration appliance from the mains electricity
supply.
- Ventilate the room where the refrigeration appliance is located for
several minutes.
- Contact the Miele Customer Service Department.
The more coolant there is in a refrigeration appliance, the larger
the room it should be installed in. In the event of a leakage, if the ap-
pliance is in a small room, there is the danger of a combustible gas/
air mixture building up. For every 8g of coolant at least 1m
3
of room
space is required. The amount of coolant in the refrigeration appli-
ance is stated on the data plate inside the appliance.

Warning and Safety instructions
7
To avoid the risk of damage to the appliance, make sure that the
connection data (fuse rating, frequency and voltage) on the data
plate corresponds to the household supply.
Check that this is the case before connecting the appliance. Consult
a qualified electrician if in any doubt.
The electrical safety of this appliance can only be guaranteed
when correctly earthed. It is essential that this standard safety re-
quirement is met. If in any doubt please have the electrical installa-
tion tested by a qualified electrician.
Temporary or permanent operation on an autonomous power sup-
ply system or a power supply system that is not synchronised with
the mains power supply (e.g. island networks, back-up systems) is
possible. A prerequisite for operation is that the power supply sys-
tem complies with the specifications of EN50160 or an equivalent
standard.
The function and operation of the protective measures provided in
the domestic electrical installation and in this Miele product must
also be maintained in isolated operation or in operation that is not
synchronised with the mains power supply, or these measures must
be replaced by equivalent measures in the installation. As described,
for example, in the current version of BS OHSAS 18001–2 ISO
45001.
If the electrical connection cable is faulty it must only be replaced
by a Miele authorised service technician to protect the user from
danger.
Do not connect the appliance to the mains electrical supply by a
multi-socket adapter or extension lead. These are a fire hazard and
do not guarantee the required safety of the appliance.
If moisture gets into electrical components or into the mains con-
nection cable, it could cause a short circuit. Therefore, do not oper-
ate this refrigeration appliance in areas which are exposed to mois-
ture (e.g in a garage or utility room).

Warning and Safety instructions
8
This appliance must not be used in a non-stationary location (e.g.
on a ship).
Do not use a damaged appliance. It could be dangerous. Check
the appliance for visible signs of damage.
This refrigeration appliance is not intended for use as a built-in ap-
pliance.
The appliance must be isolated from the electricity supply during
installation, maintenance and repair work.
Unauthorised installation, maintenance and repairs can cause
considerable danger for the user.
Installation, maintenance and repairs must only be carried out by a
Miele authorised technician.
While the appliance is under warranty, repairs should only be un-
dertaken by a Miele authorised service technician. Otherwise the
warranty is invalidated.
Faulty components must only be replaced with genuine Miele ori-
ginal spare parts. Miele can only guarantee the safety standards of
the appliance when Miele replacement parts are used.
This refrigeration appliance is supplied with a special lamp to
cope with particular conditions (e.g. temperature, moisture, chemical
resistance, abrasion resistance and vibration). This lamp must only
be used for the purpose for which it is intended. The lamp is not suit-
able for room lighting. Replacement lamps may only be fitted by a
Miele authorised technician or by the Miele Customer Service De-
partment. This refrigeration appliance contains several light sources
with at least energy efficiency classF.

Warning and Safety instructions
9
Proper installation
Change the door hinging (if necessary) as described in the install-
ation instructions supplied with the appliance.
Two people are required to install the refrigeration appliance.

Warning and Safety instructions
10
Correct use
This refrigeration appliance is designed for use within specific am-
bient temperatures (climate range). Do not use in ambient temperat-
ures for which it is not designed. The climate range is stated on the
data plate in the interior cabinet of the refrigeration appliance. A
lower ambient temperature will cause the compressor to switch off
for longer periods, meaning that the refrigeration appliance is unable
to maintain the required temperature.
Do not cover or block the air vents as this could impair the effi-
ciency of the appliance, increase the electricity consumption and
could cause damage to the components.
If storing food which contains a lot of fat or oil in the appliance or
the door, make sure that it does not come into contact with plastic
components as this could cause stress cracks or break the plastic.
Risk of fire and explosion. Do not store explosive materials in the
refrigeration appliance or any products containing propellants (e.g.
spray cans). Electrical components can cause flammable mixes of
gases to ignite.
Danger of explosion. Do not operate any electrical equipment (e.g.
an electric ice-cream maker) inside the refrigeration appliance.
Danger of sparking and explosion.
Danger of injury and damage to the appliance. Do not store cans
or bottles containing carbonated drinks or liquids which could freeze
in the freezer zone. Otherwise they could burst.
Danger of injury and damage to the appliance. When cooling
drinks quickly in the freezer zone, make sure bottles are not left in for
more than one hour. Otherwise they could burst.
Danger of injury. Never handle frozen food or the metal parts of
the appliance with wet hands. Your hands may freeze to the frozen
food or to the metal.

Warning and Safety instructions
11
Danger of injury. Do not take ice cubes out with your bare hands
and never place ice cubes or ice lollies in your mouth straight from
the freezer zone. The very low temperature of the frozen food can
cause frost burn to the lips and tongue.
Do not refreeze partially or fully defrosted food. Consume defros-
ted food as soon as possible, as it will lose its nutritional value and
spoil if left for too long. Defrosted food may only be re-frozen after it
has been cooked.
Observe the manufacturer's “use-by” dates and storage instruc-
tions given on food to avoid the risk of food poisoning. Storage times
will depend on several factors, including the freshness and quality of
the food, as well as the temperature at which it is stored.

Warning and Safety instructions
12
Accessories and spare parts
Only use original Miele accessories. If other parts are used, war-
ranty, performance and product liability claims will be invalidated.
Miele will guarantee to supply functional spare parts for a min-
imum of 10years and up to 15years following the discontinuation of
your refrigeration appliance.

Warning and Safety instructions
13
Cleaning and care
Do not use any oils or grease on the door seals, as these will
cause the seals to deteriorate and become porous with time.
Do not use a steam cleaning appliance to clean or defrost this ap-
pliance.
Steam could reach electrical components and cause a short circuit.
Sharp edged or pointed objects will damage the evaporator, caus-
ing irreversible damage to the appliance. Do not use sharp edged or
pointed objects to
- remove frost and ice,
- separate frozen food or remove ice trays.
Do not place electric heaters or candles in the appliance to de-
frost it. These can damage the plastic parts.
Do not use defrosting sprays or de-icers, as they could contain
substances which could damage the plastic parts or which might
cause the build-up of gases and pose a danger to health.

Warning and Safety instructions
14
Transport
Always transport the appliance in an upright position and in its ori-
ginal transport packaging to avoid damage in transit.
Danger of injury and damage to the appliance. The refrigeration
appliance is very heavy and must be transported by two people.
Disposal of your old appliance
Children playing could become trapped in the appliance and
could suffocate.
- Remove the appliance doors.
- Remove the drawers.
- Leave the adjustable shelves in the refrigeration appliance so chil-
dren cannot climb inside.
- If your old refrigeration appliance has a door lock, destroy it. This
will prevent the risk of children playing accidentally locking them-
selves in and endangering their lives.
Risk of electric shock!
- Cut the power plug off the mains connection cable.
- Cut the mains connection cable off the old appliance.
Dispose of everything separately from the old appliance.
During and after disposal, make sure that the refrigeration appli-
ance is not placed near petrol or other flammable gases and liquids.
Risk of fire due to escaping oil or refrigerant!
The refrigerant and oil inside the appliance are flammable. In high
enough concentrations, escaping refrigerant or oil may ignite if they
come into contact with an external heat source.
During disposal, make sure that the cooling circuit is not damaged in
order to prevent refrigerant and oil escaping in an uncontrolled man-
ner (see the data plate for details of the refrigerant).
Warning and Safety instructions
15
Splashes of coolant can damage the eyes. Be careful not to dam-
age any part of the pipework whilst awaiting disposal, e.g. by
- puncturing the coolant channels in the condenser,
- bending any pipework, or
- scratching the surface coating.
Symbol on the compressor (depending on model)
This information is only relevant for recycling. There is no risk during normal oper-
ation.
The oil in the compressor can be fatal if swallowed or if it penet-
rates the airways.
Caring for the environment
16
Disposal of the packing mater-
ial
The packaging is designed to protect
the appliance from damage during
transportation. The packaging materials
used are selected from materials which
are environmentally friendly for disposal
and should be recycled.
Recycling the packaging reduces the
use of raw materials in the manufactur-
ing process and also reduces the
amount of waste in landfill sites.
Disposing of your old appli-
ance
Electrical and electronic appliances
contain many valuable materials. They
also contain certain materials, com-
pounds and components which were
essential for their correct functioning
and safety. These could be hazardous
to human health and to the environment
if disposed of with household waste or
if handled incorrectly. Please do not,
therefore, dispose of your old appliance
with household waste.
Instead, please make use of officially
designated collection and disposal
points to dispose of and recycle elec-
trical and electronic appliances in your
local community, with your dealer or
with Miele. By law, you are solely re-
sponsible for deleting any personal data
from the old appliance prior to disposal.
Take care not to damage your refrigera-
tion appliance’s pipework before or dur-
ing transportation to an authorised col-
lection depot.
This is to ensure that refrigerant in the
cooling circuit and oil in the compressor
is contained, and will not leak into the
environment.
Ensure that your old appliance presents
no danger to children while being
stored for disposal. For further informa-
tion, see “Warning and safety instruc-
tions” in these operating instructions.

Installation
*INSTALLATION*
17
Installation site
Risk of damage due to high hu-
midity.
In environments with high humidity,
condensation can build up on ex-
ternal refrigeration appliance panels.
This condensate can cause corrosion
on external appliance panels.
Install the refrigeration appliance in a
dry and/or air-conditioned room with
sufficient ventilation.
After installation please make sure
that the appliance door(s) closes/
close properly and that the specified
ventilation gaps are adhered to.
Fire risk and risk of damage from
appliances which give off heat.
Appliances which give off heat can
catch fire and set fire to the refrigera-
tion appliance.
Do not place appliances which give
off heat, such as mini-ovens, double
burner hobs or toasters on the refri-
geration appliance.
Fire risk and danger of damage
from open flames.
Open flames can set fire to the refri-
geration appliance.
Keep open flames (e.g. a candle)
away from the refrigeration appli-
ance.
This appliance should be installed in a
dry, well-ventilated room.
When deciding on the installation site,
please bear in mind that your refriger-
ation appliance will use more energy if
installed near to a heater, a cooker or
other appliance that gives off heat.
Avoid direct sunlight.
The higher the ambient temperature,
the longer the compressor runs and
the higher the energy consumption is.
When installing the refrigeration appli-
ance, please note the following:
- The socket must be easily accessible
in an emergency, not concealed be-
hind the appliance.
- The mains plug and mains connec-
tion cable must not touch the rear of
the refrigeration appliance as they
could be damaged by vibrations from
the appliance.
- Do not plug in other appliances into
sockets behind this appliance.
- Do not position or operate multi-
socket adapters, distributor strips or
other electronic devices (such as
halogen transformers) at the rear of
the appliance.
- The floor at the installation site must
be horizontal and level and must be
as high as the surrounding floor.
Installation
*INSTALLATION*
18
Climate range
This refrigeration appliance is designed
for use within specific ambient temper-
atures (climate range). Do not use in
ambient temperatures for which it is not
designed.
A lower ambient temperature leads to
the compressor switching off for longer
periods. This can cause the internal
temperature in the refrigeration appli-
ance to rise with the risk of food deteri-
orating and going off.
The climate range is stated on the data
plate in the interior cabinet of the refri-
geration appliance.
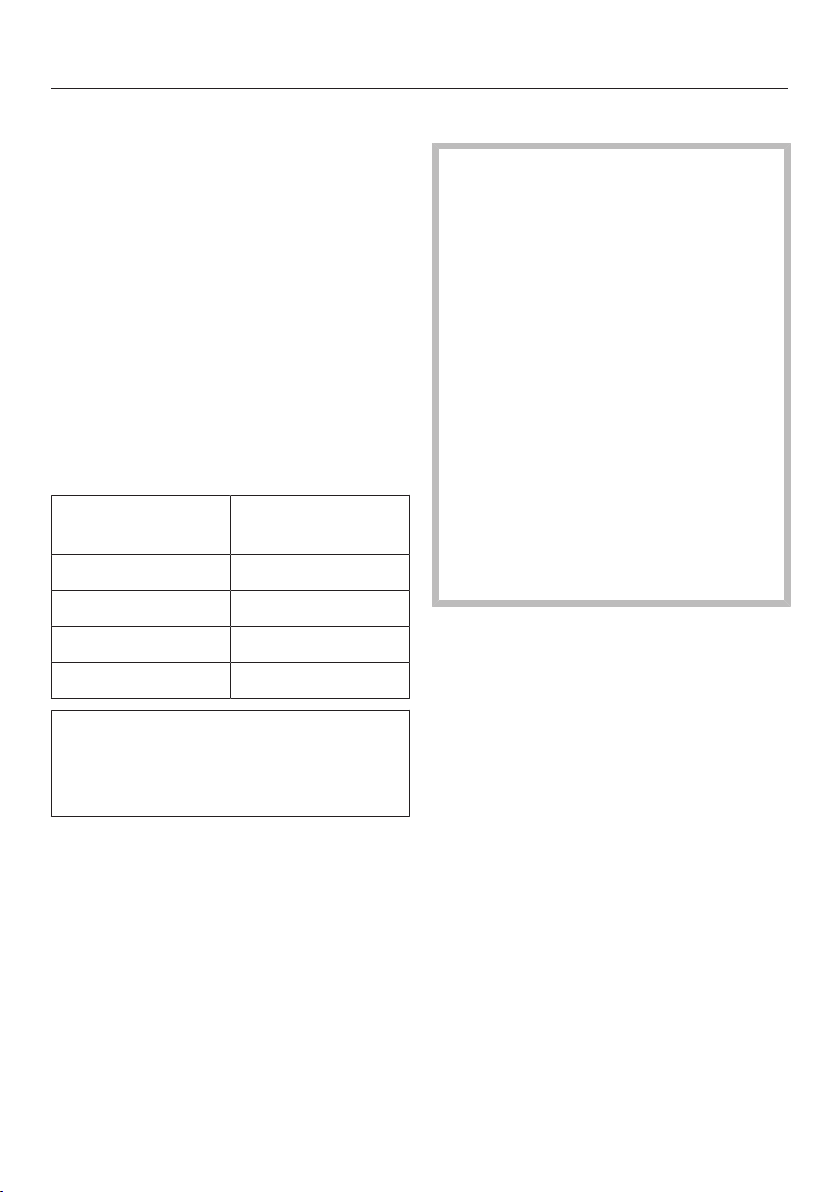
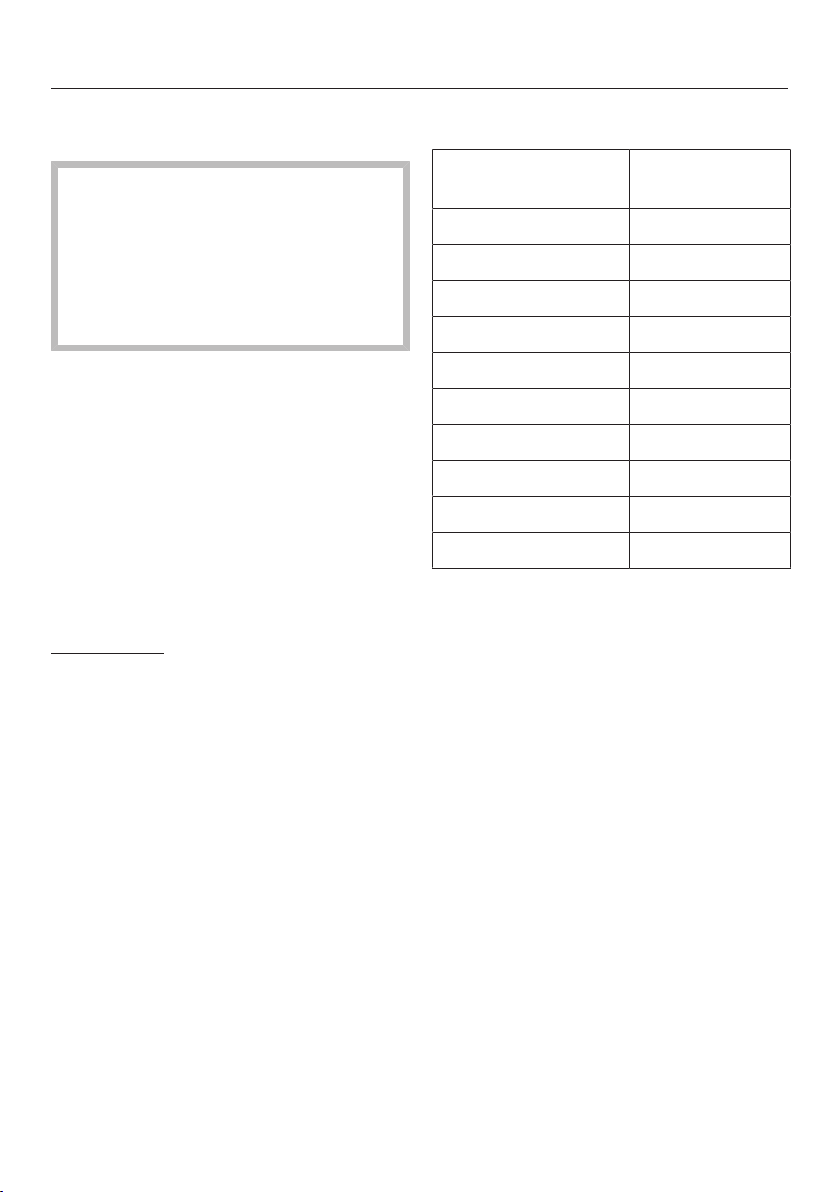
Climate range Ambient temper-
ature
SN +10to+32°C
N +16to+32°C
ST +16to+38°C
T +16to+43°C
A refrigeration appliance from the SN
climate range can operate without any
difficulties in rooms with a cooler am-
bient temperature (down to +5°C).
Ventilation requirements
Risk of fire and damage due to
insufficient ventilation.
If the refrigeration appliance is not
ventilated sufficiently, the com-
pressor will run more frequently and
for longer periods. This will result in
increased energy consumption and a
higher operating temperature for the
compressor. This may, in turn, cause
damage to the compressor.
Please ensure that there is adequate
ventilation around the refrigeration
appliance.
It is essential to observe the required
ventilation gaps.
The ventilation gaps must not be
covered or blocked in any way.
They must also be regularly dusted.
Air at the back of the refrigeration appli-
ance gets warm. Sufficient space for
proper ventilation must therefore be en-
sured (see “Installation dimensions”).
Installation
*INSTALLATION*
19
Installing several refrigeration
appliances
Risk of damage due to condens-
ation on external appliance panels.
In environments with high humidity,
condensation can build up between
the external refrigeration appliance
panels, which can cause corrosion.
Do not place different refrigeration
appliances directly next to one an-
other.
Changing the door hinging
Danger of injury and damage
when changing the door hinging.
There is an increased danger of in-
jury and damage if the door hinging
is installed by a single person.
Always change the door hinging with
the help of a second person.
The refrigeration appliance is supplied
with hinges on the right. If left-hand
hinging is required, the hinges must be
changed (see accompanying installation
instructions).
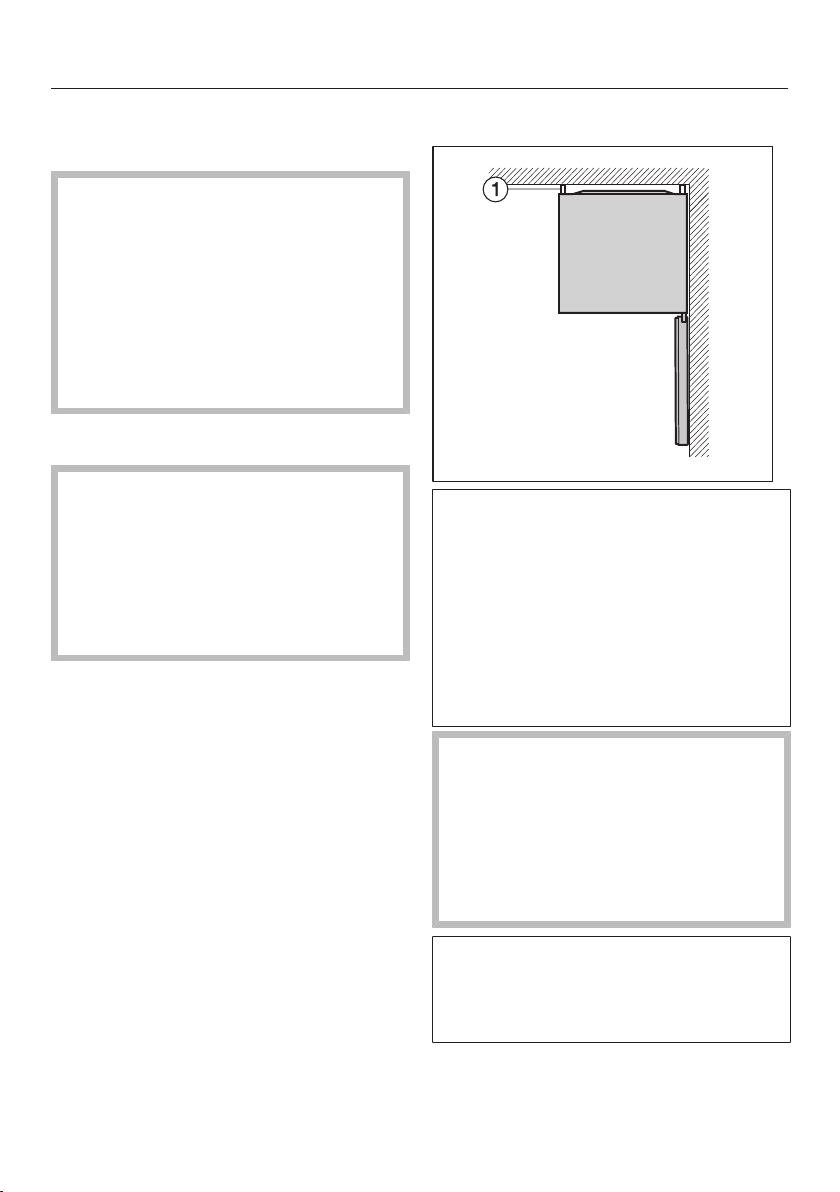
Wall spacers
The wall spacers on the back of
your refrigeration appliance are de-
signed to ensure that the declared en-
ergy consumption is achieved. They
also prevent the build-up of condens-
ation at high ambient temperatures.
Fitting wall spacers increases the
depth of the refrigeration appliance by
approx.20mm.
Risk of damage as a result of in-
correct handling.
The wall spacers must not be fitted
when the refrigeration appliance is
laid on its back.
Remove the wall spacers from the
back of the appliance.
The refrigeration appliance does not
require wall spacing at the side. All
drawers and shelves can still be pulled
out.
Installation
*INSTALLATION*
20
Installing the refrigeration ap-
pliance
Risk of injury and damage due to
the refrigeration appliance tipping
over.
There is an increased risk of injury
and damage if the refrigeration appli-
ance is installed by a single person.
Two people are required for installing
the refrigeration appliance.
Risk of damage to the appliance
door caused by impact.
The appliance door could hit the wall
of the room resulting in damage to
the door.
Protect the appliance door by fitting
a felt stopper, for example, to the
wall of the room.
Risk of damaging the floor.
Moving the refrigeration appliance
can cause damage to the floor.
Move the refrigeration appliance
carefully on floors that are sensitive
to scratching.
Tip: The refrigeration appliance must be
empty when it is installed.
Prepare the refrigeration appliance for
installation as close as possible to its
intended installation site.
Connect the refrigeration appliance to
the electricity supply as described in
“Electrical connection”.
Move the refrigeration appliance
carefully to its intended installation
site.
Position the refrigeration appliance
with the wall spacers close to the
wall.
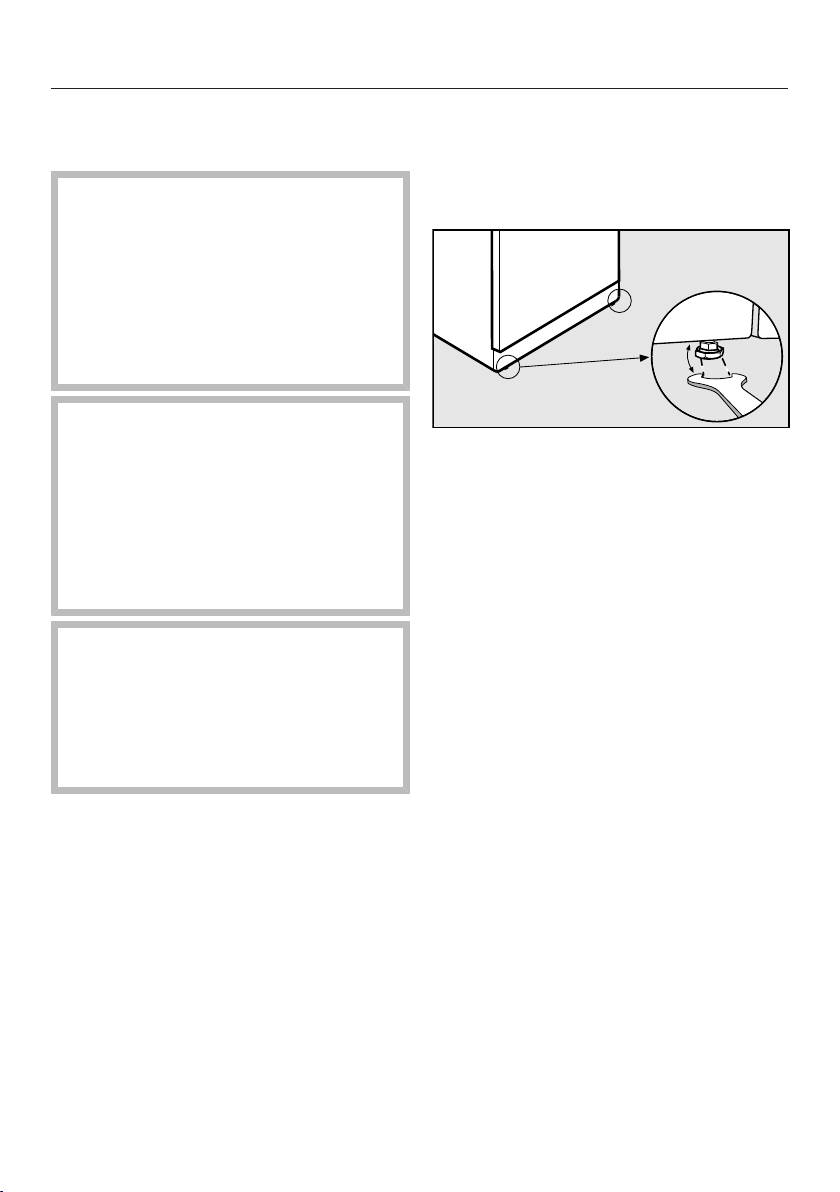
Aligning the refrigeration appliance
To align the refrigeration appliance,
adjust the front feet using the open
spanner.

Installation
*INSTALLATION*
21
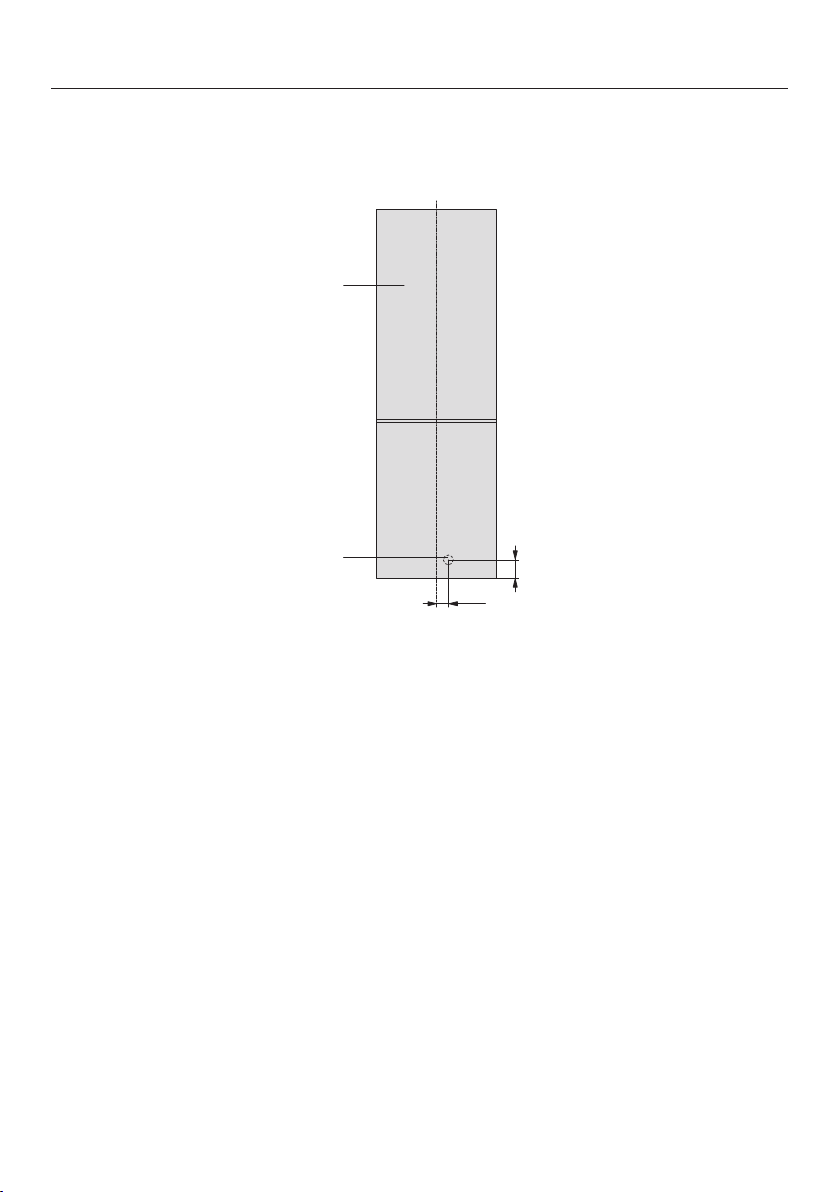
Appliance dimensions
Installation dimensions/View from above
All dimensions are given in mm.
The refrigeration appliance will function correctly if the specified ventilation cross-
sections are kept clear.
1057
632
790
10
445
245
597
650
11
A
1162
600
1200
845
90°
115°
* Dimensions without wall spacers fitted. Fitting the wall spacers supplied increases the ap-
pliance depth by 20mm.
A
KD4050 E el Active, KD4052 E el Active 1750
KD4072 E ws/el Active, KD4172 E ws/el Active 1850
Installation
*INSTALLATION*
22
Connections
All dimensions are given in mm.
56
88
①
②
a
View from the front
b
Mains connection cable, length = 2400mm
A longer mains connection cable is available to order from the Miele Customer
Service Department.
Installation
*INSTALLATION*
23
Electrical connection
The refrigeration appliance is supplied
with a mains cable with moulded plug
ready for connection to a suitable
earthed socket.
The socket must be easily accessible
after the refrigeration appliance has
been installed. If the socket is not easily
accessible, ensure that a suitable
means of disconnection is provided on
the installation side for each pole.
Risk of fire from overheating.
Connecting the refrigeration appli-
ance to a multi-socket plug adapter
or to an extension lead can overload
the cable.
For safety reasons, do not use an ex-
tension lead or multi-socket adapter.
The electrical installation must comply
with VDE0100 requirements.
For safety reasons, we recommend us-
ing a typeresidual current device
(RCD) in the assigned electrical installa-
tion for connecting the refrigeration ap-
pliance.
If the mains connection cable is dam-
aged, it must only be replaced with a
specific mains connection cable of the
same type (available from the Miele
Customer Service Department). For
safety reasons, such replacement may
only be carried out by a qualified spe-
cialist or the Miele Customer Service
Department.
These operating instructions and the
data plate indicate the nominal power
consumption and the appropriate fuse
rating. Compare this information with
the data of the on-site electrical con-
nection.
If in any doubt, consult a qualified elec-
trician.
Temporary or permanent operation on
an autonomous power supply system or
a power supply system that is not syn-
chronised with the mains power supply
(e.g. island networks, back-up systems)
is possible. A prerequisite for operation
is that the power supply system com-
plies with the specifications of
EN50160 or an equivalent standard.
The function and operation of the pro-
tective measures provided in the do-
mestic electrical installation and in this
Miele product must also be maintained
in isolated operation or in operation that
is not synchronised with the mains
power supply, or these measures must
be replaced by equivalent measures in
the installation. As described, for ex-
ample, in the current version of VDE-
AR-E2510-2.

Saving energy
24
How to save energy:
Installation
site
The refrigeration appliance has to cool more often at higher am-
bient temperatures and consumes more energy in the process.
Therefore, you should:
- Install the refrigeration appliance in a well-ventilated room.
- Do not install the refrigeration appliance near to a heat source
(heater element, cooker).
- Protect the refrigeration appliance from direct sunlight.
- Ensure an ideal ambient temperature of 20°C.
- Clean the ventilation gaps on a regular basis to remove any
dust.
Temperature
setting
The colder the temperature, the higher the energy consumption.
The following settings are recommended:
- 4 to 5°C in the refrigerator section.
- -18°C in the freezer section.
Use Energy consumption is increased by heat input and impeded air
circulation. Therefore, you should:
- Only open the appliance door(s) when necessary and for as
short a time as possible. Arrange the food in such a way that
makes it easy to find in the appliance.
- Always close the appliance door(s) properly after opening
them.
- Allow hot food and drinks to cool down before placing them in
the refrigeration appliance.
- Store food well packaged or covered.
- Do not overfill the compartments to allow air to circulate.
- Place frozen food in the fridge zone to defrost.
- When placing food in the appliance, make sure that the ventil-
ation slots are not blocked.

Saving energy
25
- When placing food in the freezer, make sure that the ventila-
tion slots in the rear panel are not blocked.
Defrosting A layer of ice hinders the cold from reaching the frozen food.
Therefore, you should:
- Defrost the freezer when a layer of ice 0.5cm (max.) thick has
built up.
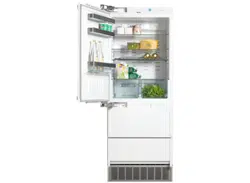
Guide to the appliance
26
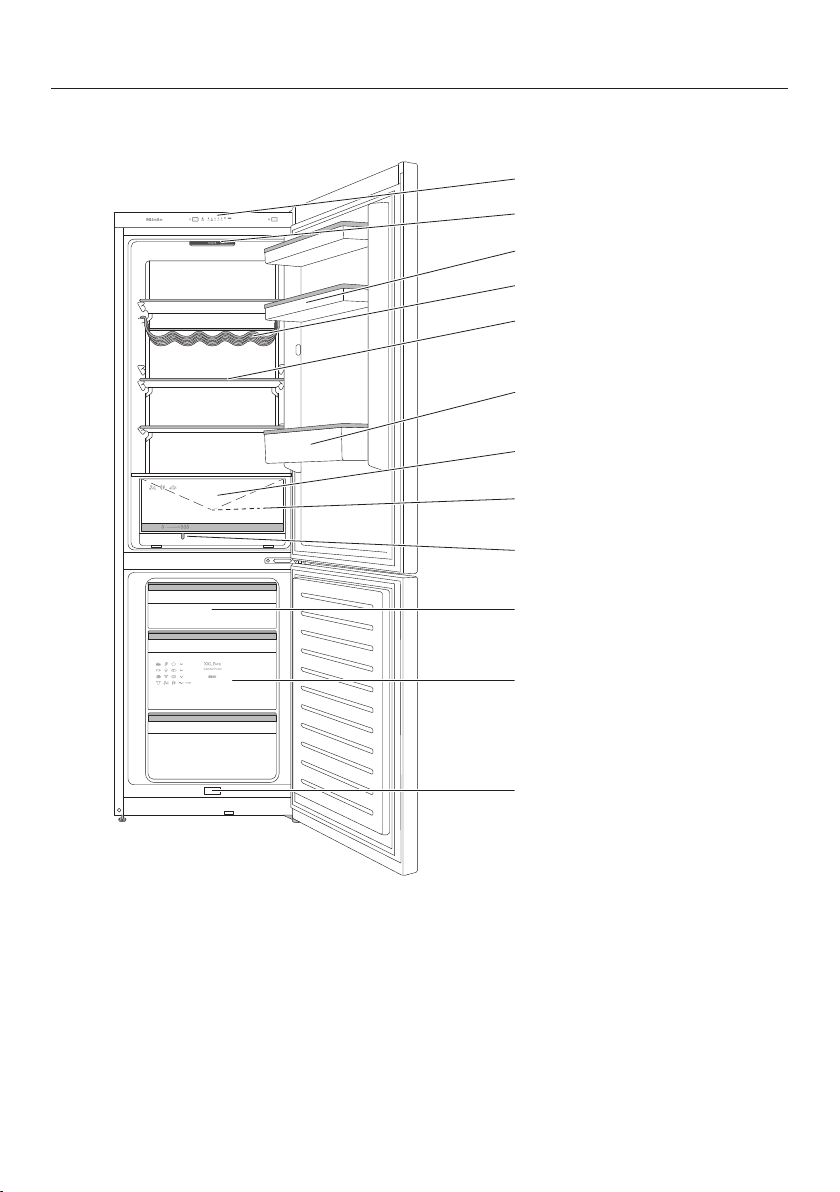
Appliance overview
DailyFresh
This drawing is for illustration purposes only.

Guide to the appliance
27
a
Control panel with display
b
Interior lighting
c
Shelf with egg tray in the appliance door
d
Flexible bottle rack
e
Adjustable shelf
f
Bottle shelf with bottle holder
g
DailyFresh drawer for fruit and vegetables (humidity-controlled)
h
Condensate channel with drain hole
i
Moisture regulator for the DailyFresh drawer
j
Freezer drawers
k
XXL freezer box
l
Condensation drain
Guide to the appliance
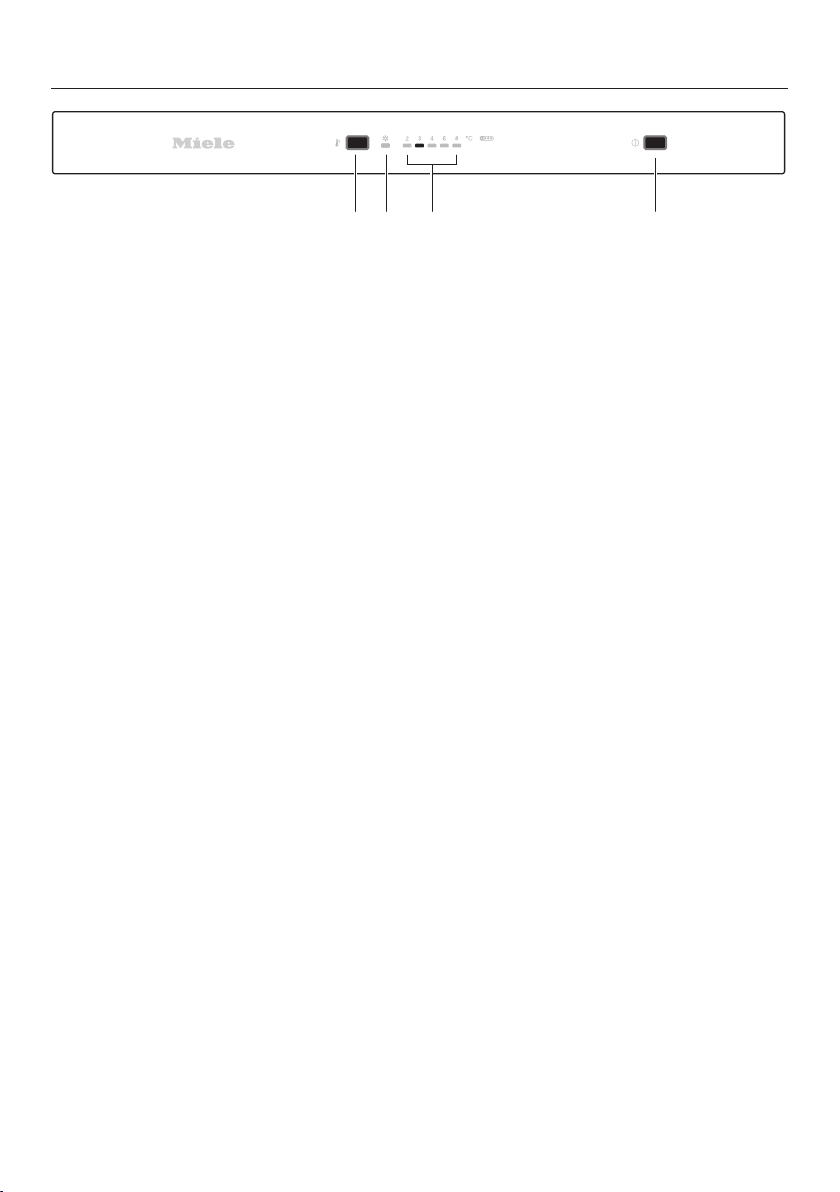
28
a
For setting the temperature,
for switching the SuperFreeze function on/off
b
SuperFreeze indicator
c
Temperature display for fridge zone
d
For switching the refrigeration appliance on/off
Guide to the appliance
29
Adjusting the interior fittings
Moving the door shelf/bottle shelf
Only move the door/bottle shelves in
the appliance door when they are
empty.
Push the door/bottle shelves up-
wards, then remove them by pulling
them forwards.
Replace the door/bottle shelves at
the required height.
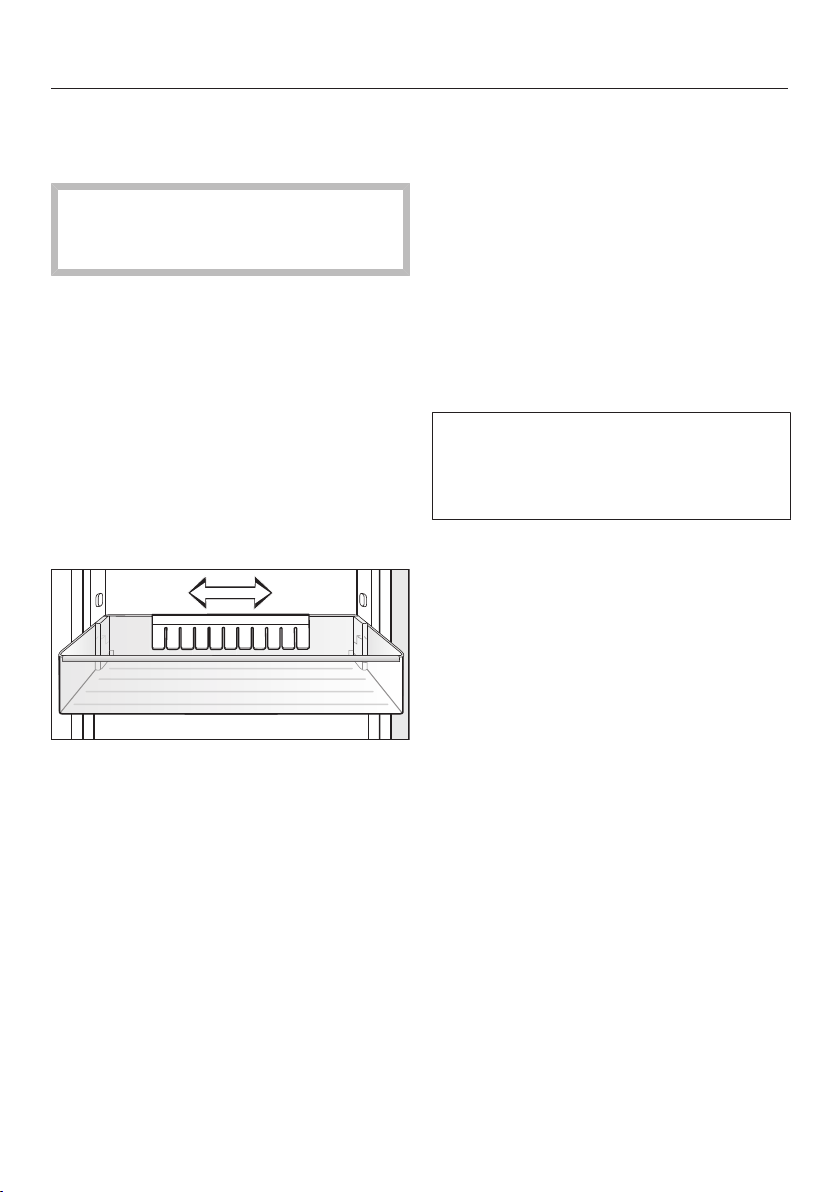
Adjusting or removing the bottle
holder
The non-slip fins of the bottle holder
make bottles more secure when you
open and close the appliance door.
The bottle holder can be moved to the
left or right to create more room for
drink cartons.
The bottle holder can be removed com-
pletely, e.g. for cleaning:
pull the bottle holder up to remove it.
Moving the shelves
The shelves can be adjusted according
to the height of the food.
Pull the shelf towards you and tilt it
up to remove it.
Fit the shelf in its new position with
the rear edge facing upwards. The
raised edge at the back must face
upwards to prevent food from touch-
ing the back of the appliance and
freezing to it.
The raised edge on the protective strip
at the back must face upwards to pre-
vent food from touching the back of
the appliance and freezing to it.
Guide to the appliance
30
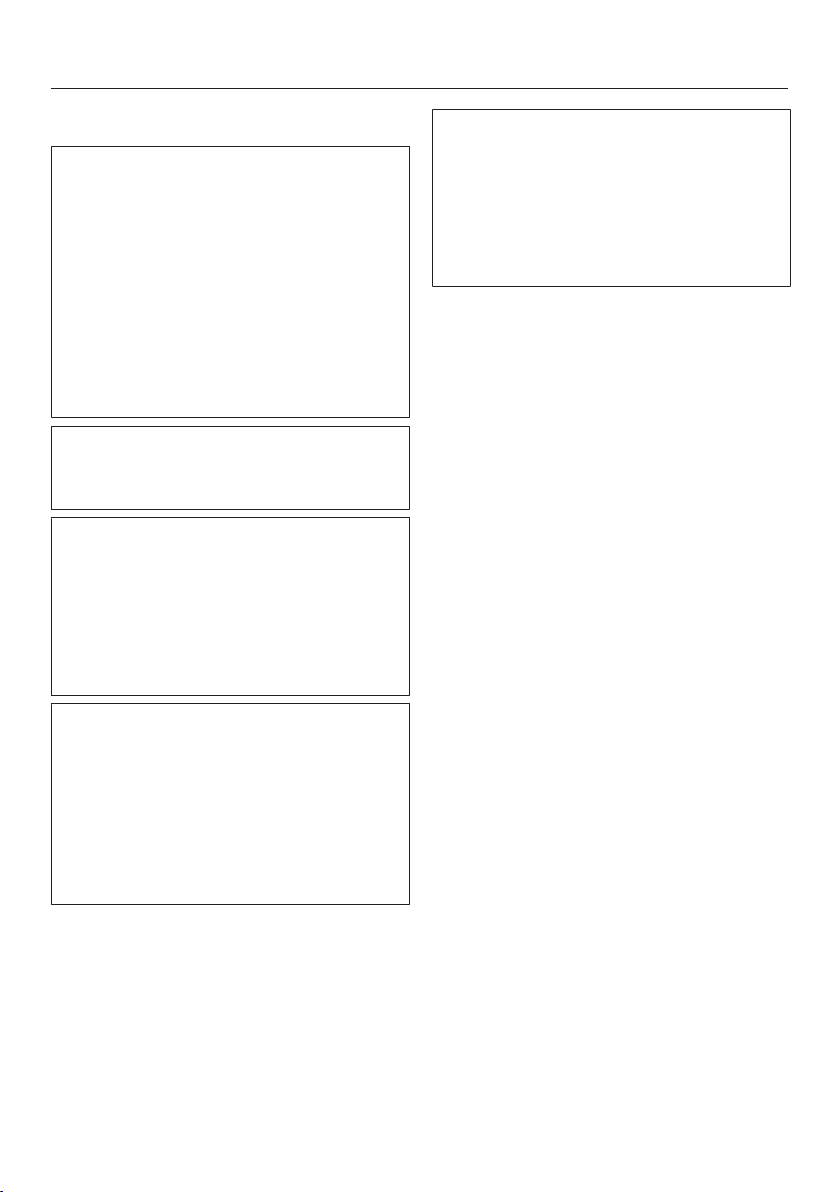
Moving the charcoal filters
KKF-FS charcoal filters with holder
(Active AirClean) are available as op-
tional accessories (see “Optional ac-
cessories”).
When storing very strong smelling
food (e.g. very ripe cheese):
- Place the holder with the charcoal fil-
ters on the shelf where this food is
kept.
- Change the charcoal filters sooner if
necessary.
- Use more charcoal filters (with hold-
ers) in the refrigeration appliance.
The holder for the charcoal filters sits
on the protective strip at the back of the
shelf.
To move the charcoal filter, pull the
holder upwards to remove it from the
protective strip.
Refit the holder on the protective strip
of the shelf you wish to use it on.
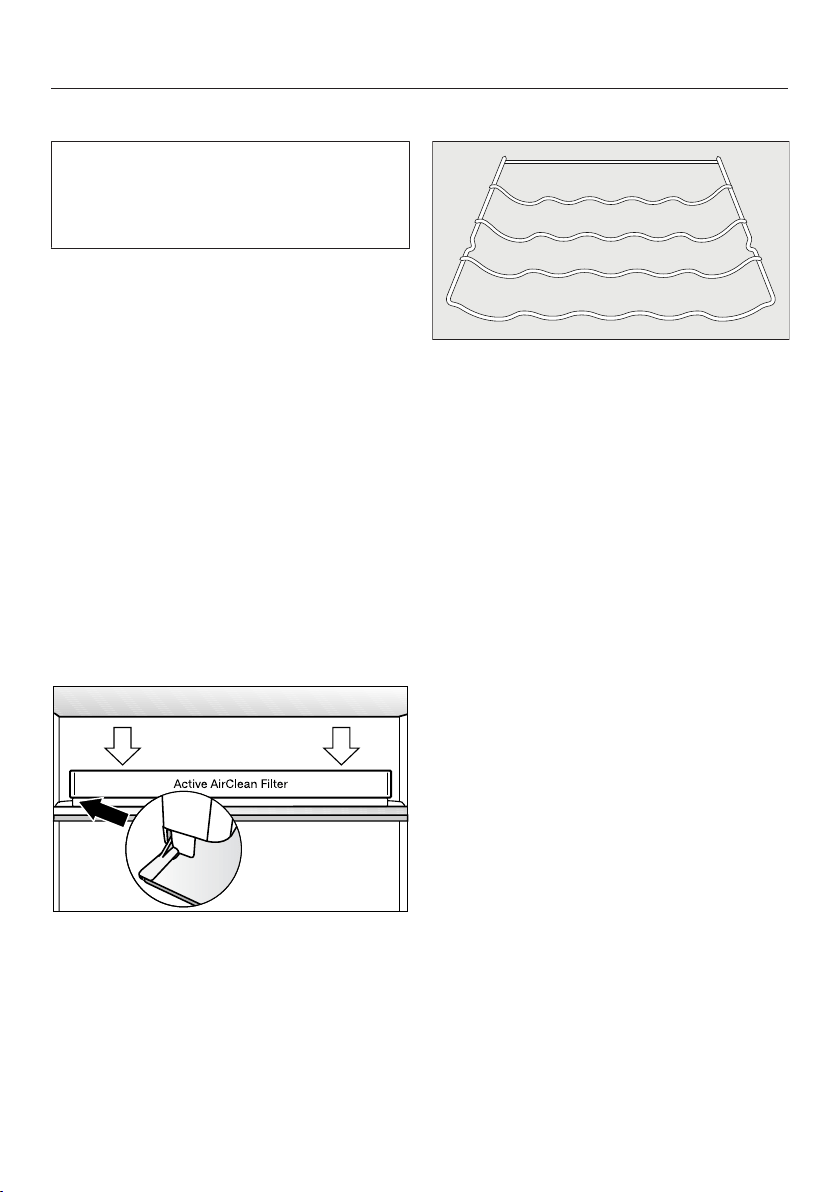
Moving the bottle rack
The bottle rack can be placed at differ-
ent positions in the refrigeration appli-
ance.
Lift the bottle rack up slightly at the
back and pull it out towards you.
The rear rail must face upwards to pre-
vent bottles from touching the back of
the appliance.
XXLbox freezer drawer
The extra high freezer drawer offers
more volume and space for storing
bulky and tall items of frozen food.

Guide to the appliance
31
Accessories supplied
Egg tray (depending on model)
Flexible bottle rack
Bottle holder
Ice cube tray
Optional accessories
A range of useful Miele accessories and
care products are available for your ap-
pliance.
Multi-purpose microfibre cloth
The microfibre cloth is suitable for re-
moving fingerprints and light soiling
from surfaces such as stainless steel,
glass, plastic and chrome without the
use of chemicals.
MicroCloth Kit
The MicroCloth Kit contains a universal
cloth, a glass cloth and a polishing
cloth.
These cloths are extremely resistant to
tearing and very robust. Thanks to very
fine microfibres these cloths achieve an
excellent cleaning performance.
MicroCloth HyClean
The MicroCloth HyClean is a multi-pur-
pose antibacterial cloth and is particu-
larly tear resistant and durable. It can be
used wet or dry, with or without clean-
ing agent.
KKF-FF charcoal filter with holder
(Active AirClean)
Charcoal filters neutralise unpleasant
odours in the fridge zone for improved
air quality.
KKF-RF replacement filters
(ActiveAirClean)
Replacement filters to the fit the holder
are available. We recommend replacing
the charcoal filters every 6months.
Optional accessories can be ordered
from the Miele webshop. They can
also be ordered from the Miele Cus-
tomer Service Department (see end of
this booklet for contact details) or from
your Miele dealer.

Switching on and off
32
Before using for the first time
Remove all packaging material and
protective film.
Clean the inside of the appliance and
the accessories (see “Cleaning and
care”).
Allow the refrigeration appliance to
stand for approx. 1hour before con-
necting it to the power supply.
This will prevent potential functional
problems with the refrigeration appli-
ance.
Connecting the refrigeration appli-
ance
Connect the refrigeration appliance to
the electricity supply as described in
“Electrical connection”.
Switching the refrigeration ap-
pliance on
Open the upper appliance door.
Switch the refrigeration appliance on
by pressing the On/Off switch on the
control panel.
The refrigeration appliance will start to
cool and the interior lighting will come
on when the appliance door is opened.
The refrigeration appliance will gradually
reach the pre-set temperatures.
To enable the temperature to get suf-
ficiently cold inside the refrigeration
appliance, allow the appliance to run
for a few hours before placing food
in it. Do not place food in the refri-
geration appliance until it has
reached the preset temperature.
Do not place food in the freezer zone
until it has reached the preset tem-
perature (min. -18°C).
Switching off the refrigeration appli-
ance
Switch the refrigeration appliance off
by pressing the On/Off switch on the
control panel.
The cooling and interior lighting are
switched off.
Please note: the refrigeration appli-
ance is not disconnected from the
power supply when it is switched off.

Switching on and off
33
Switching off for longer periods of
time
If, during a long absence, the refri-
geration appliance is switched off
but not cleaned and the door is left
shut, there is a danger of mould
building up inside the appliance.
It is essential to clean the refrigera-
tion appliance.
If the refrigeration appliance is not go-
ing to be used for a longer period of
time, observe the following:
Switch the refrigeration appliance off.
Defrost the freezer.
Switch off at the wall and disconnect
the plug from the socket, or discon-
nect the fuse.
Clean the refrigeration appliance and
leave the door ajar to air the refrigera-
tion appliance and avoid odours
building up inside.

The correct temperature
34
It is very important to set the correct
temperature to ensure the shelf life of
food. Reducing the temperature re-
duces the growth rate of microorgan-
isms. Food does not spoil as quickly.
The temperature in the refrigeration ap-
pliance will rise:
- The more often the appliance door is
opened and the longer it is kept open
- The more food that is stored in it
- The warmer the food is which is be-
ing put into it
- The higher the ambient temperature
surrounding the refrigeration appli-
ance. This refrigeration appliance is
designed for use within specific am-
bient temperatures (climate range).
Do not use in ambient temperatures
for which it is not designed.
...in the refrigerator section
We recommend a temperature of 4°C
in the refrigerator section.
...in the freezer zone
To freeze fresh food, a temperature of
-18°C is required. This will prolong the
storage life of your food and retain its
quality.

The correct temperature
35
Temperature display
The temperature display on the control
panel always shows the required tem-
perature.
Setting the temperature
Press the button for setting the tem-
perature repeatedly until the tem-
perature you want lights up in the
temperature display for the fridge
section.
Possible temperature settings
- Fridge zone: 2to8°C
If you change the temperature set-
ting:
check the temperature display after a
few hours. It will take this long for the
appliance to give an accurate read-
ing.
- Wait for approx.6hours if the refri-
geration appliance is not very full
- Wait for approx.24hours if the refri-
geration appliance is full
If, after this time, the temperature is still
too high or too low:
Adjust the temperature again.
Using Super freeze
36
SuperFreeze
When switched on, the SuperFreeze
function can be used to rapidly re-
duce the temperature in the freezer
section to its lowest setting (depend-
ing on the ambient temperature). The
refrigeration appliance will work at full
power and lower the temperature. Se-
lect this function before freezing fresh
food. This helps food to freeze quickly
and retain its nutrients, vitamins, fla-
vours and appearance.
When the SuperFreeze function is
switched on, the appliance may make
more noise than usual.
The SuperFreeze function should
be switched on 4–6 hours before pla-
cing food in the freezer.
When you are freezing the maximum
amount of food, the SuperFreeze
function should be switched on
24hours beforehand.
The SuperFreeze function will
switch itself off automatically after a
maximum of 60hours. The refrigera-
tion appliance will then run at normal
power again. The quantity of fresh
food placed in the freezer will determ-
ine the duration before the Super-
Freeze function turns off.
Tip: To save energy, you can switch the
SuperFreeze function off yourself
once food and drinks are sufficiently
chilled.
You do not need to switch on the Su-
perFreeze function:
- If you are placing food that is
already frozen in the freezer
- If you only freeze up to 2kg of
fresh food daily
Switching SuperFreeze on and off
Press the button for setting the tem-
perature repeatedly until the indic-
ator for the SuperFreeze function
lights up or goes out again.
Storing food in the refrigerator section
37
Risk of explosion due to flam-
mable mixes of gases.
Electrical components can cause
flammable mixes of gases to ignite.
Do not store explosive materials in
the refrigeration appliance or any
products containing propellants (e.g.
spray cans). The spray cans in ques-
tion can be identified by the contents
printed on the can or by a flame
symbol. Electrical components can
cause escaping gases to ignite.
Risk of damage due to greasy or
oily foods.
If storing food which contains a lot of
fat or oil in the refrigeration appliance
or the appliance door, make sure
that it does not come into contact
with plastic components as this
could cause stress cracks or break
the plastic.
Make sure that no fat or oil leaks
onto the plastic parts of the refrigera-
tion appliance.
If there is insufficient air circulation,
the cooling performance will de-
crease and energy consumption will
increase.
To allow air to circulate efficiently, do
not pack food too closely together in
the appliance.
Different storage zones
Due to natural air circulation, there are
different temperature regions in the re-
frigerator section.
Cold, heavy air sinks to the lowest sec-
tion of the refrigeration section. Make
use of the different zones when placing
food in the appliance.
Warmest area
The warmest area in the refrigerator
section is at the top in the front area
and in the door. Use this for storing but-
ter and cheese.
Storing food in the refrigerator section
38
Coldest area
The coldest area in the fridge zone is
directly above the DailyFresh drawer
and at the back of the appliance.
Use these areas to store all delicate and
highly perishable food such as:
- Fish, meat, poultry
- Cold cuts, ready meals
- Dishes or baked goods containing
eggs or cream
- Fresh dough, cake mixtures, pizza or
quiche dough
- Raw milk cheese and other raw milk
products
- Pre-packed vegetables
- Other fresh food (with a label stating
it should be kept at a temperature of
approx. 4°C)
Tip: Store food in such a way that it
does not touch the rear wall of the
fridge zone. Otherwise it could freeze to
the rear wall.
Temperature indicator for the coldest
area
The temperature indicator for the cold-
est area is located on the left-hand in-
side wall in the coldest area of the refri-
gerator section. You can use the tem-
perature indicator to check the temper-
ature in this area for your delicate and
highly perishable food. If the temperat-
ure settings are correct, the lowest av-
erage temperature will be in the coldest
area (between the temperature indicator
and the shelf below). This low temperat-
ure, combined with appropriate hygiene
measures, delays the propagation of
bacteria, e.g. salmonella and listeria,
which can lead to serious food poison-
ing.
After initial commissioning of the refri-
geration appliance, it may take up to
12hours before the desired temperat-
ure is reached.
The temperature indicator will not
display an accurate reading if the ap-
pliance door is opened frequently or
for long periods. Do not keep the ap-
pliance door open for long periods.
Check the temperature indicator
again after a few hours.
Storing food in the refrigerator section
39
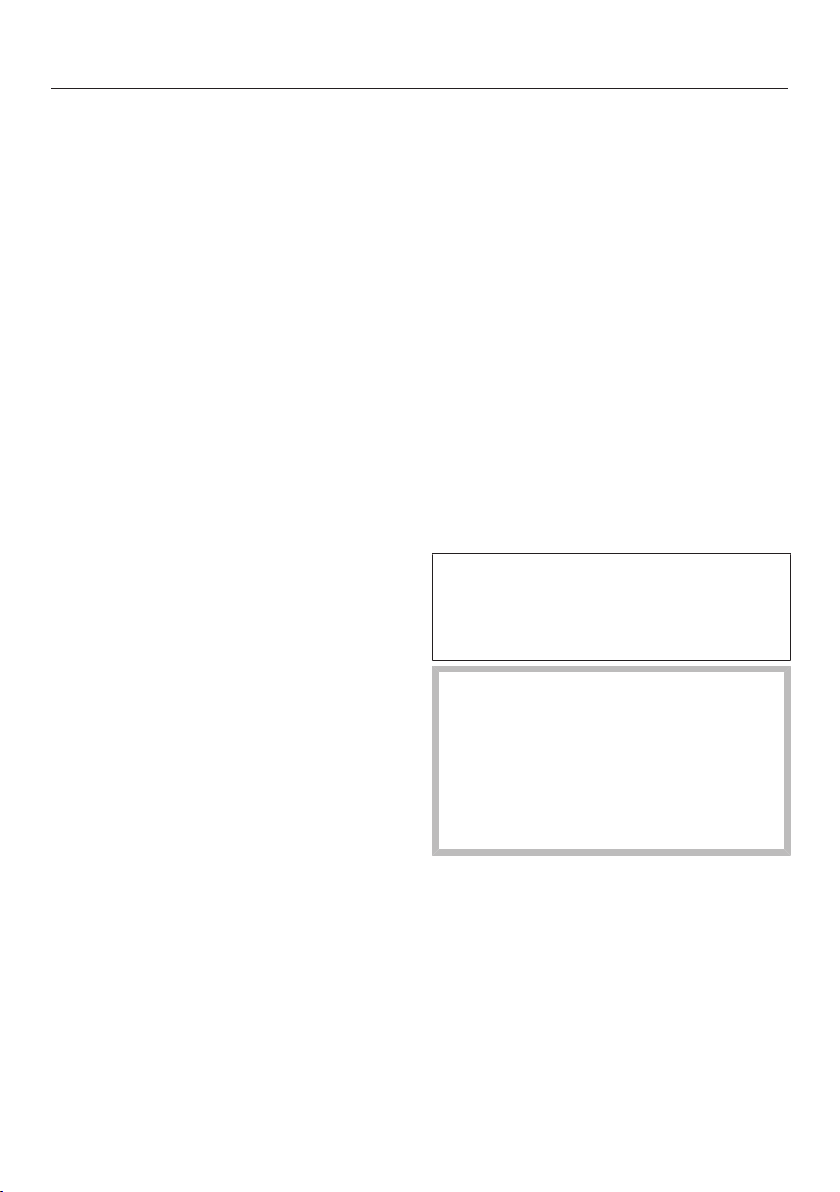
Temperature indicator display
If the temperature indicator is white and
the text “OK” is visible, the temperature
is set correctly. Your delicate and highly
perishable food will be refrigerated
properly in this area.
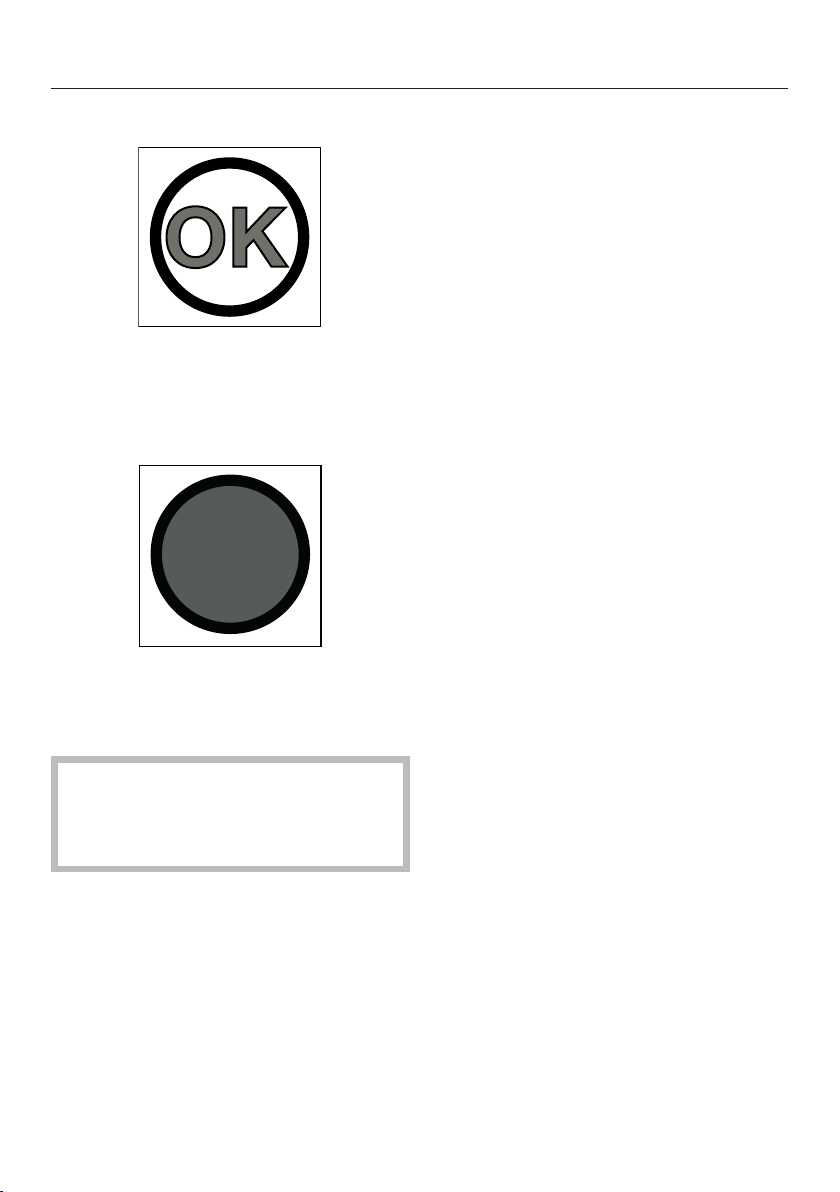
If the temperature indicator is black and
the text “OK” is not visible, the temper-
ature is too high. Lower the temperat-
ure.
If the room temperature fluctuates
significantly, check the temperature
indicator more frequently. If neces-
sary, adjust the temperature again.
Tip: If the temperature indicator re-
mains light black even when the tem-
perature is set as low as possible, con-
tact the Customer Service Department.
The temperature indicator is damaged
and correct storage of your delicate and
highly perishable food cannot be en-
sured.
Food which is not suitable for
storage in the refrigerator sec-
tion
Not all food is suitable for refrigeration
at temperatures below 5°C, because it
may be sensitive to cold. Depending on
the type of food, the appearance, con-
sistency, flavour and/or vitamin content
may be altered if stored at too cold a
temperature.
Food which is sensitive to cold in-
cludes:
- Pineapples, avocados, bananas,
pomegranates, mangoes, melons,
papayas, passionfruit, citrus fruit
such as lemons, oranges, mandarins,
grapefruit
- Fruit (which is not yet ripe)
- Aubergines, cucumbers, potatoes,
peppers, tomatoes, courgettes
- Hard cheeses (e.g. Parmesan, moun-
tain cheese)
Notes on buying food
The freshness of the food when it is first
placed in the appliance is the most im-
portant factor for how long it stays
fresh.
Take into account the use-by date and
the correct storage temperature.
Time out of the refrigerator, e.g. trans-
porting food in a warm car, should be
kept to a minimum.

Storing food in the refrigerator section
40
Storing food correctly
Ensure that food stored in the fridge
zone is in packaging or covered prop-
erly (some exceptions apply in the
DailyFresh drawer). This will prevent
food odours from affecting other food,
stop food from drying out and also pre-
vent any cross-contamination of bac-
teria. This is particularly important when
storing meat products. Make sure that
food such as raw meat and fish in par-
ticular does not come into contact with
other food.
By ensuring that the temperature set-
tings are correct and by taking appro-
priate hygiene measures, you can pro-
long the storage life of your food con-
siderably. This prevents food waste.
Protein-rich food
Please note that food rich in protein de-
teriorates faster than other types of
food. Shellfish, for example, deterior-
ates faster than fish, and fish deterior-
ates faster than meat.
Storing food in the DailyFresh drawer
41
The DailyFresh drawer provides good
storage conditions for fruit and veget-
ables.
The humidity level in the DailyFresh
drawer can also be regulated to suit the
food being stored. Food retains its own
moisture if stored at a higher humidity
and so does not dry out as quickly. The
temperature is approximately equivalent
to the temperature in the fridge zone.
Remember that the fresher the food
when placed in the appliance, the
longer it will stay fresh.
Changing the humidity level in the
DailyFresh drawer
The moisture level in the DailyFresh
drawer largely depends on the type
and quantity of food being stored, if
stored unwrapped.
If the quantity of food being stored in
this compartment is small, the humid-
ity level may be too low.
Tip: If you are only storing a small
amount of food, wrap it in airtight pack-
aging.
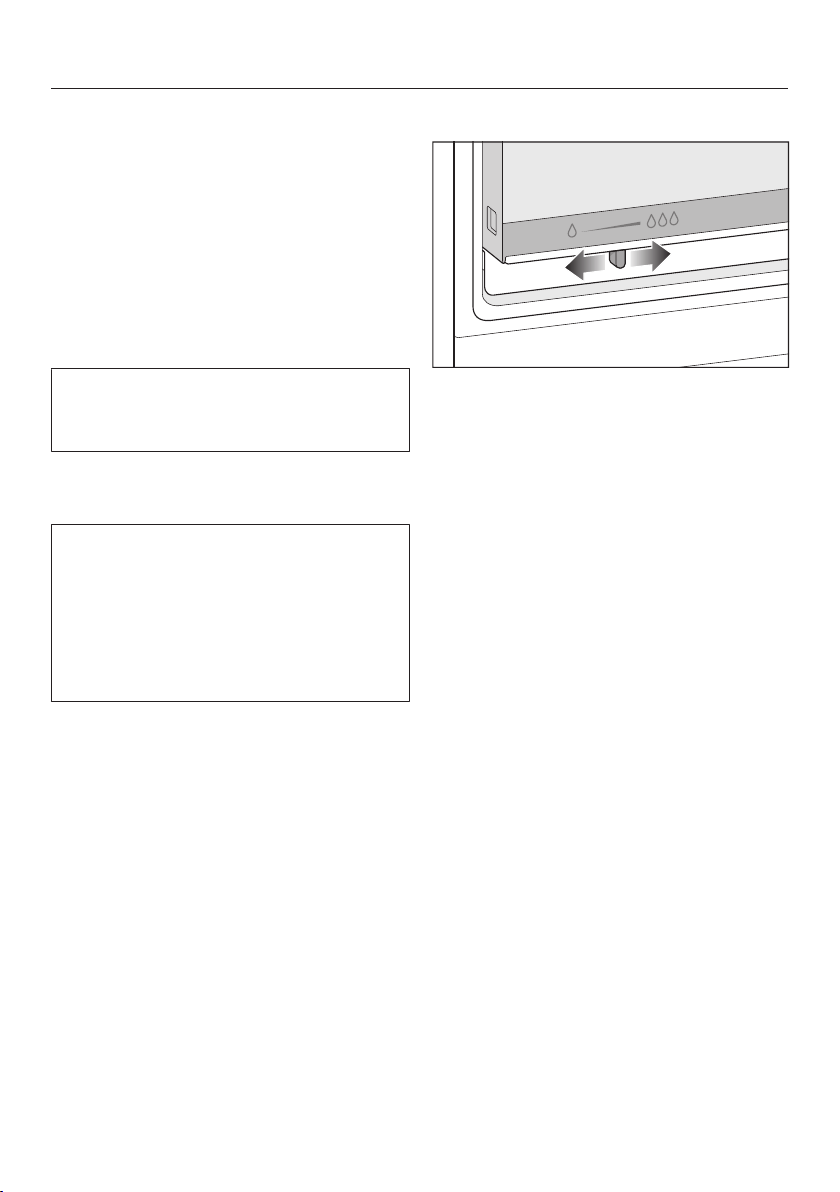
Selecting low humidity
Slide the control to the left.
The lid of the drawer is open and the
humidity drops .
Always select this setting if:
- A large amount of food is being
stored in the drawer
- Different types of food are being
stored in the drawer
- Most of the food being stored in the
drawer is fruit
- The humidity level in the DailyFresh
drawer is too high
Storing food in the DailyFresh drawer
42
Selecting increased humidity
Slide the control to the right.
The lid of the drawer is closed and the
humidity remains in the compartment
.
Select this setting if:
- A small amount of food is being
stored in the drawer
- Most of the food being stored in the
drawer is vegetables
- The humidity level in the DailyFresh
drawer is too low
Increased moisture in the humidity-
controlled compartment can cause a
build-up of condensate.
If you find that too much condensate
has formed and this is affecting the
food, proceed as follows:
Wipe off any condensate with a
cleaning cloth.
Open the lid of the drawer.

Storing food in the DailyFresh drawer
43
Observe the following tips if you find that food you have stored does not keep
well (e.g. food becomes limp or wilts after only being stored for a short time):
Only place fresh food in the appliance. The initial condition of the food is crucial
to maintaining freshness.
Clean the DailyFresh drawer before storing food in it.
Very wet food should be dried off before storing it.
Do not store food which is sensitive to cold in the DailyFresh drawer (see “Stor-
ing food in the fridge section – Food which is not suitable for storage in the
fridge section”).
Set the slide control to the correct position for the food being stored (depending
on what it is).
An increased humidity level in the humidity-controlled compartment is achieved
with the moisture present in the food being stored if it is stored unwrapped. The
more food stored in the compartment, the higher the humidity.
If too much moisture collects in the compartment and the food is affected, dry
the floor and place a rack or similar item in the compartment so that excess
moisture can drip down. Slide the control to the left so that moisture can be dis-
sipated.
If the humidity level is too low despite the lid of the DailyFresh being closed
(control slid to the right), wrap the food in airtight packaging.

Freezing and storing food
44
Freezing fresh food
Health risk caused by decom-
posing food.
If the temperature in the freezer re-
mains above -18°C for a long time,
the frozen food can start to defrost.
This will reduce the storage life of the
food.
Check whether the frozen food has
started to defrost. If it has, check
that the food is safe to use and if it
is, then use it as soon as possible or
cook it before freezing it again.
Fresh food should be frozen as quickly
as possible. This way the nutritional
value of the food, its vitamin content,
appearance and taste are not impaired.
If food is frozen quickly, the cells have
less time to lose moisture, so they
shrink significantly less. As there is not
so much moisture loss, it is easier for
the food to reabsorb it during the de-
frosting process, and very little water
collects around the defrosted food.
Maximum freezing capacity
To ensure that fresh food placed in the
freezer freezes through to the core as
quickly as possible, the maximum
freezing capacity must not be ex-
ceeded. The maximum freezing capa-
city for freezing within a 24-hour period
is given on the data plate: “Freezing ca-
pacity...kg/24hrs”.
Storing frozen food
When buying frozen food to store in
your freezer, check:
- That the packaging is not damaged
- The use-by date
- That the temperature at which the
frozen food is being stored in the
shop is -18°C or colder
Where possible, transport frozen food
in an insulated bag and then store it
quickly in the refrigeration appliance.
Freezing and storing food
45
Home freezing
Before placing food in the freezer
When freezing more than 2kg of
fresh food, switch on the SuperFreeze
function for 6hours before placing
the food in the freezer.
When freezing even larger amounts of
food, switch on the SuperFreeze
function for 24hours before pla-
cing the food in the freezer.
This helps the frozen food which is
already stored in the freezer to stay
frozen.
Only freeze fresh food which is in a
good condition.
Please note that some food is not suit-
able for freezing. These include, for
example, vegetables that are usually
eaten raw, such as lettuce or radishes.
Tip: To retain colour, taste, aroma and
vitamin C, vegetables should be
blanched before they are frozen. To do
so, place vegetables portion by portion
into boiling water for 2–3minutes. Then
remove and plunge the vegetables into
ice-cold water to cool quickly. Leave
the vegetables to drain.
Packaging food for freezing
Freeze food in portions.
Tip: Use suitable packaging to avoid
freezer burn (such as freezer contain-
ers).
Expel as much air as possible from
the packaging and close it tightly.
Make a note of the contents and the
date of freezing on the packaging.
Placing frozen food in the freezer
Unfrozen food should not touch
frozen food as this will cause the
frozen food to begin to thaw.
To prevent food sticking together
when frozen, make sure that the
packaging and containers are dry.
Always place the frozen food as close
as possible to the side walls of the
freezer drawer so that it freezes
through to the core as quickly as pos-
sible.
Then transfer to freezer bags or con-
tainers and place in the other freezer
drawers.
Unfrozen food should not touch
frozen food as this will cause the
frozen food to begin to thaw.
–Freezing small amounts of food
Place the food in the lower freezer
drawers.
Place the frozen food flat in the bot-
tom of the lower freezer drawers so
that it freezes through to the core as
quickly as possible.
Freezing and storing food
46
–VarioRoom: freezing the maximum
amount of food (see data plate)
If the ventilation slots are blocked,
the cooling performance will de-
crease and energy consumption will
increase.
When placing food in the freezer,
make sure that the ventilation slots
are not blocked.
Tip: You can expand the space avail-
able in the freezer section. If you wish to
freeze large frozen food such as a tur-
key or game, the glass shelves between
the freezer drawers can be removed.
Remove the lowest freezer drawer.
Place the frozen food in the refrigera-
tion appliance so that it is in contact
with the bottom of the appliance or
the interior side walls.
Once frozen:
Switch the SuperFreeze function
off.
Place the frozen food in the freezer
drawers and push them back in.
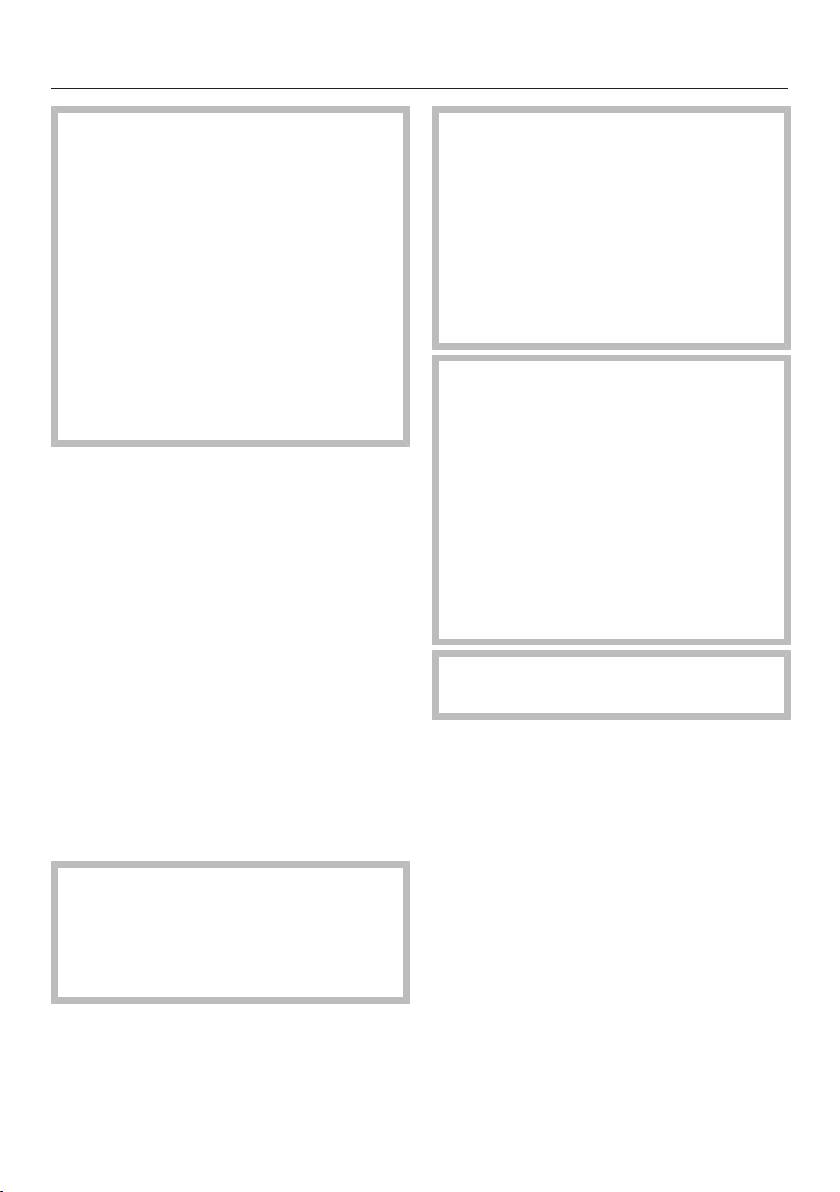
Storage time for frozen food
Food group Storage time
(Months)
Ice cream 2to6
Bread, baked goods 2to6
Cheese 2to4
Fish, oily 1to2
Fish, lean 1to5
Sausage, ham 1to3
Game, pork 1to12
Poultry, beef 2to10
Vegetables, fruit 6to18
Herbs 6to10
The storage times given are guidelines only.
For standard freezing results, follow the
advice on packaging.
By keeping the freezer zone at a con-
stant temperature of -18°C and taking
appropriate hygiene measures you can
maximise the storage life of your food
and avoid food waste.

Freezing and storing food
47
Cooling drinks quickly
When cooling drinks quickly in the
freezer, make sure bottles are not left in
for more than one hour; otherwise
they could burst, causing injury and
damage.
Using accessories
Making ice cubes
Fill the ice cube tray 3/4 full with wa-
ter and place it on the bottom of one
of the freezer drawers.
Once frozen, use a blunt instrument,
for example a spoon handle, to re-
move the ice cube tray from the
freezer if it is stuck.
Tip: Ice cubes can be removed easily
from the tray by twisting the tray gently
or by holding it under cold running wa-
ter for a short time.
Defrosting
48
Refrigerator section and
DailyFresh drawer
The refrigerator section and the
DailyFresh drawer defrost automatically.
Condensate and frost can build up on
the back wall of the refrigerator section
whilst the compressor is running. You
do not need to remove this.
The condensate drains through a chan-
nel and drain hole into an evaporation
system at the back of the refrigeration
appliance. The warmth generated by
the compressor causes the condensate
to evaporate automatically.
Keep the condensate channel and
drain hole clean to enable this. Con-
densate must be able to drain away
unhindered at all times.
Defrosting the freezer section
The freezer does not defrost automatic-
ally.
In normal use, ice and frost will form in
the freezer, e.g. on the internal walls.
How much ice and frost accumulates in
the appliance will depend on the follow-
ing:
- Whether the freezer door has been
opened frequently and/or left open
for a while
- Whether a large quantity of food has
been placed in the freezer at once
- Whether the humidity in the room has
increased
Too thick a layer of ice will make it hard
to open freezer drawers, and in certain
circumstances can prevent the freezer
door from closing properly. Too thick a
layer of ice also reduces cooling per-
formance and thus increases energy
consumption.
The freezer should be defrosted from
time to time. It must be defrosted if a
layer of ice approx. 0.5cm thick has
accumulated.
Tip: It is best to defrost when only very
few or no frozen food at all are left in
the freezer or the humidity level and the
ambient temperature in the room are
low.
Defrosting
49
Risk of damage from an incor-
rect defrosting process.
When defrosting the freezer, make
sure that you do not damage the
evaporator as this would cause irre-
versible damage to the refrigeration
appliance.
Do not scrape off ice and frost. Do
not use sharp objects.
Do not use any mechanical tools or
other types of aid which are not re-
commended by the manufacturer to
accelerate the defrosting process.
Switch the SuperFreeze function
on approx. 4hours prior to defrost-
ing. This helps the frozen food to re-
tain the cold reserve for longer when
taken out of the freezer.
Remove the frozen food and wrap it
in several layers of newspaper or
cloths.
Tip: You could also place the frozen
food in a cool box or bag.
Store the frozen food in a cool place
until the freezer is ready for use
again.
Remove all freezer drawers and glass
shelves from the freezer.
The longer the frozen food is left out
at room temperature, the faster it de-
teriorates.
Carry out the defrosting procedure
as quickly as possible.
Risk of damage due to heat and
moisture ingress.
The steam from a steam cleaner as
well as electric heaters and candles
can damage plastic and electrical
components.
Do not use a steam cleaner, electric
heaters or candles to defrost the re-
frigeration appliance.
Risk of damage and risk to
health caused by defrosting sprays
or de-icers.
Defrosting sprays or de-icers can
contain substances which could
damage the plastic parts or which
might cause a build-up of explosive
gases and pose a danger to health.
Never use defrosting sprays or de-
icers to defrost the refrigeration ap-
pliance.
Ensure that water does not get into
the surrounding cabinetry.
Switch the refrigeration appliance off.
Switch off at the wall and disconnect
the plug from the socket, or discon-
nect the fuse.
Leave the freezer door open.
Place a suitable container in front of
the condensation drain.
Tip: You can use the bottle shelf to col-
lect condensation (see “Appliance over-
view”).
Open the condensation drain at the
bottom on the front of the appliance.

Defrosting
50
Tip: To speed up defrosting, place two
bowls of hot water (not boiling), with
plates underneath them, in the freezer
section. Closing the door in this in-
stance will help retain the warmth and
speed up the defrosting process.
Also remove any loose pieces of ice.
Pour away the condensate that has
collected in the container.
Close the condensation drain.
After defrosting
Clean the freezer, then dry it thor-
oughly.
Close the appliance doors.
Reconnect the refrigeration appliance
to the mains and switch it back on.
Switch on the SuperFreeze func-
tion so that the refrigeration appli-
ance can cool down quickly.
Once the freezer has reached the re-
quired temperature, place the glass
shelves and freezer drawers back in
the freezer together with the frozen
food.
Switch the SuperFreeze function
off as soon as the temperature in the
freezer is a constant -18°C or colder.
Cleaning and care
51
The data plate located inside the in-
terior cabinet of the refrigeration appli-
ance must not be removed. It contains
information which is required in the
event of a fault.
Do not let water get into the elec-
tronic unit or the lighting.
Risk of damage due to moisture
ingress.
The steam from a steam cleaner can
damage plastic and electrical com-
ponents.
Do not use a steam cleaner to clean
the refrigeration appliance.
Cleaning water must not get into the
drain hole.
Cleaning agents
Cleaning and conditioning agents
used in the interior cabinet of the re-
frigeration appliance must be food
safe.
To avoid damaging the surfaces of the
appliance, do not use the following:
- Cleaning agents containing soda,
ammonia, acids or chlorides
- Cleaning agents containing descaling
agents
- Abrasive cleaning agents (e.g. scour-
ing powder, scouring liquid or pumice
stones)
- Cleaning agents containing solvents
- Stainless steel cleaners
- Dishwasher cleaner
- Oven sprays
- Glass cleaning agents
- Hard, abrasive sponges and brushes
(e.g. pot scourers)
- Eraser stain remover blocks
- Sharp metal scrapers
We recommend using a clean sponge
and lukewarm water with a little wash-
ing-up liquid to clean the surfaces of
the appliance.
Cleaning and care
52
Preparing the refrigeration ap-
pliance for cleaning
Switch the refrigeration appliance off.
Take any food out of the refrigeration
appliance and store it in a cool place.
Take out any removable parts for
cleaning.
Cleaning the inside of the ap-
pliance
Clean the refrigeration appliance reg-
ularly, at least once a month, and the
freezer section each time it is defros-
ted.
If soiling is left on for any length of
time, it may become impossible to
remove under certain circumstances.
Surfaces may suffer discolouration or
damage.
It is therefore best to remove any
soiling immediately.
Clean the interior with a clean
sponge, lukewarm water and a little
washing-up liquid.
Rinse all parts by hand. Do not wash
in a dishwasher.
Clean the freezer section every time it
is defrosted.
After cleaning, wipe with clean water
and dry with a cloth.
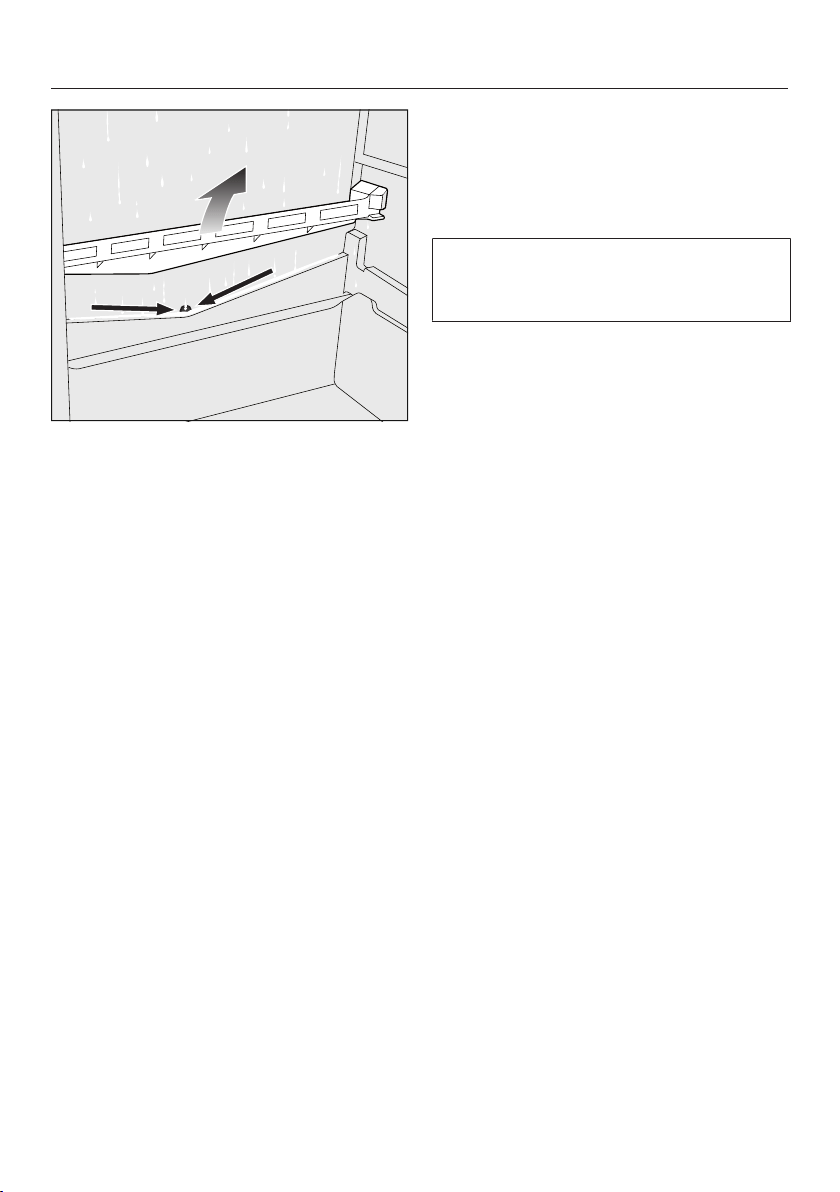
Remove the DailyFresh drawer before
cleaning the condensate channel.
Cleaning and care
53
Then remove the condensate channel
with drain hole.
Clean the condensate channel and
drain hole frequently using a cotton
swab or similar item to ensure that
condensate can drain away freely.
Refit the condensate channel with
drain hole and the DailyFresh drawer.
Leave the door open to air the refri-
geration appliance sufficiently for a
short while and to prevent odour
build-up.
Removing and dismantling ac-
cessories for cleaning
Dismantling the door shelf/bottle
shelf
Remove the stainless steel trim before
cleaning the door shelf/bottle shelf in
the dishwasher.
To remove the stainless steel trim, pro-
ceed as follows:
Place the door shelf/bottle shelf on
the worktop.
Pull the trim off the shelf beginning at
one side.
After cleaning the door shelf/bottle
shelf, reattach the trim.
Cleaning and care
54
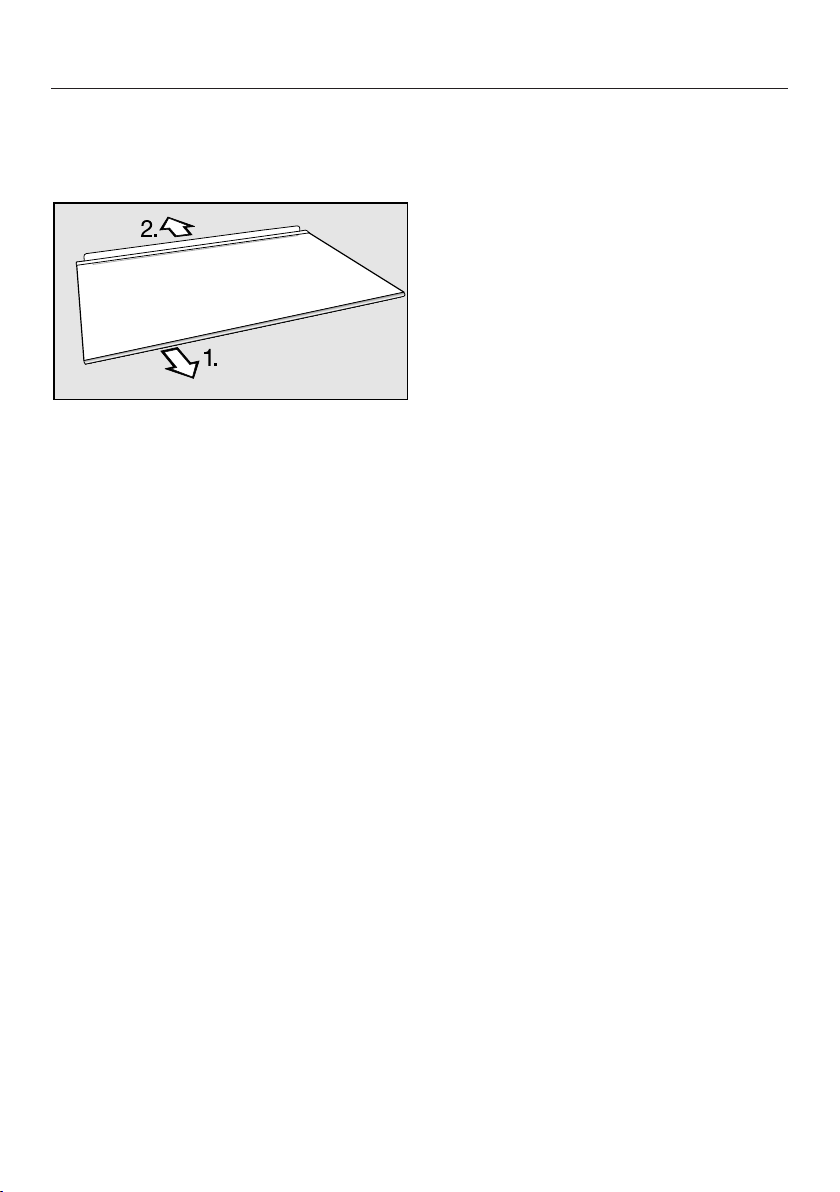
Dismantling an adjustable shelf
Place the shelf on a worktop covered
with a soft material (e.g. a tea towel).
Before cleaning the shelf remove the
plastic trim and protective strip at the
back of the shelf as follows:
1. First pull the plastic trim off, starting
from one side.
2. Then pull the protective strip off.
After cleaning the shelf reattach the
plastic trim and the protective strip.
Removing the fruit and vegetable
drawer
Lift the fruit and vegetable drawer up
slightly at the front and pull it out.
Removing the drawers and glass
shelves from the freezer section
Lift the drawer up slightly at the front
and pull it out.
Unhook the glass shelf at the front on
both sides and remove it.
Inserting the glass shelves and draw-
ers into the freezer section
Fit the glass panel at the back first
and then push it down into place at
the front on both sides.
Insert the drawer into the guides on
the left and right from above at a
slight angle.
Push in and lower the drawer.
Cleaning and care
55
Cleaning the front of the appli-
ance and the side panels
If soiling is left on for any length of
time, it may become impossible to
remove. Surfaces may suffer discol-
ouration or damage.
Therefore, it is best to remove soiling
from the appliance front and side
panels immediately.
All surfaces are susceptible to
scratching. Contact with unsuitable
cleaning agents can alter or discol-
our the surfaces.
See the information on “Cleaning
agents” at the beginning of this sec-
tion.
Clean the surfaces with a clean
sponge and a solution of warm water
and washing-up liquid. A clean, damp
microfibre cloth without cleaning
agent can also be used.
After cleaning, wipe with clean water
and dry with a soft cloth.
Cleaning the door seal
Risk of damage as a result of in-
correct cleaning.
If you treat the door seal with oils or
grease, it can become porous.
Do not use any oils or grease on the
door seal.
The door seal should be cleaned reg-
ularly with clean water, and then
wiped dry with a soft cloth.
Cleaning the ventilation gaps
A build-up of dust will increase the en-
ergy consumption of the appliance.
The ventilation gaps should be
cleaned on a regular basis with a
brush or vacuum cleaner (you could
use a Miele vacuum cleaner dusting
brush, for example).

Cleaning and care
56
After cleaning
Refit all shelves and accessories in
the refrigeration appliance.
Switch the refrigeration appliance on.
Switch the SuperFreeze function
on for a while so that the freezer sec-
tion can cool down quickly.
Place food in the fridge section and
close the appliance door.
Once the freezer has reached the re-
quired temperature, place the frozen
food back in the freezer drawers and
put them back in the freezer.
Switch the SuperFreeze function
off as soon as the temperature in the
freezer is a constant -18°C or colder.
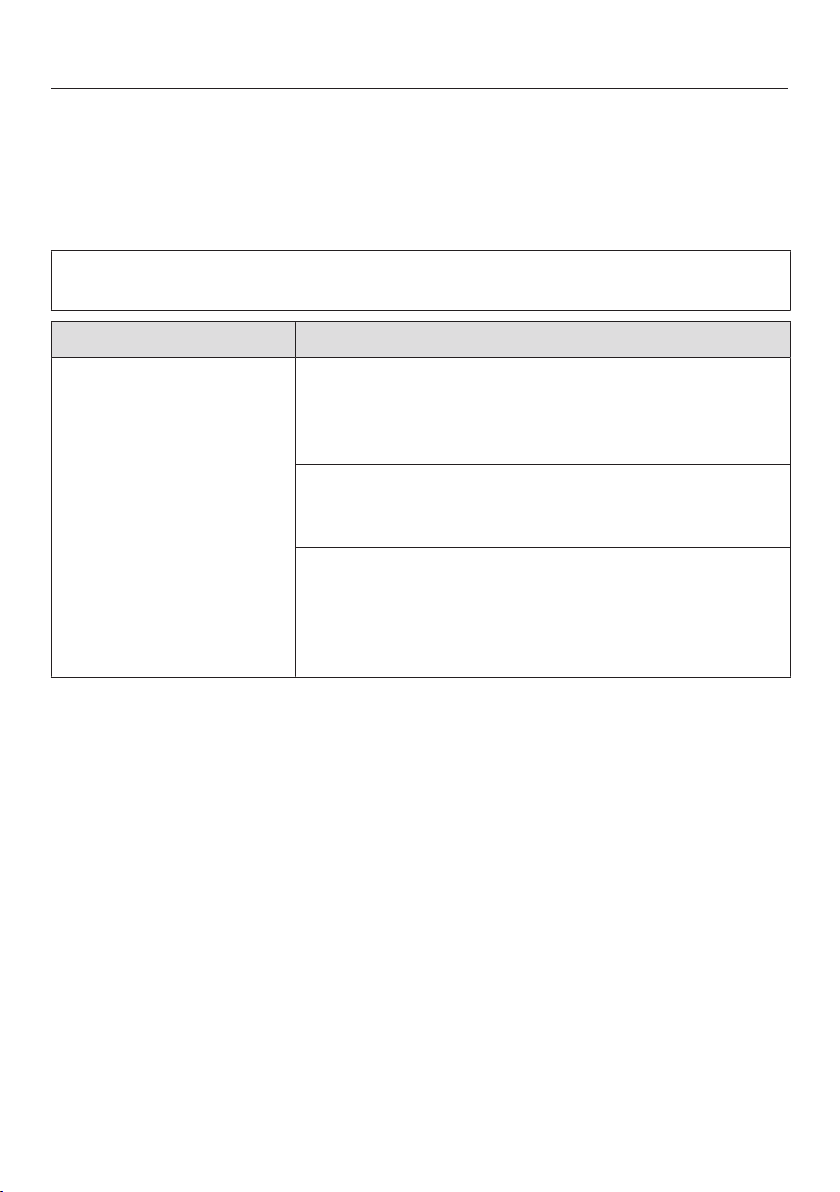
Problem solving guide
57
Many malfunctions and faults that can occur in daily operation can be easily
remedied. Time and money will be saved because a service call will not be
needed.
The following guide may help you to find the reason for a malfunction or a fault,
and to correct it.
To prevent unnecessary loss of temperature it is advisable not to open the door
while waiting for the appliance to be serviced.
Problem Cause and remedy
The refrigeration appli-
ance is not getting cold
and the interior lighting
does not come on when
the appliance door is
opened.
The refrigeration appliance has not been switched
on. The temperature display on the control panel is
not showing a temperature.
Switch the refrigeration appliance on.
The plug is not inserted into the socket correctly.
Insert the plug into the socket; the temperature
display for the freezer section will flash.
The mains fuse has tripped. There could be a fault
with the refrigeration appliance, the household elec-
trical wiring or another electrical appliance.
Contact a qualified electrician or the Miele Cus-
tomer Service Department.
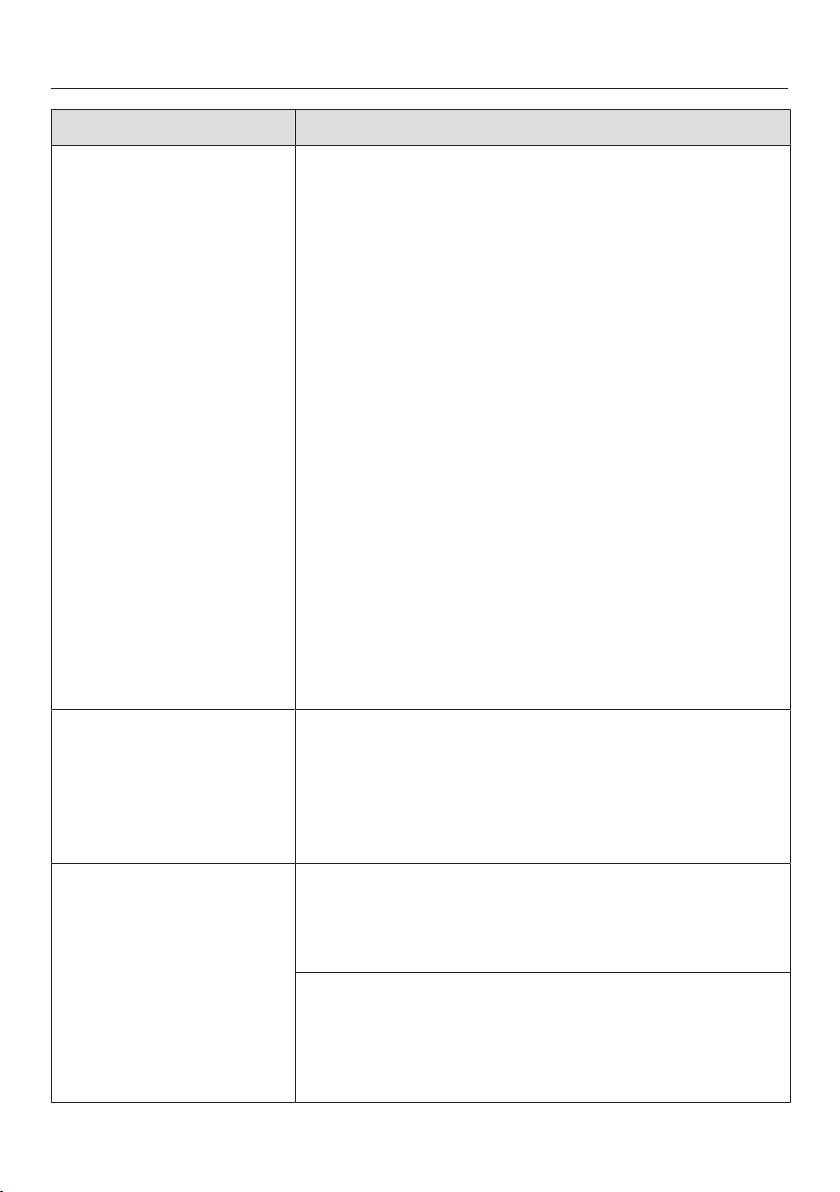
Problem solving guide
58
Problem Cause and remedy
The temperature display
lights up but the refri-
geration appliance is
not cooling.
Demo mode has been activated. This allows the refri-
geration appliance to be presented in the dealer
showroom without the cooling system being
switched on. This setting is not needed for domestic
use.
Switch off demo mode by running the appliance
self-test:
Switch the refrigeration appliance off and back on
again after 5minutes.
Within the next 10seconds, press the button for
setting the temperature for 3–5seconds until the
indicator for 2°C lights up in the temperature dis-
play.
The temperature displays light up in succession to in-
dicate the start of the self-test.
- If the temperature display shows the temperature
set previously after a relatively short period of time,
your refrigeration appliance is ready for operation.
- If the indicator for the SuperFreeze function on
the control panel flashes for 10seconds after a rel-
atively short period of time, a fault has occurred.
Contact the Miele Customer Service Department.
The temperature inside
the refrigeration appli-
ance deviates signific-
antly from the selected
setting.
It may take several hours until the temperature inside
the refrigeration appliance returns to the previous
setting.
In some cases, it can help to switch off the refri-
geration appliance for 5minutes and then switch it
back on again.
The compressor is
switching on more fre-
quently and for longer
periods of time. The
temperature in the refri-
geration appliance is
too low.
The ventilation gaps have been covered or become
too dusty.
Do not block the ventilation gaps.
Dust the ventilation gaps regularly.
The appliance doors have been opened too fre-
quently, or a large amount of fresh food has been put
in all at once for storage or freezing.
Only open the appliance doors when necessary
and for as short a time as possible.
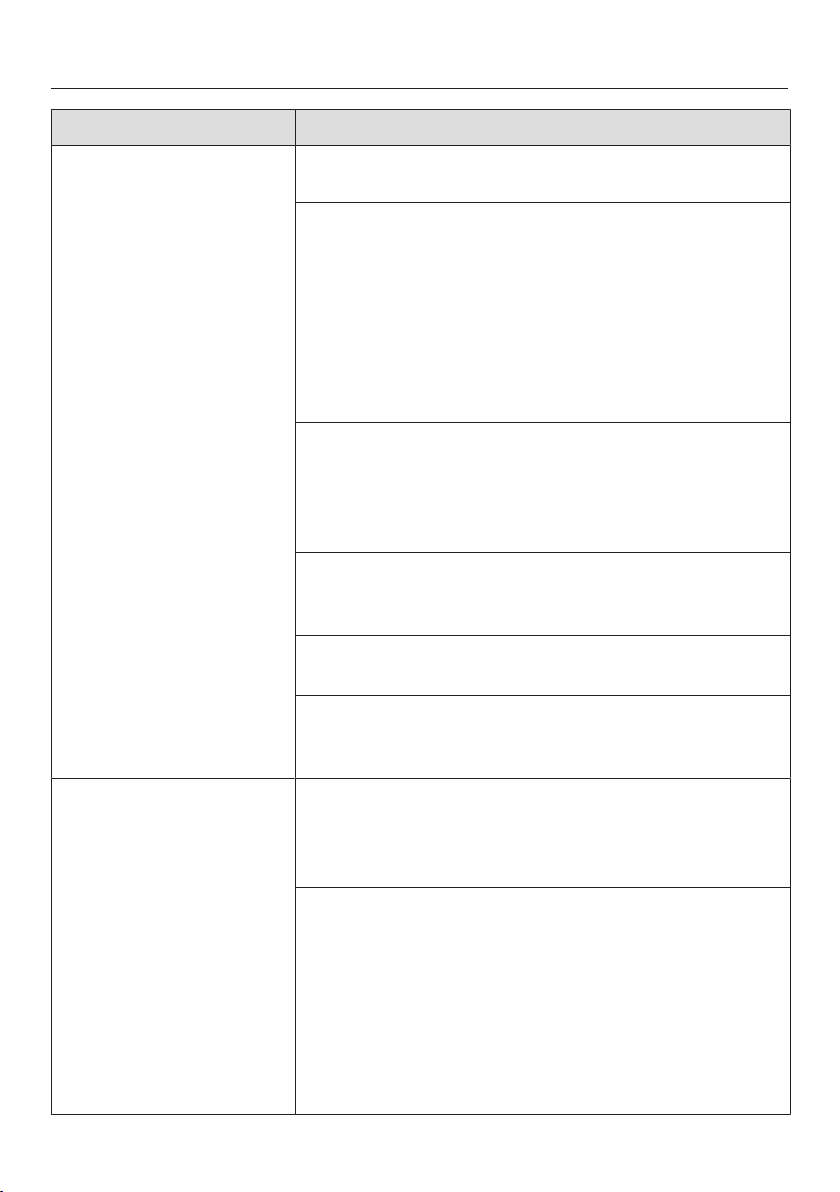
Problem solving guide
59
Problem Cause and remedy
After a while, the temperature will return to normal by
itself.
The appliance doors are not closed properly. A thick
layer of ice may have formed in the freezer section.
Close the appliance doors.
After a while, the temperature will return to normal by
itself.
If a thick layer of ice has already formed, this will af-
fect cooling and increase energy consumption.
Defrost the refrigeration appliance and clean it.
The ambient temperature is too high. The higher the
ambient temperature, the longer the compressor
runs.
See the information in “Installation – Installation
site”.
The temperature setting in the refrigeration appliance
is too low.
Correct the temperature setting.
A large amount of food is being frozen at once.
See “Freezing and storing food”.
The SuperFreeze function is still switched on.
Switch off the SuperFreeze function earlier to
save energy.
The compressor comes
on less and less often
and for shorter periods
of time. The temperat-
ure in the refrigeration
appliance rises.
This is not a fault. The temperature setting is too
high.
Correct the temperature setting.
Check the temperature again after 24hours.
The frozen food begins to defrost.
The ambient temperature is too low for this refrigera-
tion appliance.
If the ambient temperature is too low, the com-
pressor will run less frequently. This may cause the
freezer section to become too warm.
See the information in “Installation – Installation
site”.
Increase the ambient temperature.

Problem solving guide
60
Problem Cause and remedy
Ice or condensation has
built up inside the refri-
geration appliance. The
appliance door may not
close correctly.
The door seal has come out of its groove.
Check that the door seal is correctly positioned in
the groove.
The door seal is damaged.
Check whether the door seal is damaged.

Problem solving guide
61
Other problems
Problem Cause and remedy
The floor of the refriger-
ator section is wet.
The condensate drain hole is blocked.
Clean the condensate channel and drain hole.
Food has frozen to-
gether.
The food packaging was not dry when placed in the
freezer.
Use a blunt instrument, e.g. a spoon handle or
plastic scraper, to prise it apart carefully.
The front panels of the
refrigeration appliance
feel warm to the touch.
Some areas of the front panels of the refrigeration
appliance are being heated slightly to prevent con-
densation around the door seal.
Frost is forming on the
glass shelves in the
freezer section.
The cooling system can cause frost to form on the
glass shelves in the freezer section. This will not af-
fect the functioning of the refrigeration appliance or
energy consumption in any way.
The freezer should be defrosted from time to
time. It must be defrosted if a layer of ice approx.
0.5cm thick has accumulated.
This is not a fault.
The refrigeration appli-
ance is not working
properly.
If your refrigeration appliance is not working properly,
you can check this by running a self-test. The self-
test identifies appliance faults that can only be fixed
by the Miele Customer Service Department.
Switch the refrigeration appliance off and back on
again after 5minutes.
Within the next 10seconds, press the button for
setting the temperature for 3–5seconds until the
indicator for 2°C lights up in the temperature dis-
play.
The temperature displays light up in succession to in-
dicate the start of the self-test.
- If the temperature display shows the temperature
set previously after a relatively short period of time,
your refrigeration appliance is ready for operation.
- If the indicator for the SuperFreeze function on
the control panel flashes for 10seconds after a rel-
atively short period of time, a fault has occurred.
Contact the Miele Customer Service Department.
Problem solving guide
62
Problem Cause and remedy
Water is collected on
the appliance surface
and on the shelves in-
side the refrigeration
appliance.
A combination of high humidity and a warm ambient
temperature can cause condensate to form.
Always open the appliance doors only when ne-
cessary and for as short a time as possible.
Wipe the water away with a soft, dry cleaning
cloth.
The door to the freezer
will not open because it
has been opened and
closed too many times
in succession.
This is not a fault. The suction caused by opening
and closing the door is preventing the door from
opening. Wait approx. 1minute and then try again.
It should now open without force.
Problem solving guide
63
The interior lighting is not working.
Problem Cause and remedy
The interior lighting is
not working.
The refrigeration appliance has not been switched
on.
Switch the refrigeration appliance on.
To avoid overheating, the lighting switches itself off
automatically after approx. 10minutes if the appli-
ance door is left open. If this is not the case, then
there is a fault.
Risk of electric shock due to exposed, live
electrical components.
When removing the lighting cover, there is a risk of
coming into contact with live electrical compon-
ents.
Do not remove the lighting cover. The LED lighting
may only be repaired or replaced by the Miele
Customer Service Department.
Danger of injury from LED lighting.
This lighting corresponds to risk group RG2. If the
cover is defective, there is a danger of eye injury.
If the lighting cover is defective, do not look from a
close range directly into the lighting with optical in-
struments (e.g. magnifying glass or similar).
Contact the Miele Customer Service Department.

Noises
64
Normal
noises
What is causing them?
Brrrrr... A humming noise is made by the compressor. This noise can
get louder for brief periods when the compressor switches on.
Blubb,
blubb...
A gurgling noise can be heard when the refrigerant circulates
through the pipes.
Click... Clicking sounds occur whenever the thermostat switches the
compressor on or off.
Sssrrrrr... You can sometimes just hear the sound of the fan inside the ap-
pliance.
Crack... A cracking sound can be heard when materials expand inside
the refrigeration appliance.
Please bear in mind that a certain amount of noise is unavoidable (from the com-
pressor and the refrigerant circulating through the cooling circuit).
Noises Cause and remedy
Rattling, vi-
brating
The refrigeration appliance is uneven. Realign the appliance us-
ing a spirit level by raising or lowering the adjustable feet under-
neath the refrigeration appliance.
The refrigeration appliance is touching another appliance or
piece of furniture. Move it away.
Drawers, baskets or shelves are jiggling or are stuck. Check all
removable items and refit them correctly.
Bottles or containers are touching. Separate them.
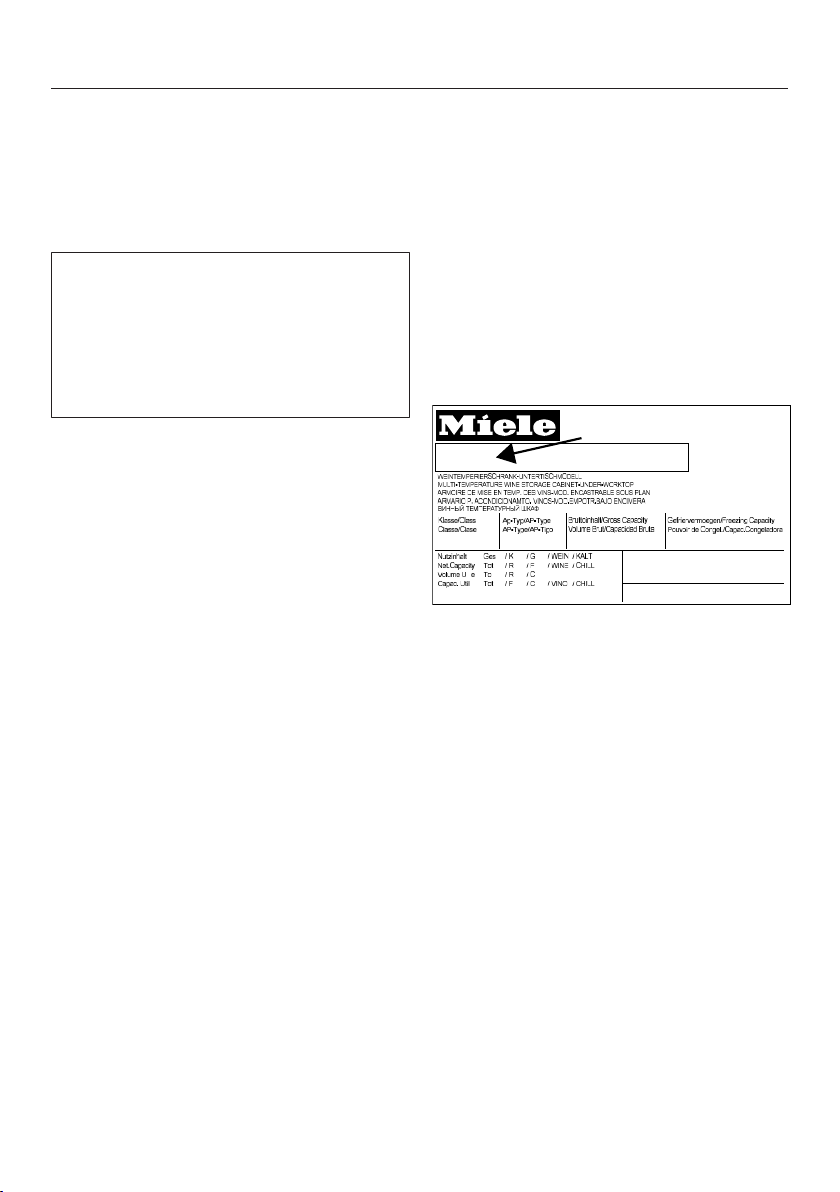
Service
65
Contact in the event of a fault
In the event of any faults which you
cannot remedy yourself, please contact
your Miele dealer or the Miele Customer
Service Department.
You can book a Miele Customer Ser-
vice Department call-out online at
www.miele.com/service.
Contact information for the Miele Cus-
tomer Service Department can be
found at the end of this document.
Please quote the model identifier and
serial number of your appliance (Fabr./
SN/Nr.) when contacting the Miele Cus-
tomer Service Department. This inform-
ation can be found on the data plate.
Please note that telephone calls may be
monitored and recorded for training
purposes and that a call-out charge will
be applied to service visits where the
problem could have been resolved as
described in this booklet.
The data plate can be found in the in-
terior cabinet of the refrigeration appli-
ance.
Displaying appliance informa-
tion
This can be found in Settings mode un-
der Information (see “Selecting further
settings”) or on the data plate inside the
refrigeration appliance.
EPREL database
From 1 March 2021, information on en-
ergy labelling and ecodesign require-
ments will be available in the European
Product Database (EPREL). You can
find the product database at the follow-
ing link https://eprel.ec.europa.eu/. You
will be asked to enter the model identi-
fier.
The model identifier can be found on
the data plate.
SN-ST
R600a:
XXXXXX
Nr. XX/ XXXXXXXXX.
XXX l
XXg
Warranty
The appliance warranty is valid for 2
years from date of purchase. In the UK,
you must activate your cover by calling
0330 160 6640 or registering online at
www.miele.co.uk.
For more information on country-spe-
cific warranty terms and conditions,
please contact Miele Customer Service.


United Kingdom
Miele Co. Ltd., Fairacres, Marcham Road, Abingdon, Oxon, OX14 1TW
Tel: 0330 160 6600, Internet: www.miele.co.uk/service, E-mail: [email protected]
Australia
Miele Australia Pty. Ltd.
ACN 005 635 398
ABN 96 005 635 398
Level 4, 141 Camberwell Road
Hawthorn East, VIC 3123
Tel: 1300 464 353
Internet: www.miele.com.au
Miele Electrical Appliances Co., Ltd.
1-3 Floor, No. 82 Shi Men Yi Road
Jing' an District
200040 Shanghai, PRC
Tel: +86 21 6157 3500
Fax: +86 21 6157 3511
E-mail: [email protected],
Internet: www.miele.cn
China Mainland
Miele (Hong Kong) Ltd.
41/F - 4101, Manhattan Place
23 Wang Tai Road
Kowloon Bay, Hong Kong
Tel: (852) 2610 1025
Fax: (852) 3579 1404
Email:
Website: www.miele.hk
Hong Kong, China
Miele India Pvt. Ltd.
1st Floor, Copia Corporate Suites,
Commercial Plot 9,
Mathura Road, Jasola,
New Delhi - 110025
E-mail: customercare@miele.in
Website: www.miele.in
India
Miele Ireland Ltd.
2024 Bianconi Avenue
Citywest Business Campus
Dublin 24
Tel: (01) 461 07 10
Fax: (01) 461 07 97
E-Mail: [email protected]
Internet: www.miele.ie
Ireland
Malaysia
Miele Sdn Bhd
Suite 12-2, Level 12
Menara Sapura Kencana
Petroleum
Solaris Dutamas No. 1
Jalan Dutamas 1
50480 Kuala Lumpur, Malaysia
Phone: +603-6209-0288
Fax: +603-6205-3768
Miele New Zealand Limited
IRD 98 463 631
8 College Hill
Freemans Bay, Auckland 1011
New Zealand
Tel: 0800 464 353
Internet: www.miele.co.nz
New Zealand
Miele Pte. Ltd.
29 Media Circle
#11-04 ALICE@Mediapolis
Singapore 138565
sTel: +65 6735 1191
Fax: +65 6735 1161
E-Mail: [email protected]
Internet: www.miele.sg
Singapore
Miele (Pty) Ltd.
63 Peter Place
Bryanston 2194
P.O. Box 69434
Bryanston 2021
Tel: (011) 875 9000
Fax: (011) 875 9035
E-mail: [email protected]
Internet: www.miele.co.za
South Africa
Miele Appliances Ltd.
Showroom 1
Eiffel 1 Building
P.O. Box 114782 - Dubai
Tel. +971 4 3044 999
Fax. +971 4 3418 852
800-MIELE (64353)
E-Mail: [email protected]
Website: www.miele.ae
United Arab Emirates
Manufacturer:
Miele & Cie. KG, Carl-Miele-Straße 29, 33332 Gütersloh, Germany
Thailand
Miele Appliances Ltd.
BHIRAJ TOWER at EmQuartier
43rd Floor Unit 4301-4303
689 Sukhumvit Road
North Klongton Sub-District
Vadhana District
Bangkok 10110, Thailand
Sheikh Zayed Road, Umm Al Sheif

M.-Nr. 12 072 660 / 00en-GB
KD 4050 E el Active, KD 4052 E el Active, KD 4072 E ws/el
Active, KD 4172 E ws/el Active