Loading ...
Loading ...
Loading ...
o oo
Note: The time of day must firSt beset in ordert0 operate the oven
To Set the Minute Timer (cont'd):
time in 10 minute increments. The timer can be set for
any amount of time from 1 minute to 11 hours and 59
minutes.
.
.
Note: If you press the tfirst, the timer will advance
to 11 hours and 59 minutes.
The display shows the timer count down in minutes
until one minute remains. Then the display will count
down in seconds.
When the set time has run out, the timer will sound a 3
second beep. 0:00 will appear in the display until
is pressed.
Note: While the minute timer is counting down, the ":" will
flash. The minute timer does not start or stop cooking. It
serves as an extra timer in the kitchen that will beep when
the set time has run out. The minute timer can be used
alone or during any of the other oven functions. When the
minute timer is in use with any other function, the minute
timer will be shown in the display. To view other functions,
press the pad for that function.
To Set or Change the Temperature for Baking
The oven can be programmed to bake at any temperature
from 170°F to 500°F.
To Set the Controls for Baking:
1. Press ,, _ O,,appears in the display.
2. Within 5 seconds, press the or . The display
will show "350°F. '' By pressing and holding the or
), the temperature can then be adjusted in 5°F
increments.
3. When the or is released, the oven will begin
heating to the selected temperature. When the
displayed temperature reaches the desired baking
temperature, the control will beep once.
4. To cancel the baking function, press @.
To Change the Oven Temperature after Baking has
Started:
To Change the Minute Timer while it is in use:
While the timer is active and shows in the display, press
and hold the or to increase or decrease the time.
1. Press
displayed.
2. Press the
and make sure the bake temperature is
or to increase or decrease the set
To Cancel the Minute Timer before the set time has
run out: Press _,
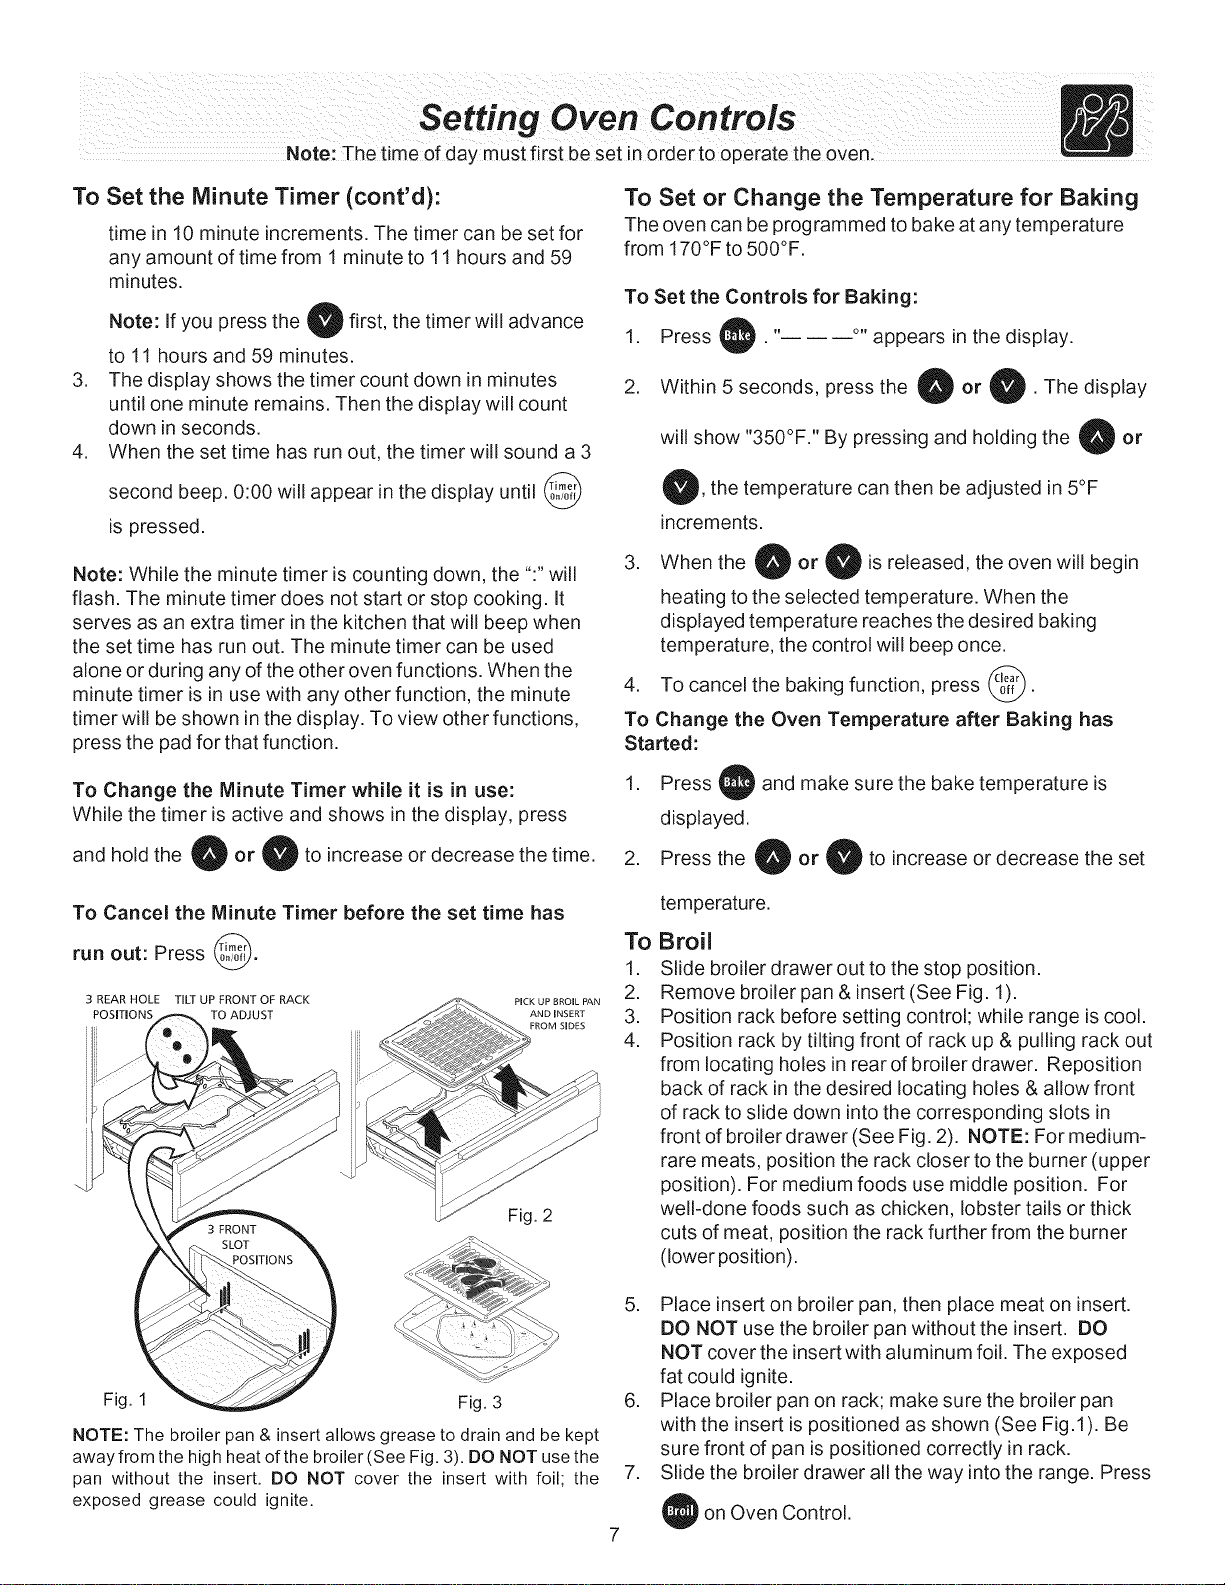
3 REAR HOLE TILT UP FRONT OF RACK
POSITIONS TO ADJUST
Fig. 1
AND iNSERT
FROM SIDES
Fig. 2
Fig. 3
NOTE: The broiler pan & insert allows grease to drain and be kept
away from the high heat of the broiler(See Fig. 3). DO NOT use the
pan without the insert. DO NOT cover the insert with foil; the
exposed grease could ignite.
To
1.
2.
3.
4.
temperature.
Broil
Slide broiler drawer out to the stop position.
Remove broiler pan & insert (See Fig. 1).
Position rack before setting control; while range is cool.
Position rack by tilting front of rack up & pulling rack out
from locating holes in rear of broiler drawer. Reposition
back of rack in the desired locating holes & allow front
of rack to slide down into the corresponding slots in
front of broiler drawer (See Fig. 2). NOTE: For medium-
rare meats, position the rack closer to the burner (upper
position). For medium foods use middle position. For
well-done foods such as chicken, lobster tails or thick
cuts of meat, position the rack further from the burner
(lower position).
5. Place insert on broiler pan, then place meat on insert.
DO NOT use the broiler pan without the insert. DO
NOT cover the insert with aluminum foil. The exposed
fat could ignite.
6. Place broiler pan on rack; make sure the broiler pan
with the insert is positioned as shown (See Fig.l). Be
sure front of pan is positioned correctly in rack.
7. Slide the broiler drawer all the way into the range. Press
on Oven Control.
Loading ...
Loading ...
Loading ...