Loading ...
Loading ...
SSEMBLY
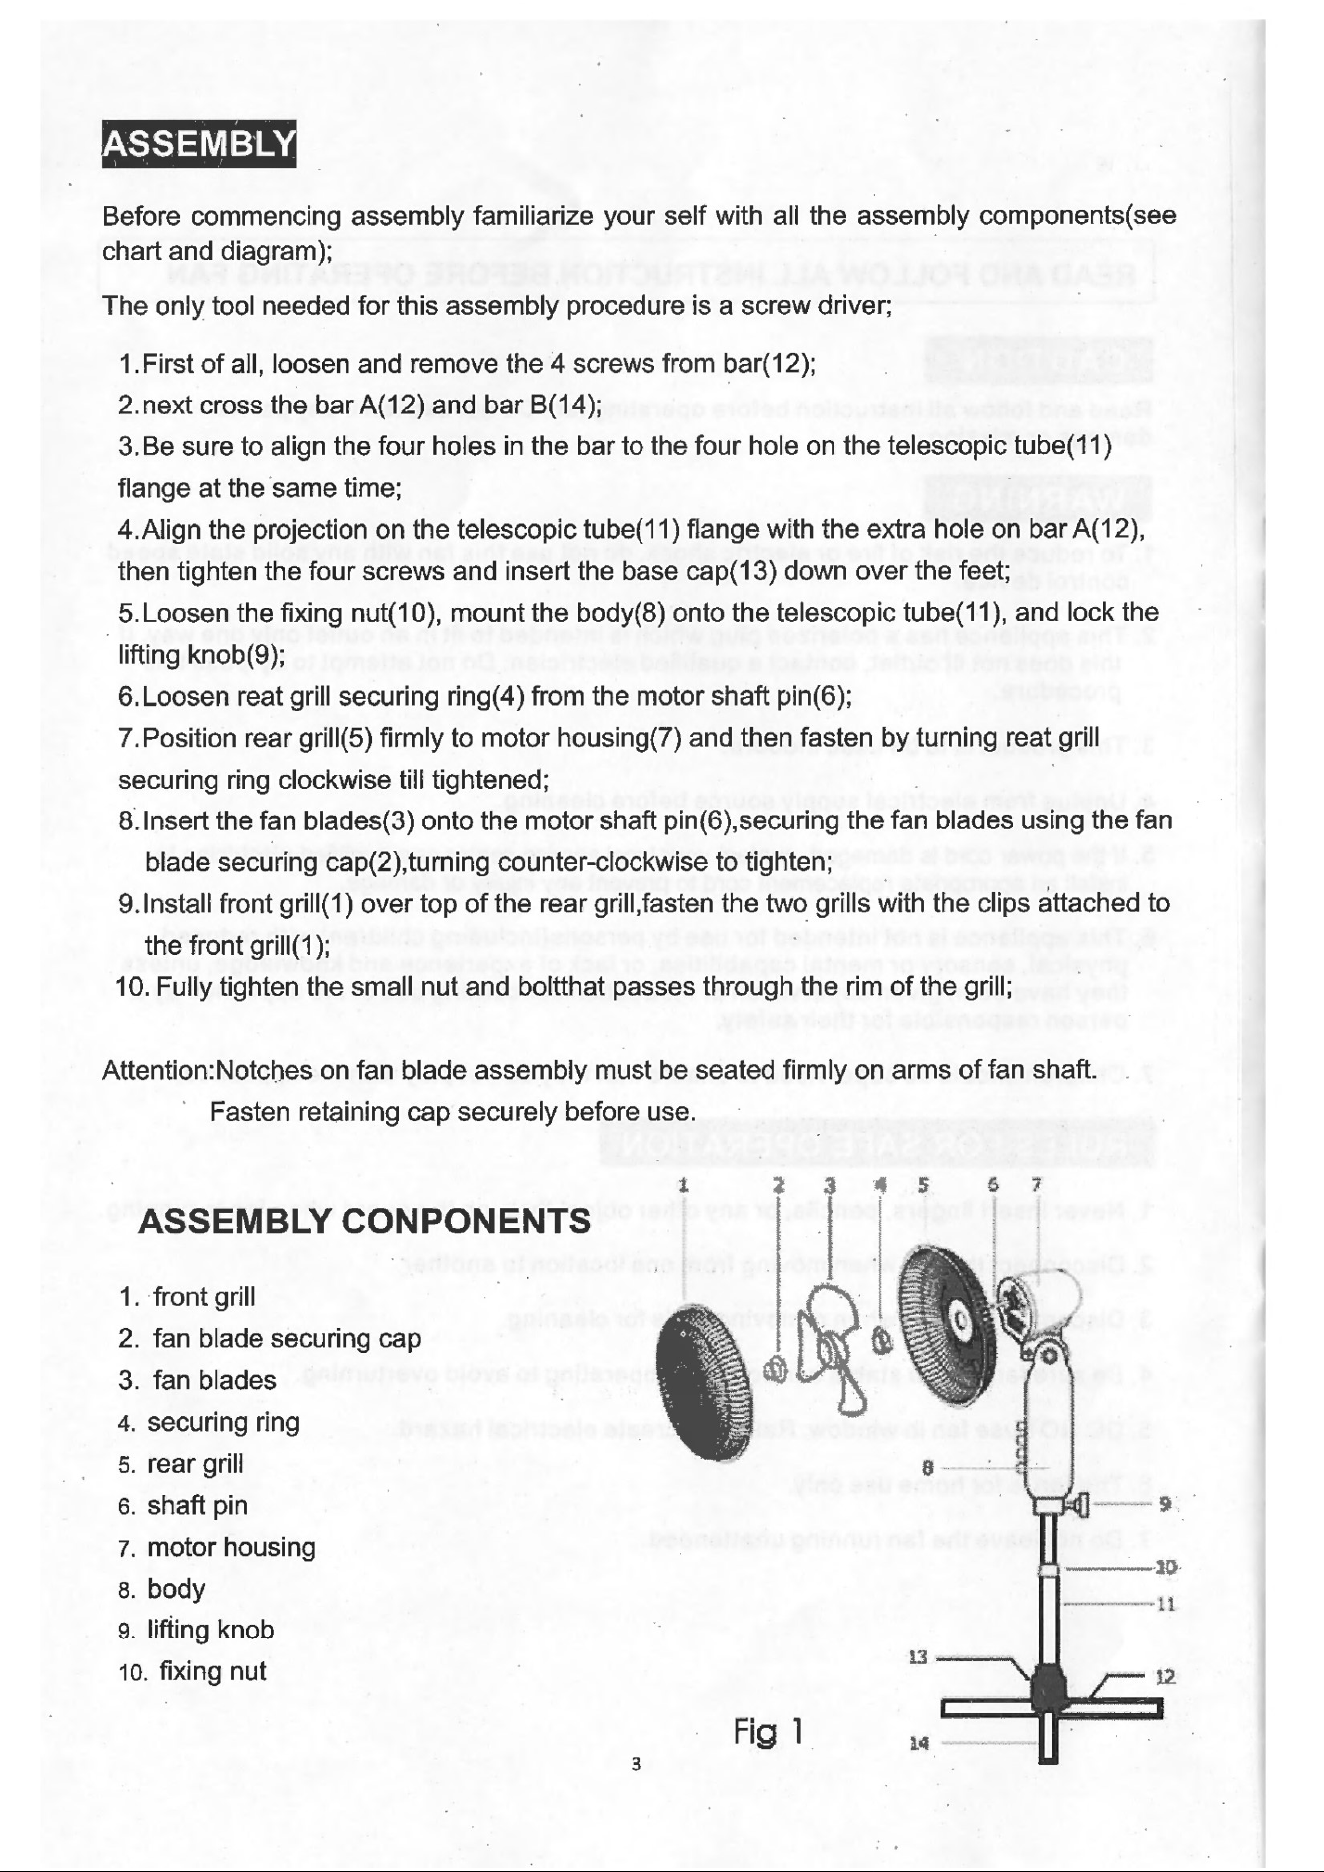
Before commencing assembly familiarize your self with all the assembly components(see
chart and diagram);
The only tool needed for this assembly procedure
is
a screw driver;
1.
First of all, loosen and remove the 4 screws from
ba
r( 12);
2.next cross the bar A(12) and bar B(14);
3.
Be sure to align the four holes
in
the bar
to
the four hole
on
the telescopic tube(11)
flange at the same time;
4.Aiign the projection
on
the telescopic tube(11) flange with the extra hole
on
bar A(12),
then tighten the four screws and insert the base cap(13) down over the feet;
5.Loosen the fixing nut(1 0), mount the body(8) onto the telescopic tube(11
),
and lock the
lifting knob(9);
6.Loosen real grill securing ring(4) from the motor shaft pin(6);
?.Position rear
gri11(5)
firmly to motor housing(?) and then fasten by turning real grill
securing ring clockwise till tightened;
8.1nsert the fan blades(3) onto the motor shaft pin(6),securing the fan blades using the fan
blade securing cap(2),turning counter-clockwise to tighten;
9.1nstall front grill(1) over top
of
the rear grill,fasten the two grills with the clips attached to
the front grill(1
);
10. Fully tighten the small nut and boltthat passes through the
rim
of
the grill;
Attention:Notcl)es
on
fan blade assembly must be seated firmly
on
arms
of
fan shaft.
Fasten retaining cap securely before use.
ASSEMBLY CONPONENTS
1.
front grill
2.
fan blade securing cap
3.
fan blades
4. securing ring
5.
rear grill
6.
shaft pin
7.
motor housing
8. body
9. lifting knob
10. fixing nut
J.
2
~
<l
5
G 7
~
~t
Fig
1
Loading ...
Loading ...