INSTRUCTION MANUAL
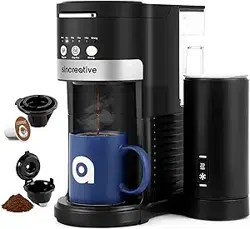
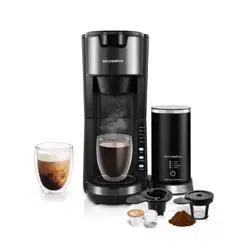
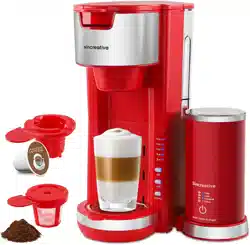
2 in 1 Coffee Maker with Milk Frother
HOUSEHOLD USE ONLY
Please read all instructions carefully before using the product
love · life
Model: KCM 207
Rev 1.0

Contents
IMPORTANT SAFEGUARDS .........................................................................................................
PACKAGE CONTENTS ..................................................................................................................
KNOW YOUR COFFEE MAKER ....................................................................................................
TECHNICAL DETAILS ...................................................................................................................
BEFORE USING ..............................................................................................................................
USING THE APPLICANCE ............................................................................................................
REPARATIONMILK FROTHER ....................................................................................................
HINTS AND TIPS ............................................................................................................................
CLEANING AND MAINTENANCE ...............................................................................................
REMOVEL OF MINERAL DEPOSITS ............................................................................................
STORAGE ........................................................................................................................................
TROUBLE SHOOTING ...................................................................................................................
WARRANTY CLAIM PROCEDURE ...............................................................................................
ENVIRONMENT FRIENDLY DISPOL ...........................................................................................

IMPORTANT SAFEGUARDS
When using electrical appliances, basic safety precautions should always be followed, including the following:
01. Read all instructions before use.
02. Do not touch hot surfaces. Use handles or knobs.
03. Close supervision is necessary when any appliance is used by or near
children.
04. Unplug the appliance when it is not in use, before putting on or taking off
parts, and before cleaning. Allow to cool before handling, putting on or taking
off parts, and before cleaning the appliance.
05. Do not operate any appliance with a damaged cord or plug, or after the
appliance malfunctions or has been damaged in any manner. Call our toll-free
customer assistance number for information regarding repairs, or
adjustments
06. The use of accessory attachments not recommended by the appliance
manufacturer may result in fire, electric shock or injury.
07. Do not use outdoors or in a damp area.
08. Do not place the appliance close to the edge of the countertop.
09. Do not allow the power cord to hang over the edge of the table or counter, or
touch hot surfaces.
10. Do not place on or near a hot gas or electric burner or in a heated oven.
WARNING To protect against electric shock, fire and personal injury:
- Do not immerse cord in water or other liquids
- Do not immerse the appliance or any electrical components in water or any other liquids
- Always switch off and unplug the appliance before cleaning.

Possibility of injury! The underside of the Lid and Capsule Holder contain sharp needles.
Use caution when handling and during cleaning. Do not touch the needles.
CAUTION:
11.
Do not use appliance for other than intended use.
12. Do not clean with metal scouring pads. Pieces can break off the pad and touch electrical parts involving a risk of
electric shock.
13. Never leave the appliance unattended during operation.
14. To switch off and disconnect, press either the CAPSULE or GROUND button, until the indicator light turns off,
then remove the plug from the wall outlet.
15. A fire may occur if the appliance is covered or touching flammable material, including curtains, draperies, and
walls, when in operation. Do not place any item on top of the appliance when in use.
16. Extreme caution must be used when moving an appliance containing liquids.
17. Do not open the Release Lever, the Lid or remove the Ground Coffee Holder/Capsule Holder during or
immediately after use. Always exercise caution when opening the Lid or removing the Ground Coffee Holder
/Capsule Holder after use. Hot steam might be trapped beneath. Scalding may occur if the Lid is opened
during the brewing cycle.
18. Do not use the appliance with an empty or under filled water reservoir. Ensure the water level is always between
the MIN (6 oz) and MAX (30 oz) markings. Do not fill the water reservoir over the MAX (30 oz) marking.
19. Keep the area above the appliance clear during use, as hot steam will escape from the appliance.
20. Do not use the appliance without a suitable cup/mug placed under the Nozzle.
21. Do not use the appliance without the Ground Coffee Holder/Capsule Holder.
22. Do not use hot water, milk or other liquids for brewing.
23. Always use fresh, cold water for brewing.
24. Use extreme caution when removing the Ground Coffee Holder/Capsule Holder and disposing of used coffee
grounds/capsules.

Notes Regarding Extension Cords:
A short power-supply cord is provided to reduce the risk of becoming entangled in, or tripping over a longer cord.
Extension cords may be used if care is exercised in their use.
If an extension cord is used:
- The marked electrical rating of the extension cord should be at least as great as the electrical rating of the
appliance.
- The longer cord should be arranged so that it does not drape over the countertop or table top where it can be
pulled on by children or tripped over.
Polarized plug
This appliance has a polarized plug (one blade is wider than other). To reduce the risk of electric shock, this plug is
intended to fit into a polarized outlet only one way. If the plug does not fit fully into the outlet, reverse the plug. If it still
does not fit, contact a qualified electrician. Do not attempt to modify the plug in any way.
Do not let children handle or put the electrical cord into their mouths.
SAVE THESE INSTRUCTIONS!
WARNING
DO NOT OPERATE APPLIANCE IF THE POWER CORD SHOWS ANY DAMAGE OR IF
APPLIANCE WORKS INTERMITTENTLY OR STOPS WORKING ENTIRELY.
IMPORTANT SAFEGUARDS
PACKAGE CONTENTS
1 x Coffee Maker 1 x Ground Coffee Holder 1 x Capsule Holder
1 x Milk Frother 1 x User Manual 1 x Warranty Card
Check the delivery contents immediately after unpacking to ensure you received all the items.
Remove all packaging materials and plastic film from the appliance.
C
APSULE
C
APSULE

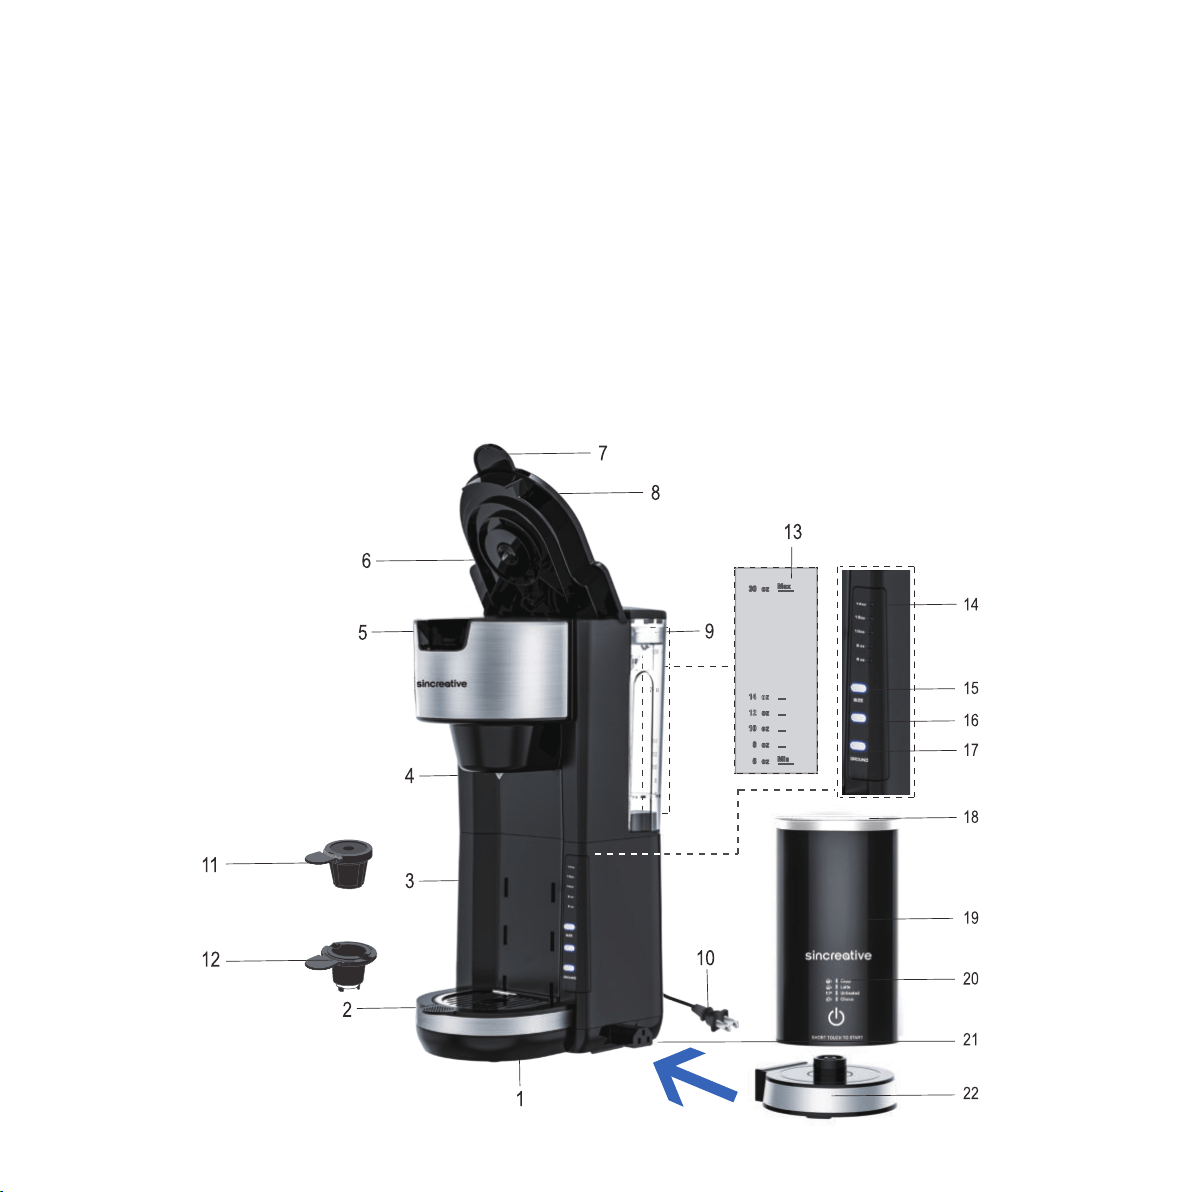
1. Drip tray 12. Capsule holder
2. Cup holder 13. Water level mark
3. Mounting slots 14. Cup size indicator lights
4. Nozzle 15. Cup size button with indicator light
5. Insert holder 16. Capsule button with indicator light
6. Release lever 17. Ground button with indicator light
7. Lid 18. Milk frother lid
8. Water reservoir with lid 19. Milk frother
9. Water tank 20. Milk frother function selecting indicator
10. Power plug 21. Connection of Coee Maker and Milk Frother
11. Ground coee holder 22. Milk frother base
BEFORE USING
TECHNICAL DETAILS
Coee Maker with Milk Frother
Model: KCM
Rated Voltage: V~ Hz
Power of Coee Maker: W
Power of Milk Frother: W
Water Tank Capacity: OZ
Cup Sizes: OZ, OZ, OZ, OZ, OZ
- Remove all packaging materials
- Check package content to verify it is complete and undamaged. Do not operate the appliance if the content is
incomplete or appears damaged.

USING THE APPLIANCE
- Before plugging the appliance into the wall outlet, ensure that the electrical circuit is not overloaded with other
appliances. This appliance should always be operated on a separate 120V~ 60Hz wall outlet.
- Make sure the appliance is assembled before connecting it to a wall outlet.
Place the appliance on a clean, flat and heat
resistant surface.
Lift the Release Lever to open the lid.
When using capsules insert a capsule in the
Capsule Holder. Insert the Capsule Holder in
the Insert Holder.
NOTE:
- Always use the appliance once it has been fully assembles and with a suitable cup/mug
- The appliance may produce an odor and/or emit smoke when switched on for the first time, as residues from the
production process are eliminated. This is normal and does not indicate a defect or hazard.
NOTE:
Danger of suocation!
- Packaging materials are not toys. Always keep plastic bags, foils and foam parts away from babies and children.
Packaging material could block airways and prevent breathing.
- When using the appliance for the first time, it is recommended to operate it for at least 1 full cycle without coffee
or a capsule (see USING THE APPLIANCE).
- Let the appliance cool completely.
- Clean the appliance (see CLEANING AND MAINTENANCE).
This appliance can be used for brewing up to 14 oz of coffee using ground coffee or capsules.
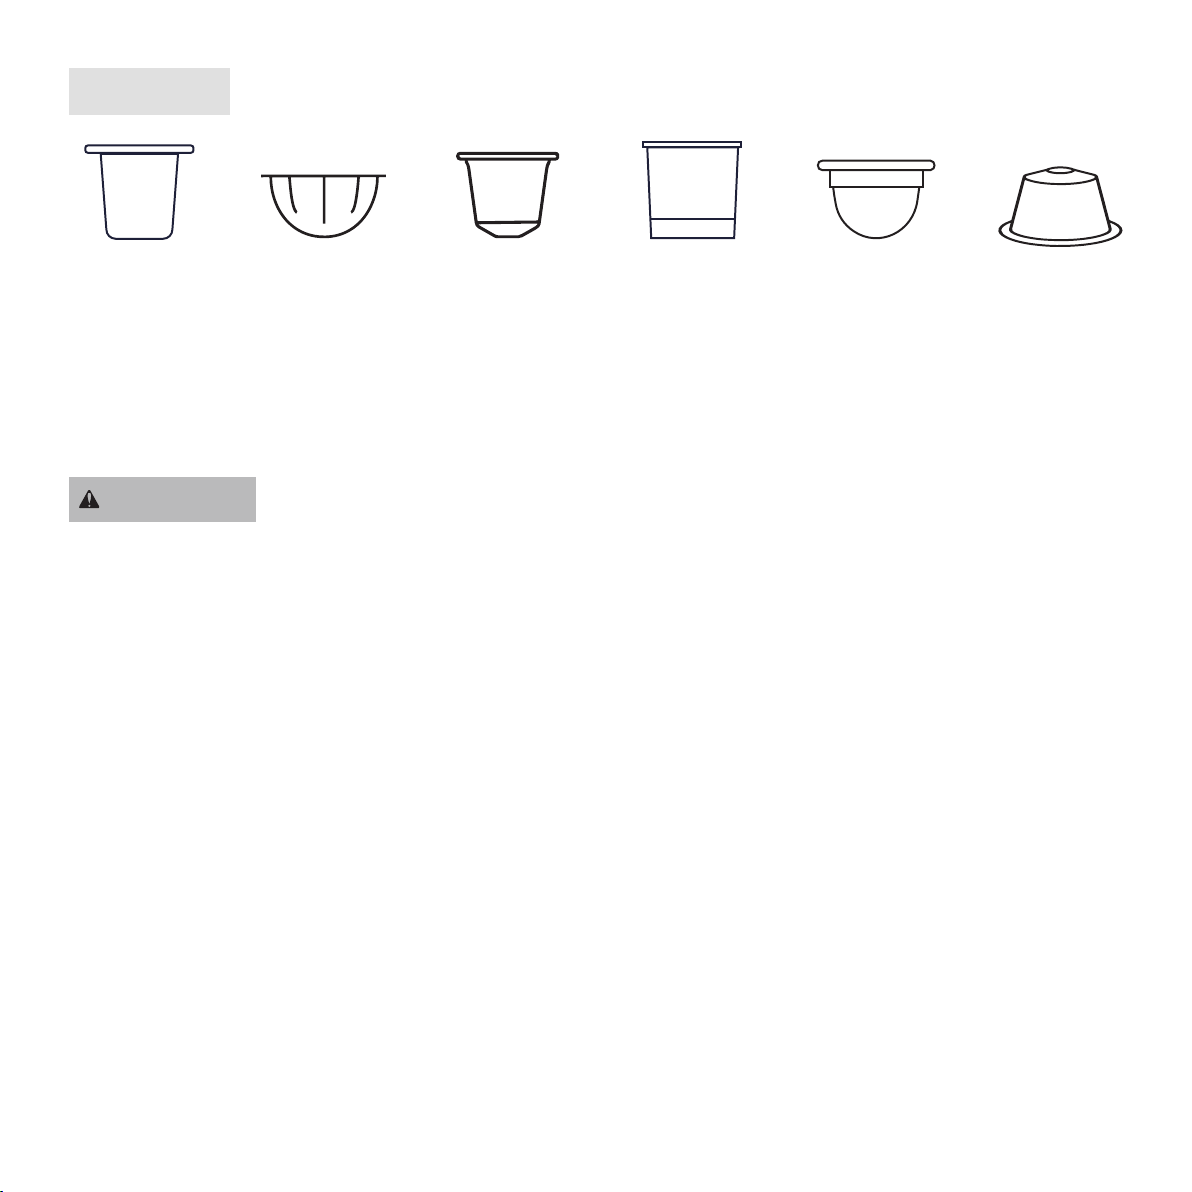
Please use K-cup capsule only.
NOTE:
WARNING
- Do not touch the sharp Needle on the underside of the Lid or inside the Capsule Holder.
- Only use suitable ground coee or capsules. Do not place ground coee/capsule directly into the Insert Holder.
Do not place anything other than the recommended ground coee/capsule into the Ground Coee Holder/Capsule
Holder.
- Some capsules may not work with this appliance. If the capsule does not properly fit into the Capsule Holder, or leaks
during the brewing cycle, do not use that type of capsule again.
Press the lid down into the lock position to close.
Adjust the Drip Tray to fit your container by locking it into the upper, middle or lower Mounting Slots. Make sure the
tray holds firm and is steady.
When using the Ground Coffee Holder, ensure it contains the required amount of ground coffee. Fill with ground
coffee up to the MAX fill line. Do not overfill it. Do not compress the ground coffee in the Ground Coffee Holder. Do
not use ground coffee for Espresso, as it is too fine and can clog the Ground Coffee Holder. Insert the Ground Coffee
Holder in the Insert Holder.
K-cup Capsule Dolce Gusto
Capsule
Nespresso
VertuoLine
Capsule
Nespresso
OriginalLine
Capsule
iperEspresso
Capsule
SF Capsule
X XX X
√
X

- Use the lower Mounting Slots when using large mugs and the upper or middle Mounting Slots when using small
cups.
- When removing the Water Reservoir with Lid close the lid, do not touch the underside of the Lid or inside the
Capsule Holder.
NOTE:
BREWING
Either press the GROUND Button or CAPSULE Button according to the coffee to be brewed. The 6 oz Cup Size
Indicator Light will light up, the indicator light around the CUP SIZE Button will flash.
Press the CUP SIZE Button until your desired size lights up.
Press either the GROUND Button or CAPSULE Button again to start the brewing process (brewing will start automati-
cally after 5 seconds if nothing is pressed).
WARNING
- Do not over or under fill the Water Reservoir with Lid. Ensure the water level is always between the MIN (6 oz) and
MAX (30 oz) markings on the Water Level Indicator.
Remove the water reservoir and drain excess water if needed.
Securely place a cup/mug in the center of the Cup Holder.
Insert the Power Cord with Plug into a wall outlet. All indicator lights will flash 3 times and then stop. The appliance
will now be in standby mode.
Lift the Water Reservoir with Lid and remove it from the appliance. Fill with fresh cold water and then reattach to the
unit.

Allow the appliance to cool down before removing the Ground Coffee Holder/Capsule Holder from the Insert Holder.
Always remove any used coffee grounds/capsules after use. Remove with caution as recently used coffee grounds or
capsules can be hot.
WARNING
- During use, the appliance produces hot steam. Keep clear of the area above the appliance at all times.
- Do not open the Lid during use or touch the appliance housing.
- Never use the appliance with the Lid open or without the Ground Coffee Holder/Capsule Holder in the Insert
Holder. All indicator lights will flash when the Lid is open or does not close properly. Close the Lid, place the Release
Lever in the lock position and/or place the Ground Coffee Holder/Capsule Holder in the Insert Holder and repeat
previous steps to resume brewing.
- Do not remove the cup/mug until all indicator lights have switched off.
Once the brewing cycle has finished, all indicator lights switch off automatically.
- Another way to brew is to press the CUP SIZE Button first and then press either the GROUND Button or CAPSULE
Button
- If the GROUND Button or CAPSULE Button is not pressed within 30 seconds, all indicator lights will switch off and
the appliance will switch to stand-by mode. Restart previous steps (Brewing).
- You can stop the brewing process at any time by either pressing the GROUND Button with Indicator Light or
CAPSULE Button with Indicator Light
- You cannot change the cup size once the brewing process has begun.
- If the Water Reservoir with Lid is empty from the start or empties during the brewing process, the appliance will
stop heating and all indicator lights will switch off after a few seconds.
NOTE:
Disconnect the Power Cord with Plug from the wall outlet.
Remove the cup/mug from the Cup Holder
This appliance is not intended for use by persons (including children) with reduced physical, sensory
or mental capacities, or lack of experience and knowledge, unless they have been given supervision
or instruction concerning use of the appliance by a person responsible for their safety.
WARNING
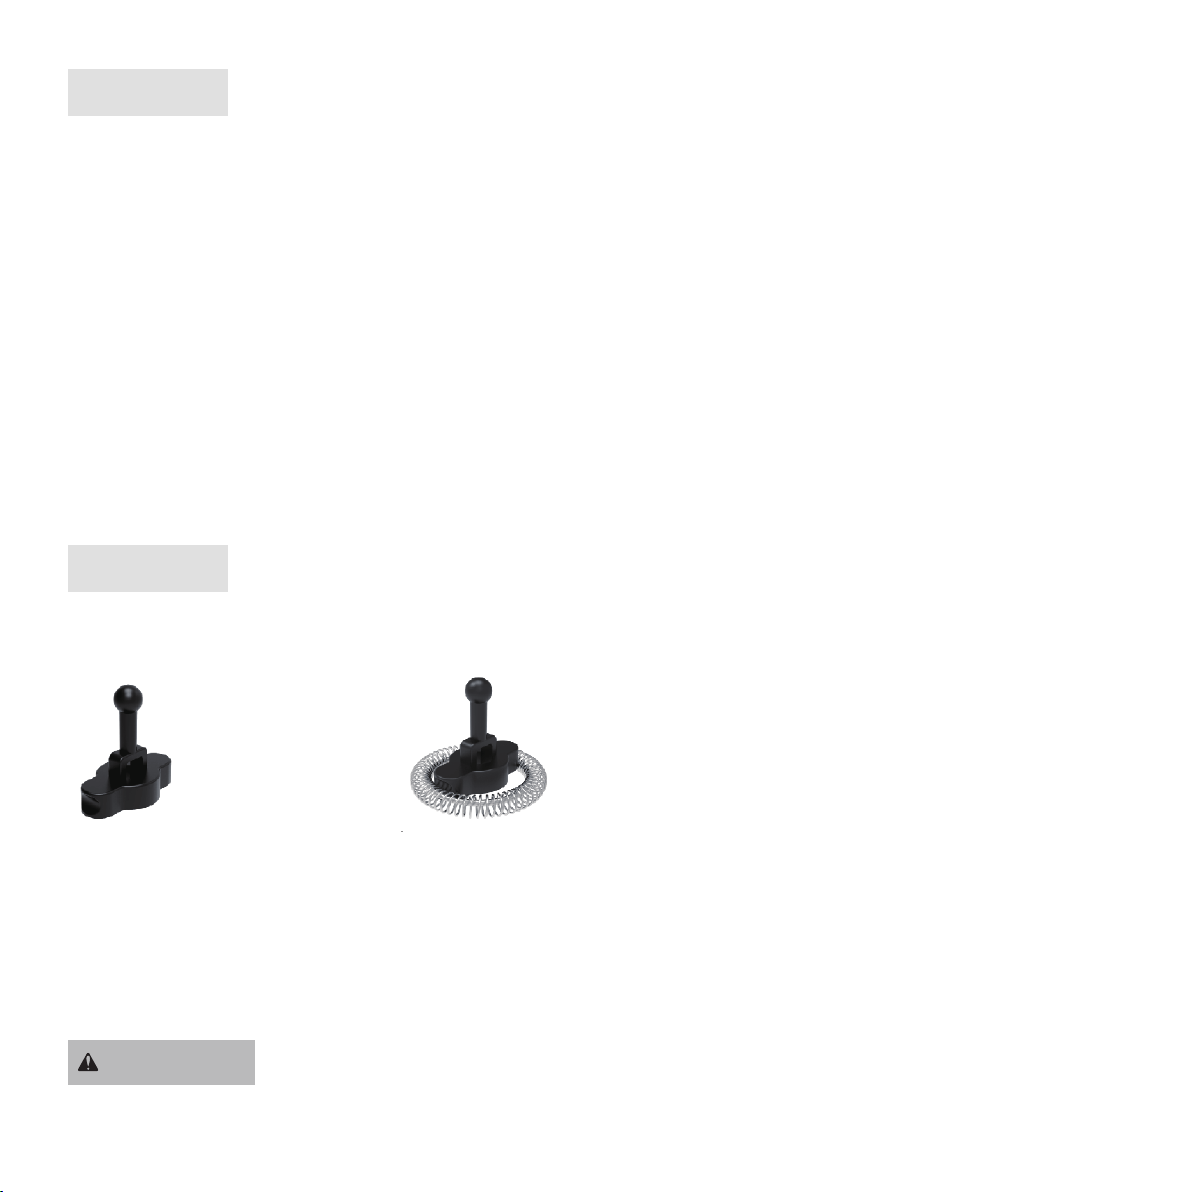
for Capp, Latte and Unheated milkfor Choco
PREPARATION- MILK FROTHER
Plug the Milk Frother Base into the socket before use. The indicator light will flash once and then turn off.
Press the button to select a mode, the frother will start up within 3 seconds.
The milk frother will stop automatically after completion. You can also stop it manually if necessary.
Use fresh, cold, full-fat or semi-skimmed milk.
Bottom of the milk jug must be dry before using the device.
Clean the inside of the jug with a cloth suitable for non-stick surfaces. Attach relevant frother.
NOTE:
- If you want to brew more coffee, allow the appliance to cool for at least 1 minute, before starting a
new brewing cycle.
Make sure you have enough water. Always fill the Ground Coffee Holder with fresh ground coffee or place a new capsule
in the Capsule Holder. Do not reuse the same capsule/ground coffee.
NOTE:
Preparation Times:
Capp of 125 ml (MAX): approximately 120 seconds
Latte of 125 ml (MAX): approximately 120 seconds
Choco of 200 ml (MAX): approximately 120 seconds

- Do not immerse the Power Cord with Plug or appliance into water or any other liquids. Do not use abrasive cleaners,
steel wool or scouring pads. Dry all the parts thoroughly after cleaning, before using or storing the appliance. Ensure
that no water enters the appliance housing.
Remove the Drip Tray, Cup Holder, Ground Coffee Holder, and Capsule Holder from the appliance. These parts can be
washed in hot soapy water.
Wipe the seal on the needle on the underside of the Lid with a damp cloth. Do not remove the seal.
Clean all accessories after each use.
Clean the appliance housing, Lid and Insert Holder with a damp sponge or cloth.
NOTE:
CLEANING AND MAINTENANCE
- Always disconnect the Power Cord with Plug from the wall outlet before cleaning. Allow all parts of the appliance
to cool down completely.
- The underside of the Lid and Capsule Holder contain sharp needles. Use caution when handling and during
cleaning.
HINTS AND TIPS
- We recommend not placing the appliance under cabinets, as rising steam can cause damage to wooden furniture.
- Empty the Drip Tray after each use to prevent it from overflowing.
- Use a suitable thermal cup/mug to keep your coffee hot for longer.
If the supply cord is damaged, it must be replaced by the manufacturer, its service agent or another qualified person in
order to avoid a hazard.
Our product is not waterproof. Never use in dishwasher. Only clean with a non-abrasive cloth, never use a brush.

REMOVAL OF MINERAL DEPOSITS
To keep your appliance operating effectively, periodically descale your appliance to remove any build-up of lime
scale. We recommend removing lime scale deposits as follows:
Remove the Water Reservoir with Lid from the appliance and remove the reservoir Lid.
Use a household descaler. Fill the water reservoir with fresh water and descaler up to the 14 oz marking. The ratio of
water and descaler is 4:1. Follow descaler instructions.
Place the Lid back onto the Water Reservoir with Lid and put the water reservoir back on the appliance.
Ensure the Ground Coffee Holder is placed in the Insert Holder without coffee and the Release Lever is placed in the
lock position.
Place the Drip Tray with Cup Holder in the lower Mounting Slots. Ensure it sits flat.
Place a large mug onto the Cup Holder. Insert the Power Cord with Plug into a wall outlet.
Press both the CAPSULE and GROUND buttons at the same time until their indicator lights switch on and flash. The
appliance will start pumping water.
Always clean all parts that have come into contact with food immediately after use and before storage.
NOTE:
- The appliance will run for 5 cycles of 25 seconds each, alternating water pumping and resting time during each cycle.
- Do not press any buttons or try to interrupt the process during the descaling cycle.
NOTE:
Once the descaling cycle has finished, the appliance and the indicator lights automatically switch off.
Rinse the appliance by brewing 14 oz of fresh water at least 3 times afterwards without coffee placed in the Ground
Coffee Holder. Discard pumped water.
Disconnect the Power Cord with Plug from the wall outlet.

STORAGESTORAGE
Before storage, always make sure the appliance is completely cool, clean and dry.
It is recommended to store the appliance in a dry place.
Never wrap the Power Cord with Plug around the appliance.
Store the appliance on a stable shelf or in a cupboard. To avoid accidents, ensure that both the appliance and its power
cord are beyond reach of children or pets.
You can use white vinegar instead of household descaler.
NOTE:
The ratio of water to white vinegar is 2:1.
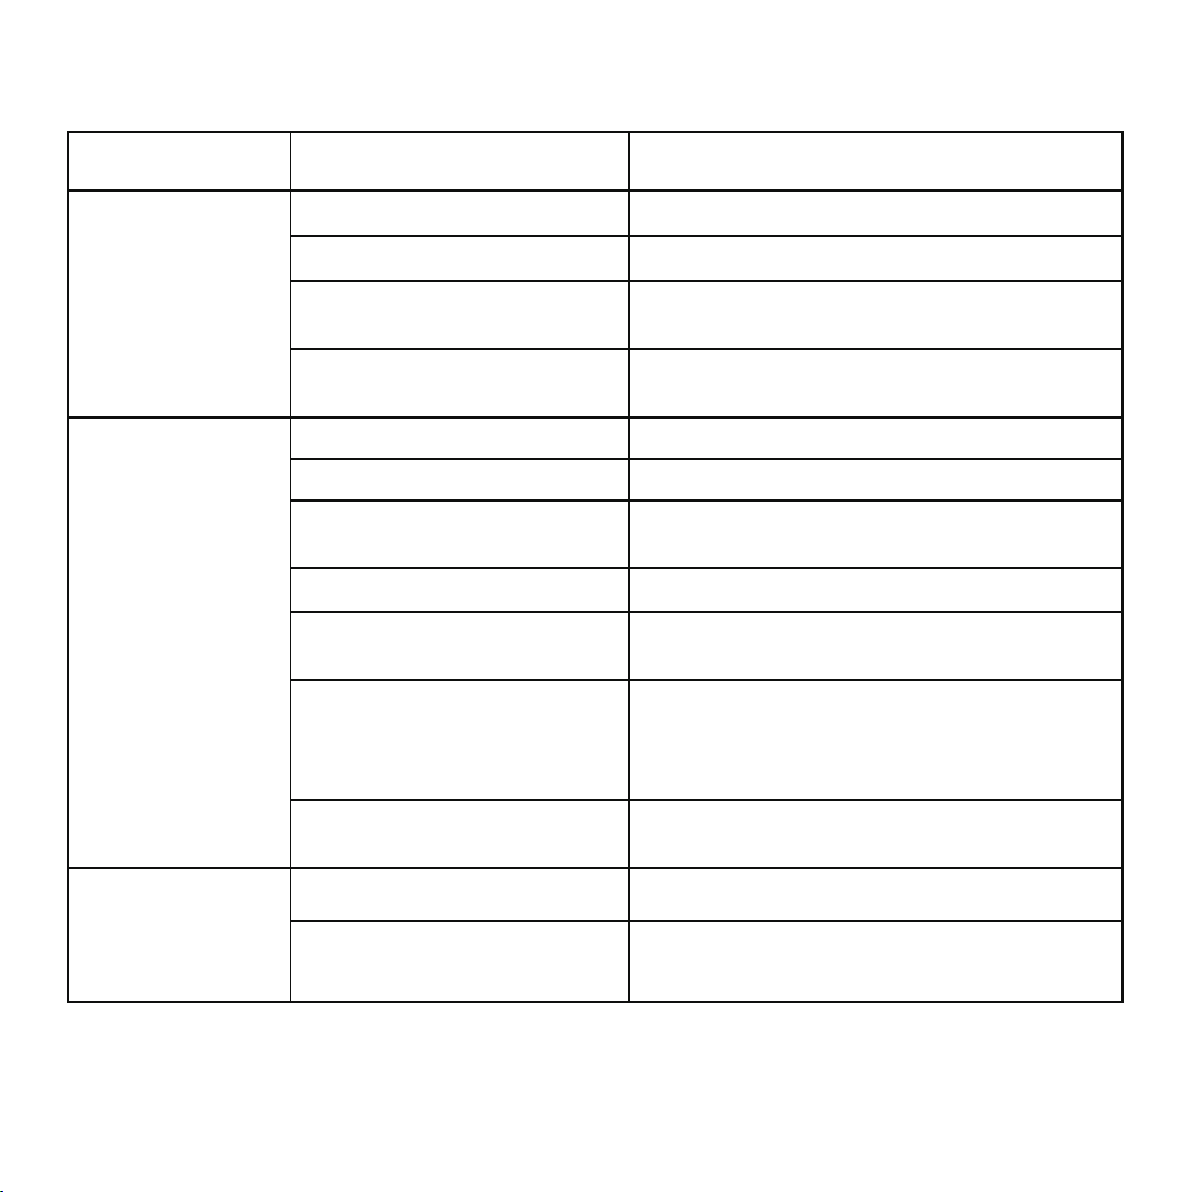
TROUBLE SHOOTING
PROBLEM CAUSE SOLUTION
The appliance is not
working.
The appliance not plugged in.
Insert the plug into the wall outlet.
Wall outlet not energized.
Appliance not switched on.
Malfuctioning appliance.
Check fuses and circut breaker.
Switch the appliance on by pressing CAPSULE
button or GROUND button.
Unplug the appliance from the wall outlet and contact
qualified person to check and repair theappliance.
Nozzle blocked.
Check the Nozzle for blockages.
Excessive lime scale buildup.
Clean and descale the appliance.
Ground coffee too fine.
Clean the Ground Coffee Filter and refill with coarse
ground coffee.
Capsule not suitable Replace with a suitable capsule.
Empty water reservoir.
Refill the water reservoir with fresh
water.
Upper/bottom of the capsule not
pierced by the needle.
Switch the appliance off and carefully replace the
capsule into the holder, press with enough force to
feel the needle pierce the capsule. Ensure that the lid
is closed all the way when the capsule is installed.
The needle(s) may be plugged with
debris.
A toothpick or fine pipe cleaner with fresh water.
No water comes out
from the Nozzle.
Brewing process
does not start.
Water reservoir is empty. Refill the water reservoir with fresh water.
No action for 30 secondsafter
volume selection.
Repeat settings selection.
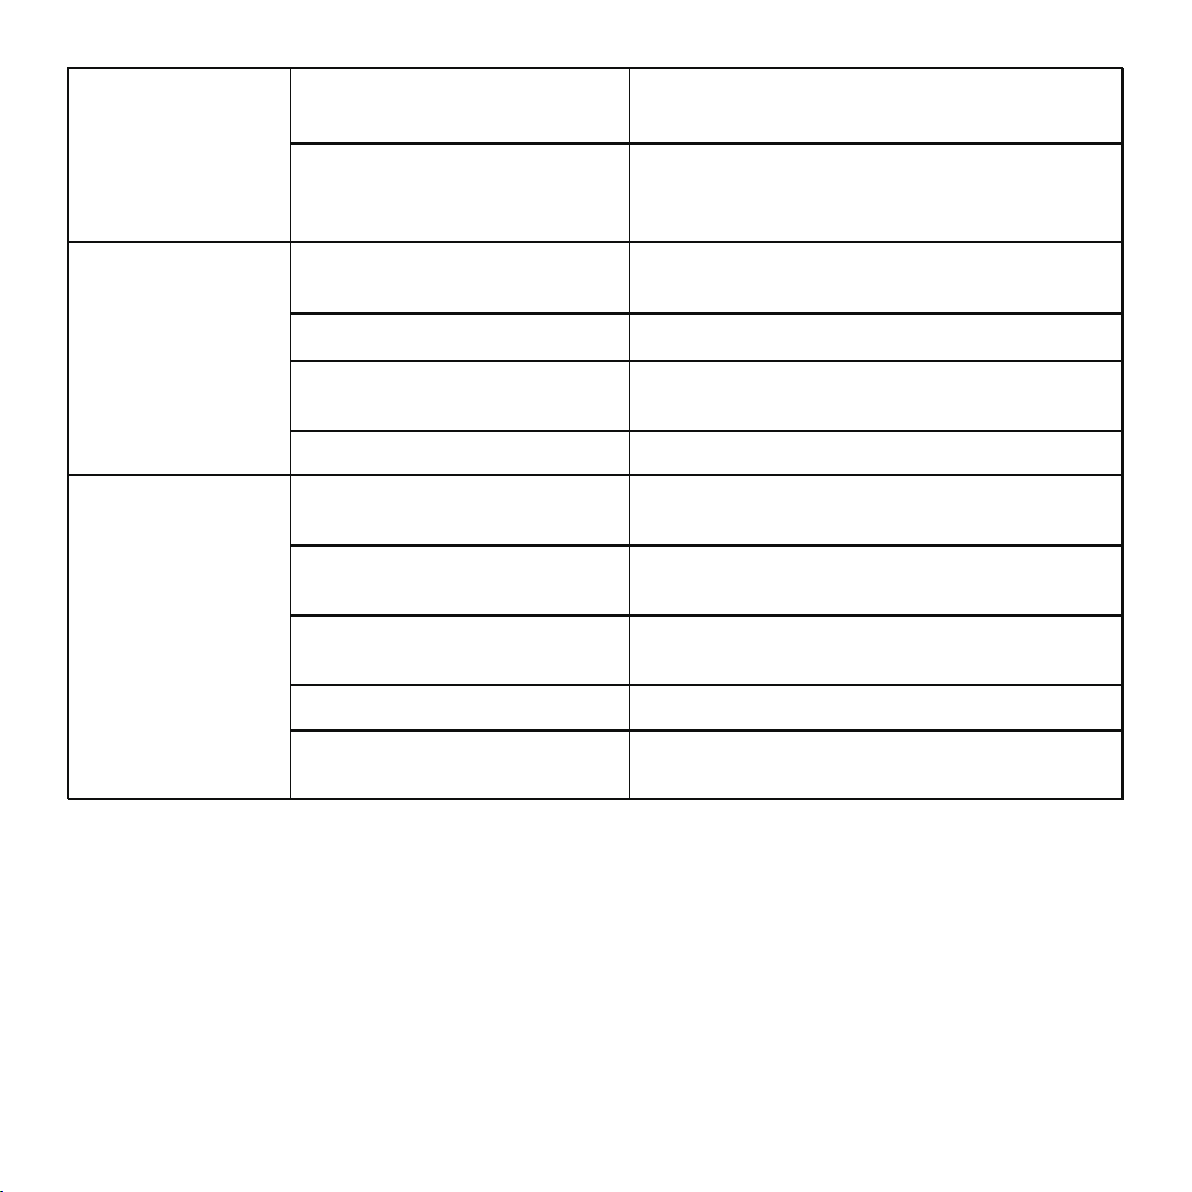
Upper/bottom of the capsule not
pierced by the needle.
Switch the appliance off and carefully replace the
capsule.
Brewing processstops
before completion.
Lid opened duringbrewing process.
Not enough water according to the
preselected volume.
Close the lid, wait for the indicator lights to switch
off and restart settings selection.
Wait for the indicator lights to switch off, refill the
water reservoir with fresh water and restart
operation.
Not enough ground coffee.
Add more ground coffee. Do not fill over the MAX fill
line on the round coffee holder.
Coffee flavor is too
weak.
Too much ground coffee inside the
Ground Coffee Holder.
Remove some ground coffee from the Ground
Coffee Holder. Ensure its lid is properly closed.
The Ground Coffee Holder/
Capsule Holder is Damaged.
Replace with a suitable Ground Coffee Holder/
Capsule Holder.
Ground coffee is too fine.
Clean the Ground Coffee Holder and refill with
coarse ground coffee.
Ground coffee used more than once.
Clean the ground coffee holder and refill with fresh
ground coffee.
Capsule used more than once. Discard of the old capsule and use a new one.
Too much water used.
Reduce the amount of water used on the next brew.
The appliance is
leaking during brewing
cycle.
Capsule is not suitable.
Replace with a suitable capsule.

ENVIRONMENT-FRIENDLY DISPOSAL
This product must be dropped off at an authorized electronics waste disposal site.
Do not throw away with your regular waste.
WARRANTY CLAIM PROCEDURE
The manufacturer provides warranty in accordance with the legislation of the customer's own country of residence,
with a minimum of 12 months, starting from the date on which the appliance is sold to the end user.
The warranty only covers defects in material or workmanship. It does NOT include:
- Normal wear and tear.
- Incorrect use, e.g. overloading of the appliance, use of non-approved accessories.
- Use of force, damage caused by external influences.
- Damage caused by non-observance of the user manual, e.g. connection to an
unsuitable power supply or non-compliance with installation instructions.
- Partially or completely dismantled appliances.
Contact our friendly customer service team with questions.
Here's how we can connect: [email protected]


1
Sincreative Brands Inc
20947 Currier Rd, Unit C,
Walnut, CA 91789,
United States of America
www.sincreative.com