
Loading ...
Loading ...
Loading ...
14 - English
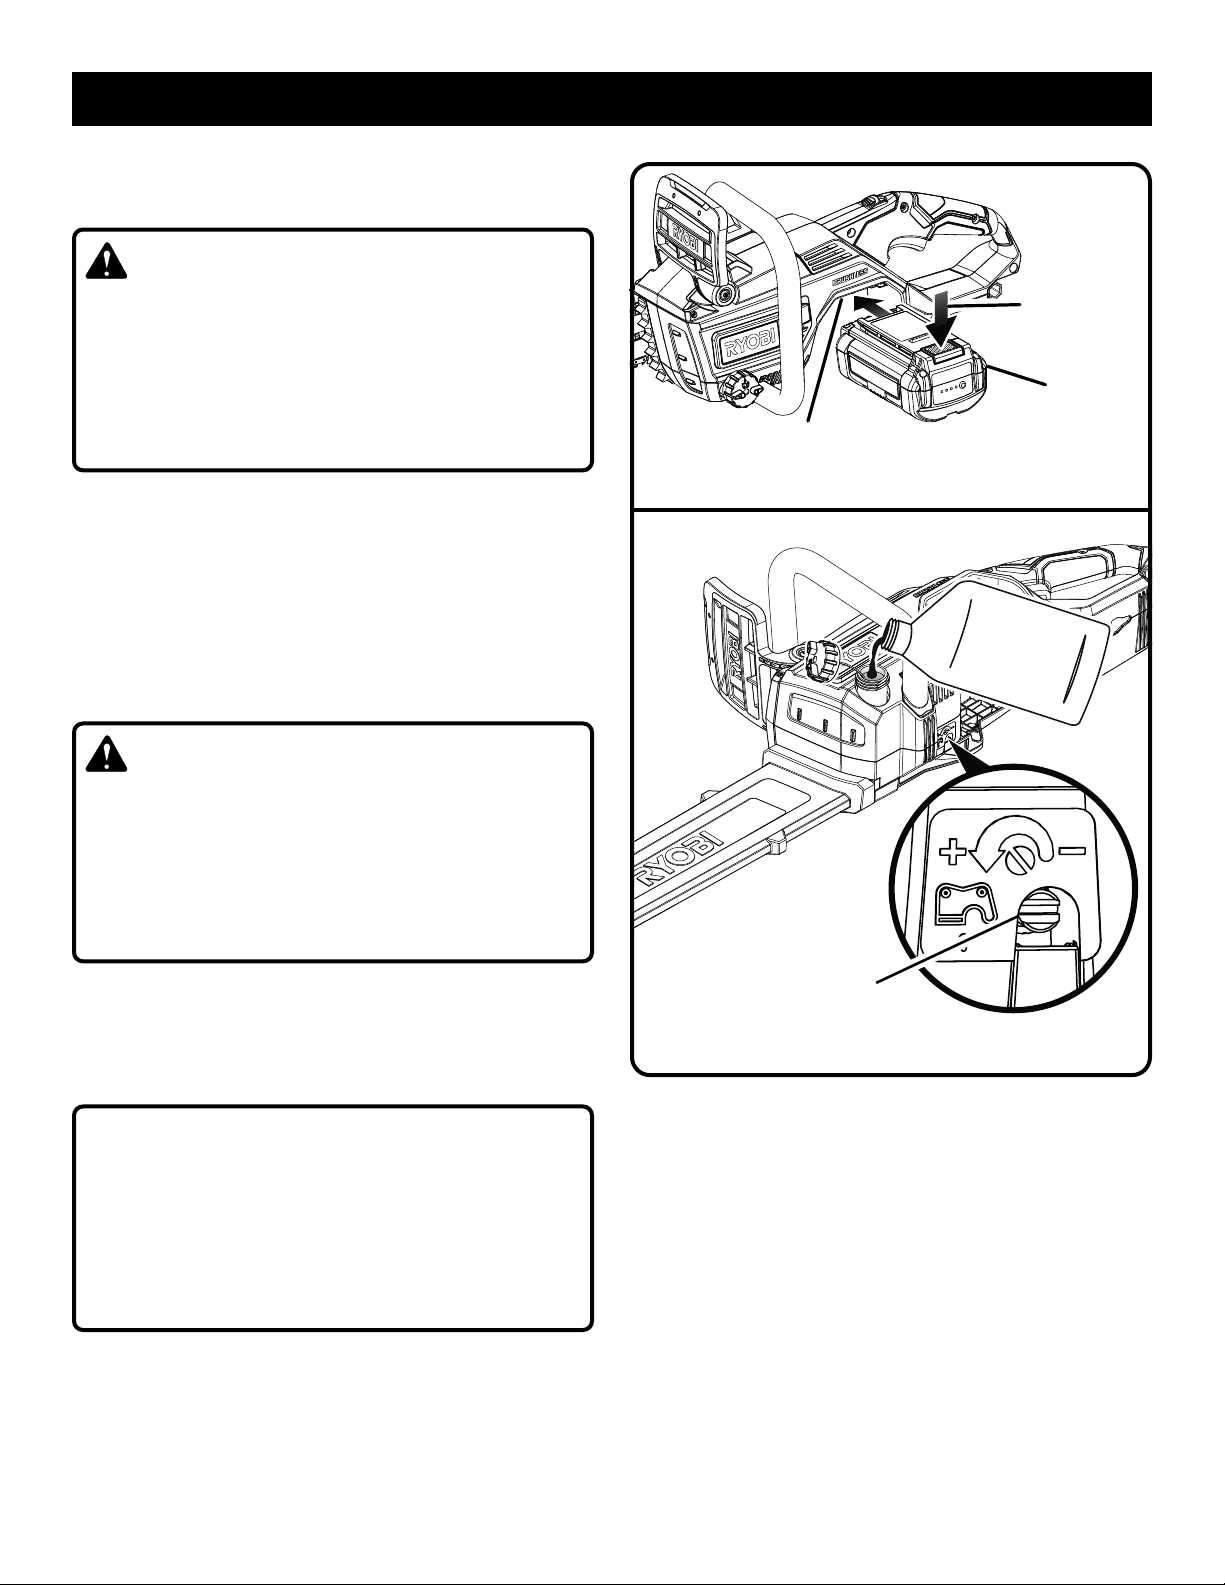
TO INSTALL/REMOVE BATTERY PACK
See Figure 5.
WARNING:
Always remove battery pack from your tool
when you are assembling parts, making adjust-
ments, cleaning, carrying, transporting or when
not in use. Removing battery pack will prevent
accidental starting that could cause serious
personal injury.
NOTE: To avoid serious personal injury, always
remove the battery pack and keep hands clear of
the lock-out button when carrying or transporting
the tool.
To install:
Place the battery pack in your chain saw. Align
raised rib on battery pack with groove in chain
saw’s battery port.
WARNING:
Make sure the latch on the battery pack snaps
in place and the battery pack is fully seated and
secure in the power head battery port before
beginning operation. Failure to securely seat
the battery pack could cause the battery pack
to fall out, resulting in serious personal injury.
To remove:
Locate latch on bottom of battery pack and depress
both sides to release the battery pack from the
chain saw.
NOTICE:
When placing battery pack in your chain saw,
be sure raised rib on battery pack aligns with
groove in chain saw’s battery port and latches
snap in place properly. Improper assembly of
battery pack can cause damage to internal
components.
For complete charging instructions, see the opera-
tor’s manuals for your battery pack and charger.
Fig. 6
Fig. 5
BATTERY
PACK
LATCH
BATTERY
PORT
OPERATION
BAR AND CHAIN LUBRICATION
See Figure 6.
The bar and chain require continuous lubrication.
Lubrication is provided by the automatic oiler sys-
tem when the oil tank is kept filled. Lack of lubri-
cant will quickly ruin the bar and chain. Too little
lubricant will cause overheating shown by smoke
coming from the chain and/or discoloration of the
bar. Lubrication can be increased or decreased by
turning (up to 1/4 turn maximum) the adjustment
screw located on the bottom of the crankcase with
the screwdriver end of the included combination
wrench.
OILER
ADJUSTING
SCREW
Loading ...
Loading ...
Loading ...