Loading ...
2
Installation instructions
1. Determine installation heigh according your hood installation
manual information and trace a baseline at the selected
mounting heigh on the wall.
2. Trace a vertical centerline over the baseline.
3. Place the template
on the wall and align
the baseline and
centerline, tape it.
A. Centerline
B. Baseline
A
B
4. Draw the propper holes for horizontal and vertical supports
considering your cabinet model and remove template.
5. Drill ³⁄₁₆” (4.8 mm) pilot holes at marked locations.
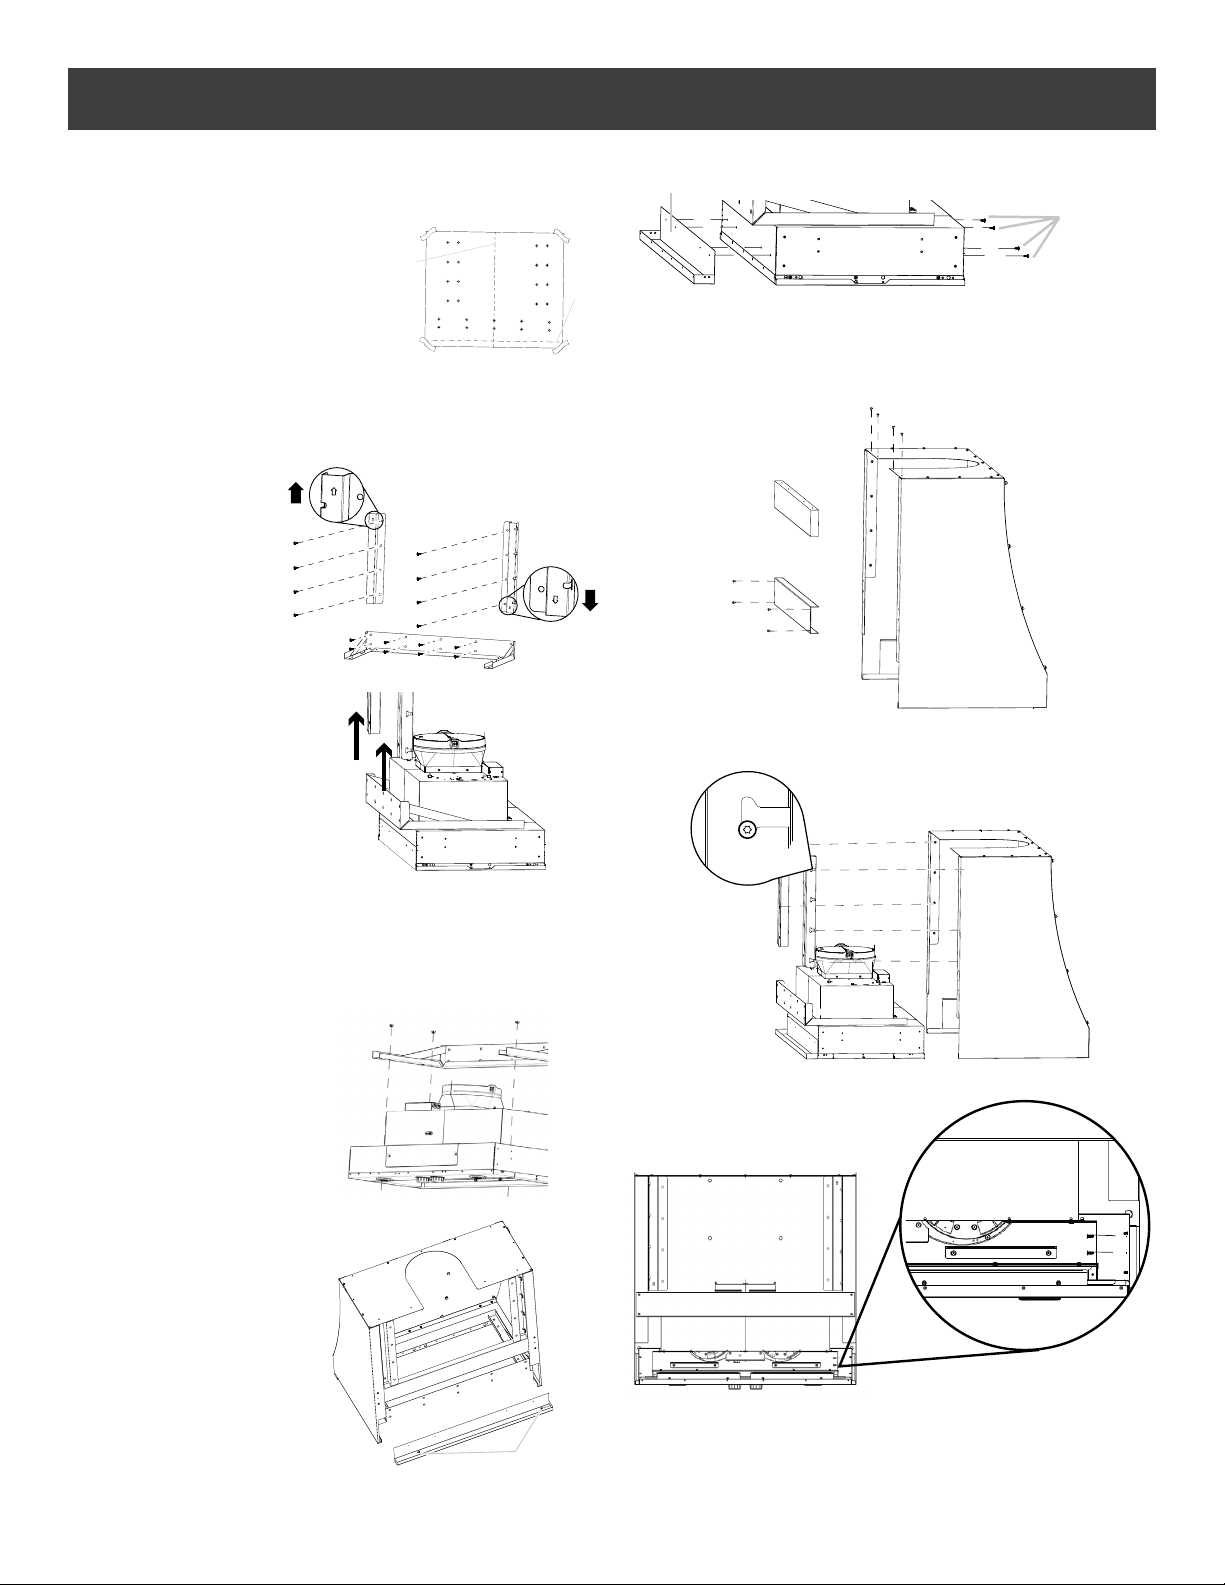
6. Place the vertical supports on the wall and fix each with 4 - 5.4
x 75 mm screws using 10 x 50 mm anchors.
7. Place the horizontal
support on the wall
and fix with 10 - 5.4 x
75 mm screws using 10
x 50 mm anchors.
8. Using 2 or more
people, lift the hood
insert near the cabinet
sliding it from below
the supports.
9. Place the hood insert near its mounting position and run the
power supply cable through the strain relief into terminal box
(enough to make connection).
10. Tighten the strain relief screws.
11. Remove hood metal grease filters.
12. Place the hood insert under the horizontal support.
13. Fix the hood insert to
the horizontal support
with 4 - 6 x 16 mm
screws and 4 clip nuts.
14. Only for ETRXXXXX
hood models unscrew
and remove hood
insert rear bracket
support that will be
attached to the back
of the cabinet
A. Screws
A
15. Only for ETRXXXXX hood models attach hood insert rear
bracket support with 4 - 4.2 x 15 mm screws on the back.
A. 4 - 4.2 x 15 mm
screws
B. Rear bracket
A
B
16. Make electrical connection according your hood installation
manual.
17. Unscrew 4 rear and 4 top screws and remove both metalic
and wood support rear brackets from cabinet. Dispose of this
brackets.
18. Lift the hood cabinet beneath the motor housing. Insert the
cabinet pins into the vertical support slots. Once the eight pins
are already inserted, the cabinet stands hanging.
19. Fix the cabinet to hood insert with 4 - 4.2 x 15 mm screws on
each side. Use the following image as a guide.
20. Replace metalic grease filters.
Loading ...
Loading ...
Loading ...