
Loading ...
Loading ...
Loading ...
en Trouble shooting
16
3Trouble shooting
Tr oubl e s hoot i ng
If a fault occurs, there is often a simple explanation.
Before calling the after-sales service, please refer to the
fault table and attempt to correct the fault yourself.
Rectifying faults yourself
You can often easily rectify technical faults with the
appliance yourself.
If a dish does not turn out exactly as you wanted, you
can find useful cooking tips and instructions at the end
of this instruction manual. ~ "Tested for you in our
cooking studio" on page 17
--------
:Warning – Risk of electric shock!
Incorrect repairs are dangerous. Repairs may only be
carried out and damaged power cables replaced by
one of our trained after-sales technicians. If the
appliance is defective, unplug the appliance from the
mains or switch off the circuit breaker in the fuse box.
Contact the after-sales service.
Replacing the bulb in the top of the cooking
compartment
If the cooking compartment light bulb fails, it must be
replaced. Heat-resistant, 25 watt, 230 V halogen bulbs
are available from the after-sales service or specialist
retailers.
When handling the halogen bulb, use a dry cloth. This
will increase the service life of the bulb. Only use these
bulbs.
:Warning – Risk of electric shock!
When replacing the cooking compartment bulb, the
bulb socket contacts are live. Before replacing the bulb,
unplug the appliance from the mains or switch off the
circuit breaker in the fuse box.
:Warning – Risk of burns!
The appliance becomes very hot. Never touch the
interior surfaces of the cooking compartment or the
heating elements. Always allow the appliance to cool
down. Keep children at a safe distance.
1. Place a tea towel in the cold cooking compartment
to prevent damage.
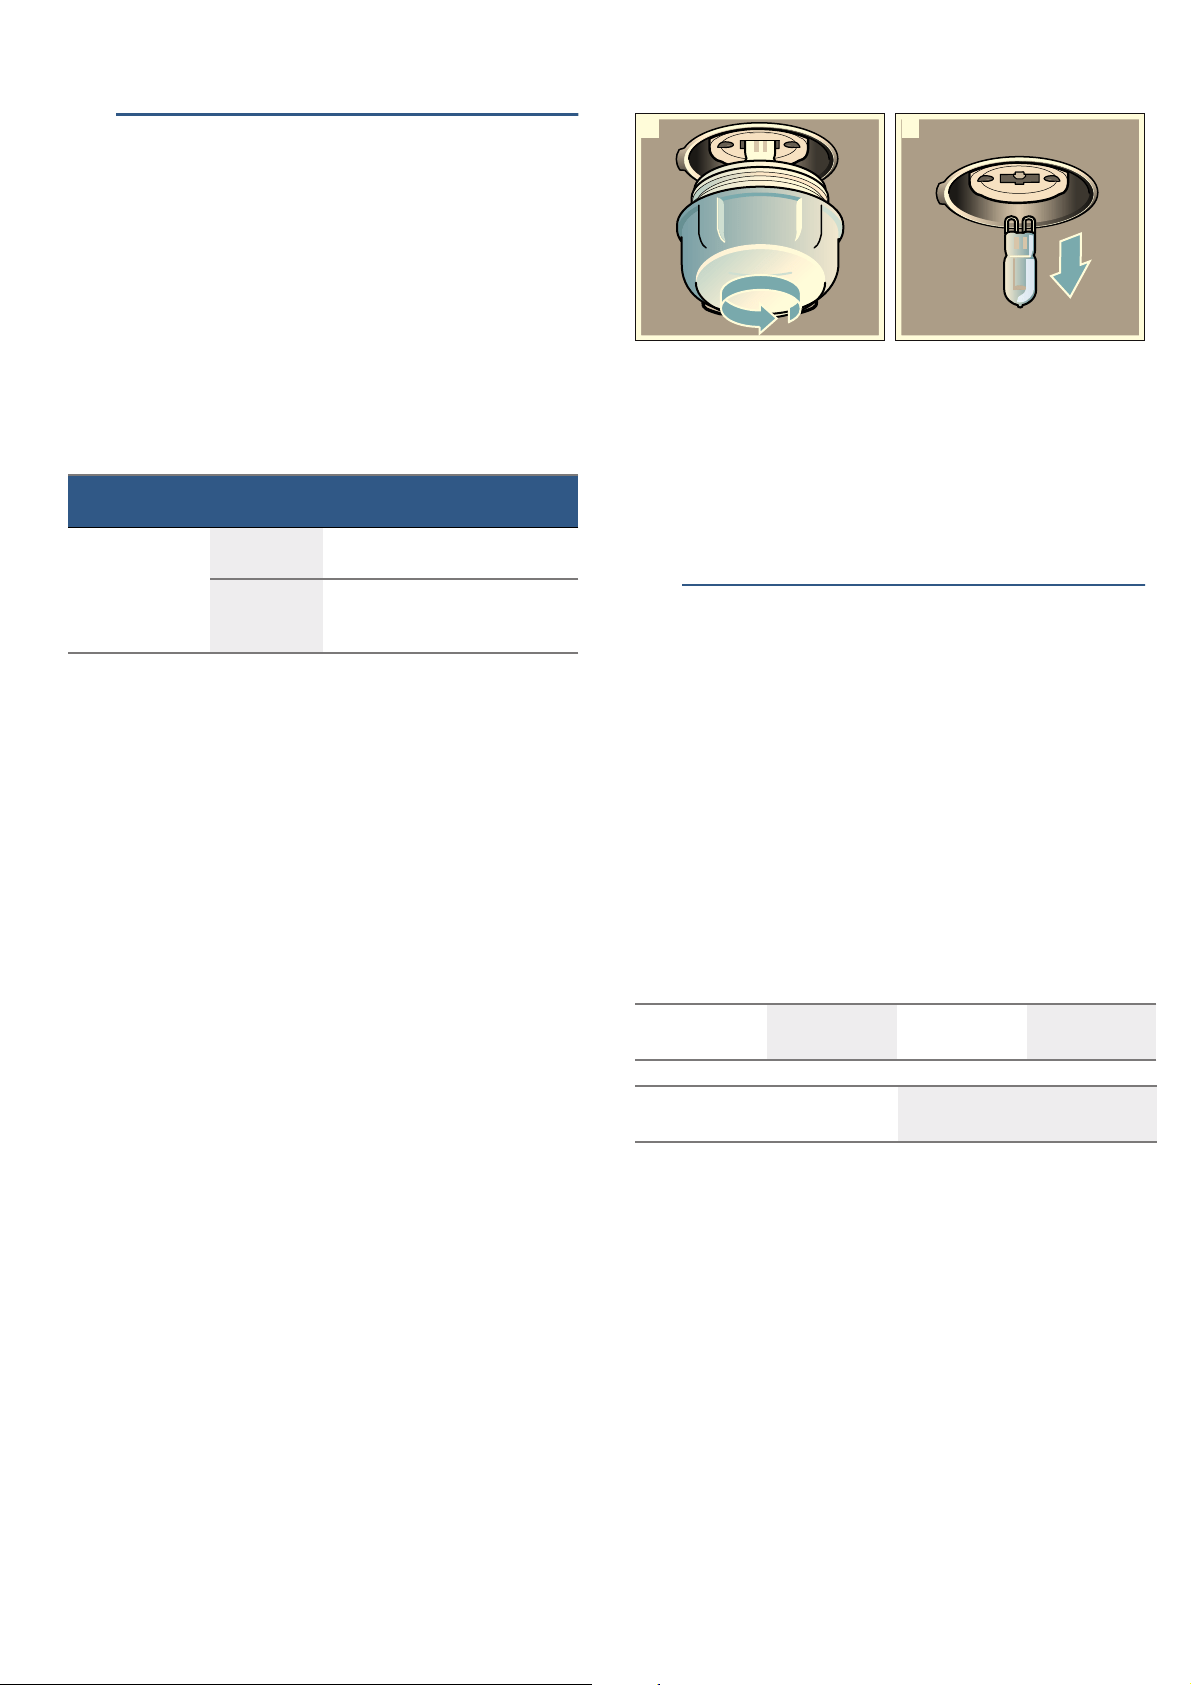
2. Turn the glass cover anti-clockwise to remove it
(figure !).
3. Pull out the bulb – do not turn it (figure ").
Insert the new bulb, making sure that the pins are in
the correct position. Push the bulb in firmly.
4. Screw the glass cover back on.
Depending on the appliance model, the glass cover
may have a sealing ring. If the glass cover has a
sealing ring, put it back in place before screwing the
cover back on.
5. Remove the tea towel and switch on the circuit
breaker.
4Customer service
Cu s t o mer ser vi ce
Our after-sales service is there for you if your appliance
needs to be repaired. We will always find an
appropriate solution, also in order to avoid after-sales
personnel having to make unnecessary visits.
E number and FD number
When calling us, please give the product number (E
no.) and the production number (FD no.) so that we can
provide you with the correct advice. The rating plate
containing these numbers can be found on the right-
hand side of the oven door. You can make a note of the
numbers of your appliance and the telephone number
of the after-sales service in the space below to save
time should it be required.
Please note that there will be a fee for a visit by a
service technician in the event of a malfunction, even
during the warranty period.
After-sales contact details for all countries can be found
in the attached after-sales service directory.
Fault Possible
cause
Notes/remedy
The appliance is
not working.
Defective cir-
cuit breaker.
Check the circuit breaker in the
fuse box.
Power failure Check whether the kitchen light
or other kitchen appliances are
working.
E no.
FD no.
After-sales service O
21
Loading ...
Loading ...
Loading ...