
Loading ...
Loading ...
Loading ...
9
ENGLISH
OPERATION
WARNING: To reduce the risk of serious personal
injury, turn unit off and remove the battery pack
before making any adjustments or removing/
installing attachments or accessories. An
accidental start-up can causeinjury.
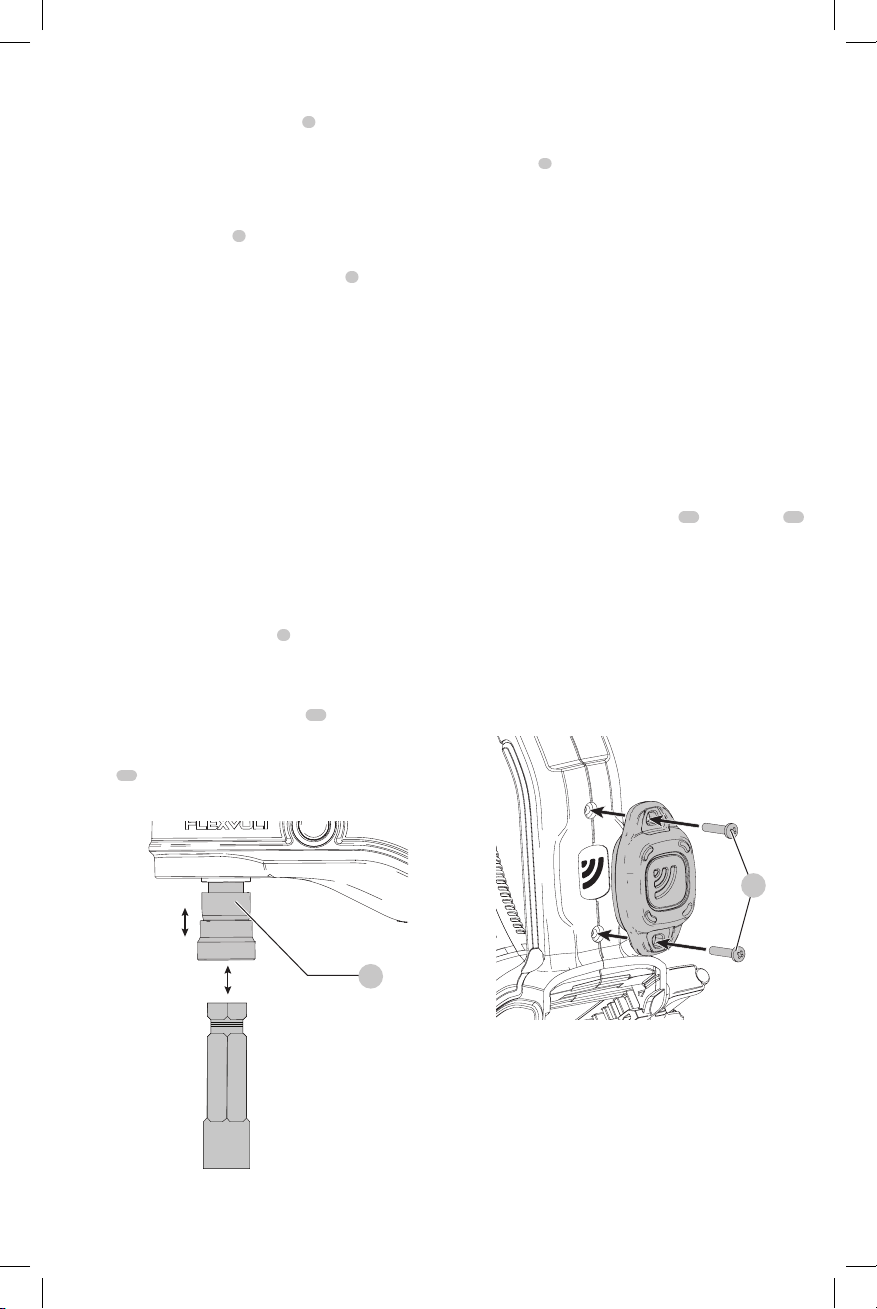
Fig. F
15
DEWALT
Bluetooth® Tool Tag Ready
(Fig.A,F)
Optional Accessory
WARNING: Read instruction manual for the
DEWALT
Bluetooth® ToolTag.
WARNING: Remove battery from tool before installing
the
DEWALT
Bluetooth® ToolTag.
WARNING: When installing or replacing the
DEWALT
Bluetooth® Tool Tag, use only the screws provided. Be
sure to securely tighten thescrews.
Your tool comes with mounting holes
12
and fasteners
15
for installing a
DEWALT
Bluetooth® Tool Tag (DCE041). You
will need a cross head bit tip to install the tag. Screw torque
should be between 0.8 and 1.2 Nm (7.1 to 10.6 in-lbs). The
DEWALT
Tool Tag is designed for tracking and locating
professional power tools, equipment, and machines using
the
DEWALT
Tool Connect™ app. For proper installation of
the
DEWALT
Tool Tag, refer to the
DEWALT
Tool Tagmanual.
To learn more,visit:
www.
DEWALT
.com/en-us/jobsite-solutions/tool-connect
Fig. E
14
Installing and Releasing a Bit (Fig. A, E)
WARNING: Always lock off trigger switch
and disconnect tool from power source when
changingacces sories.
WARNING: Always ensure the bit is secure before
starting the tool. A loose bit may eject from tool
causing possible personalinjury.
WARNING: The quick release chuck should only
be replaced or repaired by a
DEWALT
authorized
serivcecenter.
NOTE: The chuck accepts 7/16'' (11.1 mm) hex accessories
and bit tips only.
Place the forward/reverse button
9
in the lock-off (center)
position and remove the battery pack before changing
accessories.
To install a bit or an accessory, fully insert the bit or
accessory into the quick release chuck
10
. The bit or
accessory is locked into place.
To Remove a bit or an accessory, push the chuck
collar
14
away from the front of the tool. Remove the bit or
accessory. Release the collar.
Forward/Reverse Button (Fig.A)
A forward/reverse button
9
determines the direction of the
tool. It is located in front of the trigger.
To select forward rotation, release the trigger
7
and depress
the forward/reverse button on the right side of thetool.
To select reverse, depress the forward/reverse button on
the left side of the tool. When changing the position of the
button, be sure the trigger is released.
Worklight (Fig.A)
CAUTION: Do not stare into worklight. Serious eye
injury could result.
The worklight
8
is activated when the trigger is depressed,
and will remain on for a short time after the trigger is
released. If the trigger remains depressed, the worklight will
remain on.
NOTE: The worklight is for lighting the immediate work
surface and is not intended to be used as a flashlight.
Variable Speed Trigger (Fig.A)
Depressing the variable speed trigger
7
turns the tool on,
releasing the variable speed trigger turns the tool off. The
variable speed trigger permits speed control—the farther
the trigger is depressed, the higher the speed of the drill.
Loading ...
Loading ...
Loading ...