®
5-TRAY
FOOD
DEHYDRATOR
USER GUIDE
• Safety Instructions
• Features
• Operating Instructions
• Dehydrating Tips
• Cleaning and Maintenance
• Notes
• Terms and Conditions
• Warranty
RJ43-ROB-5

READ ALL INSTRUCTIONS BEFORE USE
For your safety and continued enjoyment of this product, always
read the instruction manual before using.
COOKING FORWARD
Welcome!
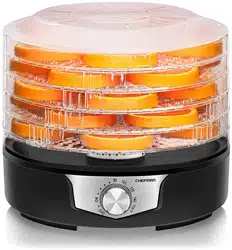
Thank you for choosing the 5-Tray Food Dehydrator for your dehydrating needs.
Whether this is your first Chefman
®
appliance or you’re already part of our family,
we’re happy to be in the kitchen with you. With its automatic fan circulating warm
air and adjustable height drying trays, the Food Dehydrator can help you create
delicious and nutritious dried fruit and vegetable snacks, as well as lightweight
dried meals perfect for backpacking. You can also dry flowers and herbs in the
Food Dehydrator to enjoy all year long. The dehydrator’s compact size makes it
easy to store, but with its black base and stainless-steel accents, it’s handsome
enough to leave out on the counter.
We know you’re excited to get started, but please take a few minutes to read our
directions, safety instructions, and warranty information.
From our kitchen to yours,
The Chefman
®
Team
1 Safety Instructions
5 Features
8 Operating Instructions
9 Dehydrating Tips
10 Cleaning and Maintenance
11 Notes
13 Terms and Conditions
15 Warranty
CONTENTS

READ ALL INSTRUCTIONS BEFORE USE
For your safety and continued enjoyment of this product, always
read the instruction manual before using.
COOKING FORWARD
Welcome!
Thank you for choosing the 5-Tray Food Dehydrator for your dehydrating needs.
Whether this is your first Chefman
®
appliance or you’re already part of our family,
we’re happy to be in the kitchen with you. With its automatic fan circulating warm
air and adjustable height drying trays, the Food Dehydrator can help you create
delicious and nutritious dried fruit and vegetable snacks, as well as lightweight
dried meals perfect for backpacking. You can also dry flowers and herbs in the
Food Dehydrator to enjoy all year long. The dehydrator’s compact size makes it
easy to store, but with its black base and stainless-steel accents, it’s handsome
enough to leave out on the counter.
We know you’re excited to get started, but please take a few minutes to read our
directions, safety instructions, and warranty information.
From our kitchen to yours,
The Chefman
®
Team
1 Safety Instructions
5 Features
8 Operating Instructions
9 Dehydrating Tips
10 Cleaning and Maintenance
11 Notes
13 Terms and Conditions
15 Warranty
CONTENTS

1 2
SAFETY INSTRUCTIONS SAFETY INSTRUCTIONS
IMPORTANT SAFEGUARDS IMPORTANT SAFEGUARDS
WARNING: When using electrical appliances, basic safety precautions should always be
followed including the following:
1. Read all instructions.
2. Do not touch hot surfaces. Use handles or knobs.
3. To protect against electrical shock do not immerse cord, plugs, or unit housing in water
or other liquid.
4. Close supervision is necessary when any appliance is used by or near children.
5. Unplug from outlet when not in use and before cleaning. Allow to cool before putting
on or taking off parts.
6. Do not operate any appliance with a damaged cord or plug or after the appliance
malfunctions or has been damaged in any manner. Return appliance to the nearest
authorized service facility for examination, repair, or adjustment.
7. The use of accessory attachments not recommended by the appliance manufacturer
may cause injuries.
8. Do not use outdoors.
9. Do not let cord hang over edge of table or counter or touch hot surfaces.
10. Do not place on or near a hot gas or electric burner, or in a heated oven.
11. Extreme caution must be used when moving an appliance containing hot oil or other
hot liquids.
12. Always attach plug to appliance first, then plug cord into the wall outlet. To disconnect,
turn any control to “off,” then remove plug from wall outlet.
13. Do not use appliance for other than intended use.
SAVE THESE INSTRUCTIONS

3 4
WARNING: This appliance has a polarized plug (one blade is wider than the other). This
plug is intended to fit into a polarized outlet only one way. If the plug does not fit fully
into the outlet, reverse the plug. If it still does not fit, contact a qualified electrician. Do not
attempt to modify the plug in any way or force it into the outlet. This could result in injury
or electric shock.
SHORT CORD INSTRUCTIONS
A short power supply cord is provided to reduce the hazards of entanglement or tripping
over a longer cord. Longer detachable power-supply cords or extension cords are available
and may be used if care is exercised in their use. If a longer detachable power-supply
extension cord is used:
1. The marked electrical rating of the extension cord should be at least as great as the
electrical rating of the appliance.
2. The cord should be arranged so that it will not drape over the countertop or
tabletop where it can be pulled on by children or tripped over.
SAFETY INSTRUCTIONS
IMPORTANT SAFEGUARDS
POWER CORD SAFETY TIPS
1. Never pull or yank on cord or the appliance.
2. To insert plug, grasp it firmly and guide it into outlet.
3. To disconnect appliance, grasp plug and remove it from outlet.
4. Before each use, inspect the power cord for cuts and/or abrasion marks.
If any are found, this indicates that the appliance should be serviced, and
the power cord replaced. Please contact Chefman
®
Support for assistance.
5. Never wrap the cord tightly around the appliance, as this could place
undue stress on the cord where it enters the appliance and cause it to fray
and break.
DO NOT OPERATE APPLIANCE IF THE POWER CORD SHOWS
ANY DAMAGE OR IF APPLIANCE WORKS INTERMITTENTLY
OR STOPS WORKING ENTIRELY.
Do not place the appliance
on a stovetop or any other
heatable surface.
SAFETY INSTRUCTIONS
IMPORTANT SAFEGUARDS
5 6
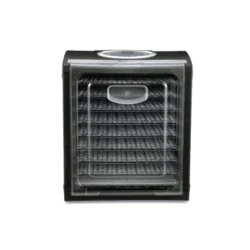
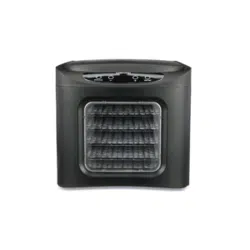
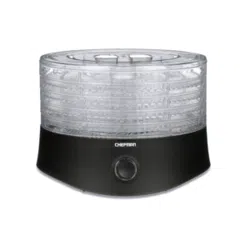
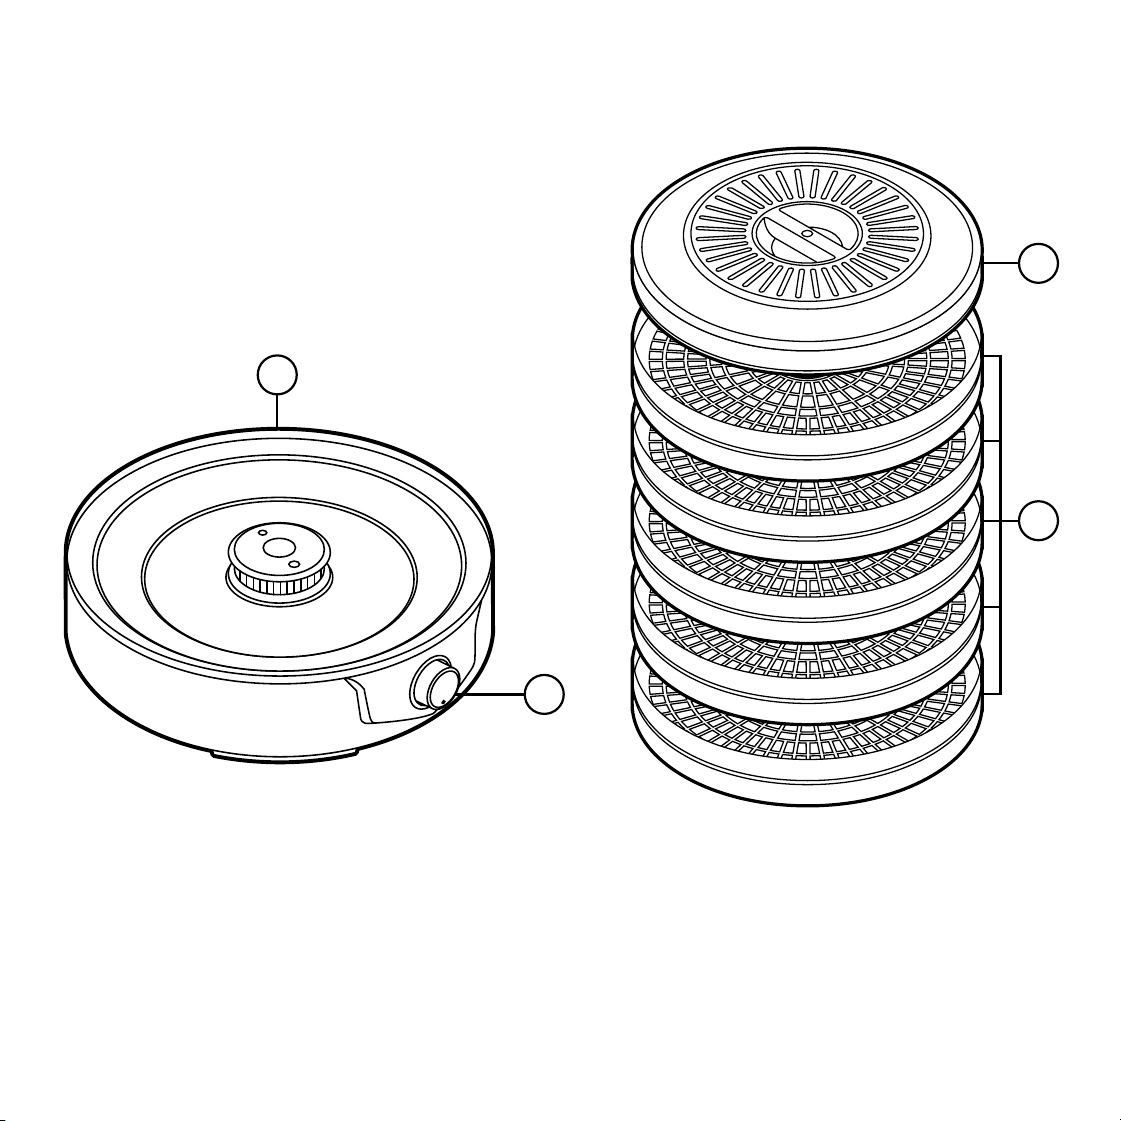
1. Base (contains heating element,
motor, and fan)
2. Control Knob
(Off/On and Temp)
3. Lid with Handle
4. Adjustable Height Drying
Trays (5)
FEATURES FEATURES
3
4
1
2
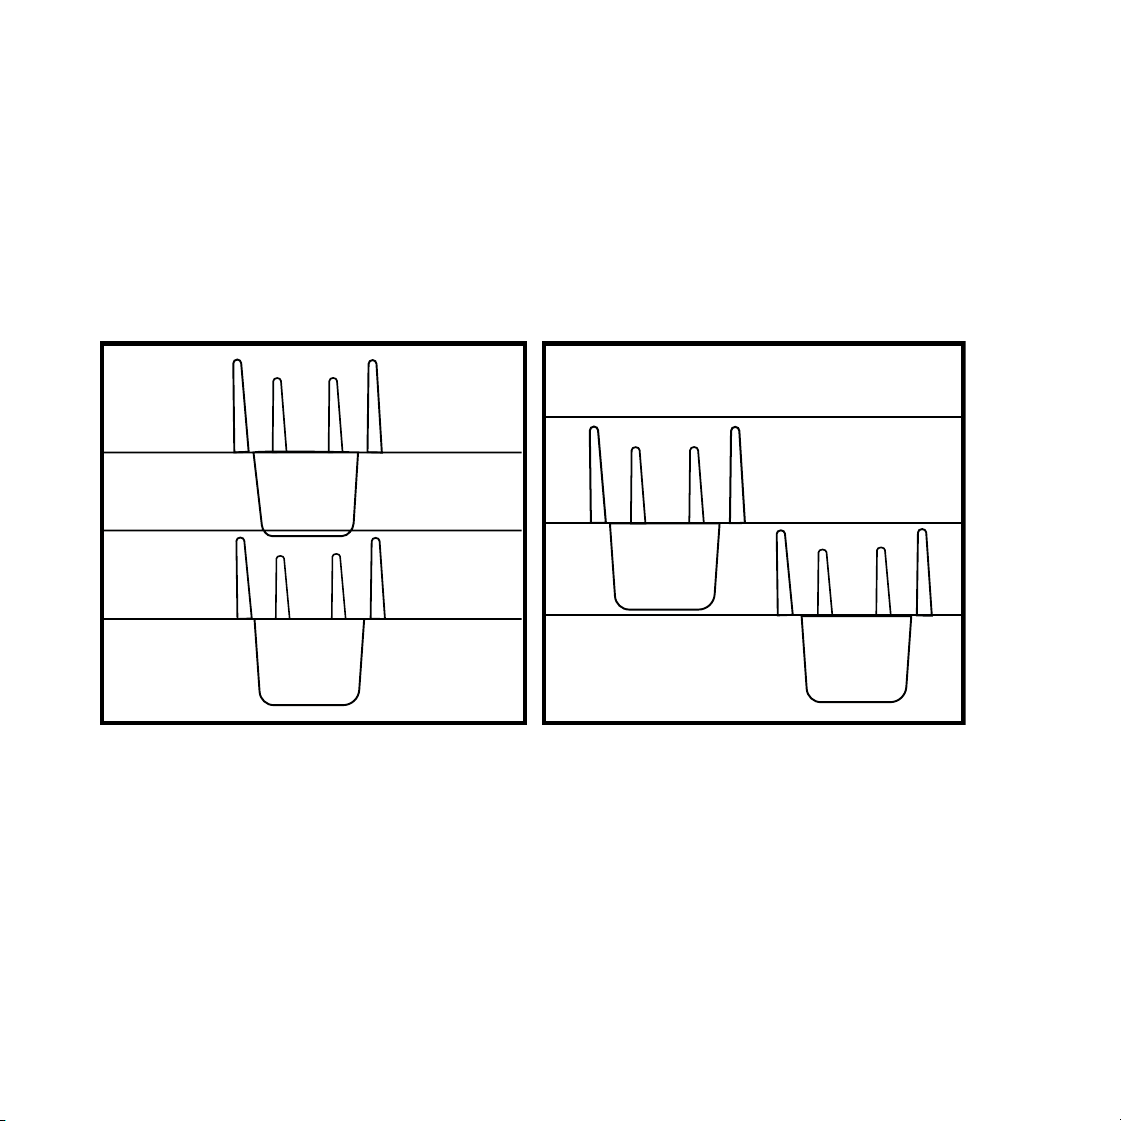
HOW TO ADJUST TRAY HEIGHT
To increase the height, align the solid plastic tab at the bottom of one tray over the
multiple, thinner tabs of the tray below it. For less height, don’t align the tabs.
MORE HEIGHT LESS HEIGHT
5 6
1. Base (contains heating element,
motor, and fan)
2. Control Knob
(Off/On and Temp)
3. Lid with Handle
4. Adjustable Height Drying
Trays (5)
FEATURES FEATURES
3
4
1
2
HOW TO ADJUST TRAY HEIGHT
To increase the height, align the solid plastic tab at the bottom of one tray over the
multiple, thinner tabs of the tray below it. For less height, don’t align the tabs.
MORE HEIGHT LESS HEIGHT

7 8
OPERATING INSTRUCTIONS OPERATING INSTRUCTIONS
BEFORE FIRST USE
1. Remove all packaging materials, such as plastic bags and foam inserts and check to
ensure that all parts and accessories are accounted for.
2. Read and remove all stickers on unit (except for rating label on bottom).
3. Wipe the trays and lid with a damp cloth. (Trays and lid are not dishwasher safe.) Wipe
the base unit with a slightly damp cloth. Never submerge the base unit in water or
wash it in the dishwasher.
4. Switch the appliance on without any food in it, and let it run for 30 minutes. (Any
smoke or smells during this time are normal and will dissipate with use.) After
30 minutes, turn the Food Dehydrator off, unplug it, and let it cool completely.
5. Rinse trays and lid one more time and dry well before storing.
HOW TO OPERATE THE 5-TRAY FOOD DEHYDRATOR
A straightforward design makes the 5-Tray Food Dehydrator a breeze to use. The base
contains a heater and fan that sends warm air through the vented trays to remove moisture
from food. Use the dehydrator in a well ventilated, warm, and dry room.
1. Prepare food for dehydrating. For fruits and vegetables, this may include a
pre-treatment, such as blanching or a dip in acidulated water to preserve texture and
color. Most meats should be cooked before dehydrating. For jerky, follow a trusted
recipe and follow food safety guidelines. NOTE: Because fruits and vegetables dried in
your food dehydrator don’t include preservatives, they will be different in appearance
from most store-bought dried fruits.
2. Place the dehydrator’s base on a dry, level, heatproof surface, away from any
flammable objects.
3. Place prepared foods on trays in a single layer. Note that for trays to stack, the food
must be placed on the side of the tray that has a rim around the hole in the center. You
do not have to fill all five trays with food. NOTE: Never use oil or nonstick spray on the
trays.
4. Stack trays on base from bottom to top. The height is adjustable. To increase the
height, align the solid plastic tab at the bottom of one tray over the multiple, thinner
tabs of the tray below it. For less height, don’t align the tabs. NOTE: For best results,
stack at least three trays when dehydrating, even if some are empty.
5. Place lid over top tray and plug the Food Dehydrator in.
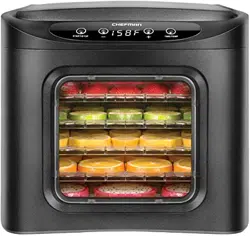
6. Turn the dial clockwise to turn on the heater and fan and to set the temperature
between 95˚F and 158˚F. The LED ring around the dial will light up when the Food
Dehydrator is on.
WARNING: Do not run the appliance for more than 20 hours in one single use. After 20
hours, turn the Food Dehydrator off, unplug it, and allow it to cool for at least 2 hours
before operating again.
7. During dehydrating, periodically rotate trays, carefully moving the bottom tray to
the top tray position. The foods on the bottom tray closest to the heat and fan will
dehydrate quicker.
NOTE: Many variables affect drying time including the size and composition of the
food and the ambient humidity. Check on foods regularly to ensure you get the results
you’re after.
8. When finished dehydrating, turn the Food Dehydrator off and allow food to cool
before storing airtight. NOTE: Be sure to follow food safety guidelines when storing
dehydrated foods.

7 8
OPERATING INSTRUCTIONS OPERATING INSTRUCTIONS
BEFORE FIRST USE
1. Remove all packaging materials, such as plastic bags and foam inserts and check to
ensure that all parts and accessories are accounted for.
2. Read and remove all stickers on unit (except for rating label on bottom).
3. Wipe the trays and lid with a damp cloth. (Trays and lid are not dishwasher safe.) Wipe
the base unit with a slightly damp cloth. Never submerge the base unit in water or
wash it in the dishwasher.
4. Switch the appliance on without any food in it, and let it run for 30 minutes. (Any
smoke or smells during this time are normal and will dissipate with use.) After
30 minutes, turn the Food Dehydrator off, unplug it, and let it cool completely.
5. Rinse trays and lid one more time and dry well before storing.
HOW TO OPERATE THE 5-TRAY FOOD DEHYDRATOR
A straightforward design makes the 5-Tray Food Dehydrator a breeze to use. The base
contains a heater and fan that sends warm air through the vented trays to remove moisture
from food. Use the dehydrator in a well ventilated, warm, and dry room.
1. Prepare food for dehydrating. For fruits and vegetables, this may include a
pre-treatment, such as blanching or a dip in acidulated water to preserve texture and
color. Most meats should be cooked before dehydrating. For jerky, follow a trusted
recipe and follow food safety guidelines. NOTE: Because fruits and vegetables dried in
your food dehydrator don’t include preservatives, they will be different in appearance
from most store-bought dried fruits.
2. Place the dehydrator’s base on a dry, level, heatproof surface, away from any
flammable objects.
3. Place prepared foods on trays in a single layer. Note that for trays to stack, the food
must be placed on the side of the tray that has a rim around the hole in the center. You
do not have to fill all five trays with food. NOTE: Never use oil or nonstick spray on the
trays.
4. Stack trays on base from bottom to top. The height is adjustable. To increase the
height, align the solid plastic tab at the bottom of one tray over the multiple, thinner
tabs of the tray below it. For less height, don’t align the tabs. NOTE: For best results,
stack at least three trays when dehydrating, even if some are empty.
5. Place lid over top tray and plug the Food Dehydrator in.
6. Turn the dial clockwise to turn on the heater and fan and to set the temperature
between 95˚F and 158˚F. The LED ring around the dial will light up when the Food
Dehydrator is on.
WARNING: Do not run the appliance for more than 20 hours in one single use. After 20
hours, turn the Food Dehydrator off, unplug it, and allow it to cool for at least 2 hours
before operating again.
7. During dehydrating, periodically rotate trays, carefully moving the bottom tray to
the top tray position. The foods on the bottom tray closest to the heat and fan will
dehydrate quicker.
NOTE: Many variables affect drying time including the size and composition of the
food and the ambient humidity. Check on foods regularly to ensure you get the results
you’re after.
8. When finished dehydrating, turn the Food Dehydrator off and allow food to cool
before storing airtight. NOTE: Be sure to follow food safety guidelines when storing
dehydrated foods.

9 10
1. Before cleaning, turn off the unit, unplug it, and let it cool.
2. Wash the trays and lid of the appliance in warm soapy water with a soft sponge.
Rinse and dry thoroughly. Trays and lid are not dishwasher safe.
3. Wipe the base clean with a slightly damp cloth. Do not use abrasive cleaners like steel
wool pads, as they may damage the finish. Never submerge the base unit in water or
wash it in the dishwasher.
• When dehydrating foods, follow a recipe or directions from a trusted source.
• For best color and flavor, blanch most vegetables prior to dehydrating them.
• Most fruits benefit from pretreating before dehydrating to keep them from
oxidizing as well as to keep bacteria at bay. Soak pieces in an equal mix of water
and lemon juice or use a commercial pretreatment, which are usually sold in
supermarkets near the canning supplies.
• To easily remove seeds or pits from fruits like grapes and cherries without making
a juicy mess, dehydrate the fruits about halfway and then pop seeds out. This
prevents juice from dripping out.
• When correctly dried, most of your fruits and vegetables will be soft and pliable,
without any damp spots.
• Cut foods into small pieces to dehydrate.
• Set lower temperatures for thin/small pieces of food or for a small load of food.
Set higher temperatures for drying thick/big pieces of food and large loads.
• Toward the end of drying time, lower the temperature to make it easier to control
the final moisture level in the food.
• Follow all food safety recommendations for dehydrating meat, poultry, and fish
safely. Less fatty proteins dehydrate better.
• Keep notes and records of your dehydrating experiences to learn best practices.
CLEANING AND MAINTENACEDEHYDRATING TIPS

11 12
NOTES NOTES

11 12
NOTES NOTES

13 14
Our products are backed by a limited 1-year warranty. To register, follow the
instructions on the Chefman
®
Warranty Registration page in this User Guide.
We offer a limited 1-year warranty from the date of purchase. This warranty is void
without proof of purchase within the USA, Canada, or Mexico. Service centers and
retail stores do not have the right to alter or change the Terms and Conditions of this
warranty.
WHAT THE WARRANTY COVERS
• Manufacturer Defects
Chefman
®
products are warranted against defects in material and workmanship
for a period of 1 year from the date of purchase when used in accordance with the
Chefman
®
User Guide.
• Qualified Replacements
If your product does not work as it should, we will send you a new one. If the product
is no longer available, we will replace it with one that is comparable.
THIS WARRANTY DOES NOT COVER
• Misuse - Damage that occurs from neglectful or improper use of products; damage
that occurs as a result of usage with incompatible voltage. See Safety Instructions for
information on proper use.
• Poor Maintenance - General lack of proper care. See Cleaning and Maintenance for
information on proper maintenance.
• Commercial Use - Damage that occurs from commercial use.
• Altered Products - Damage that occurs from alterations or modifications by any
entity other than Chefman
®
; removal of rating label.
• Catastrophic Events - Damage that occurs from fire, floods, or natural disasters.
• Loss of Interest - Claims of loss of interest or enjoyment.
TERMS AND CONDITIONS
Limited Warranty
TERMS AND CONDITIONS
Limited Warranty
15 16
For product information, visit chefman.com
OTHER LIMITATIONS: ALL WARRANTIES OF ANY KIND WHATSOEVER, EXPRESS, IMPLIED AND
STATUTORY, ARE HEREBY DISCLAIMED. ALL IMPLIED WARRANTIES OF MERCHANTABILITY AND
FITNESS FOR A PARTICULAR PURPOSE ARE HEREBY DISCLAIMED, PROVIDED THAT IF ANY IMPLIED
WARRANTIES OF ANY KIND IS REQUIRED BY ANY JURISDICTION, INCLUDING MERCHANTABILITY
AND FITNESS FOR A PARTICULAR PURPOSE, THE DURATION OF SUCH IMPOSED IMPLIED
WARRANTY IS LIMITED TO ONE (1) YEAR. THIS WARRANTY DOES NOT COVER, AND CHEFMAN
®
SHALL NOT BE LIABLE FOR, INCIDENTAL, INDIRECT, SPECIAL OR CONSEQUENTIAL DAMAGES,
INCLUDING WITHOUT LIMITATION, DAMAGE TO, OR LOSS OF USE OF THE PRODUCT, OR LOST SALES
OR PROFITS OR DELAY OR FAILURE TO PREFORM THIS WARRANTY OBLIGATION. THE REMEDIES
PROVIDED HEREIN ARE THE EXCLUSIVE REMEDIES UNDER THIS WARRANTY, WHETHER BASED ON
CONTRACT, TORT OR OTHERWISE.
This Warranty gives you specific legal rights, and you may also have other rights that vary from state
to state or province to province. Some states or provinces do not allow the exclusions or limitations set
forth in this Warranty, so the above limitations or exclusions may not apply to you depending on the
jurisdiction of purchase.
Chefman
®
is a registered trademark of RJ BRANDS, LLC.
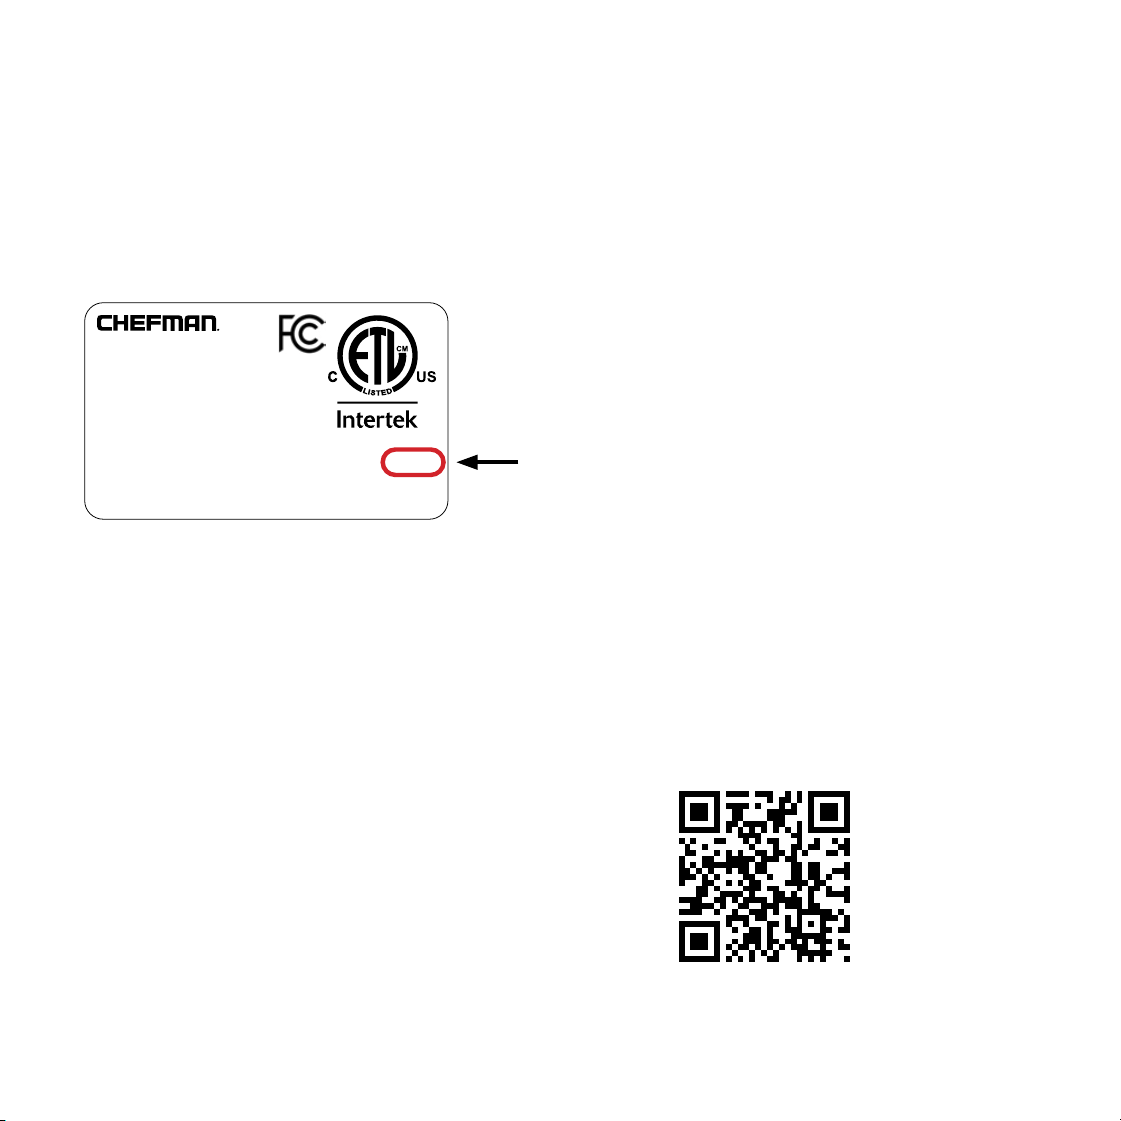
Register your product to add an additional 3 months to your warranty.
What do I Need to Register my Product
•Contact Information
•Model Number
•Proof of Purchase
(online confirmation, receipt, gift receipt)
•Date code
How Do I Register my Product?
We offer two convenient ways to access the Chefman
®
registration form:
1. Visit chefman.com/register.
2. Scan the QR code below to access site:
MADE IN CHINA/FABRIQUE EN CHINE
AC ONLY/ AC SEULEMENT
DATE CODE:
ACCESS CODE:
Model/Modele: RJ25-C
Conveyor toaer
120v~60hz 1800W
CONFORMS TO UL STD. 1026
CERTIFIED TO CSA STD.C22.2 No.64
CAUTION: DO NOT IMMERSE IN WATER
ATTENTION: NE PAS PLONGER DANS L’EAU
WARNING: TO PREVENT ELECTRIC SHOCK,
UNPLUG BEFORE CLEANING
PRÉAVIS: POUR ÉVITER LES CHOCS ÉLECTRIQUES,
DÉBRANCHEZ L’APPAREIL AVANT DE L’UTILISER
READ INSTRUCTIONS BEFORE USING
LISEZ LES INSTRUCTIONS AVANT DE L’UTILISER
HOUSEHOLD USE ONLY
POUR USAGE DOMESTIQUE SEULEMENT
0000000
0000
XXXXXXXX
CHEFMAN
®
WARRANTY REGISTRATION CHEFMAN
®
WARRANTY REGISTRATION
NOTE: Label depicted here is an example.

15 16
For product information, visit chefman.com
OTHER LIMITATIONS: ALL WARRANTIES OF ANY KIND WHATSOEVER, EXPRESS, IMPLIED AND
STATUTORY, ARE HEREBY DISCLAIMED. ALL IMPLIED WARRANTIES OF MERCHANTABILITY AND
FITNESS FOR A PARTICULAR PURPOSE ARE HEREBY DISCLAIMED, PROVIDED THAT IF ANY IMPLIED
WARRANTIES OF ANY KIND IS REQUIRED BY ANY JURISDICTION, INCLUDING MERCHANTABILITY
AND FITNESS FOR A PARTICULAR PURPOSE, THE DURATION OF SUCH IMPOSED IMPLIED
WARRANTY IS LIMITED TO ONE (1) YEAR. THIS WARRANTY DOES NOT COVER, AND CHEFMAN
®
SHALL NOT BE LIABLE FOR, INCIDENTAL, INDIRECT, SPECIAL OR CONSEQUENTIAL DAMAGES,
INCLUDING WITHOUT LIMITATION, DAMAGE TO, OR LOSS OF USE OF THE PRODUCT, OR LOST SALES
OR PROFITS OR DELAY OR FAILURE TO PREFORM THIS WARRANTY OBLIGATION. THE REMEDIES
PROVIDED HEREIN ARE THE EXCLUSIVE REMEDIES UNDER THIS WARRANTY, WHETHER BASED ON
CONTRACT, TORT OR OTHERWISE.
This Warranty gives you specific legal rights, and you may also have other rights that vary from state
to state or province to province. Some states or provinces do not allow the exclusions or limitations set
forth in this Warranty, so the above limitations or exclusions may not apply to you depending on the
jurisdiction of purchase.
Chefman
®
is a registered trademark of RJ BRANDS, LLC.
Register your product to add an additional 3 months to your warranty.
What do I Need to Register my Product
•Contact Information
•Model Number
•Proof of Purchase
(online confirmation, receipt, gift receipt)
•Date code
How Do I Register my Product?
We offer two convenient ways to access the Chefman
®
registration form:
1. Visit chefman.com/register.
2. Scan the QR code below to access site:
MADE IN CHINA/FABRIQUE EN CHINE
AC ONLY/ AC SEULEMENT
DATE CODE:
ACCESS CODE:
Model/Modele: RJ25-C
Conveyor toaer
120v~60hz 1800W
CONFORMS TO UL STD. 1026
CERTIFIED TO CSA STD.C22.2 No.64
CAUTION: DO NOT IMMERSE IN WATER
ATTENTION: NE PAS PLONGER DANS L’EAU
WARNING: TO PREVENT ELECTRIC SHOCK,
UNPLUG BEFORE CLEANING
PRÉAVIS: POUR ÉVITER LES CHOCS ÉLECTRIQUES,
DÉBRANCHEZ L’APPAREIL AVANT DE L’UTILISER
READ INSTRUCTIONS BEFORE USING
LISEZ LES INSTRUCTIONS AVANT DE L’UTILISER
HOUSEHOLD USE ONLY
POUR USAGE DOMESTIQUE SEULEMENT
0000000
0000
XXXXXXXX
CHEFMAN
®
WARRANTY REGISTRATION CHEFMAN
®
WARRANTY REGISTRATION
NOTE: Label depicted here is an example.

17
®