Loading ...
Loading ...
Loading ...
6ninjakitchen.com
6ninjakitchen.com
USING THE CONTROL PANEL
1 With the wae maker closed, plug it in
and turn it on by adjusting the shade
selection dial to your desired shade
setting. The red LED light will illuminate,
indicating the wae maker is preheating.
2 The green LED light will illuminate when
the unit is preheated. Fill the portion
cup with batter between the minimum
fill line (/ cup) and top rim, then pour
prepared batter into the top spout of
the unit in one quick pour. Cooking will
automatically begin after batter is added
(the red LED light will illuminate to signal
cooking has begun). Batter will not
initially completely fill waffle maker. It will
rise, filling the cavity, through cooking.
3 The wae is done cooking when the
green LED light illuminates and the
unit beeps. Push the lock button to
open the wae maker and remove the
wae with silicone-tipped tongs or
other non-metal cooking utensil.
NOTE: Allow unit to fully preheat prior
to adding batter.
NOTE: Specialty is not available on all models.
NOTE: The exact amount of batter
needed will vary depending on batter
type, thickness and leavening agents
used. We recommend starting with
filling your Precision Pour Cup to the
minimum fill line and adjusting from
there. DO NOT pour more than one full
scoop (1 cup) of batter at one time.
TIP: If your wae batter does not flow
smoothly into the wae maker, mix in a
tablespoon of water or milk and try again.
Maximum Fill Line
Minimum Fill Line
CLEANING
The unit should be cleaned thoroughly
after every session.
1 Unplug the wae maker and allow it to
cool completely.
2 Using a damp soapy cloth clean the
wae plates, then wipe clean with a
clean damp cloth and dry thoroughly.
Do not submerge the main unit in water
or run under a faucet.
3 Avoid using metal cooking instruments
or abrasives while cleaning to avoid
damaging the wae plates.
4 To clean the outside of the wae
maker,use a damp cloth. For best
results, wipe up wet batter before it
dries completely.
5 To clean between the narrow gaps in
the wae maker, ensure it is unplugged
and scrap batter out using a damp cloth
wrapped around the point of a non-
metal utensil.
USING THE WAFFLE MAKER
NOTE: To avoid the risk of overfilling
your wae maker, DO NOT pour more
than 1 cup of batter into the wae
maker at once.
7
ninjakitchen.com
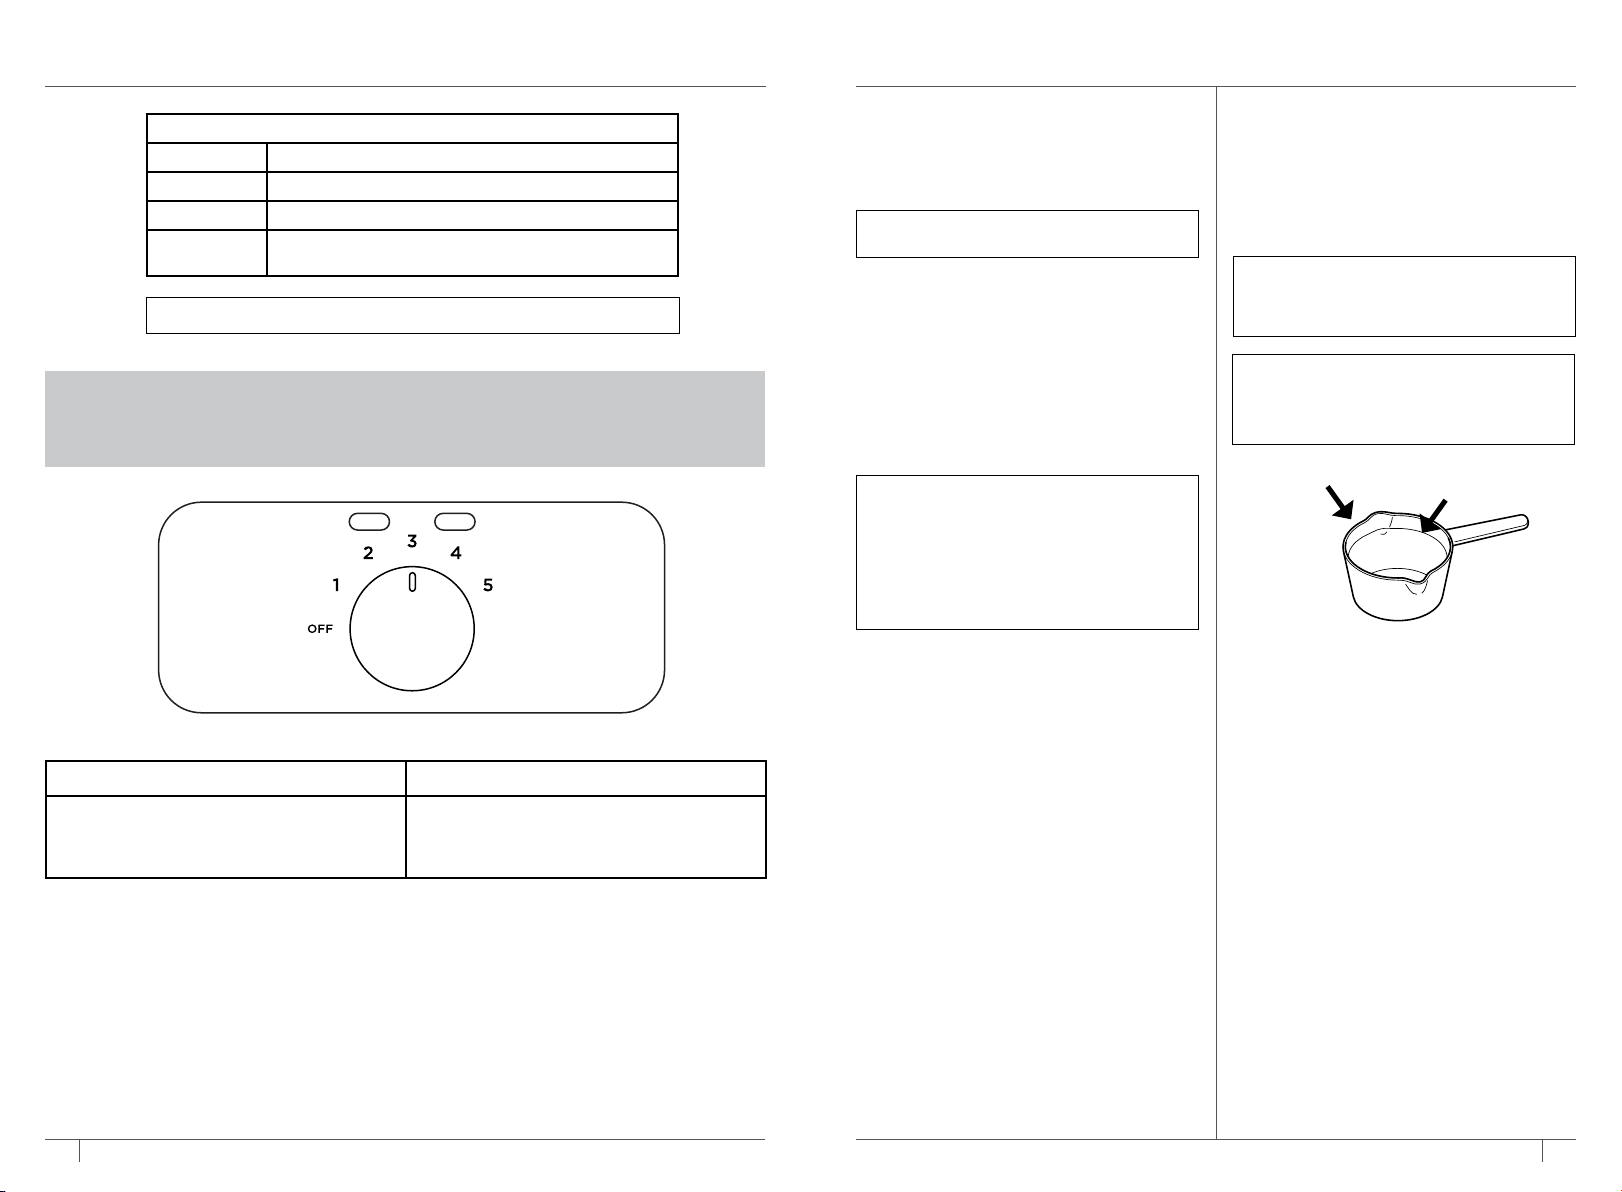
SHADE SELECT DIAL
1–2 Light brown and slightly crispy
3Golden brown and crispy
4–5 Dark brown and extra crunchy
Specialty Gently cook batters with higher sugar content
like banana bread, cake mix or brownie waes.
Indicator lights will represent multiple stages
throughout the cooking process.
Reference guide below.
GREEN INDICATOR LIGHT RED INDICATOR LIGHT
Indicates preheating is complete.
OR
Indicates cooking is complete.
Indicates wae maker is preheating.
OR
Indicates waes are cooking.
4 Close the wae maker by pivoting the
front up until it latches closed.
5 The waffle maker will automatically
start preheating after each cycle.
Wait for the green LED to indicate
the preheat cycle is complete before
starting to cook the next waffle.
Loading ...
Loading ...