Loading ...
Loading ...
Loading ...
Installation instructions en
13
¡ Diameter of 120mm corresponds to ap-
prox.113cm².
¡ Use sealing strips for different pipe diameters.
¡ Do not use any flat ducts with sharp bends.
Round pipes
Use round pipes with an inner diameter of 150mm (re-
commended) or at least 120mm.
12.9 Instructions for the air extraction mode
For air extraction mode, a one-way flap should be in-
stalled.
Notes
¡ If a one-way flap is not included with the appliance,
one can be ordered from a specialist retailer.
¡ If the exhaust air is conveyed through the external
wall, a telescopic duct should be used.
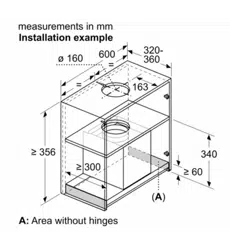
12.10 Installation
Checking the units
1.
Check whether the fitted unit is level and has suffi-
cient load-bearing capacity.
The maximum weight of the appliance is 12kg.
Do not place items weighing more than 10kg on
each side of the appliance.
Note:Note the furniture manufacturer's specifica-
tions with regard to the load-bearing capacity of the
fitted unit.
2.
Ensure that the fitted unit is heat-resistant up to
90°C.
3.
Ensure that the fitted unit is still stable after the cut-
outs have been made.
Preparing the units
Requirement:The unit is suitable for the installation.
1.
Cover the hob to prevent damage.
2.
Detach the cabinet door.
3.
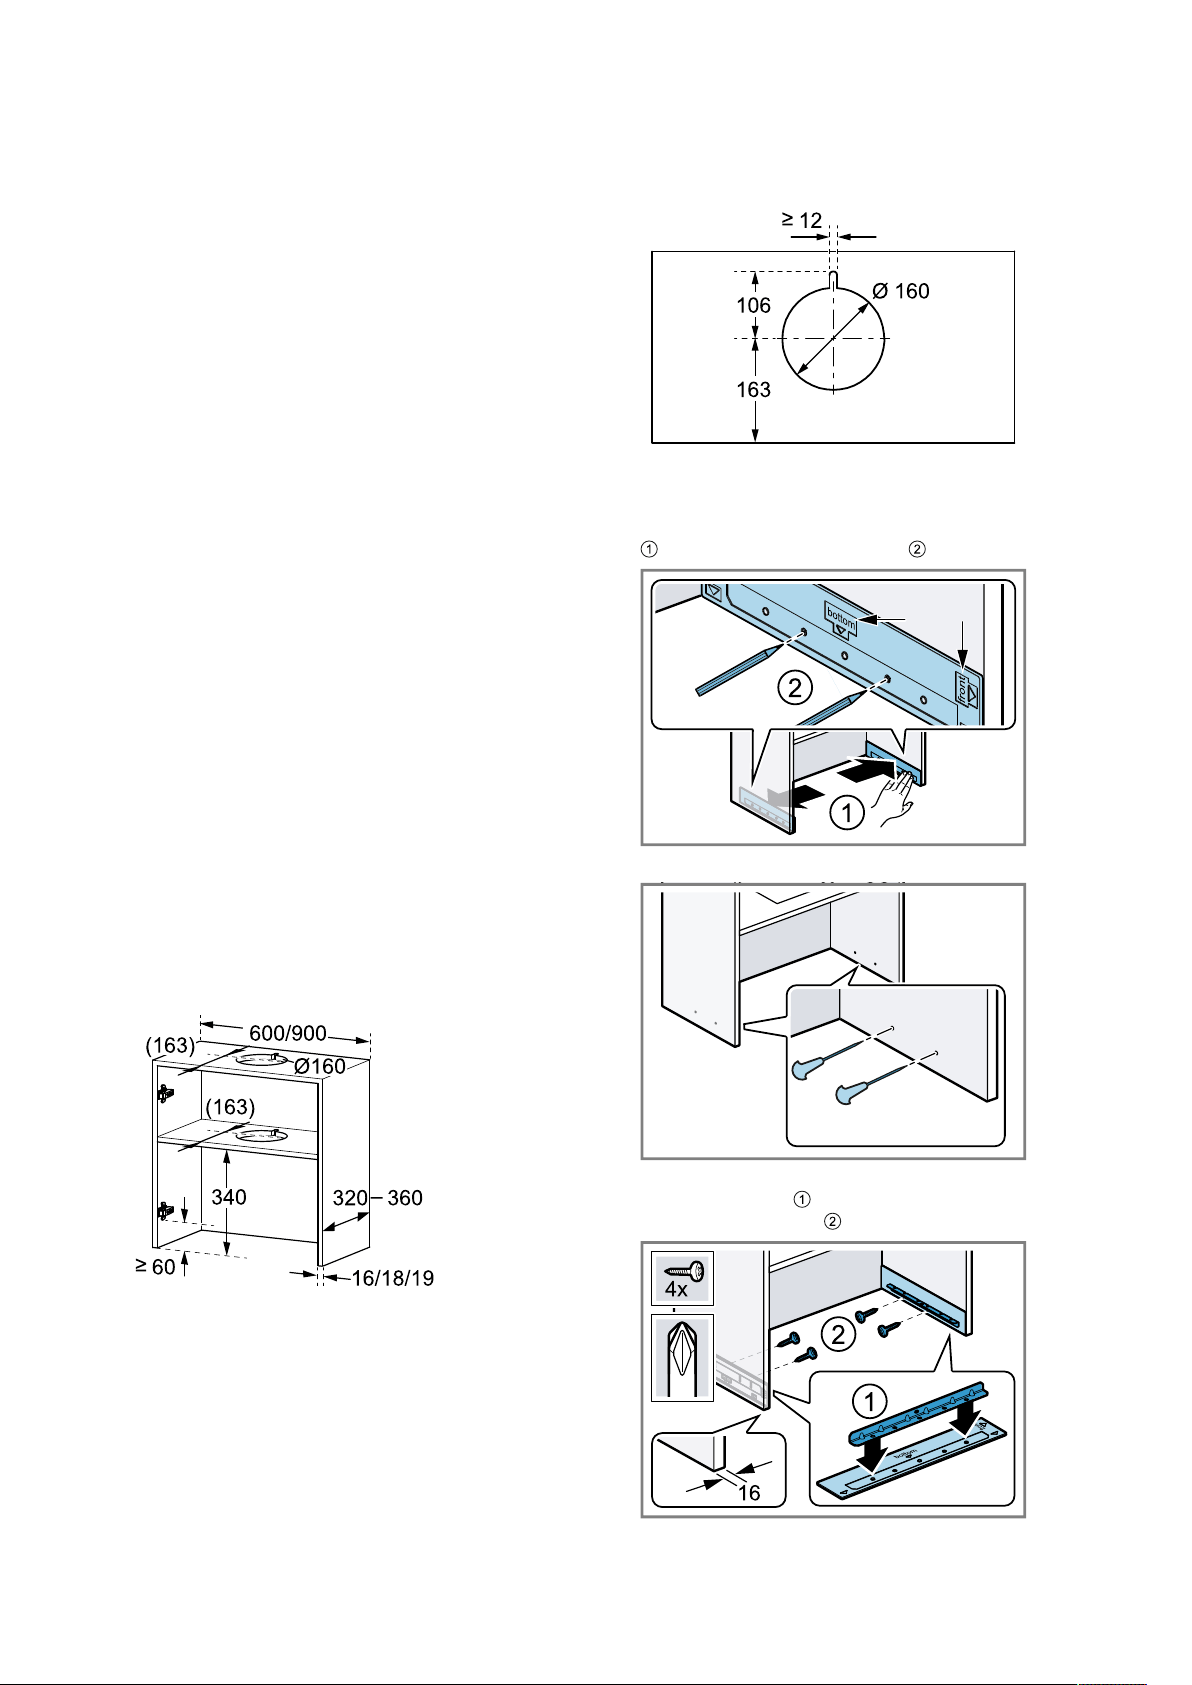
Make the cut-out for the exhaust pipe in the cabinet.
4.
Make the cut-out for the exhaust pipe in the interme-
diate floor.
‒ Make the recess for the mains connection.
5.
Ensure that the fitted unit is still stable after the cut-
outs have been made.
6.
Place the installation aid on the inside of the cabinet
and mark the fixing points .
7.
Use a bradawl to mark the fixing points.
8.
For a wall thickness of 16mm: Place the installation
aids on the rails and screw the rails into the side
walls of the cabinet .
PZ2
Loading ...
Loading ...
Loading ...