Loading ...
Loading ...
Loading ...

19
Congratulations on purchasing this
Bosch appliance. You have acquired
a high-quality product that will bring
you a lot of enjoyment.
This instruction manual describes the
following models: TKM600... series
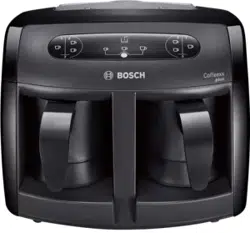
Appliance parts
X Fig. A
1 ON/OFF switch (on the side)
2 Supply cord
3 Water tank
4 Water tank insert
5 Water tank lid
6 Control panel
7 Cooking detection sensor
8 Nozzle
9 Left cover of heating surface
10 Right cover of heating surface
11 Heating surfaces
12 Coee pots
13 Measuring spoon
14 Left 1cup coee option
15 Left 2cups coee option
14+15 Left 3cups coee option
(touching at the same time)
16 Cup size controller
17 Small cup indicator
18 Medium cup indicator
19 Large cup indicator
20 Water (level) indicator
21 Right 1cup coee option
22 Right 2cups coee option
21+22 Right 3cups coee option
(touching at the same time)
Before rst use
Before using your appliance for the rst
time, wash all accessories in warm water
with a mild detergent. Please do not use
cleaning tools that may cause scratches.
During rst use it is recommended to wash
coee pots, water tank and spoon hand
wash is recommended. Afterwards, the
washed accessories should be rinsed in
clean water.
Fill water tank up to MAX and wait 10 min.
For the rst usage touch 3cups cooking
option on both sides and wait until the end
boiling. Pour boiled water. Place the empty
coee pots. Repeat it three times.
Preparing the appliance for
operation
In order to prepare your appliance for
operation, follow the instructions below.
■ Connect the appliance to a suitable
power source (data on the nameplate).
(Pic. 1)
■ Press the ON/OFF switch (1) and wait
a few seconds until the appliance is
ready to operate. Icons on the display
will turn on. (Pic. 2)
■ Take out the water tank (3) from the
appliance or leave it in the appliance
and pour with water. (Pic. 3-4)
■ Open the lid (5) and ll the water tank
(3) with appropriate amount of fresh,
cold water between min and max levels.
(Pic. 5)
Info: You can check the water level by
looking on the tank (3) (min max level).
Info: When the water level is above min.
level, water indicator
(20) lights up blue.
Info: When the water level is under min.
level the appliance will not operate and will
not brew coee, water indicator
(20)
lights up blinking red. In this case, you must
add water to the water tank (3).
Caution: Max level should not be passed
when water is lled. Exceeding the max
level will cause water leakage under the
device.
Caution: While pouring water directly into
the water tank (3) mounted on the device
(without removing the water tank) be careful
not to spill water on the appliance.
■ Close the lid (5) and place the lled water
tank (3) on the appliance. After placing
the water tank correctly please push the
tank down to be sure it tted properly.
(Pic. 6)
en
Loading ...
Loading ...
Loading ...
