Loading ...
Loading ...
Loading ...
14
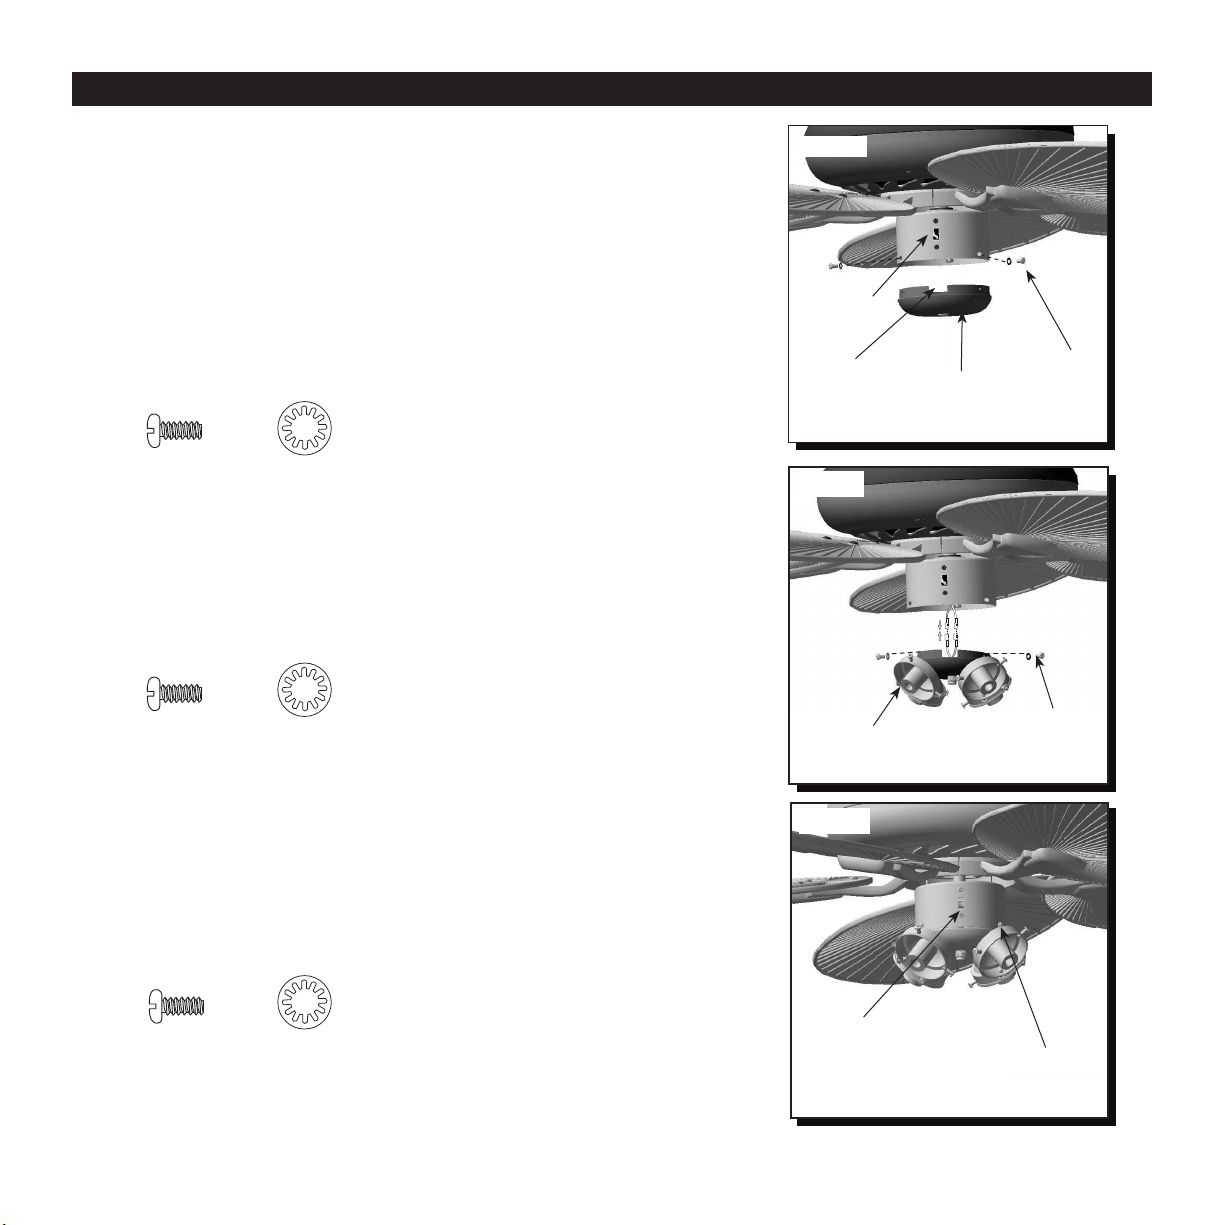
LIGHT KIT INSTALLATION
23. Remove three screws and washers from the light
kit. Connect the white wire from the switch housing
to the white wire from the light kit. Connect the
black wire from the upper switch housing to the
black wire from the light kit. Make sure plugs
connect tightly (Fig. 23).
24. Align holes in the light kit with holes in upper switch
housing. Re-insert screws and washers that were
previously removed. Use a Phillips screwdriver (not
included) to secure all screws (Fig. 24).
Note: The light kit should be oriented so its notch is
aligned with the reverse switch.
Fig. 23
Fig. 24
Screw and
Washer
Reverse
Switch
Screw and
washer
Screw
Washer
Screw
Screw
Washer
Washer
22. (Optional) To install the fan without a light kit:
Remove the three screws and washers from the
optional cap. Align holes in optional cap with holes
in switch housing. Re-insert screws and washers
that were previously removed. Use a Phillips
screwdriver (not included) to secure all screws
(Fig. 22).
Note: The optional cap should be oriented so its notch
is aligned with the reverse switch.
Proceed to step 27.
Fig. 22
Optional
Cap
Reverse
Switch
Notch
Light Kit
Screw
and
Washer
Loading ...
Loading ...
Loading ...