Loading ...
Loading ...
Loading ...
9 ENGLISH
ASSEMBLY
CAUTION: Always be sure that the tool is
switched o and the battery cartridge is removed
before carrying out any work on the tool.
Installing or removing driver bit/
socket bit
Optional accessory
12 mm
(15/32”)
9 mm
(3/8”)
Use only the driver bit/socket bit shown in the gure. Do
not use any other driver bit/socket bit.
1 2
► 1. Driver bit 2. Sleeve
To install the driver bit, pull the sleeve in the direction of
the arrow and insert the driver bit into the sleeve as far
as it will go.
Then release the sleeve to secure the driver bit.
To remove the driver bit, pull the sleeve in the direction
of the arrow and pull the driver bit out.
NOTE: If the driver bit is not inserted deep enough
into the sleeve, the sleeve will not return to its original
position and the driver bit will not be secured. In this
case, try re-inserting the bit according to the instruc-
tions above.
NOTE: When it is dicult to insert the driver bit, pull
the sleeve and insert it into the sleeve as far as it will
go.
NOTE: After inserting the driver bit, make sure that it
is rmly secured. If it comes out, do not use it.
Installing hook
CAUTION: When installing the hook, always
secure it with the screw rmly. If not, the hook
may come o from the tool and result in the personal
injury.
CAUTION: Use the hanging/mounting parts
for their intended purposes only. Using for unin-
tended purpose may cause accident or personal
injury.
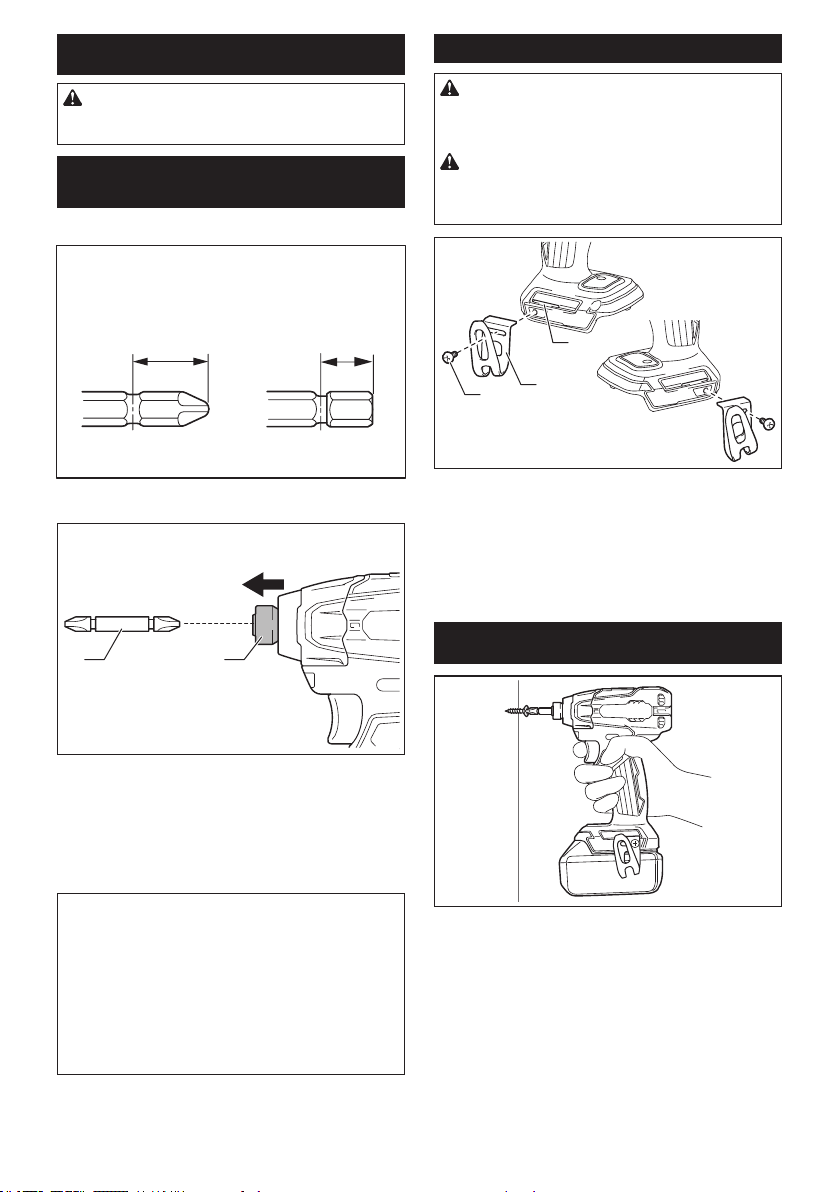
3
2
1
► 1. Groove 2. Hook 3. Screw
The hook is convenient for temporarily hanging the tool.
This can be installed on either side of the tool. To install
the hook, insert it into a groove in the tool housing on
either side and then secure it with a screw. To remove,
loosen the screw and then take it out.
OPERATION
The proper fastening torque may dier depending upon
the kind or size of the screw/bolt, the material of the
workpiece to be fastened, etc. The relation between fas-
tening torque and fastening time is shown in the gures.
Loading ...
Loading ...
Loading ...