
Loading ...
Loading ...
Loading ...
English
9
1
2
Fig. G
3
Variable Speed Trigger (Fig. H)
In addition to the variable speed dial, the material's rate of
flow is also controlled with a variable speed trigger.
1. Squeeze the trigger switch
1
to turn the toolon.
nOTE: The further the trigger is depressed the faster the
rate offlow.
2. Release the trigger switch to turn the tool off.
2
1
Fig. H
Trigger Switch Lock-off (Fig. H)
Your tool is equipped with a trigger switch lock-off
2
to
safeguard against inadvertent release ofmaterial.
1. To lock the trigger switch, push trigger switch lock-
off
2
up. The tool will not operate with the switch in
the lockedposition.
2. To unlock the trigger switch, push the trigger switch
lock-offdown.
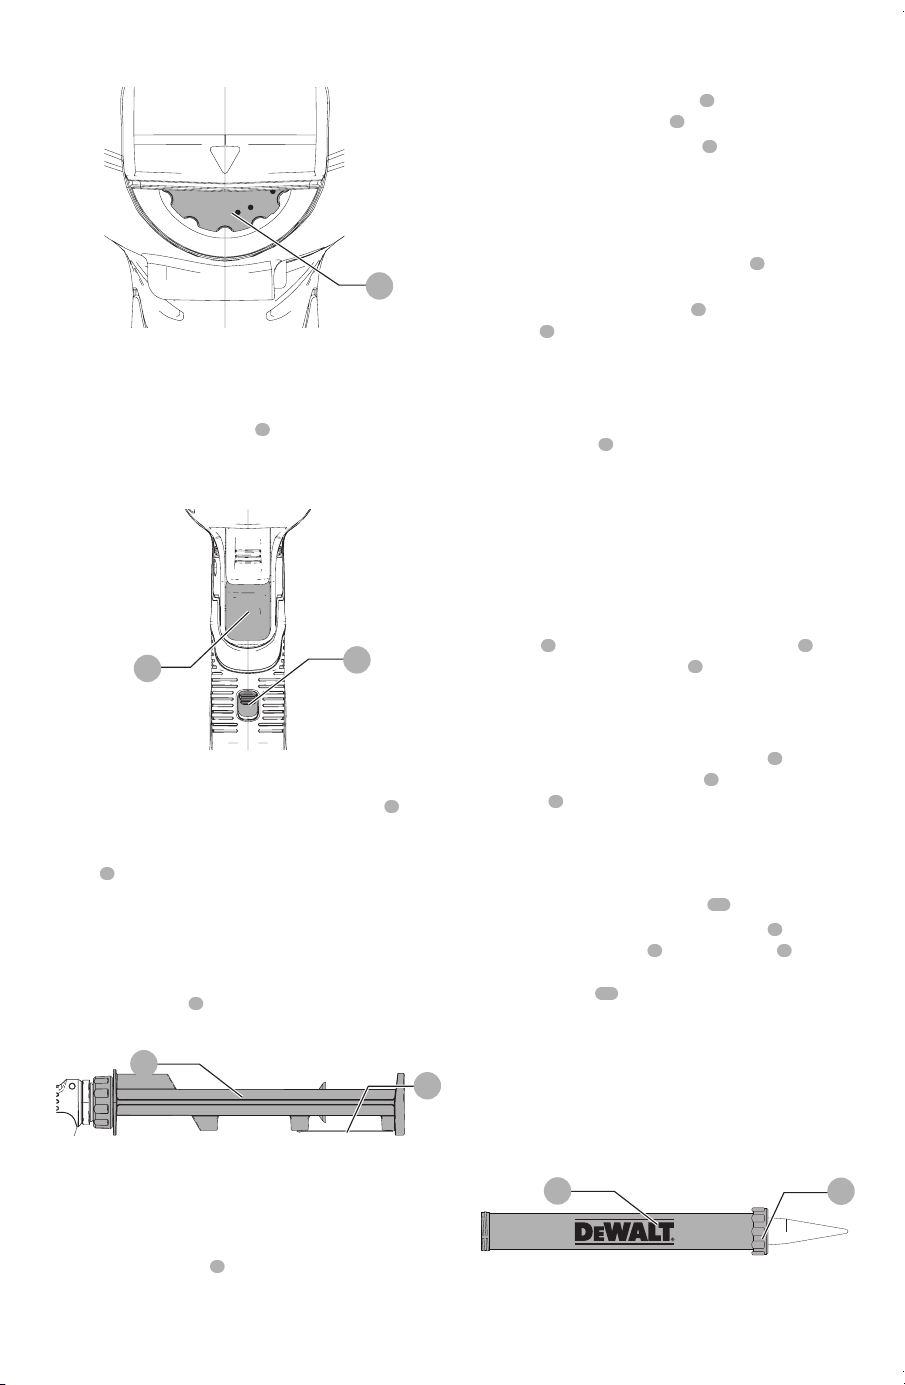
Rotating Cartridge Holder (Fig. I)
The cartridge holder
8
rotates 360˚ to apply material at
anyangle.
Fig. I
8
9
Plunger Rod Handle (Fig. A)
WARNING: To reduce the risk of serious personal
injury, DO NOT use the plunger rod handle as a hook
to suspend objectsfrom.
The plunger rod handle
4
may be used to suspend tool
from a stable location when not in use or for storage.
To Adjust Plunger Rod (Fig. A)
1. To manually adjust plunger rod
5
, press and hold the
plunger rod release trigger
6
.
2. Push or pull plunger rod handle
4
to desirableposition.
3. Release plunger rod releasetrigger.
To Insert Material
Cartridge Holder (Fig. A, K)
1. Ensure that the proper cartridge holder
8
is
installedproperly.
2. Use the trigger switch lock-off
2
to lock trigger
switch
1
.
3. Trim nozzle end of the caulk/adhesive tube (Fig.K).
Small openings require more force to push the material
possibly affecting batterylife.
4. Break inner seal of caulking tube or adhesive material
using the poker
9
located on the under side of the
cartridgeholder.
NOTICE: If the inner seal is not broken, material could be
forced out through the rear of the tube and damage thetool.
NOTICE: Keep plunger rod, cartridge holder and cartridge
clean of all material. Retracting a plunger rod that is covered
with dried material may damage the internal parts of the tool
and cause misalignment oftube.
5. Securely hold the tool, press plunger rod release
trigger
6
to declutch and free the plunger rod
5
.
Using the plunger rod handle
4
, pull the plunger rod
back to allow the caulk/adhesive tube to fit inside the
cartridgeholder.
6. Insert caulk/adhesivetube.
7. Press and hold plunger rod release trigger
6
while
pushing the plunger rod handle
4
forward until the
plunger
7
is against thetube.
8. Release the plunger rod releasetrigger.
9. Rotate cartridge holder to desiredangle.
Sausage Holder (Fig. A, J, K)
1. Unscrew and remove nozzle cap
13
. andnozzle.
2. Press and hold plunger rod release trigger
6
. Using
the plunger rod handle
4
, pull plunger rod
5
back
to allow the caulk/adhesive casing to fit inside the
sausageholder
12
.
3. Insert sausage pack into sausage holder and cut casing
(closest end to the nozzle) according to adhesive
manufacturer's instructions.
iMPORTAnT: This sausage holder is designed to be
used only WiTh sausage packs. DO nOT remove caulk/
adhesive material from the casing. nEVER dip the
nozzle tip into any type ofmaterial.
Fig. J
12
13
4. With nozzle tip facing away from tool, screw nozzle cap
back onto sausageholder.
Loading ...
Loading ...
Loading ...