Loading ...
Operation Guide IDR-200
2
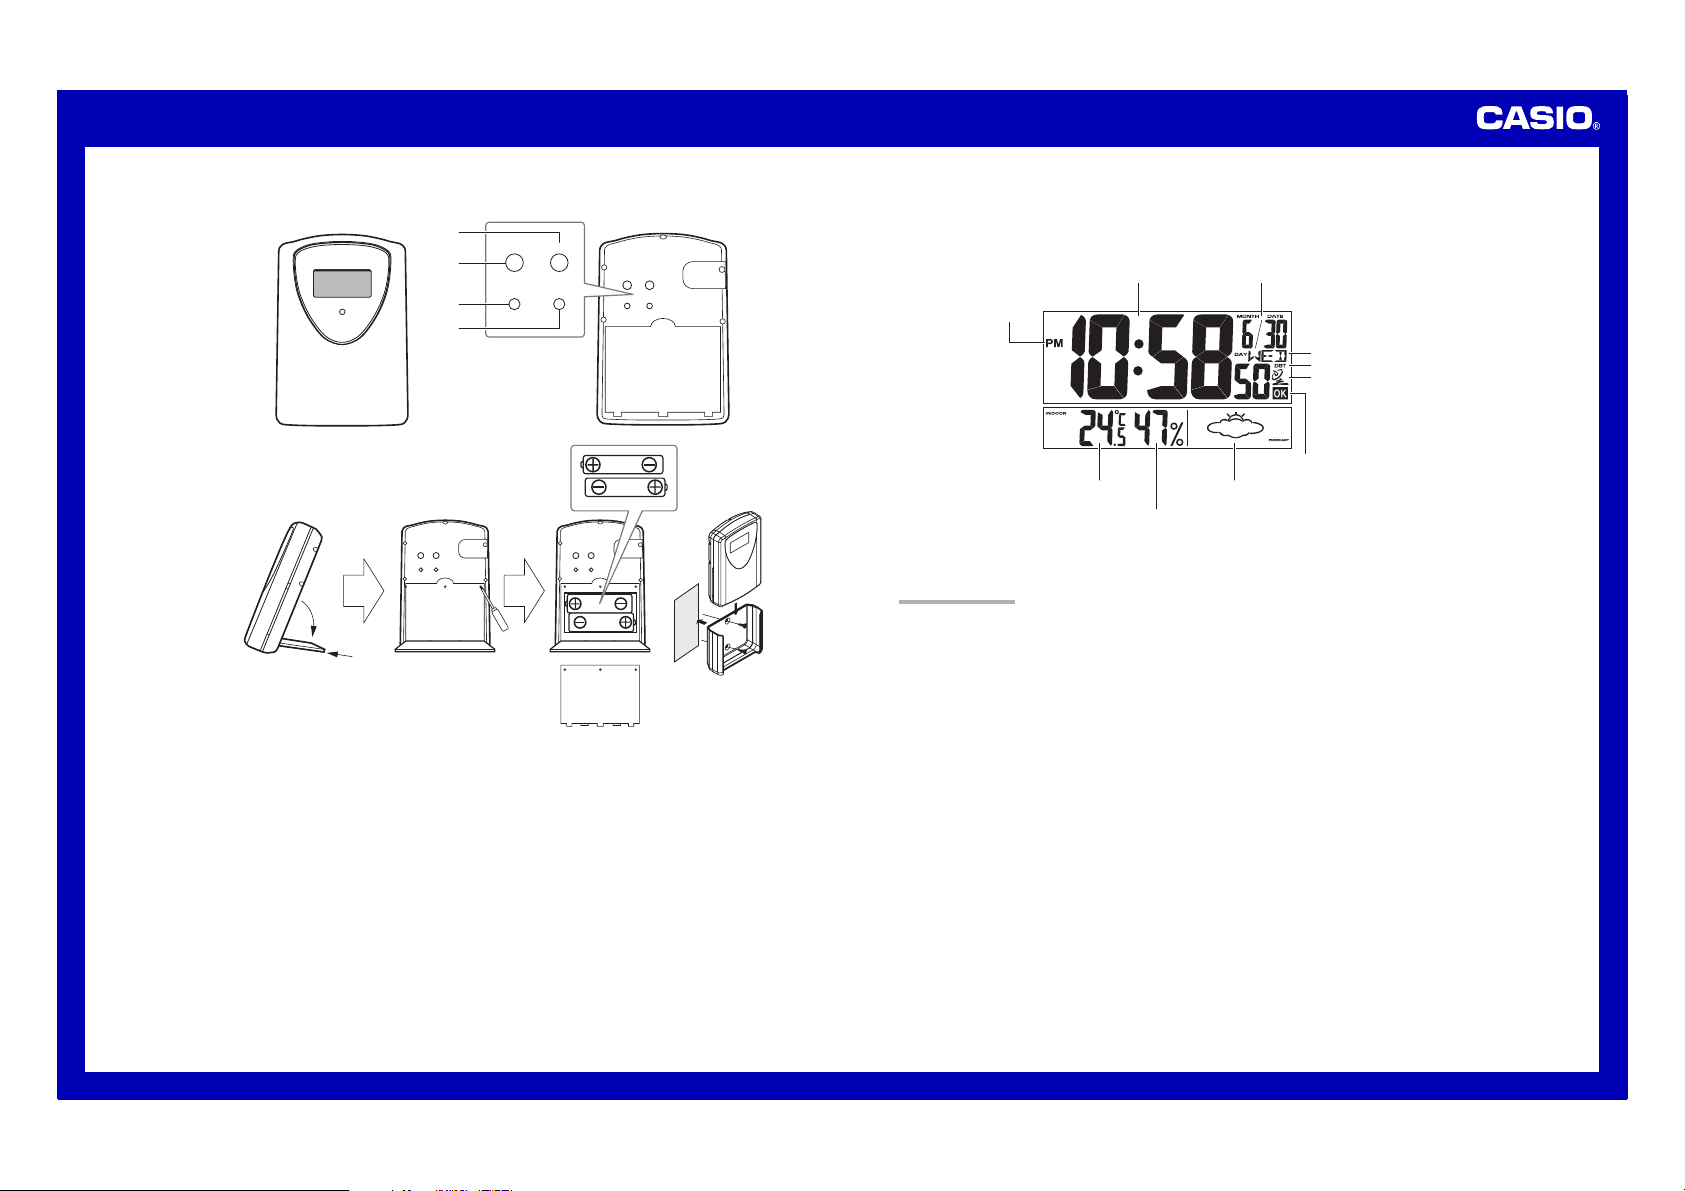
RESET
SELECT
TEST
°C/ °F
RESET
SELECT
TEST
°C/ °F
RESET
SELECT
TEST
°C/ °F
RESET
SELECT
TEST
°C/ °F
A
8
9
0
™
¡
• A sticker is affixed to the glass of this clock when you purchase it. Be sure to remove the sticker before using the
clock.
• Depending on the clock model, the configuration of your clock may differ somewhat from that shown in the
illustration.
Current time
(Hour, minutes, seconds)
DST indicato
r
Day of week
PM indicator
Wave OK indicator
Antenna Icon
Current Humidit
y
Upcomimg weather
indicator
DATE (month - date)
Current Temperature
• In locations subject to radio frequency interference, the product may malfunction and require you to reset the
product.
GENERAL GUIDE
Main unit
1 Time Setting buttons
Use these buttons to set the current time.
2 SET button
Use this button to cycle through setting screens.
3 WAVE button
Press this button to trigger a time calibration signal receive operation.
4 RESET button
Press this button to reset the clock after replacing its batteries.
5 °C/ °F button
Press this button to toggle the temperature unit between Celsius and Fahrenheit.
6 RE-SYNC button
Press this button to re-synchronize the timing of the main unit and the sub-unit.
7 SELECT button
Press this button to toggle the display between main unit (INDOOR) and sub-unit (OUTDOOR) data.
Sub-unit
8 SELECT button
Press this button to toggle the display between the current temperature and humidity.
9 RESET button
Press this button to reset the sub-unit after replacing its batteries.
0 TEST button
This button is for testing the unit. Normally, you should not press it. If you do, be sure to press the
RESET button (9) next.
A °C/ °F button
Press this button to toggle the temperature unit between Celsius and Fahrenheit.
Sub-unit
Loading ...
Loading ...
Loading ...