
Loading ...
Loading ...
Loading ...
15
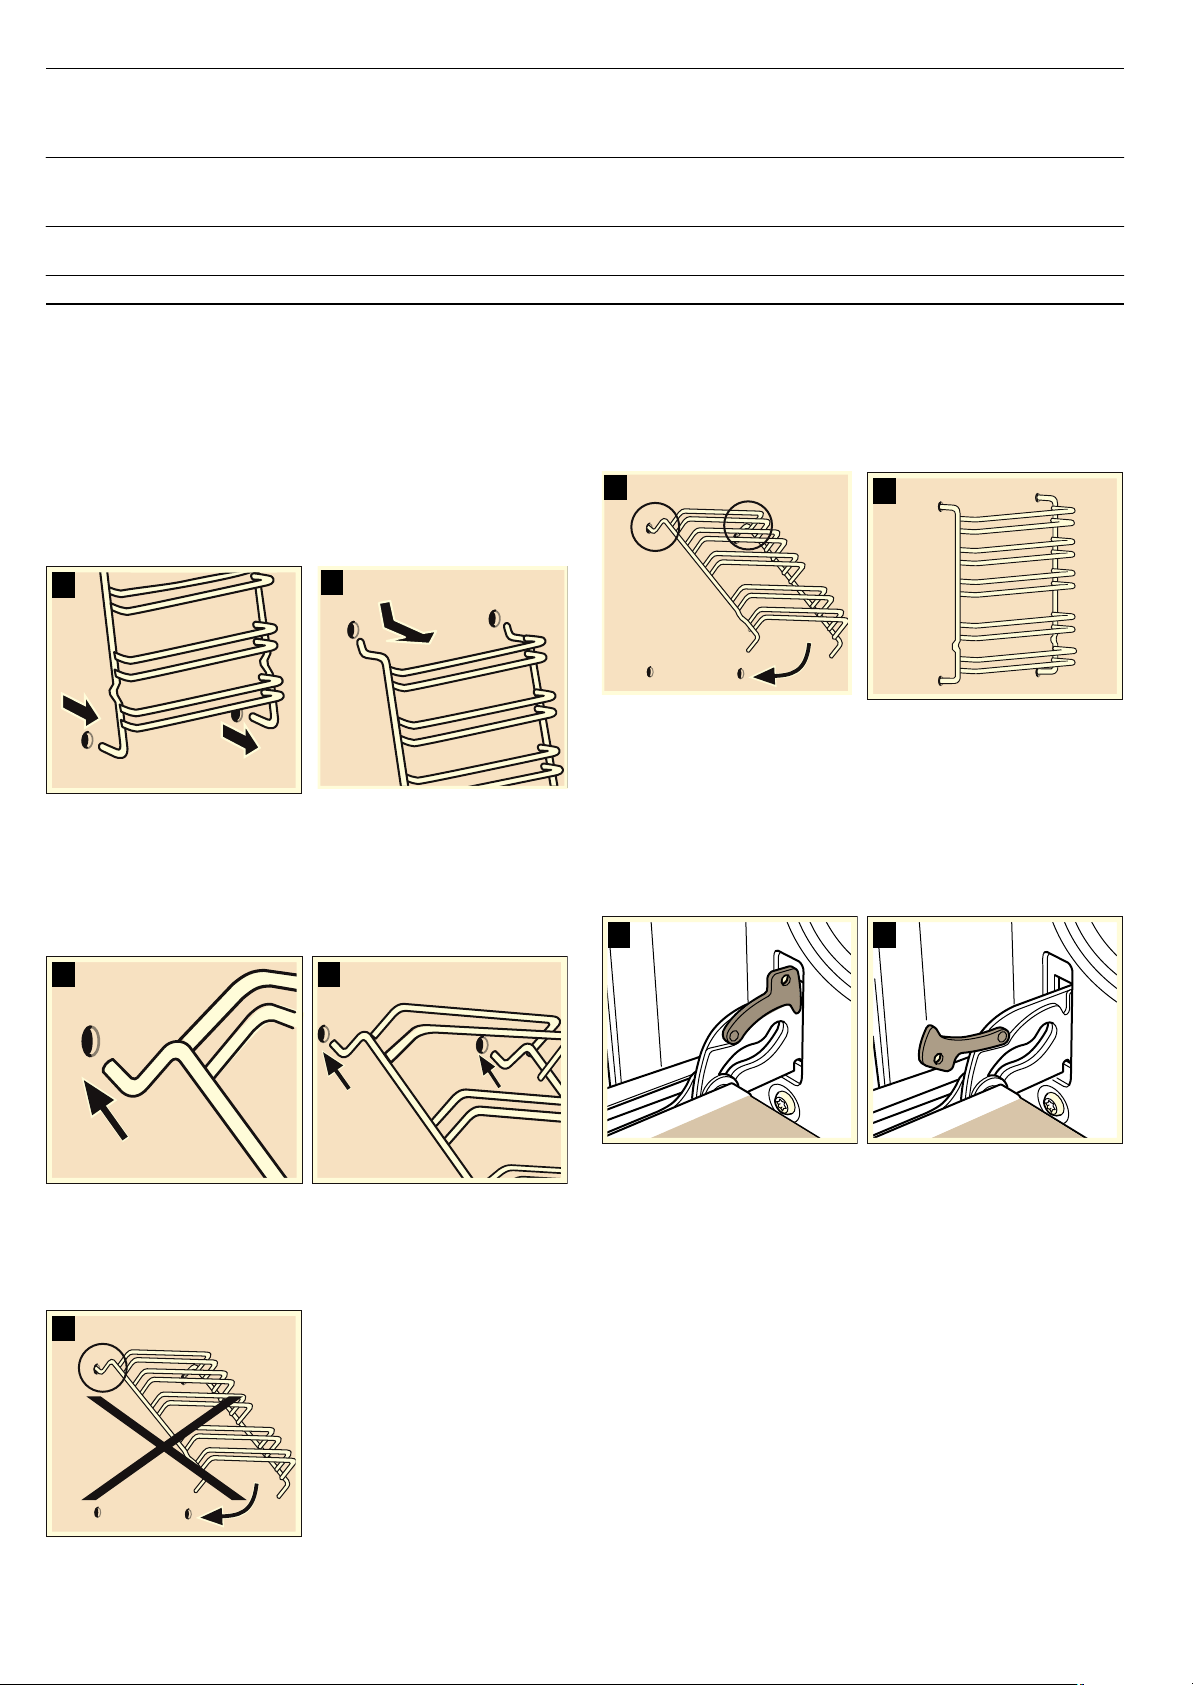
Detaching and refitting the rails
The rails can be removed for cleaning. The oven must have
cooled down.
Unhooking the rails
1. Hold the shelf frames from underneath and pull slightly
forward. Pull the extension pins at the bottom of the rails out
of the mounting holes (Fig. A).
2. Then fold the rails upwards and carefully remove them
(Fig. B).
Clean the rails with washing-up liquid and a sponge. For
stubborn deposits of dirt, use a brush.
Installing the frames
1. Insert the two hooks carefully into the upper holes. (Figure A-
B)
: Incorrect assembly!
Never move the frame before the two hooks are fully
anchored in the upper holes. The enamel could be damaged
and may break (figure C).
2. the two hooks must be inserted fully into the upper holes.
Now move the frame slowly and carefully downwards and
insert in the lower holes (figure D).
3. Insert both frames into the side walls of the oven (figure E).
If the rails are fitted correctly, the distance between the two
upper shelf positions is greater.
Detaching and attaching the oven door
For cleaning purposes and to remove the door panels, you can
detach the oven door.
The oven door hinges each have a locking lever. When the
locking levers are closed (figure A), the oven door is secured in
place. It cannot be detached. When the locking levers are open
in order to detach the oven door (Fig. B), the hinges are locked.
They cannot snap shut.
: Risk of injury!
Whenever the hinges are not locked, they snap shut with great
force. Ensure that the locking levers are always fully closed or,
when detaching the oven door, fully open.
Aluminium baking
tray (option)
Do not clean in the dishwasher. Never use oven cleaner. To avoid scratches, never touch the metal sur-
faces with a knife or similar sharp object. Wipe the surfaces horizontally and without applying pressure with
soapy water and a soft window cloth or a lint-free microfibre cloth. Dry with a soft cloth. Do not use any
abrasive materials, scouring sponges or rough cleaning cloths. They could scratch the baking tray
Childproof lock
(option)
If a childproof lock has been fitted on the oven door, it must be removed before cleaning. Soak all plastic
parts in hot soapy water and wash with a sponge. Dry with a soft cloth. If very dirty, the childproof lock will
not work properly.
Plinth drawer
(option)
Clean with some washing-up liquid and a damp cloth. Dry with a soft cloth.
Accessories Soak in hot soapy water. Clean with a brush or sponge.
%
$
%
$
&
(
'
%
$
Loading ...
Loading ...
Loading ...