Loading ...
Loading ...
Loading ...
HS8/HS7/HS5/HS8I/HS7I/HS5I/HS8S Owner’s Manual
12
Caution
• Construction work should be carried out by a professional
constructor.
• Do not install the speaker transversely.
• Make sure not to touch the cone when installing.
• For optimum safety, the installation should be checked thoroughly at
regular intervals. Some fittings may deteriorate over extended periods
of time due to wear and/or corrosion, or the mounted parts may
loosen.
• When choosing the installation location such as wall and ceiling and
mounting hardware (bolts, nuts), make sure all are strong enough to
support the weight of the speaker.
• Make sure to properly use the safety wire to prevent the speaker from
falling down in the event of an installation failure.
• When installing the safety wire to the ceiling or wall, install it higher
than the wire's attachment point on the speaker to reduce slack. Also,
ensure that the installation height and location would pose no danger
to people should the speaker fall.
• Yamaha does not assume any responsibilities for accidents such as
dropping due to insufficient strength at attachment points or
inadequacy of the mounting method.
• The recommended tightening torque for installing the included screws
for bracket installation is 6.2 Nm for the M8 screw (HS8I and HS7I)
and 2.4 Nm for the M5 screw (HS5I).
• Use safety wires with the following specifications.
NOTE Do not use the speaker if the screws at locations where
brackets are not installed have been removed. This causes air
leaks to occur from the enclosure, resulting in undesirable
performance.
Troubleshooting
Diameter Ø3.0 mm or more
Length Less than 600 mm
Material Stainless steel
Breaking load 6,370 N (650 kg) or more
Sectional
view
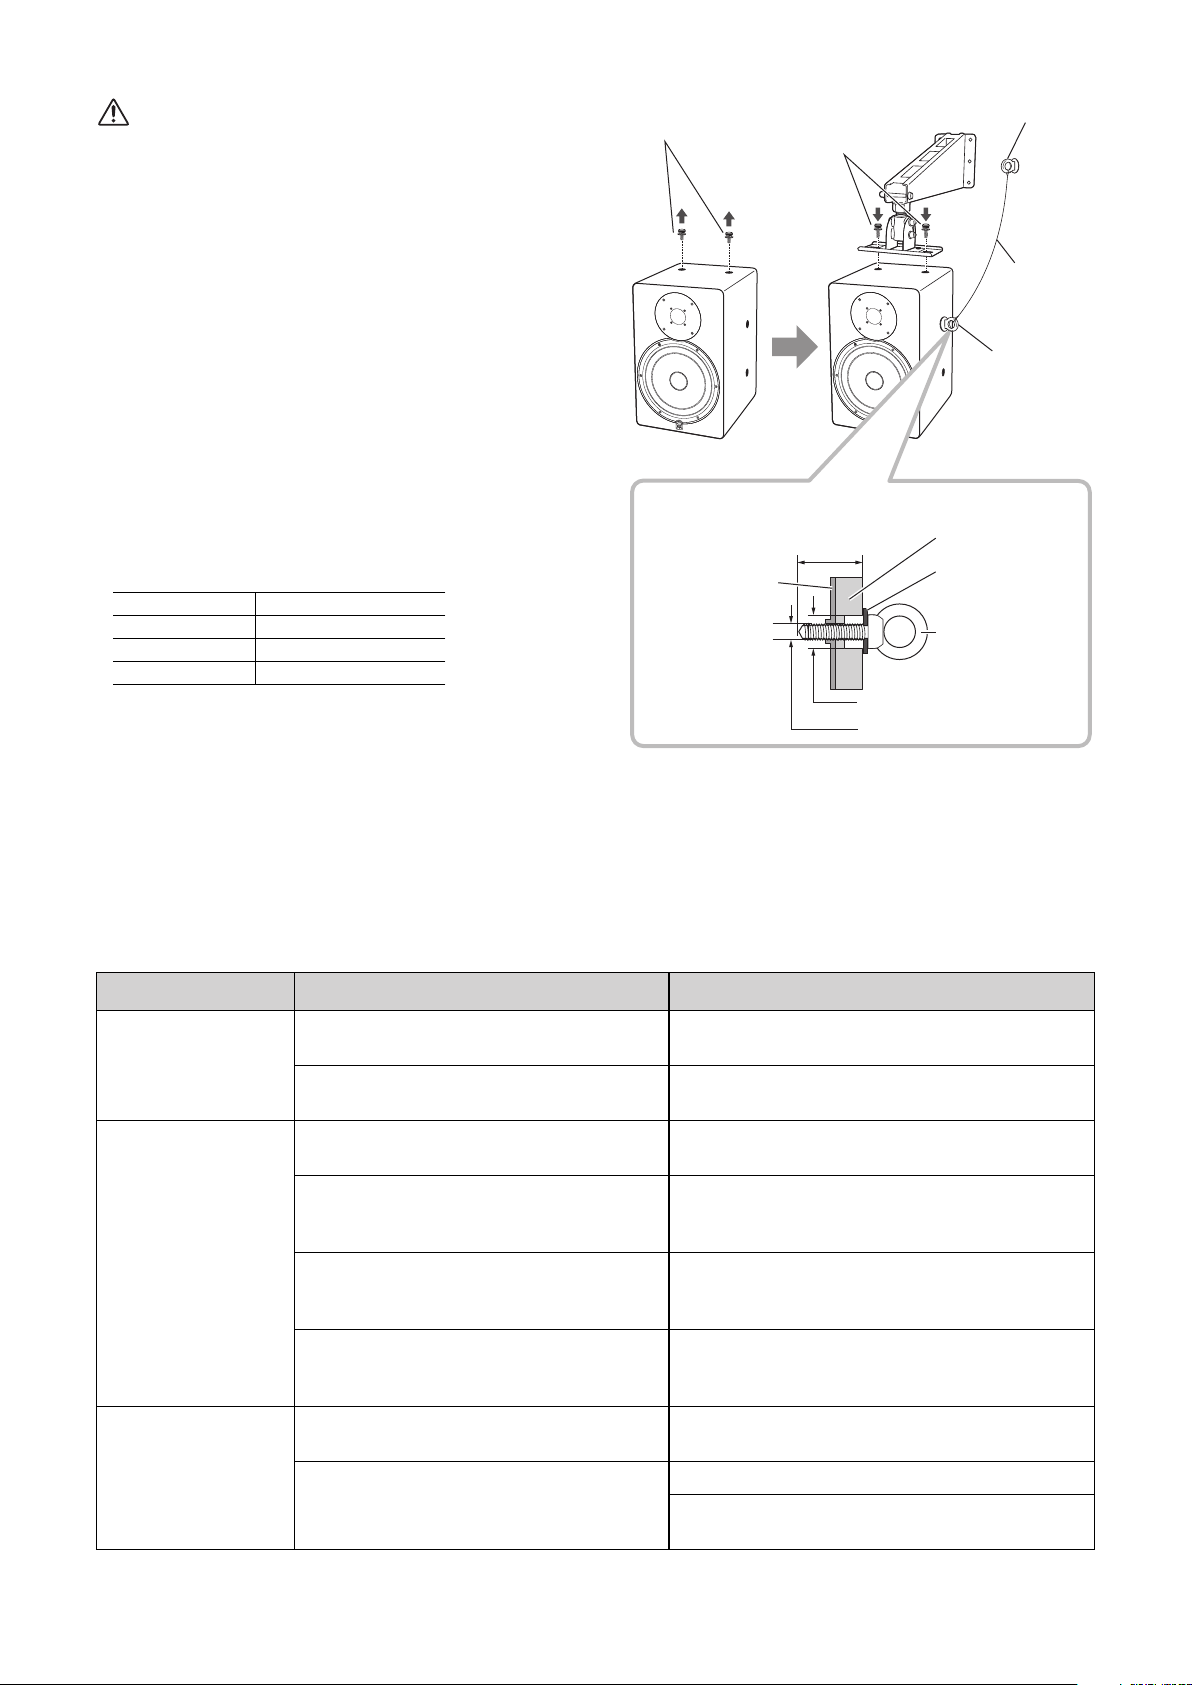
Eyenut
Screws included
with the product
Included screws
for bracket
installation
Safety
wire
Eyebolt
HS8I: 25–50 mm
HS7I: 25–30 mm
HS5I: 20–25 mm
Enclosure
Washer, etc.
Eyebolt
HS8I/HS7I: Ø18, HS5I: Ø12
HS8I/HS7I: M8, HS5I: M5
Reinforcement
plate
* This example
shows how to
install to a wall.
Symptom Possible Cause Solution
Power won’t turn on /
front panel logo
doesn’t light.
The power cord might not be connected
properly.
Check and connect the power cord.
The power switch might not be turned on. Turn the power switch ON. If the problem persists,
contact your Yamaha dealer.
No sound. One or more cables might not be
connected properly.
Check that all cables are properly connected.
The source equipment might not be
supplying an audio signal.
Make sure that the source equipment is
functioning properly and delivering the required
signal.
The level setting might be too low. Adjust the output level setting of the source
equipment, or use the LEVEL control to increase
the output level.
Are cables connected to both the XLR and
phone jack INPUT connectors?
The XLR and phone jack input connectors can not
be used simultaneously. Use only one input
connector at a time.
Noisy or distorted
sound.
One or more cables might be corroded,
shorted, or otherwise broken.
Replace faulty cable(s).
The system might be picking up external
noise.
Try changing the positions or layout of the cables.
Try changing the location of other electrical/
electronic devices that are near the speakers.
Loading ...
Loading ...
Loading ...