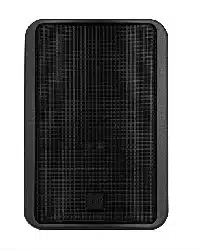

NX 910-A
NX 912-A
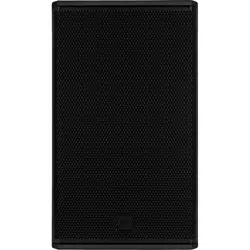
NX 915-A
NX 932-A
NX 945-A
PROFESSIONAL ACTIVE SPEAKERS
OWNER’S MANUAL
EN FRIT DE ES


3
CONTENTS
ENGLISH
1 SAFETY PRECAUTIONS AND GENERAL INFORMATION ................................................................................................................. 4
2 DESCRIPTION .................................................................................................................................................................................... 6
3 REAR PANEL FEATURES AND CONTROLS ....................................................................................................................................... 7
4 CONNECTION .................................................................................................................................................................................... 8
5 INSTALLATION ...................................................................................................................................................................... 9
6 TROUBLESHOOTING ...........................................................................................................................................................11
ITALIANO
1 AVVERTENZE PER LA SICUREZZA E INFORMAZIONI GENERALI ................................................................................................. 12
2 DESCRIZIONE .................................................................................................................................................................................. 14
3 PANNELLO POSTERIORE - FUNZIONI E CONTROLLI .................................................................................................................... 15
4 CONNESSIONI ................................................................................................................................................................................. 16
5 INSTALLAZIONE .................................................................................................................................................................17
6 RISOLUZIONE DEI PROBLEMI .............................................................................................................................................19
FRANÇAIS
1 MESURES DE SÉCURITÉ ET INFORMATIONS GÉNÉRALES ........................................................................................................... 20
2 DESCRIPTION .................................................................................................................................................................................. 22
3 FONCTIONS ET CONTRÔLES DU PANNEAU ARRIÈRE................................................................................................................... 23
4 CONNEXION .................................................................................................................................................................................... 24
5 INSTALLATION .................................................................................................................................................................... 25
6 DÉPANNAGE ......................................................................................................................................................................27
DEUTSCH
1 SICHERHEITSHINWEISE UND ALLGEMEINE INFOS ...................................................................................................................... 28
2 BESCHREIBUNG ............................................................................................................................................................................... 30
3 FUNKTIONEN / BEDIENELEMENTE RÜCKSEITE ........................................................................................................................... 31
4 ANSCHLÜßE ..................................................................................................................................................................................... 32
5 INSTALLATION .................................................................................................................................................................... 33
6 PROBLEMLÖSUNGEN .........................................................................................................................................................34
ESPAÑOL
1 MEDIDAS DE SEGURIDAD E INFORMACIÓN GENERAL ............................................................................................................... 36
2 DESCRIPCIÓN .................................................................................................................................................................................. 38
3 PANEL TRASERO Y CONTROLES ..................................................................................................................................................... 39
4 CONEXIÓN ....................................................................................................................................................................................... 40
5 INSTALACIÓN .....................................................................................................................................................................41
6 RESOLUCIÓN DE PROBLEMAS ............................................................................................................................................43
NX 910-A DIMENSIONS ...............................................................................................................................................................44
NX 912-A DIMENSIONS ...............................................................................................................................................................45
NX 915-A DIMENSIONS ...............................................................................................................................................................46
NX 932-A DIMENSIONS ...............................................................................................................................................................47
NX 945-A DIMENSIONS ...............................................................................................................................................................48
SPECIFICATION ............................................................................................................................................................................49

4
EN
1. SAFETY PRECAUTIONS AND GENERAL INFORMATION
The symbols used in this document give notice of important operating instructions
and warnings which must be strictly followed.
CAUTION
Important operating instructions:
explains hazards that could damage a
product, including data loss
WARNING
Important advice concerning the use of
dangerous voltages and the potential
risk of electric shock, personal injury or
death.
IMPORTANT NOTES
Helpful and relevant information
about the topic
SUPPORTS, TROLLEYS
AND CARTS
Information about the use of supports,
trolleys and carts. Reminds to move with
extreme caution and never tilt.
WASTE DISPOSAL
This symbol indicates that this product
should not be disposed with your
household waste, according to the
WEEE directive (2012/19/EU) and your
national law.
IMPORTANT NOTES
This manual contains important information about the correct and safe use of the
device. Before connecting and using this product, please read this instruction manual
carefully and keep it on hand for future reference. The manual is to be considered
an integral part of this product and must accompany it when it changes ownership
as a reference for correct installation and use as well as for the safety precautions.
RCF S.p.A. will not assume any responsibility for the incorrect installation and / or
use of this product.
SAFETY PRECAUTIONS
1. All the precautions, in particular the safety ones, must be read with special
attention, as they provide important information.
2. Power supply from mains
a. The mains voltage is sufficiently high to involve a risk of electrocution; install
and connect this product before plugging it in.
b. Before powering up, make sure that all the connections have been made
correctly and the voltage of your mains corresponds to the voltage shown on
the rating plate on the unit, if not, please contact your RCF dealer.
c. The metallic parts of the unit are earthed through the power cable. An apparatus
with CLASS I construction shall be connected to a mains socket outlet with a
protective earthing connection.
d. Protect the power cable from damage; make sure it is positioned in a way that
it cannot be stepped on or crushed by objects.
e. To prevent the risk of electric shock, never open this product: there are no parts
inside that the user needs to access.
f. Be careful: in the case of a product supplied by manufacturer only with
POWERCON connectors and without a power cord, jointly to POWERCON
connectors type NAC3FCA (power-in) and NAC3FCB (power-out), the following
power cords compliant to national standard shall be used:
- EU: cord type H05VV-F 3G 3x2.5 mm2 - Standard IEC 60227-1
- JP: cord type VCTF 3x2 mm2; 15Amp/120V~ - Standard JIS C3306
- US: cord type SJT/SJTO 3x14 AWG; 15Amp/125V~ - Standard ANSI/UL 62
3. Make sure that no objects or liquids can get into this product, as this may cause
a short circuit. This apparatus shall not be exposed to dripping or splashing. No
objects filled with liquid, such as vases, shall be placed on this apparatus. No naked
sources (such as lighted candles) should be placed on this apparatus.
4. Never attempt to carry out any operations, modifications or repairs that are not
expressly described in this manual.
Contact your authorized service centre or qualified personnel should any of the
following occur:
- The product does not function (or functions in an anomalous way).
- The power cable has been damaged.
- Objects or liquids have got in the unit.
- The product has been subject to a heavy impact.
5. If this product is not used for a long period, disconnect the power cable.
6. If this product begins emitting any strange odours or smoke, switch it off
immediately and disconnect the power cable.
7. Do not connect this product to any equipment or accessories not foreseen.
For suspended installation, only use the dedicated anchoring points and do not try
to hang this product by using elements that are unsuitable or not specific for this
purpose. Also check the suitability of the support surface to which the product is
anchored (wall, ceiling, structure, etc.), and the components used for attachment
(screw anchors, screws, brackets not supplied by RCF etc.), which must guarantee
the security of the system / installation over time, also considering, for example, the
mechanical vibrations normally generated by transducers.
To prevent the risk of falling equipment, do not stack multiple units of this product
unless this possibility is specified in the user manual.
8. RCF S.p.A. strongly recommends this product is only installed by
professional qualified installers (or specialised firms) who can ensure
correct installation and certify it according to the regulations in force.
The entire audio system must comply with the current standards and
regulations regarding electrical systems.
9. Supports, trolleys and carts.
The equipment should be only used on supports, trolleys and carts,
where necessary, that are recommended by the manufacturer. The
equipment / support / trolley / cart assembly must be moved with
extreme caution. Sudden stops, excessive pushing force and uneven
floors may cause the assembly to overturn. Never tilt the assembly.
10. There are numerous mechanical and electrical factors to be considered when
installing a professional audio system (in addition to those which are strictly
acoustic, such as sound pressure, angles of coverage, frequency response, etc.).
11. Hearing loss.
Exposure to high sound levels can cause permanent hearing loss. The acoustic
pressure level that leads to hearing loss is different from person to person and
depends on the duration of exposure. To prevent potentially dangerous exposure
to high levels of acoustic pressure, anyone who is exposed to these levels should
use adequate protection devices. When a transducer capable of producing high
sound levels is being used, it is therefore necessary to wear ear plugs or protective
earphones. See the manual technical specifications to know the maximum sound
pressure level.
OPERATING PRECAUTIONS
- Place this product far from any heat sources and always ensure an adequate air
circulation around it.
- Do not overload this product for a long time.
- Never force the control elements (keys, knobs, etc.).
- Do not use solvents, alcohol, benzene or other volatile substances for cleaning
the external parts of this product.
IMPORTANT NOTES
To prevent the occurrence of noise on line signal cables, use screened cables only
and avoid putting them close to:
- Equipment that produces high-intensity electromagnetic fields
- Power cables
- Loudspeaker lines

5
EN
1. SAFETY PRECAUTIONS AND GENERAL INFORMATION
WARNING! CAUTION! To prevent the risk of fire or electric
shock, never expose this product to rain or humidity.
WARNING! To prevent electric shock hazard, do not connect to
mains power supply while grille is removed
WARNING! to reduce the risk of electric shock, do not disassemble
this product unless you are qualified. Refer servicing to qualified service
personnel.
CORRECT DISPOSAL OF THIS PRODUCT
This product should be handed over to an authorized collection
site for recycling waste electrical and electronic equipment (EEE).
Improper handling of this type of waste could have a possible
negative impact on the environment and human health due to
potentially hazardous substances
that are generally associated with EEE. At the same time, your
cooperation in the correct disposal of thisproduct will contribute to the
effective usage of natural resources. For more information about where
you can drop off your waste equipment for recycling, please contact
your local city office, waste authority or your household waste disposal
service.
CARE AND MAINTENANCE
To ensure a long-life service, this product should be used following these advices:
- If the product is intended to be set up outdoors, be sure it is under cover and
protected to rain and moisture.
- If the product needs to be used in a cold environment, slowly warm up the
voice coils by sending a low-level signal for about 15 minutes before sending
high-power signals.
- Always use a dry cloth to clean the exterior surfaces of the speaker and always
do it when the power is turned off.
CAUTION: to avoid damaging the exterior finishes do not use
cleaning solvents or abrasives.
WARNING! CAUTION! For powered speakers, do cleaning
only when the power is turned off.
RCF S.p.A. reserves the right to make changes without
prior notice to rectify any errors and / or omissions.
Always refer to the latest version of the manual on
www.rcf.it.

6
EN
THE NX 9 SERIES
The NX 9 series is engineered to deliver remarkable audio performance and touring-proof versatility for solo musicians, bands, and DJs. The
new bi-amplified 2100W electroacoustic design provides impressive sound pressure levels, also when used open-air and at long distances, with
unbeatable quality. The combination of purpose-designed transducers, advanced DSP processing, and a constant directivity waveguide produces
coherent coverage on the listening area with superb, distortion-free sound and RCF reliability. Blending RCF proprietary FiRPHASE and Bass
Motion Control algorithms, perfectly tuned for each model, the audience will experience absolute clarity for vocal reproduction and deep, powerful
bass. The rugged all-wood cabinet is easy to carry and secure to install on a pole, flown-, wall-, or truss-mounted using the multiple rigging points
available.
2. DESCRIPTION
NX 910-A
2100 Watt
10” Woofer - 2,5” v.c.
1.75” Compression Driver
16.4 Kg (36.1 lbs)
NX 912-A
2100 Watt
12” Woofer - 2,5” v.c.
1.75” Compression Driver
20.8 Kg (45.8 lbs)
NX 915-A
2100 Watt
15” Woofer - 2,5” v.c.
1.75” Compression Driver
24.1 Kg (53.1 lbs)
NX 932-A
2100 Watt
12” Woofer - 2,5” v.c.
3.0” Neo Compression Driver
20.8 Kg (45.8 lbs)
NX 945-A
2100 Watt
15” neo Woofer - 3,5” v.c.
4.0” Neo Compression Driver
24.1 Kg (53.1 lbs)

7
EN
1
PRESETS SELECTOR This selector allows to select 3 different presets. By pressing
the selector, the PRESET LEDS will indicate which preset is selected.
LINEAR - this preset is recommended for all regular applications of the speaker.
BOOST - this preset creates a loudness equalization recommended for background
music applications when the system plays at a low level.
STAGE - this preset is recommended when the speaker is used as a stage monitor.
2
PRESET LEDS These LEDs indicate the selected preset.
3
FEMALE XLR/JACK COMBO INPUT This balanced input accepts a standard JACK
or XLR male connector.
4
MALE XLR SIGNAL OUTPUT This XLR output connector provides a loop trough for
speakers daisy chaining.
5
OVERLOAD/SIGNAL LEDS These LEDs indicate
The SIGNAL LED lights green if there is a signal present on the main COMBO
input.
The OVERLOAD LED indicates an overload on the input signal. It is okay if
the OVERLOAD LED blinks occasionally. If the LED blinks frequently or lights
continuously, turn down the signal level avoiding distorted sound. Anyway, the
amplifier has a built-in limiter circuit to prevent input clipping or overdriving the
transducers.
6
VOLUME CONTROL Adjusts the master volume.
7
POWER MAINS SWITCH The power switch turns the AC power ON and OFF.
8
FUSE CARRIER Mains fuse housing.
9
STANDARD 3-PRONG IEC SOCKET Power connection.
10
POWERCON INPUT SOCKET PowerCON TRUE1 TOP IP-Rated power
connection (NX 945-A only).
11
POWERCON OUTPUT SOCKET Sends the AC power to another speaker (NX 932-
A and NX 945-A only). Power link: 100-120V~ max 1600W l 200-240V~MAX 3300W
WARNING! CAUTION! Loudspeaker connections should be only
made by qualified and experienced personnel having the technical know-how
or enough specific instructions (to ensure that connections are made correctly)
in order to prevent any electrical danger.
To prevent any risk of electric shock, do not connect loudspeakers when the
amplifier is switched on.
Before turning the system on, check all connections and make sure there are no
accidental short circuits.
The entire sound system shall be designed and installed in compliance with the
current local laws and regulations regarding electrical systems.
3. REAR PANEL FEATURES AND CONTROLS
1
2 3
4
6
5
7
8
9
10 11

8
EN
4. CONNECTIONS
The connectors must be wired according to the standards specified by the AES (Audio Engineering Society).
BEFORE CONNECTING THE SPEAKER
On the rear panel you will find all the controls, signal and power inputs. At first verify the voltage label applied to the rear panel (115 Volt or 230
Volt). The label indicates the right voltage. If you read a wrong voltage on the label or if you can’t find the label at all, please call your vendor or
authorized RCF SERVICE CENTRE before connecting the speaker. This fast check will avoid any damage.
In case of need of changing the voltage please call your vendor or authorized RCF SERVICE CENTRE. This operation requires the replacement of
the fuse value and is reserved to an RCF SERVICE CENTRE.
BEFORE TURNING ON THE SPEAKER
You can now connect the power supply cable and the signal cable. Before turning on the speaker make sure the volume control is at the minimum
level (even on the mixer output). It is important that the mixer is already ON before turning on the speaker. This will avoid damages to the speaker
and noisy “bumps” due to turning on parts on the audio chain. It is a good practice to always turn on the speakers at last and turning them off
immediately after their use. You can now turn ON the speaker and adjust the volume control to a proper level.
PROTECTIONS
NX 9 Series speakers are equipped with a complete system of protection circuits. The circuit is acting very gently on audio signal, controlling level
and maintaining distortion at acceptable level.
VOLTAGE SETUP (RESERVED TO THE RCF SERVICE CENTRE)
200-240 Volt, 50 Hz
100-120 Volt, 60 Hz
(FUSE VALUE T6.3 A L 250V)
MALE XLR CONNECTOR
Balanced wiring
22
11
33
FEMALE XLR CONNECTOR
Balanced wiring
22
11
33
TRS JACK CONNECTOR
Balanced mono wiring
TIPTIP
RINGRING
SLEEVESLEEVE
TS JACK CONNECTOR
Unbalanced mono wiring
TIPTIP
SLEEVESLEEVE
PIN 1 = GROUND (SHIELD)
PIN 2 = HOT (+)
PIN 3 = COLD (-)
SLEEVE = GROUND (SHIELD)
TIP = HOT (+)
RING = COLD (-)

9
EN
5. INSTALLATION
FLOOR OR STAGE
STANDING
STAGE
MONITOR
POLE
MOUNTED
SUBWOOFER
MOUNTED
FLOOR CONFIGURATIONS
Several configurations are possibile with NX 9 Speakers; they can be placed on the floor or on a stage as main PA or used as stage monitors; they
can also be pole mounted on a speaker stand or over a subwoofer.
Examples of proper hanging
SUSPENDED CONFIGURATIONS
NX 9 Series Speakers can be suspended from the 6 x M10 suspension points located on top, on the side and on the back of the speakers or with
the specific accessory.
Wall mount with H-BR
ACCESSORIES NEEDED
For NX 912 / NX 932:
H-BR 2X COMPACT M 12 (13360445)
2X PLATE H-BR NX 912-915 (13360506)
For NX 915 / NX 935:
H-BR 2X COMPACT C 45 (13360493)
2X PLATE H-BR NX 912-915 (13360506)

10
EN
WARNING! CAUTION! Never suspend the speakers by there handles. Handles are intended for transportation,
not for rigging.
WARNING! CAUTION! The speaker top and bottom central holes are NOT for hanging; use only for H-BR.
5. INSTALLATION
WARNING! CAUTION! To use this product on a pole stand or over a a subwoofer, before installing the system,
please verify the allowed configurations and the indications regarding the accessories, on the RCF website to avoid any
danger and damages to people, animals and objects. In any case, please assure the pole stand or the subwoofer which are
holding the speaker are located on an horizontal floor and without inclinations.
WARNING! CAUTION! The use of these speakers with Stand and Pole Mount accessories can be done by qualified
and experienced personnel only, trained appropriately on professional systems installations. In any case it’s the user’s final
responsibility to ensure the system safety conditions and avoid any danger or damage to people, animals and objects.

11
EN
WARNING! to reduce the risk of electric shock, do not disassemble this product unless you are qualified. Refer servicing
to qualified service personnel.
6. TROUBLESHOOTING
THE SPEAKER DOESN’T TURN ON
Make sure the speaker is switched on and connected to an active AC power
THE SPEAKER IS CONNECTED TO AN ACTIVE AC POWER BUT DOESN’T TURN ON
Make sure the power cable is intact and connected correctly.
THE SPEAKER IS ON BUT DOESN’T MAKE ANY SOUND
Check if the signal source is sending correctly and if the signal cables are not damaged.
THE SOUND IS DISTORTED AND THE OVERLOAD LED BLINKS FREQUENTLY
Turn down the output level of the mixer.
THE SOUND IS VERY LOW AND HISSING
The source gain or the output level of the mixer might be too low.
THE SOUND IS HISSING EVEN AT PROPER GAIN AND VOLUME
The source might send a low quality or noisy signal
HUMMING OR BUZZING NOISE
Check out the AC grounding and all the equipments connected to the mixer input including cables and connectors.

12
IT
1. AVVERTENZE PER LA SICUREZZA E INFORMAZIONI GENERALI
I simboli utilizzati in questo documento notificano importanti istruzioni operative e
avvertimenti che devono essere seguiti attentamente.
CAUTELA
Importante istruzione operativa: notifica
un pericolo che potrebbe danneggiare il
prodotto, compresa la perdita di dati
ATTENZIONE
Avvertimento importante riguardante l’uso
di voltaggi pericolosi e il potenziale rischio
di shock elettrico, lesioni personali o morte.
NOTE IMPORTANTI
Informazioni utili e rilevanti sull’argomento
SUPPORTI,
TROLLEY E
CARRRELLI
Informazioni riguardanti l’utilizzo di
supporti, trolley e carrelli. Suggerisce di
muovere con estrema cautela e di non
inclinare il carico.
SMALTIMENTO
Questo simbolo indica che il prodotto non
deve essere smaltito con i rifiuti ordinari,
così come indicato nella direttiva WEEE
(2012/19/EU) e nelle normative nazionali
in vigore.
NOTE IMPORTANTI
Questo manuale contiene informazioni importanti sull’uso corretto e sicuro del
dispositivo. Prima di collegare e utilizzare questo prodotto, leggere attentamente
questo manuale di istruzioni e tenerlo a portata di mano per riferimenti futuri.
Il manuale deve essere considerato parte integrante di questo prodotto e deve
accompagnarlo in caso di cambio proprietà come riferimento per la corretta
installazione e utilizzo nonché per le precauzioni di sicurezza. RCF S.p.A. non
si assume alcuna responsabilità per l’installazione e / o l’uso errati di questo
prodotto.
PRECAUZIONI DI SICUREZZA
1. Tutte le precauzioni, in particolare quelle di sicurezza, devono essere lette con
particolare attenzione, in quanto forniscono informazioni importanti.
2. Alimentazione principale da rete elettrica
La tensione di rete è sufficientemente elevata da comportare un rischio di
folgorazione; installare e collegare questo prodotto prima di collegarlo.
Prima di accendere, assicurarsi che tutti i collegamenti siano stati eseguiti
correttamente e che la tensione della rete corrisponda alla tensione indicata
sulla targhetta dei dati sull’unità, in caso contrario, contattare il rivenditore RCF.
Le parti metalliche dell’unità sono messe a terra attraverso il cavo di alimentazione.
Un apparecchio con costruzione di CLASSE I deve essere collegato a una presa
di corrente con un collegamento di terra di protezione.
Proteggere il cavo di alimentazione da danni; assicurarsi che sia posizionato in
modo tale da non poter essere calpestato o schiacciato da oggetti.
Per evitare il rischio di scosse elettriche, non aprire mai questo prodotto: non sono
previste parti interne alle quali l’utente debba accedere.
Fare attenzione: nel caso di un prodotto provvisto solo di connettori POWERCON
e senza cavo di alimentazione, congiuntamente ai connettori POWERCON tipo
NAC3FCA (alimentazione) e NAC3FCB (alimentazione), devono essere usati i
seguenti cavi di alimentazione conformi alla norma nazionale:
EU: cavo di tipo H05VV-F 3G 3x2.5 mm2 - Standard IEC 60227-1
JP: cavo di tipo VCTF 3x2 mm2; 15Amp/120V~ - Standard JIS C3306
US: cavo di tipo SJT/SJTO 3x14 AWG; 15Amp/125V~ - Standard ANSI/UL 62
3. Assicurarsi che nessun oggetto o liquido penetri in questo prodotto poiché
ciò potrebbe causare un corto circuito. Questo apparecchio non deve essere
esposto a gocciolamenti o spruzzi. Nessun oggetto riempito di liquido, come
vasi, deve essere posizionato su questo apparecchio. Nessuna fiamma libera
(come candele accese) deve essere posizionata su questo apparecchio.
4. Non tentare mai di eseguire operazioni, modifiche o riparazioni non
espressamente descritte nel presente manuale.
Contattare il centro di assistenza autorizzato o personale qualificato qualora si
verifichi una delle seguenti condizioni:
Il prodotto non funziona (o funziona in modo anomalo).
Il cavo di alimentazione è stato danneggiato.
Oggetti o liquidi sono entrati nell’unità.
Il prodotto ha subìto un forte urto.
5. Se questo prodotto non viene utilizzato per un lungo periodo, scollegare il cavo
di alimentazione.
6. Se questo prodotto inizia a emettere strani odori o fumo, spegnerlo
immediatamente e scollegare il cavo di alimentazione.
7. Non collegare questo prodotto ad apparecchiature o accessori non previsti.
Per l’installazione sospesa, utilizzare solo i punti di ancoraggio dedicati e non
tentare di appendere questo prodotto utilizzando elementi non idonei o non
specifici per questo scopo. Verificare inoltre l’idoneità della superficie di supporto
a cui è ancorato il prodotto (parete, soffitto, struttura, ecc.) a dei componenti
utilizzati per il fissaggio (tasselli, viti, staffe non fornite da RCF ecc.) che devono
garantire sicurezza del sistema / installazione nel tempo, anche considerando,
ad esempio, le vibrazioni meccaniche normalmente generate dai trasduttori.
Per evitare il rischio di caduta dell’apparecchiatura, non impilare più unità di
questo prodotto a meno che questa possibilità non sia specificata nel manuale
dell’utente.
8.RCF S.p.A. raccomanda vivamente che questo prodotto sia installato
solo da installatori professionisti qualificati (o aziende specializzate)
che possono garantire la corretta installazione e certificarlo secondo
le normative vigenti.
L’intero sistema audio deve essere conforme agli standard e alle
normative vigenti in materia di sistemi elettrici.
9. Supporti, trolley e carrelli.
L’apparecchiatura deve essere utilizzata, ove necessario, solo su
supporti, trolley e carrelli consigliati dal produttore. L’apparecchiatura /
supporto / carrello deve essere spostata con estrema cautela. Arresti
improvvisi, eccessiva spinta e pavimenti irregolari possono causarne il
ribaltamento. Non inclinare mai.
10. Vi sono numerosi fattori meccanici ed elettrici da considerare quando si installa
un sistema audio professionale (oltre a quelli strettamente acustici, come la
pressione del suono, gli angoli di copertura, la risposta in frequenza, ecc.).
11. Perdita dell’udito.
L’esposizione a livelli sonori elevati può causare la perdita permanente dell’udito. Il
livello di pressione acustica che porta alla perdita dell’udito è diverso da persona
a persona e dipende dalla durata dell’esposizione. Per prevenire un’esposizione
potenzialmente pericolosa a livelli elevati di pressione acustica, chiunque
sia esposto a questi livelli dovrebbe usare adeguati dispositivi di protezione.
Quando viene utilizzato un trasduttore in grado di produrre alti livelli sonori, è
quindi necessario indossare tappi per le orecchie o cuffie protettive. Vedere le
specifiche tecniche del manuale per conoscere il livello massimo di pressione
sonora.
PRECAUZIONI OPERATIVE
Posizionare questo prodotto lontano da qualsiasi fonte di calore e garantire sempre
un’adeguata circolazione dell’aria attorno ad esso.
Non sovraccaricare questo prodotto per molto tempo.
Non forzare mai gli elementi di controllo (tasti, manopole, ecc.).
Non utilizzare solventi, alcool, benzene o altre sostanze volatili per pulire le parti
esterne di questo prodotto.
NOTE IMPORTANTI
Per evitare il verificarsi di disturbi sui cavi di segnale in linea, utilizzare solo cavi
schermati ed evitare di avvicinarli a:
Apparecchiature che producono campi elettromagnetici ad alta intensità
Cavi di alimentazione
Linee di altoparlanti

13
IT
1. AVVERTENZE PER LA SICUREZZA E INFORMAZIONI GENERALI
ATTENZIONE! CAUTELA! Per evitare il rischio di incendi o scosse
elettriche, non esporre mai questo prodotto a pioggia o umidità.
ATTENZIONE! Per evitare il rischio di scosse elettriche, non collegare
all’alimentazione di rete mentre la griglia è rimossa.
WARNING! Per ridurre il rischio di scosse elettriche, non smontare questo
prodotto se non si è qualificati. Per l’assistenza rivolgersi a personale di assistenza
qualificato
SMALTIMENTO CORRETTO DI QUESTO PRODOTTO
Questo prodotto deve essere consegnato a un sito di raccolta
autorizzato per il riciclaggio di apparecchiature elettriche ed
elettroniche (AEE). Una manipolazione impropria di questo tipo di
rifiuti potrebbe avere un possibile impatto negativo sull’ambiente
e sulla salute umana a causa di sostanze potenzialmente pericolose
che sono generalmente associati alle AEE. Allo stesso tempo, la
vostra collaborazione per il corretto smaltimento di questo prodotto
contribuirà all’utilizzo efficace delle risorse naturali. Per ulteriori
informazioni su dove sia possibile scaricare le attrezzature per il
riciclaggio, si prega di contattare l’ufficio comunale locale, l’autorità
competente per i rifiuti o il servizio di smaltimento dei rifiuti
domestici .
CURA E MANUTENZIONE
Per garantire un servizio di lunga durata, questo prodotto deve essere utilizzato
seguendo questi consigli:
Se il prodotto deve essere installato all’aperto, assicurarsi che sia coperto e protetto
da pioggia e umidità.
Se il prodotto deve essere utilizzato in un ambiente freddo, riscaldare lentamente le
bobine vocali inviando un segnale di basso livello per circa 15 minuti prima di
inviare segnali ad alta potenza.
Utilizzare sempre un panno asciutto per pulire le superfici esterne dell’altoparlante
e farlo sempre quando l’alimentazione è spenta
CAUTELA! Per evitare di danneggiare le finiture esterne non utilizzare
solventi per la pulizia o abrasivi.
ATTENZIONE! CAUTELA! Per gli altoparlanti alimentati, eseguire
la pulizia solo quando l’alimentazione è spenta.
RCF S.p.A. si riserva il diritto di apportare modifiche senza preavviso per rettificare
eventuali errori e/o omissioni.
Fare sempre riferimento all’ultima versione del manuale su www.rcf.it.

14
IT
LA SERIE NX 9
La serie NX 9 è stata progettata per offrire prestazioni audio straordinarie e versatilità touring per musicisti solisti, band e DJ. Il nuovo design
elettroacustico bi-amplificato da 2100 W fornisce livelli di pressione sonora impressionanti anche se utilizzato all’aperto e a lunghe distanze, con
una qualità imbattibile. La combinazione di trasduttori progettati appositamente, l’elaborazione DSP avanzata e una guida d’onda a direttività
costante determinano una copertura completa sull’area di ascolto con un suono eccellente e privo di distorsioni. Unendo gli algoritmi proprietari
RCF FiRPHASE e Bass Motion Control, perfettamente sintonizzati per ogni modello, gli ascoltatori sperimenteranno una chiarezza assoluta per la
riproduzione vocale e bassi profondi e potenti. Il robusto cabinet interamente in legno è facile da trasportare e sicuro da installare su un supporto
a stand o a parete o su traliccio utilizzando i molteplici punti di appendimento disponibili.
2. DESCRIZIONE
NX 910-A
2100 Watt
10” Woofer - 2,5” v.c.
1.75” Compression Driver
16.4 Kg (36.1 lbs)
NX 912-A
2100 Watt
12” Woofer - 2,5” v.c.
1.75” Compression Driver
20.8 Kg (45.8 lbs)
NX 915-A
2100 Watt
15” Woofer - 2,5” v.c.
1.75” Compression Driver
24.1 Kg (53.1 lbs)
NX 932-A
2100 Watt
12” Woofer - 2,5” v.c.
3.0” Neo Compression Driver
20.8 Kg (45.8 lbs)
NX 945-A
2100 Watt
15” neo Woofer - 3,5” v.c.
4.0” Neo Compression Driver
24.1 Kg (53.1 lbs)

15
IT
1
SELETTORE PRESET Questo selettore permette di selezionare 3 differenti preset.
Premendo il selettore, i LED dei PRESET indicheranno quale preset è selezionato.
LINEAR - questo preset è consigliato per tutte le normali applicazioni del diffusore.
BOOST - questo preset crea un’equalizzazione del volume consigliata per applicazioni
di musica di sottofondo o quando il sistema riproduce a basso volume.
STAGE - questo preset è consigliato quando il diffusore viene utilizzato come monitor
da palco
2
LED dei PRESET Questi LED indicano quale preset è selezionato.
3
INGRESSO COMBO XLR/JACK Questo ingresso bilanciato accetta connettori di
ingresso Jack o XLR.
4
USCITA SEGNALE XLR MASCHIO Questo connettore XLR di loop del segnale
permette la connessione a catena di più diffusori.
5
LED OVERLOAD/SIGNAL Questi LED indicano
Il LED SIGNAL si illumina di verde se è presente un segnale sull’ingresso COMBO
principale.
Il LED OVERLOAD indica un sovraccarico sul segnale di ingresso. È normale che il
LED OVERLOAD lampeggi occasionalmente. Se il LED lampeggia frequentemente
o rimane acceso, abbassare il livello del segnale per evitare distorsioni del suono.
L’amplificatore è comunque dotato di un limiter integrato per evitare il clipping in
ingresso o il sovraccarico dei trasduttori.
6
CONTROLLO DEL LIVELLO Varia il volume del diffusore.
7
INTERRUTTORE GENERALE L’interruttore generale permette l’accensione e lo
spegnimento dell’apparecchio una volta che questo sia collegato alla rete di alimentazione.
8
PORTAFUSIBILE Alloggio per fusibile di rete.
9
PRESA DI ALIMENTAZIONE IEC Presa per il cavo di alimentazione.
10
PRESA INPUT POWERCON Presa per il cavo di alimentazione IP-Rated
PowerCON TRUE1 TOP (NX 945-A only).
11
PRESA OUTPUT POWERCON Rilancio di alimentazione per un altro diffusore
(solo NX 932-A e NX 945-A).
Power link: 100-120V~ max 1600W l 200-240V~MAX 3300W
ATTENZIONE! CAUTELA! I collegamenti dei diffusori devono essere
effettuati solo da personale qualificato ed esperto in possesso del know-how
tecnico o di istruzioni specifiche sufficienti (per garantire che i collegamenti siano
effettuati correttamente) al fine di prevenire qualsiasi pericolo elettrico.
Per evitare qualsiasi rischio di scossa elettrica, non collegare altoparlanti quando
l’amplificatore è acceso.
Prima di accendere il sistema, controllare tutti i collegamenti e assicurarsi che non
vi siano cortocircuiti accidentali.
L’intero sistema di diffusione sonora deve essere progettato e installato in
conformità con le leggi e le normative locali vigenti in materia di impianti elettrici.
3. PANNELLO POSTERIORE - FUNZIONI E CONTROLLI
1
2 3
4
6
5
7
8
9
10 11

16
IT
4. CONNESSIONI
I connettori di ingresso XLR devono essere cablati secondo lo standard AES (Audio Engineering Society):
PRIMA DI CONNETTERE IL DIFFUSORE
Sul pannello posteriore si trovano tutti i controlli e gli ingressi di segnale e di alimentazione. Per sicurezza verificare sempre l’etichetta di tensione
applicata al pannello posteriore (115 Volt o 230 Volt). L’etichetta indica la giusta tensione. Se è indicato un voltaggio errato o se non è possibile
localizzare l’etichetta, chiamare il proprio rivenditore o il CENTRO DI ASSISTENZA RCF autorizzato prima di collegare il diffusore. Questo rapido
controllo eviterà qualsiasi danno.
PRIMA DI ACCENDERE IL DIFFUSORE
A questo punto è possibile inserire il connettore di alimentazione e il connettore di segnale. Prima di accendere il diffusore assicurarsi che il
controllo del volume sia al minimo sia sul diffusore che sulla sorgente sonora collegata al diffusore (generalmente un mixer); è importante
anche che il mixer sia già acceso al momento in cui viene acceso il diffusore a lui collegato. Queste due precauzioni eviteranno di causare danni
al diffusore stesso dovute a fastidiosi “bump” causati dall’accensione delle apparecchiature audio a monte dei diffusori. È buona regola che i
diffusori amplificati e gli amplificatori in genere siano sempre le ultime apparecchiature ad essere accese dopo il montaggio e le prime ad essere
spente alla fine dello spettacolo. Ora è possibile accendere il diffusore e alzare il controllo di livello a seconda delle necessità.
PROTEZIONI
I diffusori della serie NX 9 sono dotati di un sistema completo di circuiti di protezione. Il circuito agisce molto delicatamente sul segnale audio,
controllando il livello e mantenendo la distorsione a un livello accettabile.
SELEZIONE DELLA TENSIONE DI ALIMENTAZIONE (RISERVATO AI CENTRI SERVIZIO RCF)
200-240 Volt, 50 Hz
100-120 Volt, 60 Hz
(VALORE FUSIBILE T6.3 A L 250V)
CONNETTORE JACK TRS
Connessione mono bilanciata
TIPTIP
RINGRING
SLEEVESLEEVE
CONNETTORE JACK TS
Connessione mono sbilanciata
TIPTIP
SLEEVESLEEVE
PIN 1 = TERRA (GROUND; SHIELD)
PIN 2 = LATO CALDO (HOT; +)
PIN 3 = LATO FREDDO (COLD; -)
SLEEVE = GROUND (SHIELD)
TIP = HOT (+)
RING = COLD (-)
MALE XLR CONNECTOR
Balanced wiring
22
11
33
FEMALE XLR CONNECTOR
Balanced wiring
22
11
33

17
IT
5. INSTALLAZIONE
IN APPOGGIO
SU PALCO O A TERRA
MONITOR
DA PALCO
MONTAGGIO SU
SUPPORTO A STAND
MONTAGGIO SU
SUBWOOFER
CONFIGURAZIONI A TERRA
Diverse configurazioni sono possibili con i diffusori NX 9; possono essere posizionati sul pavimento o su un palco come sistema audio principale
o utilizzati come monitor da palco; possono anche essere montati su un supporto a stand o su un subwoofer.
CONFIGURAZIONI IN SOSPENSIONE
I diffusori della serie NX 9 possono essere sospesi dai 6 punti di sospensione M10 situati sul lato superiore, laterale e posteriore o con l’apposito
accessorio.
Esempio di sospensione corretta
Montaggio a muro con H-BR
ACCESSORI NECESSARI
Per NX 912 / NX 932:
H-BR 2X COMPACT M 12 (13360445)
2X PLATE H-BR NX 912-915 (13360506)
Per NX 915 / NX 935:
H-BR 2X COMPACT C 45 (13360493)
2X PLATE H-BR NX 912-915 (13360506)

18
IT
5. INSTALLAZIONE
ATTENZIONE! CAUTELA! Non sospendere mai i diffusori dalle maniglie. Le maniglie servono solo per il trasporto,
non per la sospensione.
ATTENZIONE! CAUTELA! I fori centrali superiore e inferiore del diffusore NON possono essere utilizzati per
l’appendimento; utilizzare solo per H-BR
ATTENZIONE! CAUTELA! Per utilizzare questo prodotto su supporto a stand o su un subwoofer, prima di installare
il sistema verificare sul sito RCF le configurazioni consentite e le indicazioni relative agli accessori al fine di evitare pericoli
e danni a persone, animali e cose. In ogni caso, assicurarsi che lo stand o il subwoofer che sostengolo il diffusore siano
posizionati su un pavimento orizzontale e senza inclinazioni.
ATTENZIONE! CAUTELA! L’utilizzo di questi diffusori con supporti a palo può essere effettuato solo da personale
qualificato ed esperto, adeguatamente formato su installazioni di sistemi professionali. In ogni caso è responsabilità finale
dell’utente garantire le condizioni di sicurezza del sistema ed evitare qualsiasi pericolo o danno a persone, animali e cose.

19
IT
6. RISOLUZIONE DEI PROBLEMI
ATTENZIONE! Per ridurre il rischio di scosse elettriche, non smontare questo prodotto a meno che non si sia qualificati.
Per l’assistenza, rivolgersi a personale di assistenza qualificato.
IL DIFFUSORE NON SI ACCENDE
Assicurarsi che il diffusore sia acceso e collegato a un’alimentazione attiva.
IL DIFFUSORE È COLLEGATO A UN’ALIMENTAZIONE ATTIVA MA NON SI ACCENDE
Verificare che il cavo di alimentazione sia integro e collegato correttamente.
IL DIFFUSORE È ACCESO MA NON EMETTE ALCUN SUONO
Verificare che la sorgente stia inviando il segnale correttamente e che i cavi di segnale non siano danneggiati.
IL SUONO È DISTORTO E IL LED SOVRACCARICO LAMPEGGIA FREQUENTEMENTE
Abbassare il livello di uscita del mixer.
IL SUONO È MOLTO BASSO E CON PRESENZA DI FRUSCIO
Il guadagno della sorgente o il livello di uscita del mixer potrebbero essere troppo bassi.
SI SENTE UN FRUSCIO ANCHE CON VOLUME E GUADAGNO CORRETTI
La sorgente potrebbe inviare un segnale di bassa qualità o rumoroso
IL DIFFUSORE EMETTE UN RONZIO CONTINUO
Controllare la messa a terra sia del diffusore che di tutte le apparecchiature collegate all’ingresso del mixer.
Controllare cavi e connettori.

20
FR
1. MESURES DE SÉCURITÉ ET INFORMATIONS GÉNÉRALES
Les symboles utilisés dans ce document signalent des instructions d'utilisation et
des avertissements importants qui doivent être strictement respectés.
ATTENTION
Instructions d'utilisation importantes:
explique les situations où le produit
pourrait subir des dommages, y compris
la perte de données
AVERTISSEMENT
Conseil important à propos de
l'utilisation de tensions dangereuses
et le risque potentiel d’électrisation, de
blessure ou de mort.
REMARQUES
IMPORTANTES
Informations utiles et pertinentes
sur le sujet
SUPPORTS, CHARIOTS
ET DIABLES
Informations sur l'utilisation de supports,
de chariots et de diables. Rappel que le
transport de l’enceinte doit s’effectuer
avec une extrême prudence, sans jamais
l’incliner.
ÉLIMINATION DES
DÉCHETS
Ce symbole indique que ce produit ne
doit pas être éliminé avec vos déchets
ménagers, conformément à la directive
DEEE (2012/19/UE) et à votre législation
nationale.
REMARQUES IMPORTANTES
Ce manuel contient des informations importantes pour utiliser correctement
l’appareil, en toute sécurité. Avant de brancher et d'utiliser ce produit, veuillez
lire attentivement ce manuel d'instructions et le garder à portée de main pour
le consulter ultérieurement. Le manuel doit être considéré comme faisant partie
intégrante de ce produit et doit l'accompagner lorsqu'il change de propriétaire, afin
qu’il serve de référence pour une installation et une utilisation correctes ainsi que
pour les précautions de sécurité. RCF S.p.A. n'assumera aucune responsabilité en
cas d'installation et/ou d'utilisation incorrecte de ce produit.
PRÉCAUTIONS DE SÉCURITÉ
1. Toutes les précautions, en particulier celles relatives à la sécurité, doivent être
lues avec une attention particulière, car elles offrent des informations importantes.
2. Alimentation depuis le secteur
a. La tension du secteur est suffisamment élevée pour entraîner un risque
d’électrisation. Installez et connectez ce produit avant de le brancher.
b. Avant de mettre l'appareil sous tension, assurez-vous que toutes les connexions
ont été effectuées correctement et que la tension du secteur correspond à celle
indiquée sur la plaque signalétique de l'appareil. Si ce n'est pas le cas, veuillez
contacter votre revendeur RCF.
c. Les parties métalliques de l'appareil sont mises à la terre par le câble
d'alimentation. Un appareil avec une construction de CLASSE I doit être relié à
une prise de courant équipée d’une mise à la terre.
d. Protégez le câble d'alimentation contre les dommages. Assurez-vous qu'il est
placé de manière à ce qu'on ne puisse pas marcher dessus ou l'écraser avec
des objets.
e. Pour éviter tout risque d’électrisation, n'ouvrez jamais ce produit : il n'y a
aucune pièce à l'intérieur à laquelle l'utilisateur a besoin d’accéder.
f. Faites attention: dans le cas d'un produit fourni par le fabricant uniquement
avec des connecteurs POWERCON et sans câble d'alimentation, les câbles
d'alimentation suivants conformes à la norme nationale doivent être utilisés,
avec des connecteurs POWERCON de type NAC3FCA (entrée) et NAC3FCB
(sortie), :
- UE: câble de type H05VV-F 3G 3x2,5mm2 - Norme CEI 60227-1
- JP: câble de type VCTF 3x2mm2; 15Amp/120V~ - Norme JIS C3306
- US: câble de type SJT/SJTO 3x14 AWG; 15Amp/125V~ - Norme ANSI/UL 62
3. Assurez-vous qu'aucun objet ou liquide ne peut pénétrer dans ce produit,
cela pourrait provoquer un court-circuit. Cet appareil ne doit pas être exposé à
des gouttes ou à des éclaboussures. Aucun objet rempli d’un liquide, comme un
vase, ne doit être placé sur cet appareil. Aucune flamme nue (telle que des bougies
allumées) ne doit être placée sur cet appareil.
4. N'essayez jamais d'effectuer des modifications, des réparations ou de faire
fonctionner l’appareil d’une manière qui ne sont pas expressément décrites dans
ce manuel.
Contactez votre centre de service agréé ou un personnel qualifié si l'un des cas
suivants se produit:
- Le produit ne fonctionne pas (ou fonctionne de manière anormale).
- Le câble d'alimentation a été endommagé.
- Des objets ou des liquides ont pénétré dans l'appareil.
- Le produit a subi à un gros choc.
5. Si ce produit n'est pas utilisé pendant une longue période, débranchez le câble
d'alimentation.
6. Si ce produit commence à émettre des odeurs inhabituelles ou de la fumée,
éteignez-le immédiatement et débranchez le câble d'alimentation.
7. Ne connectez pas ce produit à des équipements ou accessoires qui ne sont pas
prévus à cet effet.
Pour une exploitation en accroche, utilisez uniquement les points d'ancrage prévus
à cet effet et n'essayez pas de suspendre ce produit en utilisant des éléments
inadaptés ou non spécifiquement adaptés à cet usage. Vérifier également la
compatibilité de la surface à laquelle le produit est accroché (mur, plafond, structure,
etc.), et des composants utilisés pour la fixation (chevilles, vis, supports non fournis
par RCF, etc.), qui doivent garantir la sécurité du système / de l'installation sur
la durée, en tenant compte également, par exemple, des vibrations mécaniques
normalement générées par les haut-parleurs.
Pour éviter tout risque de chute de matériel, n'empilez pas plusieurs unités de ce
produit, sauf si cette possibilité est spécifiée dans le manuel d'utilisation.
8. RCF S.p.A. recommande vivement que ce produit soit installé
uniquement par des intégrateurs professionnels qualifiés (ou des
entreprises spécialisées) qui pourront garantir une installation correcte
et la certifier selon les normes en vigueur.
L'ensemble du système audio doit être conforme aux normes et
réglementations en vigueur concernant les systèmes électriques.
9. Supports, chariots et diables.
Ce matériel ne doit être utilisé que sur des supports, des chariots et des
diables, le cas échéant, qui sont recommandés par le fabricant.
L'ensemble équipement/support/chariot/diable doit être déplacé avec
une extrême prudence. Les arrêts soudains, une force de poussée
excessive et des sols irréguliers peuvent provoquer le basculement de
l'ensemble. Ne jamais incliner l'ensemble.
10. De nombreux facteurs mécaniques et électriques doivent être pris en compte
lors de l'installation d'un système audio professionnel (en plus des critères
strictement acoustiques, comme la pression acoustique, les angles de couverture, la
réponse en fréquence, etc.).
11. Perte de l’audition.
L'exposition à des niveaux sonores élevés peut entraîner une perte auditive
permanente. Le niveau de pression acoustique entraînant une perte d'audition est
différent d'une personne à l'autre, et dépend de la durée d'exposition. Pour éviter
un cumul potentiellement dangereux de niveaux élevés de pression acoustique,
toute personne exposée doit utiliser des dispositifs de protection adéquats.
Lorsqu'un haut-parleur capable de produire des niveaux sonores élevés est utilisé, il
est nécessaire de porter des bouchons d'oreille ou un casque anti-bruit. Consultez
les caractéristiques techniques du manuel pour connaître le niveau de pression
acoustique maximal.
PRÉCAUTIONS D'UTILISATION
- Placez ce produit loin de toute source de chaleur et assurez toujours une
circulation d'air adéquate tout autour.
- N’utilisez pas ce produit en surcharge pendant une longue période.
- Ne forcez jamais les éléments de contrôle (touches, boutons, etc.).
- N'utilisez pas de solvants, d'alcool, de benzène ou d'autres substances volatiles
pour nettoyer les parties externes de ce produit.
21
FR
1. MESURES DE SÉCURITÉ ET INFORMATIONS GÉNÉRALES
REMARQUES IMPORTANTES
Pour éviter l'apparition de bruit sur les câbles de signaux ligne, utilisez uniquement
des câbles blindés et évitez de les placer à proximité:
- d’un équipement produisant des champs électromagnétiques de
haute intensité
- de câbles secteur
- de lignes d’alimentation d’enceintes
AVERTISSEMENT ! ATTENTION ! Pour éviter tout risque
d'incendie ou d’électrisation, n'exposez jamais ce produit à la pluie ou à
l'humidité.
AVERTISSEMENT! Pour éviter tout risque d’électrisation, ne pas
brancher l'appareil sur le secteur lorsque la grille est retirée
AVERTISSEMENT ! Pour réduire le risque d’électrisation, ne
démontez pas ce produit à moins de posséder les qualifications requises.
Pour les réparations, adressez-vous à un professionnel qualifié.
ÉLIMINATION CORRECTE DE CE PRODUIT
Ce produit doit être remis à un site de collecte agréé pour le
recyclage des déchets d'équipements électriques et électroniques
(EEE). Une manipulation incorrecte de ce type de déchets pourrait
avoir un impact négatif sur l'environnement et la santé humaine
en raison de la présence de substances potentiellement dangereuses
généralement associés aux EEE. En même temps, votre coopération dans
l'élimination correcte de ce produit contribuera à l'utilisation efficace
des ressources naturelles. Pour plus d'informations sur les endroits où
vous pouvez déposer vos équipements usagés pour le recyclage, veuillez
contacter votre municipalité ou l'autorité chargée des déchets ou votre
service d'élimination des déchets ménagers.
ENTRETIEN ET MAINTENANCE
Pour garantir une longue durée de vie, voici quelques conseils pour utiliser ce
produit:
- Si le produit est destiné à être installé à l'extérieur, assurez-vous qu'il est sous
abri et protégé de la pluie et de l'humidité.
- Si le produit doit être utilisé dans un environnement froid, réchauffez lentement
les bobines des haut-parleurs en envoyant un signal de faible niveau pendant
environ 15 minutes avant d'envoyer des signaux de forte puissance.
- Utilisez toujours un chiffon sec pour nettoyer les surfaces extérieures de
l'enceinte et faites-le toujours lorsque l'appareil est éteint.
ATTENTION : pour éviter d'endommager les finitions extérieures,
n'utilisez pas de solvants, ni de produit abrasif.
AVERTISSEMENT ! ATTENTION ! Pour les enceintes
amplifiées, effectuez le nettoyage uniquement lorsque l'alimentation est
coupée.
RCF S.p.A. se réserve le droit d'apporter des
modifications sans préavis afin de rectifier toute
erreur et/ou omission.
Consultez toujours la dernière version du manuel sur
www.rcf.it.

22
FR
LA SÉRIE NX 9
La série NX 9 est conçue pour offrir des performances audio remarquables et une polyvalence à l'épreuve des tournées pour les musiciens solo,
les groupes et les DJ. Sa nouvelle conception biamplifiée, d’une puissance totale de 2100W, offre des niveaux de pression acoustique (SPL)
impressionnants. Même en plein air et à longue distance, elle assure une qualité sonore inégalable. L'association de haut-parleurs spécialement
conçus, d'un traitement DSP avancé et d'un guide d'ondes à directivité constante se traduit par une couverture cohérente et un son superbe sans
distorsion, avec la légendaire fiabilité RCF. Grâce au traitement DSP FiRPHASE et à l’algorithme Bass Motion Control, exclusivités RCF, optimisés
avec précision sur chacun des modèles, le public bénéficie d’une reproduction vocale d’une clarté absolue et de graves profonds et puissants. Le
solide coffret tout en bois est facile à transporter. Il se fixe en toute sécurité sur un mât, au mur, sur une structure ou s’accroche grâce aux multiples
points de suspension disponibles.
2. DESCRIPTION
NX 910-A
2100watts
Haut-parleur grave 10”, bobine 2,5”
Moteur à compression 1,75"
16,4kg (36,1lb)
NX 912-A
2100watts
Haut-parleur grave 12”, bobine 2,5”
Moteur à compression 1,75"
20,8kg (45,8lb)
NX 915-A
2100watts
Haut-parleur grave 15”, bobine 2,5”
Moteur à compression 1,75"
24,1kg (53,1lb)
NX 932-A
2100 Watt
12” Woofer - 2,5” v.c.
3.0” Neo Compression Driver
20.8 Kg (45.8 lbs)
NX 945-A
2100 Watt
15” neo Woofer - 3,5” v.c.
4.0” Neo Compression Driver
24.1 Kg (53.1 lbs)

23
FR
1
SÉLECTEUR DE PRESETS Ce sélecteur permet de sélectionner 3 presets
différents. En appuyant sur le sélecteur, les LED DE PRESET indiquent quel preset est
sélectionné.
LINEAR - ce preset est recommandé pour toutes les applications courantes de
l'enceinte.
BOOST - ce preset active une égalisation de type Loudness, recommandée
pour les applications de musique d’ambiance lorsque le système est utilisé à
faible niveau.
STAGE - ce preset est recommandé lorsque l'enceinte est utilisée comme
retour de scène.
2
LED DE PRESET Ces LED indiquent le preset sélectionné.
3
ENTRÉE COMBO XLR/JACK FEMELLE Cette entrée symétrique peut recevoir
un connecteur mâle standard JACK ou XLR.
4
SORTIE SIGNAL XLR MÂLE Ce connecteur de sortie XLR renvoie le signal
d’entrée, pour une connexion en chaîne des enceintes.
5
LED OVERLOAD/SIGNAL Ces LED indiquent:
La LED SIGNAL s'allume en vert si un signal est présent sur l'entrée COMBO
principale.
La LED OVERLOAD indique une surcharge du signal d'entrée. Ce n'est pas
grave si la LED OVERLOAD clignote de temps en temps. Si la LED clignote
fréquemment ou s'allume en continu, baissez le niveau du signal pour
éviter toute distorsion du son. De toute façon, l'amplificateur possède un
limiteur intégré, évitant tout écrêtage à l’entrée ou toute surcharge des
transducteurs.
6
POTENTIOMÈTRE VOLUME Règle le volume principal.
7
INTERRUPTEUR D’ALIMENTATION L'interrupteur permet d'allumer et
d'éteindre l'alimentation électrique.
8
BOÎTIER DES FUSIBLES Emplacement des fusibles de l’alimentation.
9
PRISE 3-POINTS NORME CEI Prise d’alimentation.
10
PRISE D’ENTRÉE POWERCON Prise d’alimentation IP-Rated PowerCON TRUE1
TOP (NX 945-A uniquement).
11
PRISE DE SORTIE POWERCON Renvoie l’alimentation vers une autre enceinte
(NX 932-A et NX 945-A uniquement). Alimentation distribuée : 100-120 V~ max
1600 watts l 200-240 V~MAX 3300 watts
AVERTISSEMENT! ATTENTION! Les connexions des enceintes
doivent être effectués par un personnel qualifié et expérimenté disposant
du savoir-faire technique ou d'instructions suffisamment précises (pour
s'assurer que les raccordements sont effectués correctement) afin d'éviter
tout danger électrique.
Pour éviter tout risque d'électrisation, ne connectez pas les enceintes lorsque
l'amplificateur est sous tension.
Avant de mettre le système sous tension, vérifiez toutes les connexions et
assurez-vous qu'il n'y a pas de court-circuit accidentel.
L'ensemble du système de sonorisation doit être conçu et installé en
conformité avec les lois et règlements locaux en vigueur concernant les
systèmes électriques.
3. FONCTIONS ET CONTRÔLES DU PANNEAU ARRIÈRE
1
2 3
4
6
5
7
8
9
10 11

24
FR
4. CONNEXIONS
Les connecteurs doivent être raccordés conformément aux normes spécifiées par l'AES (Audio Engineering Society).
AVANT DE CONNECTER L’ENCEINTE
Tous les contrôles ainsi que les entrées de signal et d'alimentation sont rassemblés sur le panneau arrière. Vérifiez d'abord le marquage sur le
panneau arrière indiquant la tension (115V ou 230V). Le marquage indique la tension correcte. Si vous lisez une tension erronée sur le marquage
ou si vous ne trouvez pas de marquage du tout, veuillez appeler votre revendeur ou le CENTRE DE SERVICE RCF agréé avant de connecter
l'enceinte. Ce contrôle rapide permet d'éviter tout dommage.
S’il est nécessaire de changer la tension, veuillez appeler votre revendeur ou le CENTRE DE SERVICE RCF agréé. Cette opération nécessite le
remplacement du fusible par un autre de la valeur adéquate et doit être effectué dans un CENTRE DE SERVICE RCF.
AVANT D'ALLUMER L'ENCEINTE
Vous pouvez maintenant connecter le câble d'alimentation et le câble de signal. Avant d'allumer l'enceinte, assurez-vous que le potentiomètre du
volume est réglé au niveau minimum (même sur la sortie de la table de mixage). Il est important que la table de mixage soit déjà allumée avant
d'allumer l'enceinte. Cela évitera d'endommager l’enceinte et de provoquer de forts bruits impulsionnels dus à l'activation de certains éléments
de la chaîne audio. Une bonne pratique consiste à toujours allumer les enceintes en dernier et à les éteindre immédiatement après leur utilisation.
Vous pouvez maintenant allumer l'enceinte et régler le volume à un niveau approprié.
PROTECTIONS
Les enceintes Série NX 9 sont équipées d'un ensemble complet de circuits de protection. Ces circuit agissent très discrètement sur le signal audio,
en contrôlant le niveau et en maintenant la distorsion à un niveau acceptable.
CONFIGURATION DE LA TENSION (RÉSERVÉ AU CENTRE DE SERVICE RCF)
200-240V, 50Hz
100-120V, 60Hz
(FUSIBLE T6.3A L 250V)
CONNECTEUR JACK (TRS)
Câblage mono symétrique
POINTEPOINTE
ANNEAUANNEAU
MANCHONMANCHON
CONNECTEUR JACK (TS)
Câblage mono asymétrique
POINTEPOINTE
MANCHONMANCHON
BROCHE 1 = TERRE (MASSE)
BROCHE 2 = CHAUD (+)
BROCHE 3 = FROID (-)
MANCHON = TERRE (MASSE)
POINTE = CHAUD (+)
ANNEAU = FROID (-)
MALE XLR CONNECTOR
Balanced wiring
22
11
33
FEMALE XLR CONNECTOR
Balanced wiring
22
11
33

25
FR
5. INSTALLATION
AU SOL OU
SUR SCÈNE
RETOUR DE
SCÈNE
SUR
PIED
SUR UNE BARRE
DE COUPLAGE DE
SUBWOOFER
CONFIGURATIONS AU SOL
Plusieurs configurations sont possibles avec les enceintes NX 9. Elles peuvent être posées au sol ou sur une scène en tant que sonorisation
principale, ou s’utiliser comme retour de scène. Elles peuvent également se monter sur un pied d'enceinte ou sur une barre au-dessus d'un
subwoofer.
CONFIGURATIONS SUSPENDUES
Les enceintes Série NX 9 peuvent être accrochées aux 6 points de suspension M10 situés sur le dessus, sur le côté et à l'arrière des enceintes
ou avec l’accessoire spécifique.
Exemples d’accrochage correct
Montage mural avec H-BR
ACCESSOIRES REQUIS
Pour NX 912 / NX 932:
H-BR 2X COMPACT M 12 (13360445)
2X PLATE H-BR NX 912-915 (13360506)
Pour NX 915 / NX 935:
H-BR 2X COMPACT C 45 (13360493)
2X PLATE H-BR NX 912-915 (13360506)

26
FR
5. INSTALLATION
AVERTISSEMENT! ATTENTION! N’accrochez jamais les enceintes par leurs poignées. Les poignées sont conçues
pour le transport, non pour l’accroche.
WARNING! CAUTION! Les trous centraux supérieur et inférieur ne sont PAS destinés à suspendre le produit ;
utiliser uniquement pour H-BR.
AVERTISSEMENT! ATTENTION! Pour utiliser ce produit sur un pied ou une barre de couplage de subwoofer,
avant d’installer le système, veuillez vérifier les configurations autorisées et les indications concernant les accessoires, sur le
site Web de RCF afin d’éviter tout danger et dommages aux personnes, animaux et objets. Dans tous les cas, veillez à ce que
le pied ou le subwoofer qui supporte l’enceinte soit placé sur un sol plat et sans inclinaison.
AVERTISSEMENT! ATTENTION! L’utilisation de ces enceintes avec les accessoires de pied et de barre de couplage
ne peut être effectuée que par un personnel qualifié et expérimenté, formé de manière appropriée aux installations de
systèmes professionnels. Dans tous les cas, c’est à l’utilisateur qu’incombe la responsabilité finale de garantir les conditions
de sécurité du système et d’éviter tout danger ou dommage pour les personnes, les animaux et les objets.

27
FR
AVERTISSEMENT! Pour réduire le risque d’électrisation, ne démontez pas ce produit à moins de posséder les qualifications
requises. Pour les réparations, adressez-vous à un professionnel qualifié.
6. DÉPANNAGE
L’ENCEINTE NE S’ALLUME PAS
Assurez-vous que l'interrupteur de l’enceinte est activé et que l’enceinte est branchée sur une prise secteur active
L'ENCEINTE EST BRANCHÉE SUR UNE PRISE SECTEUR ACTIVE MAIS NE S'ALLUME PAS
Vérifiez que le câble d'alimentation est intact et correctement branché.
L’ENCEINTE EST ALLUMÉE MAIS NE PRODUIT AUCUN SON
Vérifiez que le signal audio est envoyé correctement par la source, et si les câbles de signal ne sont pas endommagés.
LE SON EST DISTORDU ET LA LED OVERLOAD CLIGNOTE FRÉQUEMMENT
Baissez le niveau de sortie de la table de mixage.
LE SON EST TRÈS FAIBLE, AVEC DU SOUFFLE
Le signal de la source ou le niveau de sortie de la table de mixage est peut-être trop bas.
IL Y A DU SOUFFLE DANS LE SON, MÊME SI LE GAIN ET LE VOLUME SONT AU BON NIVEAU
La source peut envoyer un signal de mauvaise qualité ou avec du bruit
GRÉSILLEMENTS OU RONFLETTE
Vérifiez la mise à la terre du secteur et tous les équipements connectés à l'entrée de la table de mixage, y compris les câbles et
les connecteurs.

28
DE
Die in diesem Dokument verwendeten Symbole weisen auf wichtige
Betriebsanweisungen und Warnhinweise hin, die unbedingt beachtet werden
müssen.
ACHTUNG
Wichtiger Betriebshinweis: erklärt
Gefahren, die das Produkt beschädigen
können, einschließlich Datenverlust.
WARNUNG
Wichtige Hinweise zum Umgang mit
gefährlichen Spannungen und der
möglichen Gefahr von Stromschlag,
Verletzungen oder Tod.
WICHTIGE HINWEISE
Hilfreiche und relevante Informationen
zum Thema
STATIVE UND
TRANSPORT
Informationen über den Einsatz von
Stativen, Trolleys und transportwägen.
Erinnert daran, sich mit äußerster
Vorsicht zu bewegen und niemals zu
kippen.
ENTSORGUNG
Dieses Symbol zeigt an, dass dieses
Produkt gemäß der WEEE-Richtlinie
nicht über den Hausmüll entsorgt
werden darf..
WICHTIGE HINWEISE
Diese Anleitung enthält wichtige Informationen über den korrekten und sicheren
Gebrauch des Geräts. Bevor Sie das Produkt anschließen und verwenden, lesen
Sie bitte diese Anleitung sorgfältig durch und bewahren Sie sie zum späteren
Nachschlagen auf. Die Anleitung ist als integraler Bestandteil dieses Produkts zu
betrachten und muss ihm bei einem Besitzerwechsel als Referenz für die korrekte
Installation und Verwendung sowie für die Sicherheitsvorkehrungen beiliegen. RCF
S.p.A. übernimmt keine Verantwortung für eine fehlerhafte Installation und / oder
Verwendung dieses Produkts.
SICHERHEITSHINWEISE
1. Alle Vorsichtsmaßnahmen, insbesondere die Sicherheitshinweise, müssen
mit besonderer Aufmerksamkeit gelesen werden, da sie wichtige Informationen
enthalten.
2. STROMVERSORGUNG
a. TDie Netzspannung ist so hoch, dass die Gefahr eines Stromschlags besteht;
installieren und schließen Sie dieses Produkt an, bevor Sie es einstecken.
b. Vergewissern Sie sich vor dem Einschalten, dass alle Anschlüsse korrekt
ausgeführt sind und die Spannung Ihres Stromnetzes mit der auf dem
Typenschild des Geräts angegebenen Spannung übereinstimmt; falls nicht,
wenden Sie sich bitte an Ihren RCF-Händler.
c. Die metallischen Teile des Geräts sind über das Netzkabel geerdet. Ein Gerät
der Bauart KLASSE I muss an eine Steckdose mit Schutzerdungsanschluss
angeschlossen werden.
d. Schützen Sie das Netzkabel vor Beschädigungen; stellen Sie sicher, dass es so
verlegt ist, dass es nicht betreten oder von Gegenständen gequetscht werden
kann.
e. Um das Risiko eines elektrischen Schlags zu vermeiden, öffnen Sie dieses
Produkt niemals: Es befinden sich keine Teile im Inneren, auf die der Benutzer
zugreifen muss.
f. Achtung: Falls das Produkt vom Hersteller nur mit POWERCON-Steckern und
ohne Netzkabel geliefert wird, müssen gemeinsam mit den POWERCON-
Steckern des Typs NAC3FCA (Stromeingang) und NAC3FCB (Stromausgang)
die folgenden Netzkabel verwendet werden, die der nationalen Norm
entsprechen:
- EU: Kabel Typ H05VV-F 3G 3x2,5 mm2 - Norm IEC 60227-1
- JP: Kabel Typ VCTF 3x2 mm2; 15Amp/120V~ - Norm JIS C3306
- US: Kabel vom Typ SJT/SJTO 3x14 AWG; 15Amp/125V~ - Norm ANSI/UL 62
3. Achten Sie darauf, dass keine Gegenstände oder Flüssigkeiten in dieses Gerät
gelangen, da dies einen Kurzschluss verursachen kann. Dieses Gerät darf keinen
Tropfen oder Spritzern ausgesetzt werden. Es dürfen keine mit Flüssigkeit gefüllten
Gegenstände, wie z. B. Vasen, auf dieses Gerät gestellt werden. Auf dieses Gerät
dürfen keine offenen Feuerquellen (wie z. B. brennende Kerzen) gestellt werden.
4. Versuchen Sie niemals, Eingriffe, Änderungen oder Reparaturen vorzunehmen,
die nicht ausdrücklich in dieser Anleitung beschrieben sind.
Wenden Sie sich an Ihren autorisierten Kundendienst oder an qualifiziertes Personal,
wenn einer der folgenden Fälle eintritt:
- Das Gerät funktioniert nicht (oder in anomaler Weise).
- Das Netzkabel wurde beschädigt.
- Gegenstände oder Flüssigkeiten sind in das Gerät eingedrungen.
- Das Produkt wurde einem starken Stoß ausgesetzt.
5. Wenn das Produkt über einen längeren Zeitraum nicht verwendet wird, ziehen
Sie das Netzkabel ab.
6. Wenn dieses Produkt anfängt, seltsame Gerüche oder Rauch abzugeben,
schalten Sie es sofort aus und ziehen Sie das Netzkabel ab.
7. Schließen Sie dieses Produkt nicht an nicht vorgesehene Geräte oder Zubehörteile
an.
Verwenden Sie für eine hängende Installation nur die dafür vorgesehenen
Verankerungspunkte und versuchen Sie nicht, dieses Produkt mit Hilfe von
ungeeigneten oder nicht für diesen Zweck vorgesehenen Elementen aufzuhängen.
Überprüfen Sie auch die Eignung der Auflagefläche, an der das Produkt verankert
wird (Wand, Decke, Struktur usw.), sowie die zur Befestigung verwendeten
Komponenten (Schraubanker, Schrauben, Dübel, nicht von RCF gelieferte
Halterungen usw.), die die Sicherheit des Systems / der Installation auf Dauer
gewährleisten müssen, auch unter Berücksichtigung der vom Produkt abgegebenen
Vibrationen.
Um die Gefahr herabfallender Geräte zu vermeiden, dürfen nicht mehrere
Geräte dieses Produkts gestapelt werden, es sei denn, diese Möglichkeit ist im
Benutzerhandbuch angegeben.
8. RCF S.p.A. empfiehlt dringend, dieses Produkt nur von professionellen,
qualifizierten Installateuren (oder spezialisierten Firmen) installieren zu
lassen, die eine korrekte Installation gewährleisten und diese gemäß
den geltenden Vorschriften zertifizieren können.
Das gesamte Audiosystem muss den geltenden Normen und Vorschriften
für elektrische Anlagen entsprechen.
9. Stative & Trnsport
Das Gerät darf nur auf den vom Hersteller empfohlenen Stativen,
Rollwagen und ggf. Trolleys verwendet werden. Das Gerät / das Stativ /
der Wagen / die Karre müssen mit äußerster Vorsicht bewegt werden.
Plötzliches Anhalten, übermäßige Schubkraft und unebene Böden
können zum Umkippen führen. Niemals kippen.
10. Bei der Installation eines professionellen Audiosystems sind zahlreiche
mechanische und elektrische Faktoren zu berücksichtigen (zusätzlich zu den rein
akustischen Faktoren, wie Schalldruck, Abstrahlwinkel, Frequenzgang usw.).
11. Gehörverlust
Die Exposition gegenüber hohen Schallpegeln kann zu dauerhaftem Hörverlust
führen. Der Schalldruckpegel, der zu Hörverlust führt, ist von Person zu Person
unterschiedlich und hängt von der Dauer der Exposition ab. Um eine potenziell
gefährliche Exposition gegenüber hohen Schalldruckpegeln zu vermeiden,
sollte jeder, der diesen Pegeln ausgesetzt ist, angemessene Schutzvorrichtungen
verwenden. Bei der Verwendung eines Lautsprechers, der hohe Schallpegel
erzeugen kann, ist es daher notwendig, Ohrstöpsel oder schützende Ohrhörer zu
tragen. Den maximalen Schalldruckpegel entnehmen Sie bitte den technischen
Daten im Handbuch.
VORSICHTSMASSNAHMEN FÜR DEN BETRIEB
- Stellen Sie dieses Produkt weit entfernt von Wärmequellen auf und sorgen Sie
immer für eine ausreichende Luftzirkulation um das Produkt.
- - Überlasten Sie das Produkt nicht über einen längeren Zeitraum.
- - Üben Sie keine Gewalt auf die Bedienelemente (Tasten, Knöpfe usw.) aus.
- - Verwenden Sie keine Lösungsmittel, Alkohol, Benzol oder andere flüchtige
Substanzen zur Reinigung der äußeren Teile dieses Produkts
WICHTIGER HINWEIS
1. SICHERHEITSHINWEISE / ALLGEMEINE INFORMATIONEN
29
DE
1. SICHERHEITSHINWEISE / ALLGEMEINE INFORMATIONEN
TUm das Auftreten von Störungen auf Signalkabeln zu vermeiden, verwenden Sie
nur geschirmte Kabel und legen Sie diese nicht in der Nähe von:
- Geräten, die elektromagnetische Felder mit hoher Intensität erzeugen
- Stromleitungen
- Lautsprecherkabel
WARNUNG! ACHTUNG! TUm die Gefahr eines Brandes
oder elektrischen Schlages zu vermeiden, setzen Sie dieses Produkt niemals
Regen oder Feuchtigkeit aus..
WARNUNG! Um einen elektrischen Schlag zu vermeiden, schließen
Sie das Gerät nicht an das Stromnetz an, wenn das Gitter entfernt ist.
WARNUNG! Um das Risiko eines elektrischen Schlags zu verringern,
zerlegen Sie dieses Produkt nicht, wenn Sie nicht qualifiziert sind. Überlassen
Sie die Wartung qualifiziertem Servicepersonal.
KORREKTE ENTSORGUNG DES PRODUKTES
Dieses Produkt sollte bei einer autorisierten Sammelstelle für
Recycling von Elektro- und Elektronik-Altgeräten (EEE) abgegeben
werden. Unsachgemäßer
Umgang mit dieser Art von Abfall kann möglicherweise negative
Auswirkungen auf
auf die Umwelt und die menschliche Gesundheit haben. Gleichzeitig
trägt Ihre Mitarbeit bei der der korrekten Entsorgung dieses Produkts
zur effektiven Nutzung der natürlichen Ressourcen bei.
Für weitere Informationen darüber, wo Sie Ihre Altgeräte zum Recycling
abgeben können, wenden Sie sich bitte an Ihre örtliche Stadtverwaltung,
Abfallbehörde oder Ihren Hausmüllentsorgungsdienst.
PFLEGE UND WARTUNG
Um eine lange Lebensdauer zu gewährleisten, sollte dieses Produkt unter Beachtung
der folgenden Ratschläge verwendet werden:
- Wenn das Produkt im Freien aufgestellt werden soll, stellen Sie sicher, dass es
unter einer Abdeckung steht und vor Regen und Feuchtigkeit geschützt ist.
- Wenn das Produkt in einer kalten Umgebung verwendet werden soll, wärmen Sie
die Schwingspulen langsam auf, indem Sie etwa 15 Minuten lang ein Signal mit
niedrigem Pegel abspielen, bevor Sie Signale mit hoher Leistung senden.
- Reinigen Sie die Außenflächen des Lautsprechers immer mit einem trockenen
Tuch, und zwar immer bei ausgeschaltetem Gerät.
ACHTUNG: Verwenden Sie keine Reinigungsmittel oder
Scheuermittel, um eine Beschädigung der Außenflächen zu vermeiden.
WARNUNG! ACHTUNG! Verwenden Sie keine Reinigungs-
mittel oder Scheuermittel, um eine Beschädigung der Außenflächen zu
vermeiden.
RCF S.p.A. behält sich das Recht vor, ohne vorherige
Ankündigung Änderungen vorzunehmen, um Fehler
und / oder Auslassungen zu korrigieren.
Beachten Sie immer die neueste Version des
Handbuchs auf www.rcf.it.

30
DE
DIE NX 9 SERIE
Die NX 9-Serie wurde entwickelt, um Solomusikern, Bands und DJs eine bemerkenswerte Audioleistung und tourtauglichkeit zu bieten. Das
neue elektroakustische Bi-Amping-Design mit 2100 W sorgt für beeindruckende Schalldruckpegel, auch im Open-Air-Einsatz und bei großen
Entfernungen, in unschlagbarer Qualität. Die Kombination aus speziell entwickelten Schallwandlern, fortschrittlichem DSP-Processing und einem
Waveguide mit konstanter Richtwirkung sorgt für eine kohärente Abdeckung des Hörbereichs mit hervorragendem, verzerrungsfreiem Klang und
der von RCF bekannten Zuverlässigkeit. Durch die Kombination der RCF-eigenen FiRPHASE- und Bass Motion Control-Algorithmen, die perfekt auf
jedes Modell abgestimmt sind, erlebt das Publikum absolute Klarheit bei der Stimmwiedergabe und tiefe, kraftvolle Bässe. Das robuste Vollholz-
Gehäuse ist leicht zu transportieren und lässt sich mit Hilfe der zahlreichen Aufhängepunkte sicher auf einem Stativ, an der Wand oder an einer
Traverse montieren.
2. BESCHREIBUNG
NX 910-A
2100 Watt
10” Woofer - 2,5” v.c.
1.75” Compression Driver
16.4 Kg (36.1 lbs)
NX 912-A
2100 Watt
12” Woofer - 2,5” v.c.
1.75” Compression Driver
20.8 Kg (45.8 lbs)
NX 915-A
2100 Watt
15” Woofer - 2,5” v.c.
1.75” Compression Driver
24.1 Kg (53.1 lbs)
NX 932-A
2100 Watt
12” Woofer - 2,5” v.c.
3.0” Neo Compression Driver
20.8 Kg (45.8 lbs)
NX 945-A
2100 Watt
15” neo Woofer - 3,5” v.c.
4.0” Neo Compression Driver
24.1 Kg (53.1 lbs)

31
DE
1
PRESETS SELECTOR Mit diesem Wahlschalter können Sie 3 verschiedene
Voreinstellungen auswählen. Durch Drücken des Wählers zeigen die PRESET-LEDs an, welches
Preset gewählt ist.
LINEAR - diese Voreinstellung wird für alle normalen Anwendungen des
Lautsprechers empfohlen.
BOOST - diese Voreinstellung erzeugt eine Klanganpassung (Loudness), die für
Anwendungen mit Hintergrundmusik empfohlen wird, wenn das System mit einem
niedrigen Pegel spielt.
STAGE - diese Voreinstellung wird empfohlen, wenn der Lautsprecher als
Bühnenmonitor verwendet wird.
2
PRESET LEDS Diese LEDs zeigen das ausgewählte Preset an.
3
FEMALE XLR/JACK COMBO INPUT Dieser symmetrische Eingang nimmt einen
Standard-Klinke- oder XLR-Stecker auf.
4
MALE XLR SIGNAL OUTPUT Dieser XLR-Ausgangsanschluss bietet eine
Durchschleifung für den Anschluss weiterer Lautsprecher
5
OVERLOAD/SIGNAL LEDS
Die SIGNAL-LED leuchtet grün, wenn am Haupt-COMBO-Eingang ein Signal
anliegt.
zeigt eine Überlastung des Eingangssignals an. Es ist in Ordnung, wenn
die OVERLOAD-LED gelegentlich blinkt. Wenn die LED häufig blinkt oder
ständig leuchtet, drehen Sie den Signalpegel herunter, um einen verzerrten
Klang zu vermeiden. Der eingebaute Verstärker verfügt über eine eingebaute
Begrenzerschaltung, um ein Clipping des Eingangs oder eine Übersteuerung der
Schallwandler zu verhindern.
6
VOLUME CONTROL Stellt die Master-Lautstärke ein.
7
POWER MAINS SWITCH Der Netzschalter schaltet die Stromversorgung ein und aus.
8
NETZSCHALTER Der Netzschalter schaltet die Stromversorgung ein und aus.
9
SICHERUNGSHALTER Netzsicherungsgehäuse.
10
POWERCON INPUT SOCKET Stromanschluss IP-Rated PowerCON TRUE1 TOP
(nur NX 945-A).
11
POWERCON OUTPUT SOCKET zum Anschluss eines weiteren Lautsprechers mit
Powercon Anschluss (nur NX 932-A und NX 945-A). Power link: 100-120V~ max 1600W l
200-240V~MAX 3300W
WARNUNG! ACHTUNG! Der Anschluss von Lautsprechern sollte nur
von qualifiziertem und erfahrenem Personal vorgenommen werden, das über das
technische Know-how verfügt oder ausreichend spezifische Anweisungen hat
(um sicherzustellen, dass die Anschlüsse korrekt ausgeführt werden), um jegliche
Gefahr zu vermeiden.
Schließen Sie Lautsprecher nicht bei eingeschaltetem Verstärker an, um die Gefahr
eines elektrischen Schlages zu vermeiden.
Überprüfen Sie vor dem Einschalten der Anlage alle Anschlüsse und stellen Sie
sicher, dass es keine versehentlichen Kurzschlüsse gibt.
Die gesamte Beschallungsanlage muss in Übereinstimmung mit den geltenden
örtlichen Gesetzen und Vorschriften für elektrische Anlagen konzipiert und
installiert werden.
3. FUNKTIONEN UND BEDIENELEMENTE
1
2 3
4
6
5
7
8
9
10 11

32
DE
4. ANSCHLÜSSE
Die Anschlüsse müssen nach den von der AES (Audio Engineering Society) festgelegten Standards verdrahtet werden
VOR DEM ANSCHLIESSEN DES LAUTSPRECHERS
Auf der Rückseite finden Sie alle Bedienelemente, Signal- und Stromanschlüsse. Überprüfen Sie zunächst das auf der Rückseite angebrachte
Spannungsschild (115 Volt oder 230 Volt). Das Etikett zeigt die richtige Spannung an. Wenn Sie eine falsche Spannung auf dem Etikett lesen oder
das Etikett gar nicht finden können, rufen Sie bitte Ihren Händler oder eine autorisierte RCF-SERVICE-ZENTRALE an, bevor Sie den Lautsprecher
anschließen. Diese Überprüfung vermeidet Schäden. Falls Sie die Spannung ändern müssen, wenden Sie sich bitte an Ihren Händler oder eine
autorisierte RCF-Kundendienststelle. Dieser Vorgang erfordert den Austausch der Sicherung und ist einer RCF-KUNDENDIENSTSTELLE vorbehalten..
VOR DEM EINSCHALTEN DES LAUTSPRECHERS
Sie können nun das Stromkabel und das Signalkabel anschließen. Vergewissern Sie sich vor dem Einschalten des Lautsprechers, dass der
Lautstärkeregler auf dem Mindestpegel steht (auch am Mischpultausgang). Es ist wichtig, dass der Mixer bereits eingeschaltet ist, bevor Sie
den Lautsprecher einschalten. Dadurch werden Schäden am Lautsprecher und laute “Stöße” durch das Einschalten von Teilen der Audiokette
vermieden. Es ist eine gute Praxis, die Lautsprecher immer als letztes einzuschalten und sie sofort nach der Benutzung wieder auszuschalten. Sie
können nun den Lautsprecher einschalten und den Lautstärkeregler auf einen angemessenen Pegel einstellen
SCHUTZSCHALTUNGEN
Die Lautsprecher der Serie NX 9 sind mit einem kompletten System von Schutzschaltungen ausgestattet. Die Schaltungen wirken sehr sanft auf
das Audiosignal ein um den Pegel zu kontrollieren und die Verzerrung auf einem akzeptablen Niveau zu halten.
SPANNUNGSEINSTELLUNG (DEM RCF-SERVICEZENTRUM VORBEHALTEN)
200-240V, 50Hz
100-120V, 60Hz
(SICHERUNGSWERT T6.3A L 250V)
TRS-BUCHSENANSCHLUSS
Symmetrische Mono-Verkabelung
TIPTIP
RINGRING
SLEEVESLEEVE
TS-BUCHSENANSCHLUSS
Unsymmetrische Mono-Verkabelung
TIPTIP
SLEEVESLEEVE
PIN 1 = GROUND (SHIELD)
PIN 2 = HOT (+)
PIN 3 = COLD (-)
SLEEVE = GROUND (SHIELD)
TIP = HOT (+)
RING = COLD (-)
MALE XLR CONNECTOR
Balanced wiring
22
11
33
FEMALE XLR CONNECTOR
Balanced wiring
22
11
33

33
DE
5. INSTALLATION
STEHEND AUF DEM
BODEN ODER BÜHNE
BÜHNEN-
MONITOR
STATIV SUBWOOFER
(DISTANZSTANGE)
BODEN KONFIGURATIONEN
Mit den NX 9-Lautsprechern sind verschiedene Konfigurationen möglich; sie können auf dem Boden oder auf einer Bühne als Haupt-PA aufgestellt
oder als Bühnenmonitore verwendet werden; sie können auch auf einem Lautsprecherstativ oder über einem Subwoofer montiert werden.
GEFLOGENE KONFIGURATIONEN
Die Lautsprecher der Serie NX 9 können an den 6 x M10-Aufhängepunkten auf der Oberseite, an der Seite und an der Rückseite der Lautsprecher
aufgehängt werden oder mit dem spezifischen Zubehör.
Beispiele für richtiges Aufhängen
Wandmontage mit H-BR
ERFORDERLICHES ZUBEHÖR
Für NX 912 / NX 932:
H-BR 2X COMPACT M 12 (13360445)
2X PLATE H-BR NX 912-915 (13360506)
Für NX 915 / NX 935:
H-BR 2X COMPACT C 45 (13360493)
2X PLATE H-BR NX 912-915 (13360506)

34
DE
5. INSTALLATION
WARNUNG! ACHTUNG! Hängen Sie die Lautsprecher niemals an ihren Griffen auf. Die Griffe sind für den
Transport und nicht für das Aufhängen vorgesehen.
WARNING! CAUTION! Die oberen und unteren mittleren Löcher dienen NICHT zum Aufhängen des Produkts; nur
für H-BR verwenden.
WARNUNG! ACHTUNG! Wenn Sie dieses Produkt auf einem Stativ oder über einem Subwoofer verwenden
möchten, überprüfen Sie bitte vor der Installation des Systems die zulässigen Konfigurationen und die Angaben zum Zubehör
auf der RCF-Website, um Gefahren und Schäden für Menschen, Tiere und Gegenstände zu vermeiden. Stellen Sie in jedem Fall
sicher, dass das Stativ oder der Subwoofer, auf dem der Lautsprecher steht, auf einem waagerechten Boden und ohne Neigung
steht.
WARNUNG! ACHTUNG! Die Verwendung dieser Lautsprecher mit Stativ- oder Distanzstange darf nur von
qualifiziertem und erfahrenem Personal durchgeführt werden, das entsprechend für professionelle Systeminstallationen
geschult ist. In jedem Fall liegt es in der Verantwortung des Anwenders, die Sicherheit des Systems zu gewährleisten und
jegliche Gefahr oder Beschädigung von Menschen, Tieren und Gegenständen zu vermeiden.

35
DE
WARNUNG! Um das Risiko eines elektrischen Schlags zu verringern, zerlegen Sie dieses Produkt nicht, wenn Sie nicht
qualifiziert sind. Überlassen Sie die Wartung qualifiziertem Servicepersonal.
6. PROBLEMLÖSUNGEN
DER LAUTSPRECHER SCHALTET SICH NICHT EIN
Vergewissern Sie sich, dass der Lautsprecher eingeschaltet und an eine funktionierende Steckdose (AC) angeschlossen ist.
DER LAUTSPRECHER IST AN EINE STECKDOSE ANGESCHLOSSEN, LÄSST SICH ABER NICHT EINSCHALTEN
Vergewissern Sie sich, dass das Netzkabel intakt und richtig angeschlossen ist.
DER LAUTSPRECHER IST EINGESCHALTET, GIBT ABER KEINEN TON AB
Prüfen Sie, ob die Signalquelle richtig eingestellt ist und die Signalkabel nicht beschädigt sind.
DER TON VERZERRT IST UND DIE ÜBERLAST-LED BLINKT HÄUFIG
Drehen Sie den Ausgangspegel des Mischers herunter.
DER TON IST SEHR LEISE UND ZISCHEND
Der Ausgangspegel des Mischers ist möglicherweise zu niedrig.
DER TON ZISCHT AUCH BEI RICHTIGER VERSTÄRKUNG UND LAUTSTÄRKE
Die Quelle sendet möglicherweise ein minderwertiges oder verrauschtes Signal
BRUMM- ODER SUMMGERÄUSCHE
Überprüfen Sie die AC-Erdung und alle Geräte, die an das Mischpult angeschlossen sind, einschließlich Kabel und Stecker
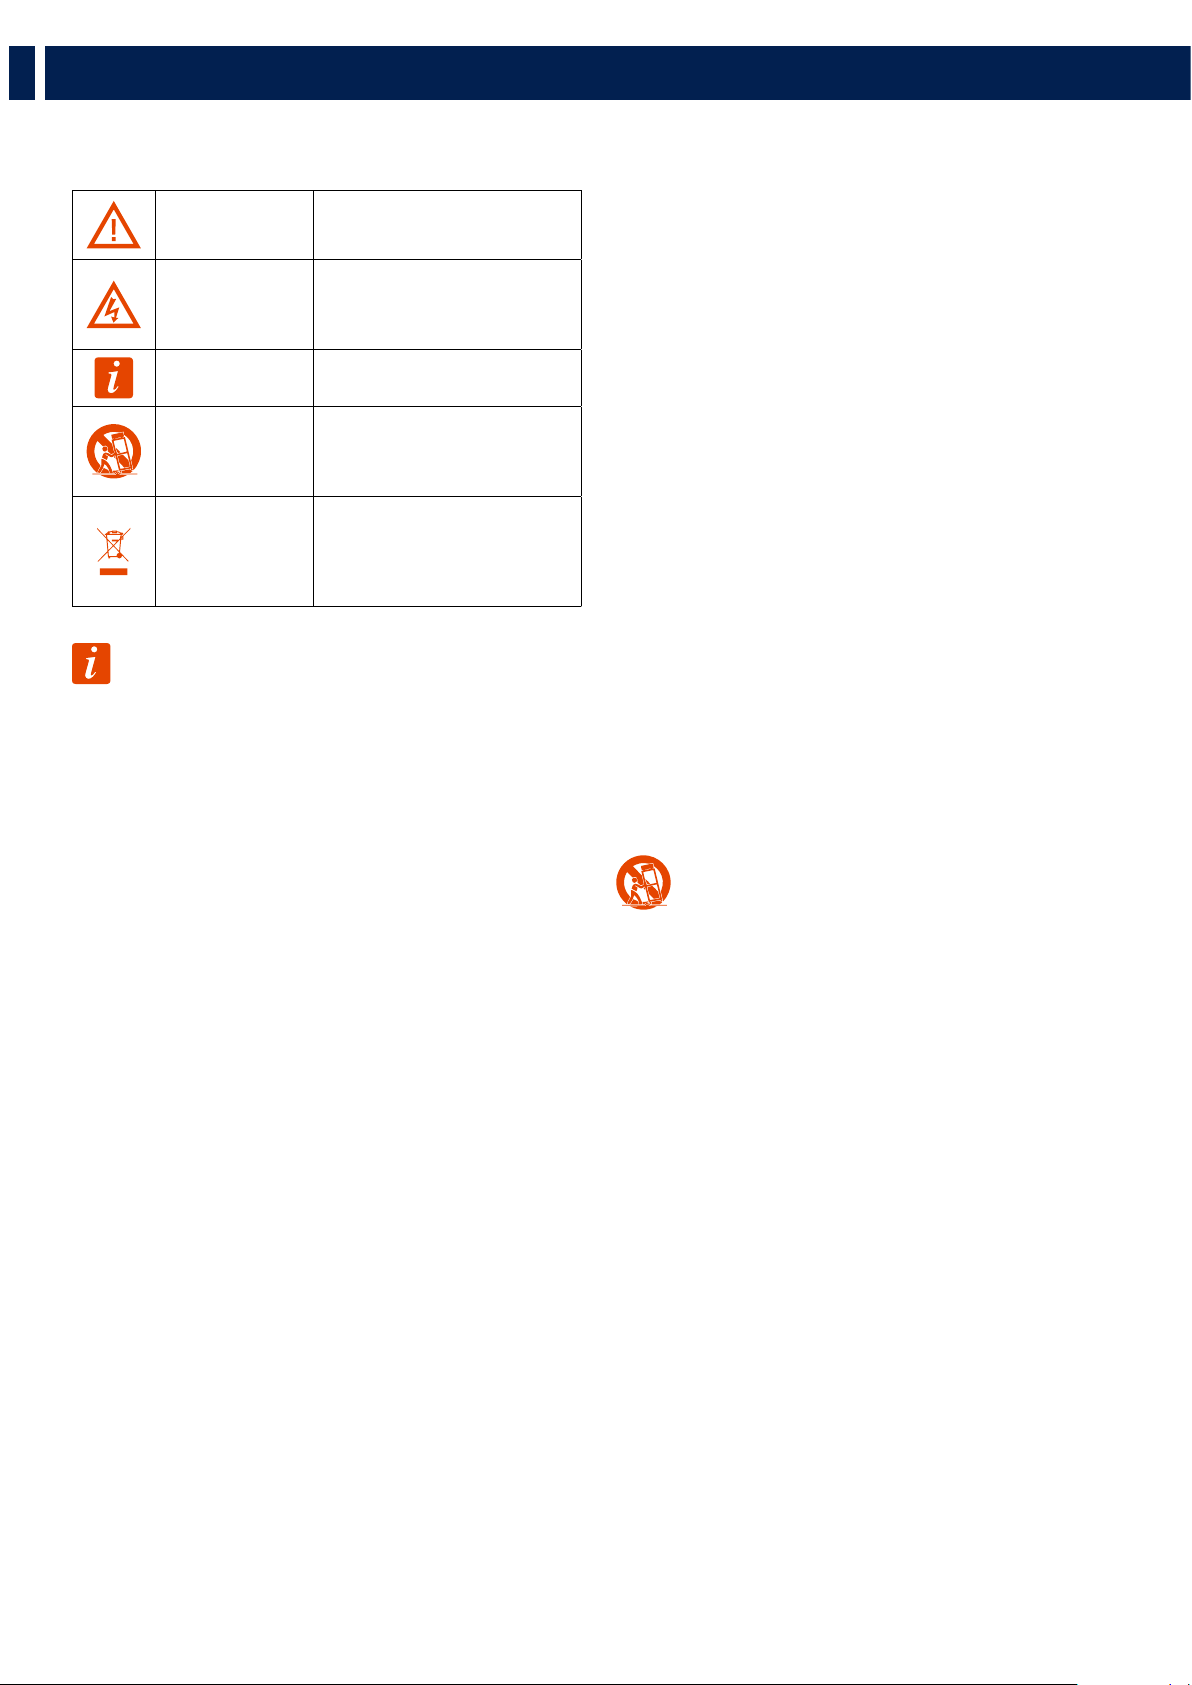
36
ES
1. MEDIDAS DE SEGURIDAD E INFORMACIÓN GENERAL
Los símbolos que se muestran en este documento informan sobre instrucciones de
uso y advertencias importantes que debe seguir rigurosamente.
PRECAUCIÓN
Instrucciones de uso importantes:
detalla peligros que pueden dañar el
producto, incluida la pérdida de datos.
ADVERTENCIA
Consejo importante referente al uso
de voltajes peligrosos y al posible
peligro de descarga eléctrica, lesiones
personales o muerte.
AVISO IMPORTANTE
Información importante y de ayuda
sobre el tema
SOPORTES,
CARRETILLAS
Y CARROS DE
TRANSPORTE
Información sobre el uso de soportes,
carretillas y carros de transporte.
Recuerde mover el producto con mucho
cuidado y no inclinarlo nunca.
ELIMINACIÓN DE
RESIDUOS
Este símbolo indica que este producto
no debe eliminarse junto con los
desechos domésticos según la directiva
sobre residuos de aparatos eléctricos
(2012/19/EU) y sus leyes nacionales.
AVISO IMPORTANTE
Este manual contiene información importante sobre el uso correcto y seguro
del dispositivo. Antes de conectar y utilizar este producto, lea este manual de
instrucciones detenidamente y guárdelo para futuras consultas. El manual se
considera una parte integral de este producto y debe entregarse junto a él cuando
cambie de propietario para que sirva como referencia sobre las medidas de
seguridad, la correcta instalación y el uso. RCF S.p.A. no se responsabiliza de la
instalación y el uso incorrectos de este producto.
MEDIDAS DE SEGURIDAD
1. Todas las medidas, en particular las relacionadas con la seguridad, deben leerse
con especial detenimiento, pues ofrecen información de importancia.
2. Alimentación de las tomas de corriente
a. El voltaje de las tomas de corriente es suficientemente alto para presentar
riesgo de electrocución; instale y realice las conexiones a este producto antes
de enchufarlo.
b. Antes de encenderlo, asegúrese de que todas las conexiones se hayan realizado
correctamente y que el voltaje de las tomas de corriente se corresponda con el
voltaje del panel de información de la unidad. Si no se corresponden, póngase
en contacto con su distribuidor de RCF.
c. Las piezas metálicas de la unidad están conectadas a tierra a través del cable de
alimentación. Un dispositivo de CLASE I debe conectar su cable de alimentación
a una toma de corriente con conexión de protección a tierra.
d. Proteja el cable de alimentación de posibles daños. Asegúrese de que está
colocado de tal manera que no pueda resultar pisado o aplastado por otros
objetos.
e. Para prevenir descargas eléctricas, no abra nunca este producto (no tiene piezas
en su interior a las que el usuario necesite acceder).
f. Cuidado: si el fabricante facilita un producto solo con conectores POWERCON
y sin el cable de alimentación, deberán usarse los siguientes cables con los
conectores NAC3FCA (alimentación de entrada) y NAC3FCB (alimentación de
salida):
- UE: cable H05VV-F 3G 3x2.5 mm2 - Norma IEC 60227-1
- JP: cable VCTF 3x2 mm2; 15Amp/120V~ - Norma JIS C3306
- EEUU: cable SJT/SJTO 3x14 AWG; 15Amp/125V~ - Norma ANSI/UL 62
3. Asegúrese de que no puedan entrar objetos o líquidos en el producto para evitar
posibles cortocircuitos. Este dispositivo no debe exponerse a goteos o salpicaduras.
No se deben colocar objetos con líquidos, como jarrones, sobre este aparato. No
se deben colocar fuentes de calor expuestas, como velas encendidas, sobre este
aparato.
4. No intente nunca llevar a cabo operaciones, modificaciones o reparaciones que
no aparezcan expresamente descritas en este manual.
Póngase en contacto con su centro de servicio autorizado o personal cualificado
en caso de que:
- El producto no funcione o funcione de forma anómala.
- El cable de alimentación se haya dañado.
- Se hayan introducido objetos o líquidos en la unidad.
- El producto haya sufrido un golpe fuerte.
5. Si este producto no se va a utilizar durante un largo periodo de tiempo,
desconecte el cable de alimentación.
6. Si este producto comienza a emitir olores extraños o humo, apáguelo
inmediatamente y desconecte el cable de alimentación.
7. No conecte este producto a ningún tipo de equipamiento o accesorio que no esté
diseñado específicamente para él.
Para instalaciones en suspensión, utilice solo los puntos de anclaje especiales
para tal fin y no intente colgar el producto utilizando elementos que no estén
indicados o no sean específicos para ello. Compruebe también la idoneidad de la
superficie de soporte a la que se anclará el producto (muro, techo, estructura, etc.)
y los componentes que se van a utilizar para la suspensión (tornillos de anclaje,
tornillos, bridas no suministradas por RCF, etc.) y que deben garantizar la seguridad
del sistema o la instalación con el paso del tiempo, considerando, asimismo, las
vibraciones mecánicas generadas normalmente por los transductores.
Para prevenir riesgos de caída del equipo, no apile múltiples unidades de este
producto a no ser que esta opción se indique expresamente en el manual de
usuario.
8. RCF S.p.A. recomienda encarecidamente que la instalación de este
producto la realicen instaladores profesionales cualificados (o empresas
especializadas) que puedan asegurar la correcta instalación y certificarla
según las normativas vigentes.
Todo el sistema de sonido debe cumplir con las normativas actuales
referentes a los sistemas eléctricos.
9. Soportes, carretillas y carros de transporte.
El equipo solo debe utilizarse en soportes, carretillas y carros de
transporte recomendados por el fabricante. El conjunto (equipo +
soporte/carretilla/carro de transporte) debe moverse con extrema
precaución. Las paradas repentinas, los empujones excesivos y los
suelos desnivelados pueden hacer que vuelque. No incline nunca el
conjunto.
10. Hay numerosos factores mecánicos y eléctricos que deben tenerse en cuenta
al instalar un sistema de sonido profesional, además de aquellos estrictamente
acústicos como la presión sonora, los ángulos de cobertura, la respuesta en
frecuencia, etc.
11. Pérdida auditiva.
La exposición a altos niveles de presión sonora puede causar la pérdida permanente
de la audición. El nivel de presión sonora que provoca pérdida auditiva depende
de la persona y del tiempo de exposición al sonido. Para prevenir la exposición
potencialmente peligrosa a altos niveles de presión acústica, cualquier persona que
esté expuesta a ellos debe utilizar dispositivos de protección adecuados. Cuando se
utiliza un transductor capaz de emitir altos niveles de presión sonora, es necesario
llevar puestos tapones para los oídos o auriculares de protección. Consulte las
especificaciones técnicas del manual para conocer el nivel máximo de presión
sonora.
PRECAUCIONES DE USO
- Coloque este producto lejos de cualquier fuente de calor y asegúrese siempre
de que hay suficiente circulación de aire a su alrededor.
- No sobrecargue este producto durante un periodo de tiempo prolongado.

37
ES
1. MEDIDAS DE SEGURIDAD E INFORMACIÓN GENERAL
- No fuerce nunca los elementos de control (teclas, botones, etc.).
- No utilice disolventes, alcohol, benceno u otras sustancias volátiles para limpiar
las partes externas de este producto.
AVISO IMPORTANTE
Para evitar el ruido en los cables de señal de línea, utilice solo cables apantallados
y evite colocarlos cerca de:
- Equipos que generen campos electromagnéticos de gran intensidad
- Cables de alimentación
- Líneas de altavoces
¡ADVERTENCIA! ¡PRECAUCIÓN! Para evitar riesgo de
incendio y descarga eléctrica, no exponga nunca este producto a la lluvia
o la humedad.
¡ADVERTENCIA! Para evitar el riesgo de descarga eléctrica, no
conecte el producto a la toma de corriente si la rejilla está retirada.
¡ADVERTENCIA! Para reducir el riesgo de descarga eléctrica, no
desmonte este producto a no ser que tenga la cualificación para hacerlo.
Deje el trabajo de mantenimiento a técnicos cualificados.
ELIMINACIÓN CORRECTA DE ESTE PRODUCTO
Este producto se debe eliminar en un lugar autorizado de recogida
de aparatos eléctricos y electrónicos (AEE). La eliminación
incorrecta de este tipo de residuo podría tener un impacto
negativo en el medioambiente y en la salud humana debido a
sustancias potencialmente peligrosas
que se relacionan generalmente con los AEE. Su cooperación en la
correcta eliminación de este producto contribuirá al uso efectivo de
los recursos naturales. Para más información sobre los lugares en los
que puede dejar su equipo para reciclarlo, póngase en contacto con
la autoridad de residuos de su oficina municipal, con la autoridad
responsable de residuos o con el servicio de recogida de basura.
CUIDADO Y MANTENIMIENTO
Para asegurar un servicio duradero del producto, siga los siguientes consejos:
- Si va a situar el producto en exteriores, asegúrese de que está a cubierto y
protegido de la lluvia y la humedad.
- Si necesita utilizar el producto en entornos fríos, caliente lentamente las bobinas
móviles enviando una señal a bajo volumen durante 15 minutos antes de enviar
señales de alta potencia.
- Use siempre un paño seco para limpiar las superficies exteriores del altavoz,
siempre con la alimentación apagada.
PRECAUCIÓN: para evitar dañar el acabado externo, no utilice
disolventes de limpieza o sustancias abrasivas.
¡ADVERTENCIA! ¡PRECAUCIÓN! Limpie los altavoces
activos solamente cuando estén apagados.
RCF S.p.A. se reserva el derecho a hacer cambios sin
previo aviso para rectificar cualquier tipo de error u
omisión.
Consulte siempre la última versión del manual en
www.rcf.it.

38
ES
LA SERIE NX 9
La Serie NX 9 está diseñada para ofrecer un rendimiento de audio extraordinario y una versatilidad a prueba de giras para músicos solistas, bandas
y DJs. El nuevo diseño electroacústico biamplificado de 2100W proporciona unos niveles de presión sonora impresionantes, incluso cuando
se utiliza en entornos al aire libre y en largas distancias, con una calidad de sonido insuperable. La combinación de transductores de diseño
especial, el procesamiento DSP avanzado y una guía de ondas de directividad constante produce una cobertura uniforme en la zona de escucha
con un sonido excelente, sin distorsiones y con la fiabilidad de la que hace gala RCF. Al combinar los algoritmos FiRPHASE y Bass Motion Control
exclusivos de RCF, perfectamente ajustados para cada modelo, el público experimentará una claridad absoluta en la reproducción de las voces y
unos graves profundos y potentes. La resistente caja de madera es fácil de transportar y se puede instalar con seguridad en un mástil, colgada, en
la pared o en un truss utilizando los múltiples puntos de anclaje disponibles.
2. DESCRIPCIÓN
NX 910-A
2100W
Altavoz de graves de 10'', bobina de 2,5''
Motor de compresión de 1,75''
16,4 kg / 36,1 lb
NX 912-A
2100W
Altavoz de graves de 12'', bobina de 2,5''
Motor de compresión de 1,75''
20,8 kg / 45,8 lb
NX 915-A
2100W
Altavoz de graves de 15'', bobina de 2,5''
Motor de compresión de 1,75''
24,1 kg / 53,1 lb
NX 932-A
2100 Watt
12” Woofer - 2,5” v.c.
3.0” Neo Compression Driver
20.8 Kg (45.8 lbs)
NX 945-A
2100 Watt
15” neo Woofer - 3,5” v.c.
4.0” Neo Compression Driver
24.1 Kg (53.1 lbs)
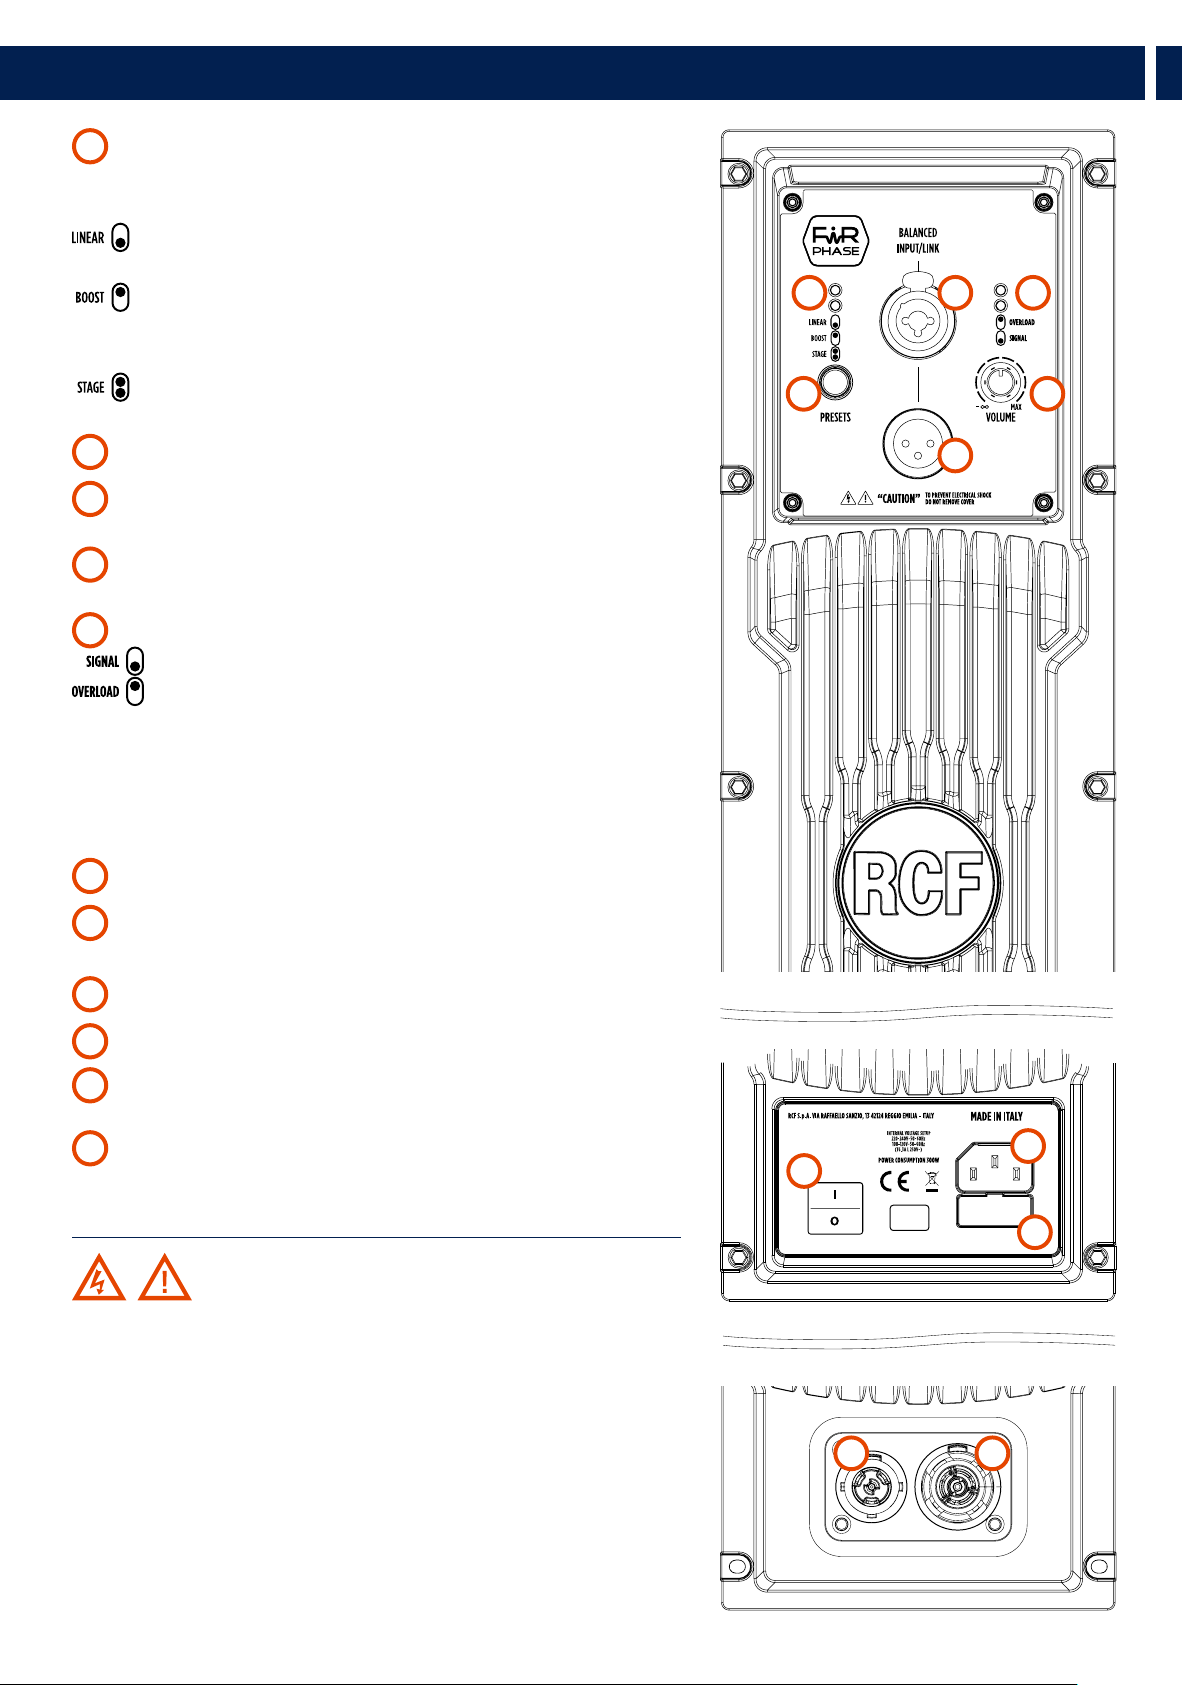
39
ES
1
SELECTOR DE PRESETS Este selector permite seleccionar 3 presets
diferentes. Presionando el selector, los LED de la sección PRESET indicarán qué
preset se ha seleccionado.
LINEAR - este preset está recomendado para todas las aplicaciones
convencionales de la caja acústica.
BOOST - este preset crea una ecualización de tipo loudness
recomendada para aplicaciones de música de fondo cuando el sistema
reproduce sonidos a niveles bajos.
STAGE - este preset está recomendado cuando se utiliza el altavoz como
monitor de escenario.
2
LED de la sección PRESETS Estos LED indican el preset seleccionado.
3
ENTRADA HEMBRA COMBO XLR/JACK Esta entrada balanceada acepta un
conector JACK o XLR macho estándar.
4
SALIDA DE SEÑAL XLR MACHO Este conector de salida XLR ofrece un
puenteo (loop through) para encadenar altavoces en serie.
5
LED DE SOBRECARGA/SEÑAL Estos LED son:
LED SIGNAL verde: cuando hay señal en la entrada COMBO principal.
LED OVERLOAD: indica una sobrecarga de la señal de entrada. No
pasa nada si el LED de OVERLOAD parpadea ocasionalmente. Si el
LED parpadea frecuentemente o se mantiene encendido, baje el nivel
de la señal para que no se distorsione el sonido. En cualquier caso,
el amplificador tiene un circuito limitador integrado para evitar la
saturación de entrada o la sobrecarga de los transductores.
6
CONTROL DE VOLUMEN Ajusta el volumen principal.
7
INTERRUPTOR DE ENCENDIDO El interruptor de encendido enciende o
apaga la alimentación AC.
8
PORTAFUSIBLE Zócalo del fusible principal.
9
CONECTOR IEC ESTÁNDAR DE 3 PINES Conexión de alimentación.
10
CONECTOR DE ENTRADA POWERCON Conexión de alimentación IP-
Rated PowerCON TRUE1 TOP (solo en el modelo NX 945-A).
11
CONECTOR DE SALIDA POWERCON Envía la alimentación eléctrica a otro
altavoz (solo en el modelo NX 932-A y NX 945-A). Puenteo de alimentación:
100-120 V~máx. 1600 W l 200-240 V~MÁX. 3300 W
¡ADVERTENCIA! ¡PRECAUCIÓN! Las conexiones de los
altavoces las debe realizar únicamente personal cualificado y con
experiencia que tenga conocimientos técnicos o instrucciones específicas
para asegurar que se hacen correctamente y evitar cualquier tipo de
riesgo eléctrico.
Para evitar el riesgo de descarga eléctrica, no conecte los altavoces
cuando el amplificador esté encendido.
Antes de encender el sistema, compruebe todas las conexiones y
asegúrese de que no hay cortocircuitos accidentales.
Todo el sistema de sonido debe estar diseñado e instalado de acuerdo
a las normativas y leyes locales vigentes relacionadas con los aparatos
eléctricos.
3. PANEL TRASERO Y CONTROLES
1
2 3
4
6
5
7
8
9
10 11

40
ES
4. CONEXIONES
Los conectores deben estar cableados de acuerdo con la normativa especificada por la AES (Sociedad de Ingenieros de Sonido de EE.UU.).
ANTES DE CONECTAR EL ALTAVOZ
En el panel trasero encontrará todos los controles, entradas de señal y alimentación. En primer lugar, compruebe la etiqueta con el voltaje en el
panel trasero (115 voltios o 230 voltios). La etiqueta indica el voltaje correcto. Si ve que la etiqueta especifica un voltaje erróneo o no está presente,
llame a su distribuidor o CENTRO DE SERVICIO RCF autorizado antes de conectar el altavoz. Esta comprobación evitará que se produzcan daños.
Si fuera necesario cambiar el voltaje, llame a su distribuidor o CENTRO DE SERVICIO RCF autorizado. Esta operación requiere la sustitución del
valor del fusible y debe realizarla un CENTRO DE SERVICIO RCF.
ANTES DE ENCENDER EL ALTAVOZ
Ahora puede conectar el cable de alimentación y el cable de señal. Antes de encender el altavoz, asegúrese de que el control de volumen esté
al mínimo (incluso en la salida del mezclador). Es importante que el mezclador esté encendido antes de encender el altavoz. Esto evitará que se
produzcan daños en el altavoz y que haya “golpes” de ruido al encender partes de la cadena de sonido. Se recomienda encender siempre los
altavoces en último lugar y apagarlos en primer lugar después de su uso. Ahora puede encender el altavoz y ajustar el control de volumen al nivel
adecuado.
PROTECCIONES
Los altavoces de la Serie NX 9 vienen equipados con un sistema completo de circuitos de protección. El circuito actúa de forma sutil sobre la señal
de sonido, controlando su nivel y manteniendo la distorsión a un nivel aceptable.
CONFIGURACIÓN DEL VOLTAJE (RESERVADO AL CENTRO DE SERVICIO DE RCF)
200-240 voltios, 50 Hz
100-120 voltios, 60 Hz
(VALOR DEL FUSIBLE T6.3 A L 250V)
CONECTOR JACK TRS
Cableado mono balanceado
PUNTAPUNTA
ANILLOANILLO
MALLAMALLA
CONECTOR JACK TS
Cableado mono no balanceado
PUNTAPUNTA
MALLAMALLA
PIN 1 = TIERRA (BLINDAJE)
PIN 2 = SEÑAL +
PIN 3 = SEÑAL -
MALLA = TIERRA (BLINDAJE)
PUNTA = SEÑAL (+)
ANILLO = SEÑAL (-)
MALE XLR CONNECTOR
Balanced wiring
22
11
33
FEMALE XLR CONNECTOR
Balanced wiring
22
11
33

41
ES
5. INSTALACIÓN
SUELO O ESCENARIO
DE PIE
ESCENARIO
MONITOR
MÁSTIL
MONTADO
SUBWOOFER
MONTADO
CONFIGURACIONES DE SUELO
Los altavoces NX 9 se pueden colocar en el suelo, en el escenario como PA principal o como monitores; también se pueden montar en un mástil
en un soporte de altavoces o sobre un subwoofer.
CONFIGURACIONES COLGADAS
Los altavoces de la Serie NX 9 se pueden colgar desde los 6 puntos de anclaje M10 situados en su parte superior, a los lados y en la parte trasera
de la caja o con el accesorio específico.
Ejemplos de un colgado correcto
Montaje en pared con H-BR
ACCESORIOS REQUERIDOS
Por NX 912 / NX 932:
H-BR 2X COMPACT M 12 (13360445)
2X PLATE H-BR NX 912-915 (13360506)
Por NX 915 / NX 935:
H-BR 2X COMPACT C 45 (13360493)
2X PLATE H-BR NX 912-915 (13360506)

42
ES
5. INSTALACIÓN
¡ADVERTENCIA! ¡PRECAUCIÓN! No cuelgue nunca los altavoces de las asas. Las asas son únicamente para su
transporte, no para la sujeción de la caja.
WARNING! CAUTION! Los agujeros centrales superior e inferior NO son para colgar el producto; utilizar solo
para H-BR.
¡ADVERTENCIA! ¡PRECAUCIÓN! Para utilizar este producto en un mástil o sobre un subwoofer, antes de instalar
el sistema, verifique las configuraciones e indicaciones permitidas de los accesorios en la página web de RCF para evitar
cualquier tipo de peligro y causar daño a las personas, animales y objetos. En cualquier caso, asegúrese de que el mástil o el
subwoofer que sostiene el altavoz están situados en un suelo horizontal sin pendientes.
¡ADVERTENCIA! ¡PRECAUCIÓN! El soporte y el mástil solo pueden utilizarse con los altavoces por personal
cualificado, experimentado y formado adecuadamente en la instalación de sistemas profesionales. En cualquier caso, la
responsabilidad del usuario será garantizar en última instancia unas condiciones de seguridad del sistema óptimas y evitar
peligros o daños a las personas, animales y objetos.

43
ES
¡ADVERTENCIA! Para reducir el riesgo de descarga eléctrica, no desmonte este producto a no ser que
tenga la cualificación para hacerlo. Deje el trabajo de mantenimiento a técnicos cualificados.
6. RESOLUCIÓN DE PROBLEMAS
EL ALTAVOZ NO SE ENCIENDE
Asegúrese de que el altavoz esté encendido y conectado a una fuente de alimentación eléctrica activa.
EL ALTAVOZ ESTÁ CONECTADO A UNA FUENTE DE ALIMENTACIÓN ELÉCTRICA ACTIVA PERO NO SE ENCIENDE
Asegúrese de que el cable de alimentación esté en buen estado y se encuentra conectado correctamente.
EL ALTAVOZ ESTÁ ENCENDIDO PERO NO EMITE SONIDO
Compruebe que la fuente de sonido envía la señal correctamente y que los cables de señal no estén dañados.
EL SONIDO ESTÁ DISTORSIONADO Y EL LED OVERLOAD PARPADEA FRECUENTEMENTE
Baje el nivel de salida del mezclador.
EL SONIDO ES MUY BAJO Y SISEA
La ganancia de la fuente o el nivel de salida del mezclador podrían ser demasiado bajos.
EL SONIDO SISEA INCLUSO CON UNA GANANCIA Y VOLUMEN APROPIADOS
La fuente podría estar enviando una señal de baja calidad o con ruido.
RUIDO DE ZUMBIDO
Compruebe la toma de tierra de la alimentación eléctrica y todos los equipos conectados a la entrada del mezclador, incluidos los
cables y conectores.
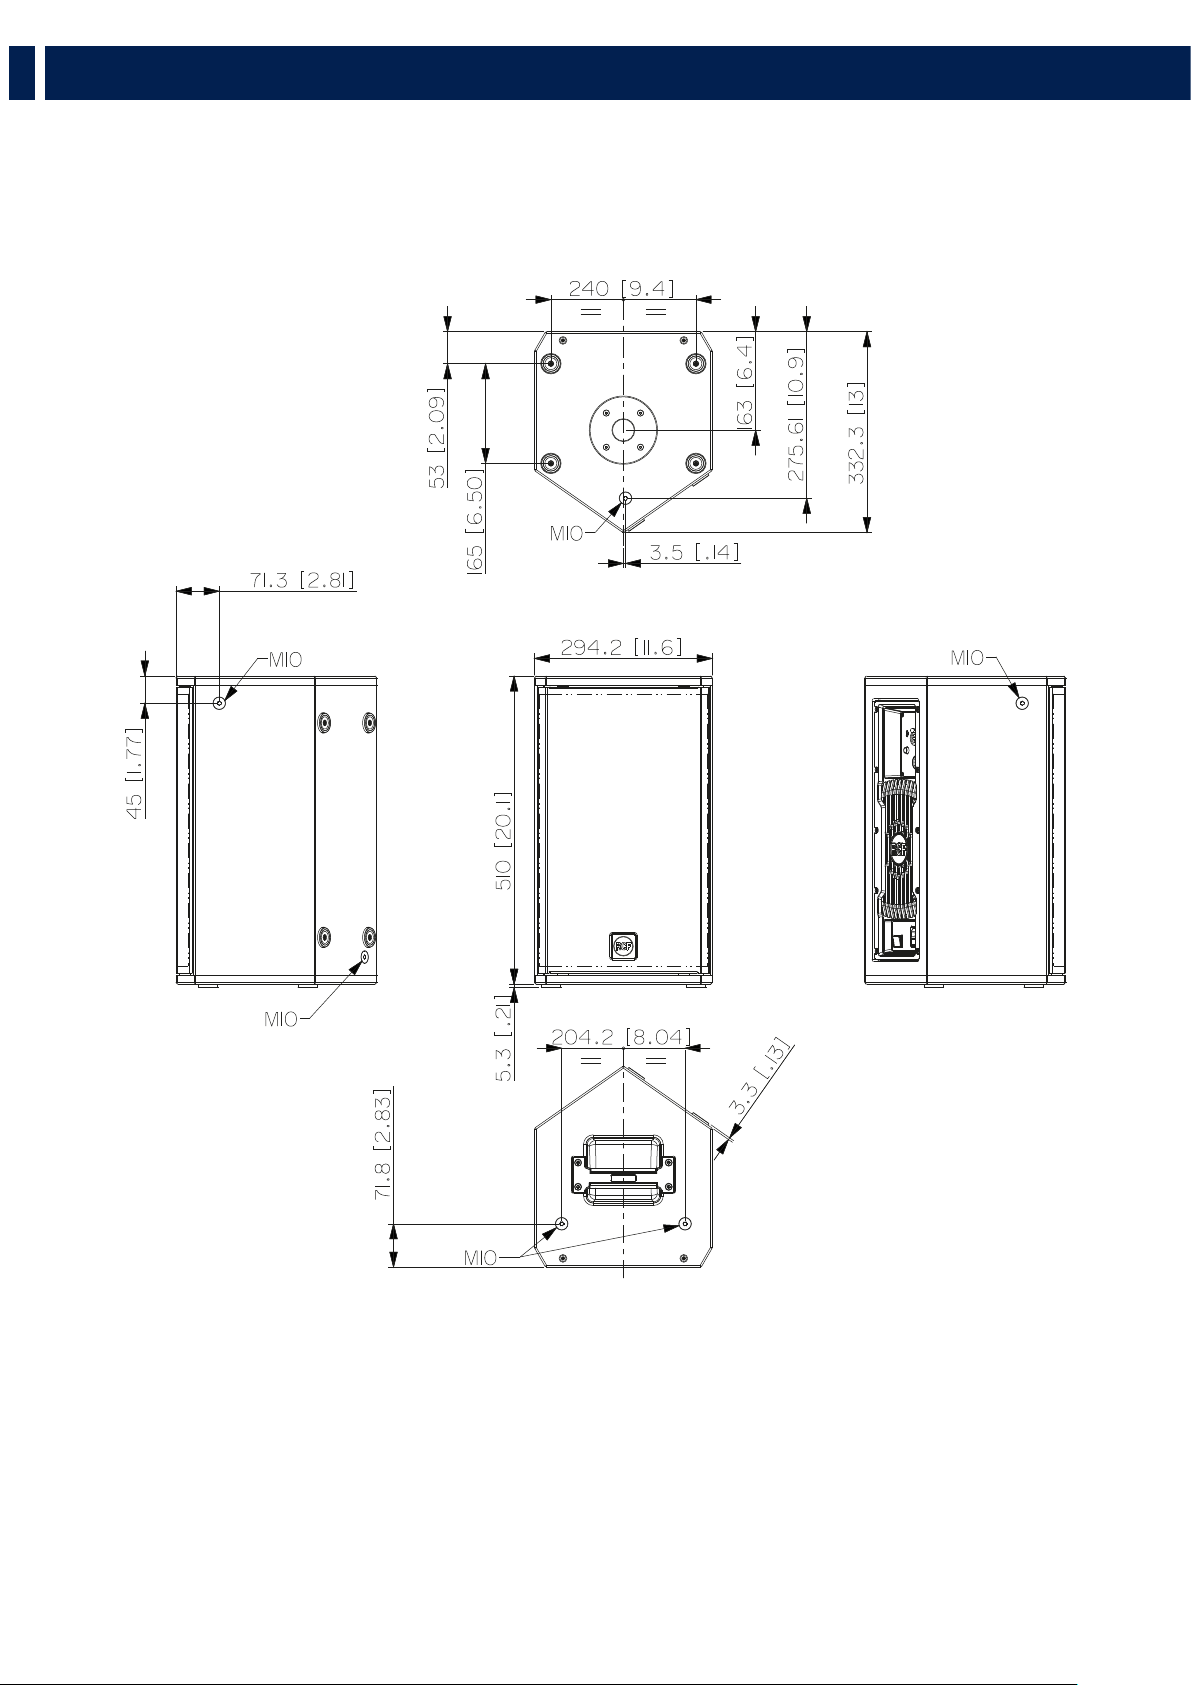
44
NX 910-A DIMENSIONS

45
NX 912-A DIMENSIONS
WARNING! This is not a single
suspension point; it can be used only
with the horizontal bracket (H-BR).
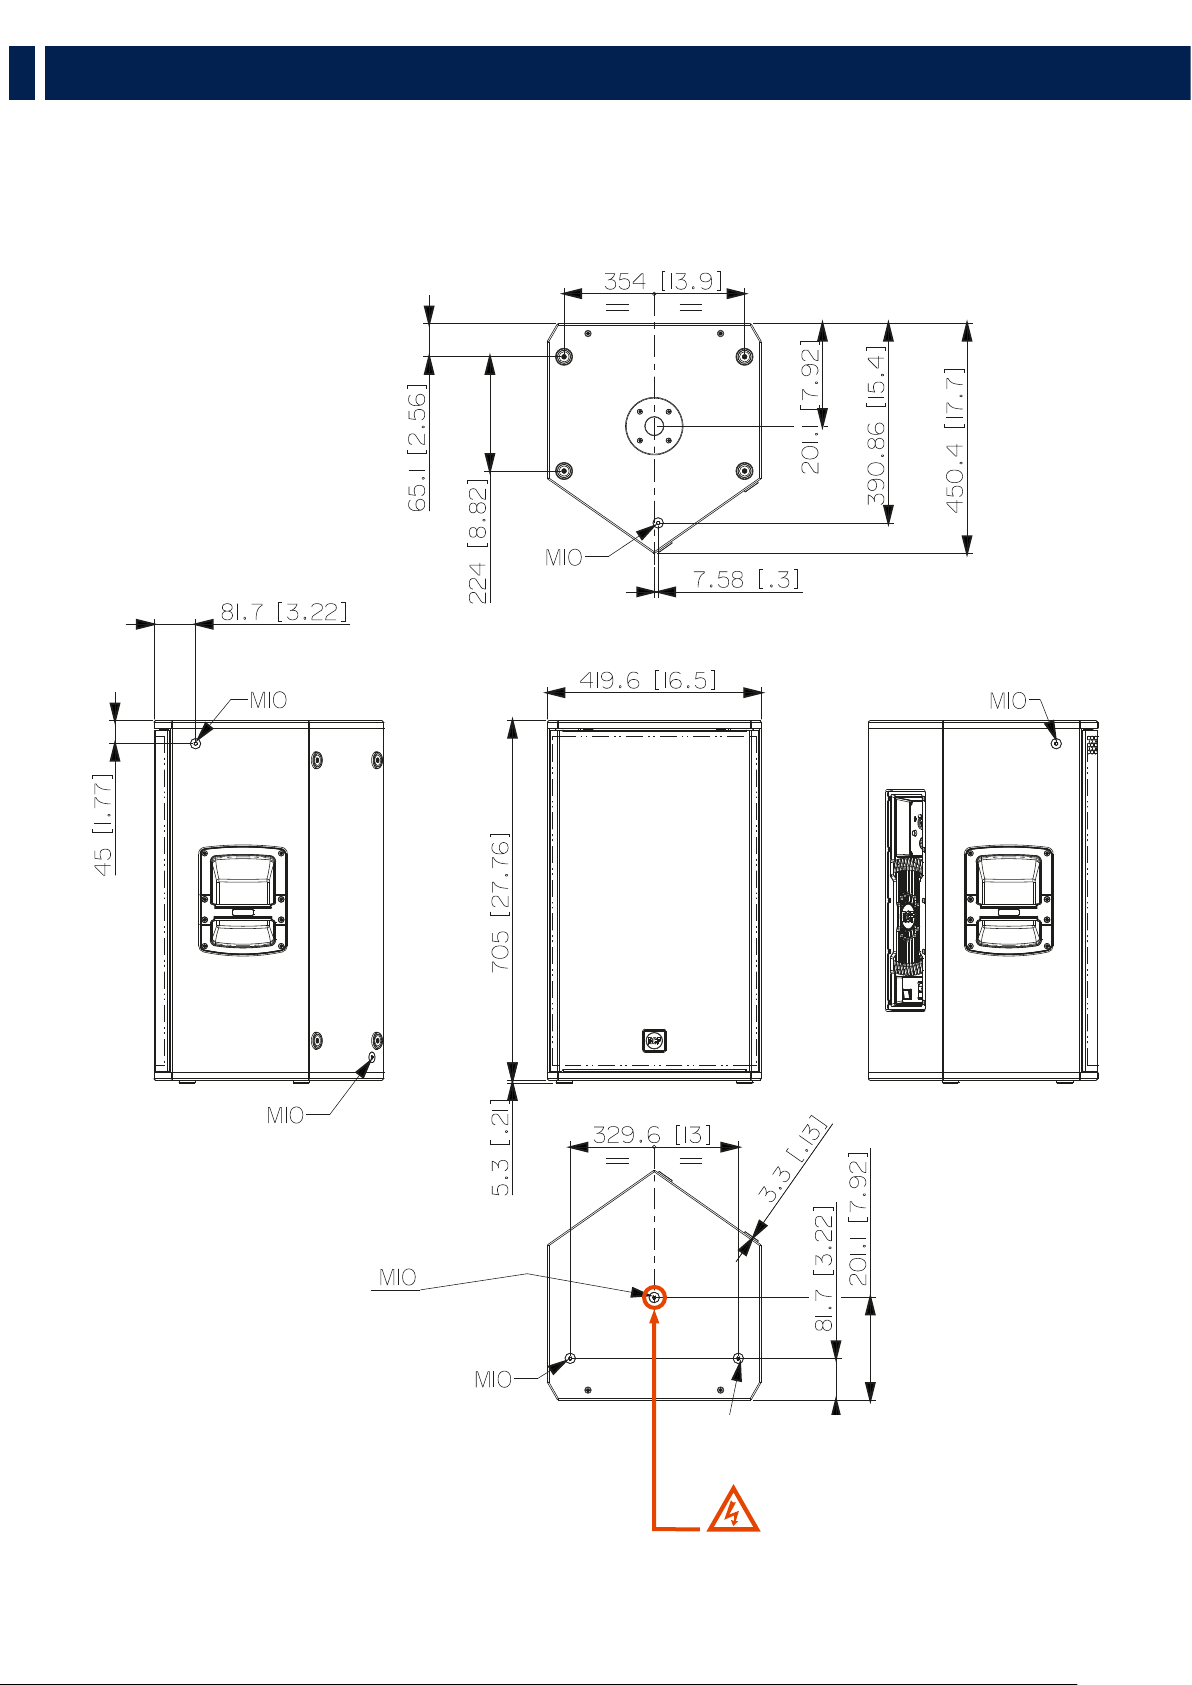
46
NX 915-A DIMENSIONS
WARNING! This is not a single
suspension point; it can be used only
with the horizontal bracket (H-BR).

47
NX 932-A DIMENSIONS
WARNING! This is not a single
suspension point; it can be used only
with the horizontal bracket (H-BR).

48
NX 945-A DIMENSIONS
WARNING! This is not a single
suspension point; it can be used only
with the horizontal bracket (H-BR).

49
SPECIFICATION / SPECIFICHE
TECHNICAL SPECIFICATIONS
Acoustical specifications
Transducers
Input/Output section
Processor section
Power section
Standard compliance
Physical specifications
Max SPL @ 1m:
Frequency Response:
Horizontal coverage angle:
Vertical coverage angle:
Compression Driver:
Woofer:
Input signal:
Input connectors:
Output connectors:
Input sensitivity:
Crossover Frequencies:
Protections:
Controls:
Total Power:
High frequencies:
Low frequencies:
Cooling:
Connections:
CE marking:
Cabinet/Case Material:
Hardware:
Limiter:
Handles:
Grille:
Color:
Height:
Width:
Depth:
Weight:
Size
100°
60°
XLR
Yes
NX 910-A
Steel
50 Hz ÷ 20000 Hz
130 dB
1.0'', 1.75'' v.c
10’', 2.5'' v.c
bal/unbal
Combo XLR/Jack
-2 dBu/+4 dBu
Termal, RMS limiter
1600 Hz
Linear, Boost, Stage, Volume
2100 W Peak
700 W Peak
1400 W Peak
Convection
VDE
Polyurea coated plywood
M10 (2 Top, 2 Side,
1 Top, 1 Bottom)
1 Top
Black
Soft limiter
510 mm / 20.1 inches
294.2mm / 11.6 inches
332.3 mm / 13 inches
16.4 kg / 36.1 lbs
NX 912-A
Yes
130 dB
50 Hz ÷ 20000 Hz
100°
60°
1.0'', 1.75'' v.c
12’', 2.5'' v.c
bal/unbal
Combo XLR/Jack
XLR
-2 dBu/+4 dBu
1600 Hz
Termal, RMS limiter
Linear, Boost, Stage, Volume
2100 W Peak
700 W Peak
1400 W Peak
Convection
Polyurea coated plywood
VDE
M10 (2 Top, 2 Side,
1 Rear, 1 Bottom)
2 Side
Soft limiter
Steel
Black
620 mm / 24.41 inches
361.4 mm / 14.2 inches
404.5 mm / 15.9 inches
20.8 kg / 45.8 lbs
NX 915-A
45 Hz ÷ 20000 Hz
131 dB
100°
60°
1.0'', 1.75'' v.c
15’', 2.5'' v.c
bal/unbal
Combo XLR/Jack
XLR
-2 dBu/+4 dBu
1600 Hz
Termal, RMS limiter
Soft limiter
Linear, Boost, Stage, Volume
2100 W Peak
700 W Peak
1400 W Peak
Convection
VDE
Yes
Polyurea coated plywood
M10 (2 Top, 2 Side,
1 Rear, 1 Bottom)
2 Side
Steel
Black
705 mm / 27.76 inches
419.6 mm / 16.5 inches
450.4 mm / 17.7 inches
24.1 kg / 53.1 lbs
NX 932-A
Yes
132 dB
45 Hz ÷ 20000 Hz
100°
70°
1 x 1.4'' neo, 3.0'' v.c
12’', 2.5'' v.c
bal/unbal
Combo XLR/Jack
XLR
-2 dBu/+4 dBu
700 Hz
Termal, RMS limiter
Linear, Boost, Stage, Volume
2100 W Peak
700 W Peak
1400 W Peak
Convection
Powercon TRUE1 TOP IN/OUT
Polyurea coated plywood
Soft limiter
M10 (2 Top, 2 Side, 2 Back)
2 Side
Steel
Black
620 mm / 24.41 inches
361.4 mm / 14.2 inches
404.5 mm / 15.9 inches
20.8 kg / 45.8 lbs
NX 945-A
45 Hz ÷ 20000 Hz
135 dB
100°
70°
1 x 1.4'' neo, 4.0'' v.c
15’' neo, 3.5'' v.c
bal/unbal
Combo XLR/Jack
XLR
-2 dBu/+4 dBu
650 Hz
Termal, RMS limiter
Soft limiter
Linear, Boost, Stage, Volume
2100 W Peak
700 W Peak
Convection
1400 W Peak
Powercon TRUE1 TOP IN/OUT
Yes
Polyurea coated plywood
M10 (2 Top, 2 Side, 2 Back)
Quick lock pin seats (2 each side)
Quick lock pin seats (2 each side)
2 Side
Steel
Black
705 mm / 27.76 inches
419.6 mm / 16.5 inches
450.4 mm / 17.7 inches
24.1 kg / 53.1 lbs


Tel +39 0522 274 411 - Fax +39 0522 232 428 - e-mail: info@rcf.it - www.rcf.it
RCF S.p.A. Via Raffaello Sanzio, 13 - 42124 Reggio Emilia - Italy
10307696 RevF