Use & Care Guide
Manual de Uso y Cuidado
Guide d’utilisation et d’entretien
English / Español / Français
Models/Modelos/Modèles: 253.6000*, 6002*, 6008*, 6011*, 6030*, 6031*,
6038*, 6040*, 6041*, 6050*, 6060*, 6062*, 6064*, 6768*, 7030*, 7040*,
7050*, 7060*, 7062*, 7063*, 7064*
P/N A01265005 (1703)
Sears Brands Management Corporation
®
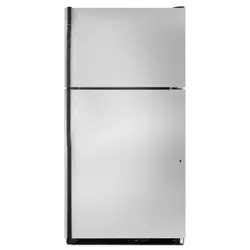
Kenmore
Top Mount Refrigerator
Refrigerador Superior
®
2
Record Model/Serial
Numbers
Record Model/Serial Numbers ................ 2
Important Safety Instructions ............... 2-4
Warranty Information ............................ 5
Master Protection Agreements ................ 6
Features at a Glance ..............................7
First Steps ....................................... 8-15
Connecting the Water Supply ................. 16
Setting the Temperature Control ....... 17-18
Optional Features ........................... 19-21
Food Storage and
Energy-Saving Ideas ........................ 22
Ice Service .......................................... 23
Normal Operating Sounds .................... 24
Care & Cleaning ............................. 25-27
Before You Call .............................. 28-30
Table of Contents
Please read and save these
instructions.
Please record your model and serial
numbers below for future reference. This
information is found on the serial plate
located inside the refrigerator compartment.
Model Number:
Serial Number:
253.
Safety Precautions
your unit until you have read the safety
throughout this manual are labeled with
Denitions
used to alert you to potential personal
that follow this symbol to avoid possible
IMPORTANT
Important Safety
Instructions
IMPORTANT
CAUTION
CAUTION indicates a potentially
hazardous situation which, if not avoided,
may result in minor or moderate injury.
WARNING
WARNING indicates a potentially
hazardous situation which, if not avoided,
could result in death or serious injury.
DANGER
DANGER indicates an imminently
hazardous situation which, if not avoided,
will result in death or serious injury.
3
For Your Safety
•
•
•
•
Child Safety
Children should never use these items
Important Safety Instructions
Proper Disposal of your Appliance
Risk of child entrapment
throw away your old unit:
•
•
WARNING
Please read all safety instructions
before using your new appliance.
WARNING
These guidelines must be followed to
ensure that safety mechanisms in this
unit will operate properly.
•
Electrical Information
• The refrigerator must be plugged into
with a three-prong grounding plug
into a properly grounded three-prong
•
WARNING
Do not attempt to replace LED lights
due to high voltage exposure. Call
customer service to replace.
4
Important Safety Instructions
Grounding type wall receptacle
Do not, under any
circumstances, cut,
remove, or bypass the
grounding prong
Power cord with 3-prong
grounded plug
• Never unplug the refrigerator by pulling
•
•
•
to prevent the refrigerator from being
•
IMPORTANT
CFC/HCFC Disposal
Your old refrigerator may have
and HCFCs are believed to harm
is removed for proper disposal by a

5
Warranty Information
KENMORE LIMITED WARRANTY
This warranty covers ONLY defects in material and workmanship, and will NOT pay
for:
Disclaimer of implied warranties; limitation of remedies
Sears Brands Management Corporation, Homan Estates, IL 60179
Sears Canada Inc., Toronto, Ontario, Canada M5B 2C3

6
Master Protection Agreements
Congratulations on making a smart purchase. Your new Kenmore
®
Parts and labor
properly under normal use. well beyond the product warranty.
— real protection.
Expert service
Unlimited service calls and nationwide service,
“No-lemon” guarantee –
Product replacement
Annual Preventive Maintenance Check
Fast help by phone –
Power surge protection
$300 Food Loss Protection
Service Promise: $50
25% discount
Some limitations and exclusions apply. For prices and additional information in the
U.S.A. call 1-800-827-6655.
Sears Installation Service
7
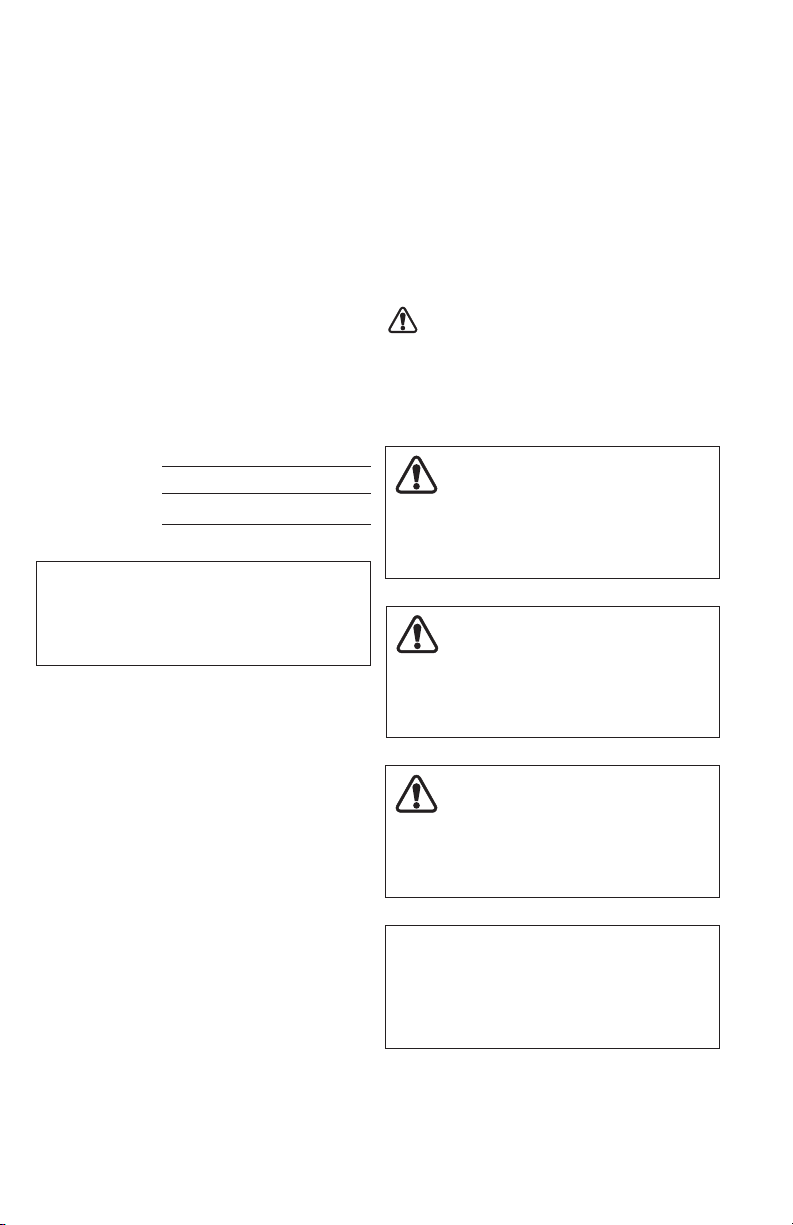
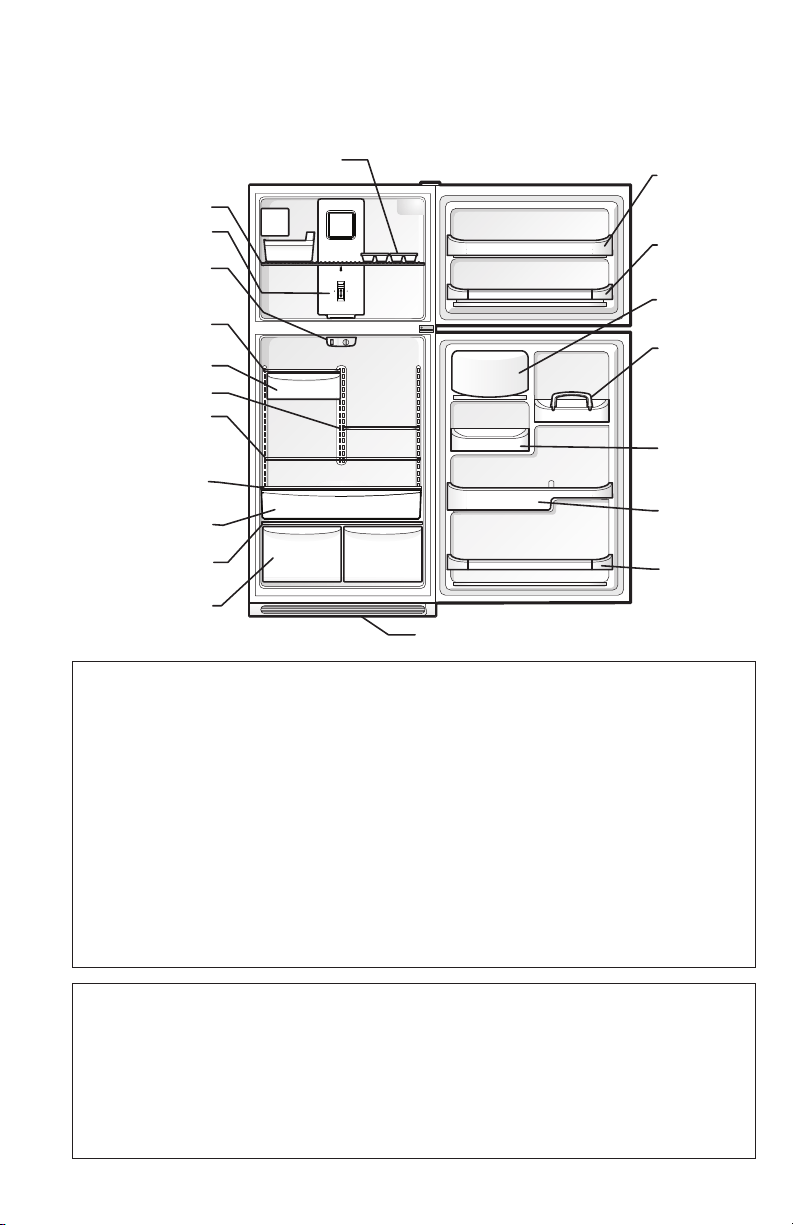
Ice Maker
Ice Bucket
Freezer Shelf
Auxiliary Freezer
Control
Refrigerator
Control
(Some Models)
Deli Drawer
Cover
Deli Drawer
Half Shelf
Full Shelf
Crisper
Cover
Crisper
Drawers
Ice Tray
Fixed Door
Bin
Door Rack
Dairy Door
Tall Bottle
Retainer
Door Bin
Fixed
Door Bin
Door Rack
Toe Grille
garage
temperature
coldest
cold
off
* recommended
Deli Drawer
Deli Drawer
Cover
Features may vary according to model
Features At A Glance
IMPORTANT
Cleaning your Refrigerator
IMPORTANT
Moving your Refrigerator
8
First Steps
Guidelines for nal positioning of your
refrigerator:
•
•
•
•
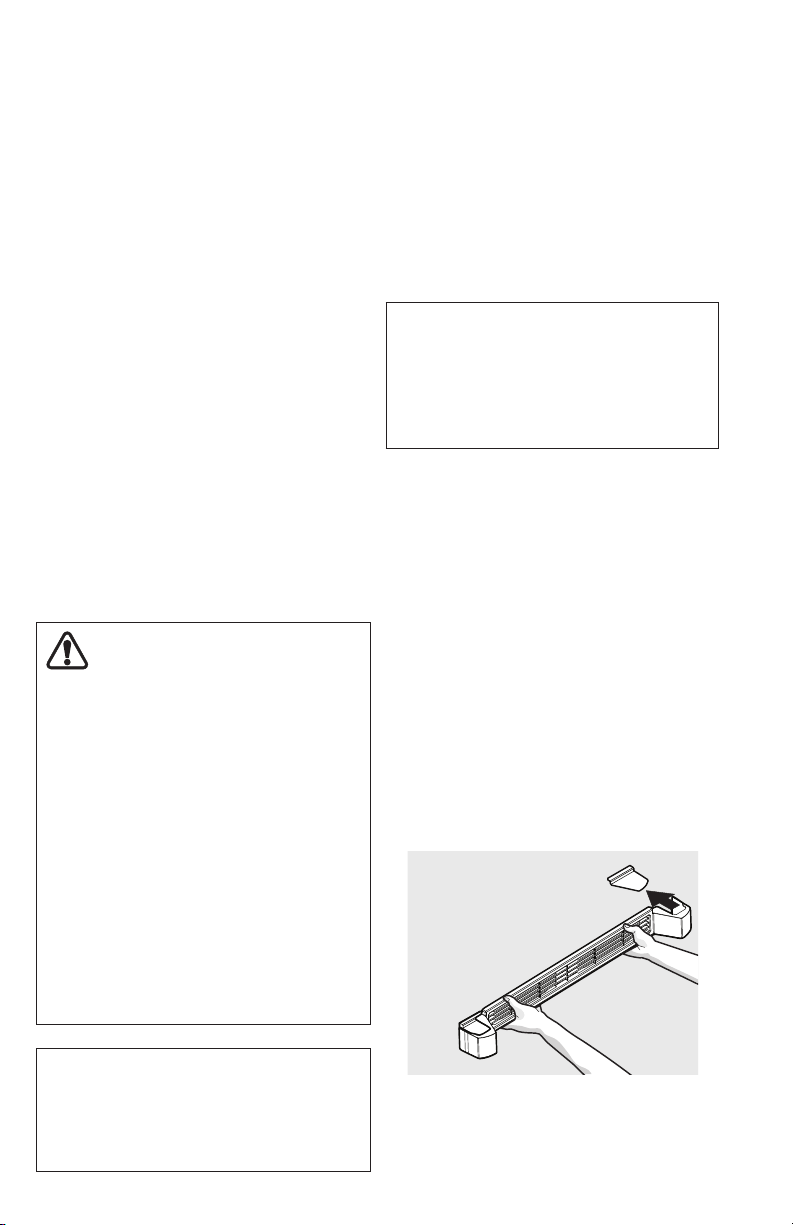
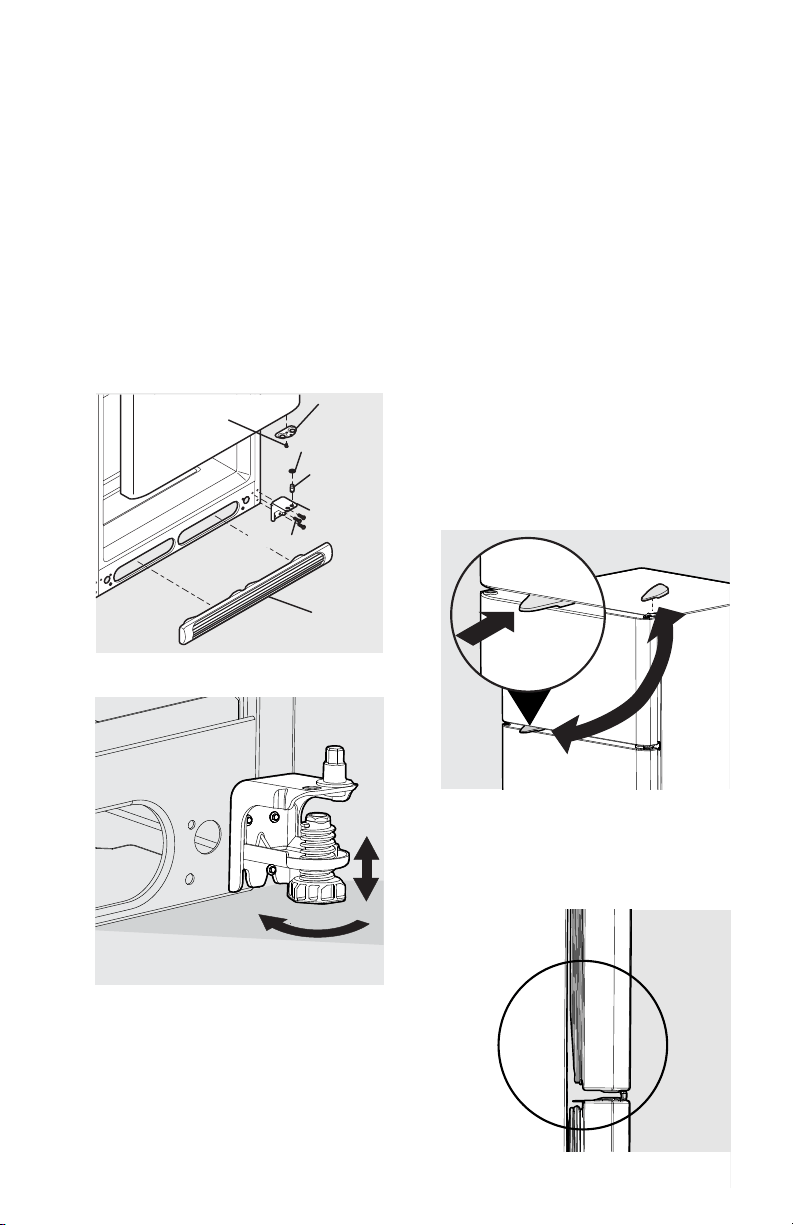
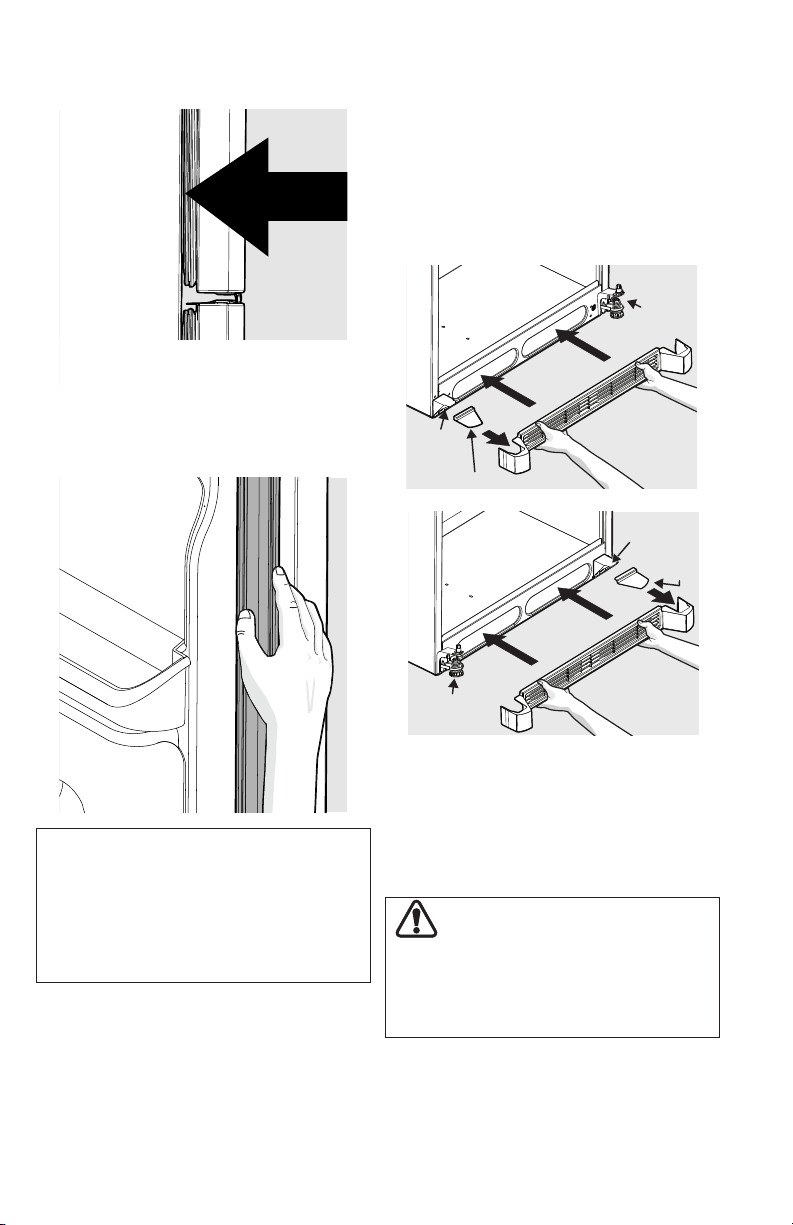
To install the toe grille:
This Use & Care Guide provides general
Location
•
•
• The refrigerator must be installed on a
• Consider water supply availability for
NOTE
CAUTION
Energy Star Models Only
Do not install refrigerator where the
surrounding air temperature may
fall to 39°F (4°C) or below. The
refrigerator contents may freeze.
Do not install refrigerator where the
surrounding air temperature may reach
110°F (43°C) or above. The refrigerator
and freezer compartments may rise to
above normal operating temperatures.
Do not block the toe grille on the lower
front of your refrigerator. Sucient air
circulation is essential for the proper
operation of your refrigerator.
NOTE
Installation
Installation clearances
•
9
First Steps
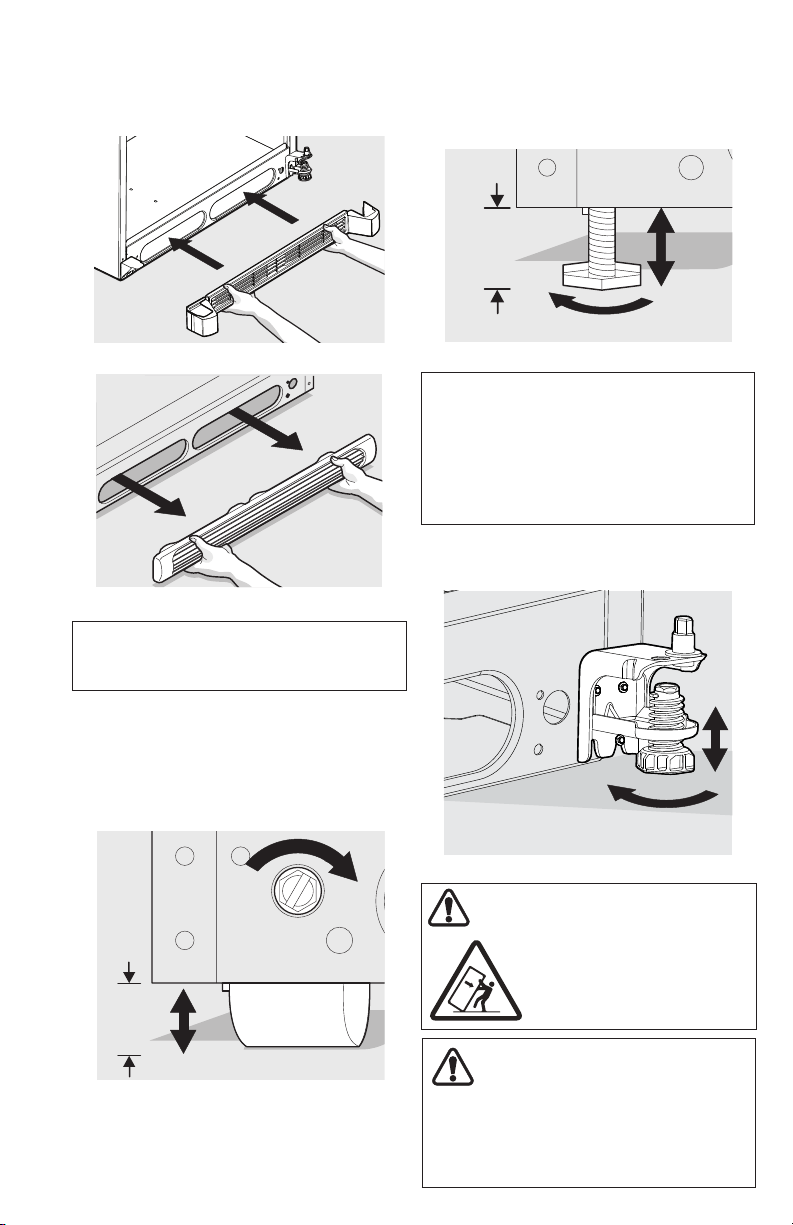
WARNING
The anti-tip device must be
installed according to the
instructions in your Use &
Care Manual. Failure to do
so will result in injury.
To level the cabinet using the front rollers:
/
9/16"
(14 mm)
Max
Raise
Figure 2
or
or
(some models)
WARNING
When reversing the door swing:
You MUST move the anti-tip bracket
to align with the hinges of the door.
Failure to do so will result in injury.
NOTE
Raise the front of the refrigerator enough
Figure 3
Raise
9/16"
(14 mm)
Max
Figure 4 (some models)
Lower
Anti-tip
Bracket
NOTE
/
10
NOTE
IMPORTANT
First Steps
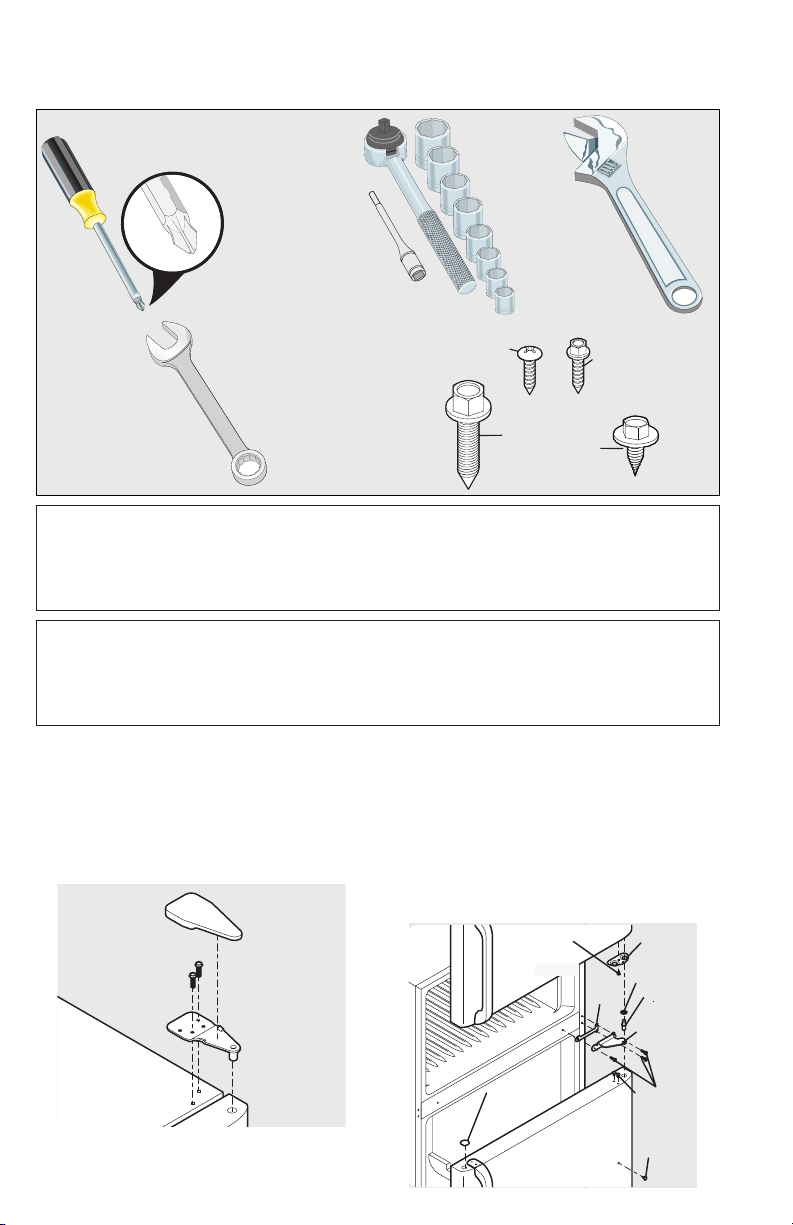
Door removal and reversal instructions:
Door
Stop
Shim
Washer
Hinge
Pin
Center
Hinge
Screws
Hinge
Hole
Plug
Handle
Hole
Plug
Door
Stop
Screw
Top
Hinge
Cover
Top Hinge
Adjustable
Wrench
Socket
Wrench Set
3/8" Fixed
Wrench
Tools Necessary:
Phillips
TM
Head
or
or
Top Hinge
Cover Front
Screw
Top Hinge
Cover Rear
Screw
Bottom
Hinge
Screw
Top
Hinge
Screw
11
First Steps
other hole in hinge and tighten with
Door Stop
Screw
Door
Stop
Washer
Hinge
Pin
Bottom
Hinge
Toe
Grille
Screws
OR
Lower
Anti-tip
Bracket
Close refrigerator door to help align
side of door and grasp the thinnest
was removed in Step 2) and insert
on the handle side approximately 3
Look for open areas between the
gasket and the cabinet flange.
12
First Steps
middle assuring that it is fully seated
Gasket should seal against the
cabinet all the way around including top
and bottom
saved earlier over the opening on the
A
Toe Grille Cover
Toe
Grille
Support
Anti-tip
Bracket
B
Toe Grille
Cover
Toe Grille
Support
Anti-tip
Bracket
WARNING
When reversing the door swing:
You MUST move the anti-tip bracket
to align with the hinges of the door.
Failure to do so will result in injury.
IMPORTANT
to damage the interior door panel or
13
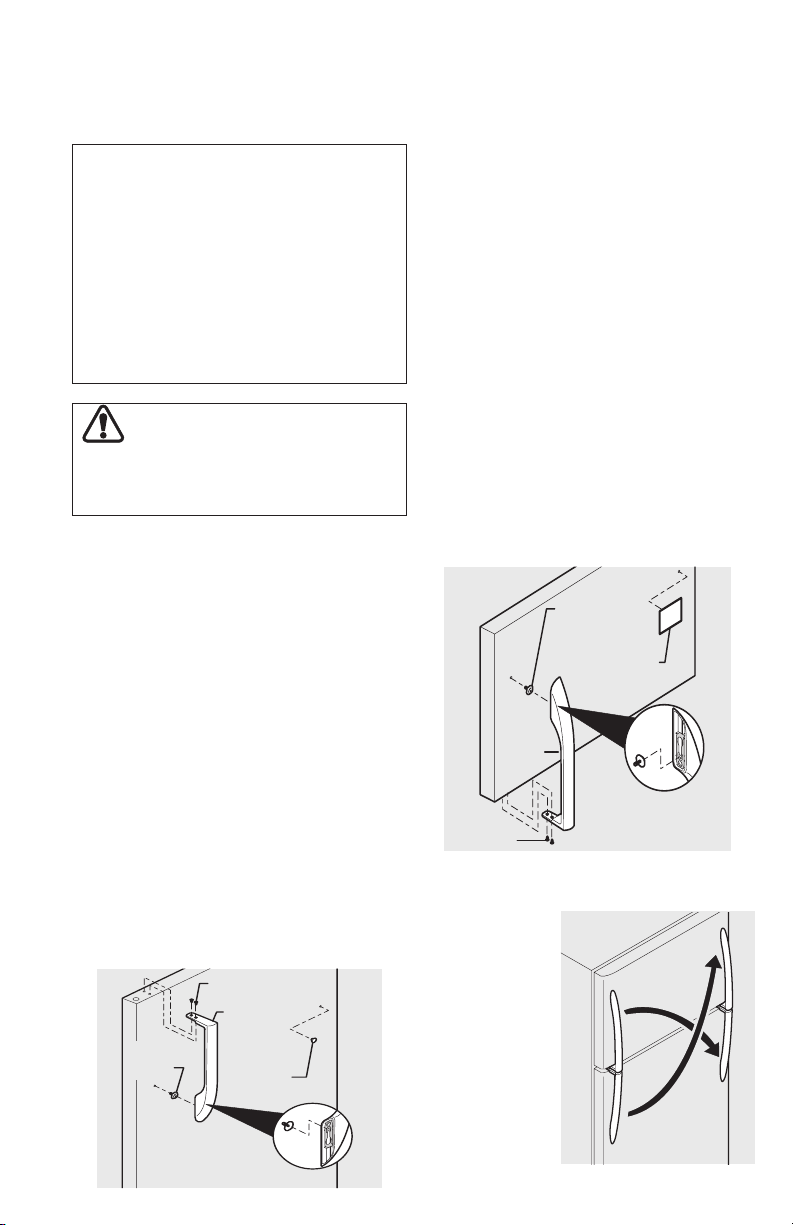
First Steps
Screw
Handle
Mounting
Screw
Button
Plug
Lock Handle
Over
Mounting Screw
Handle Style 1
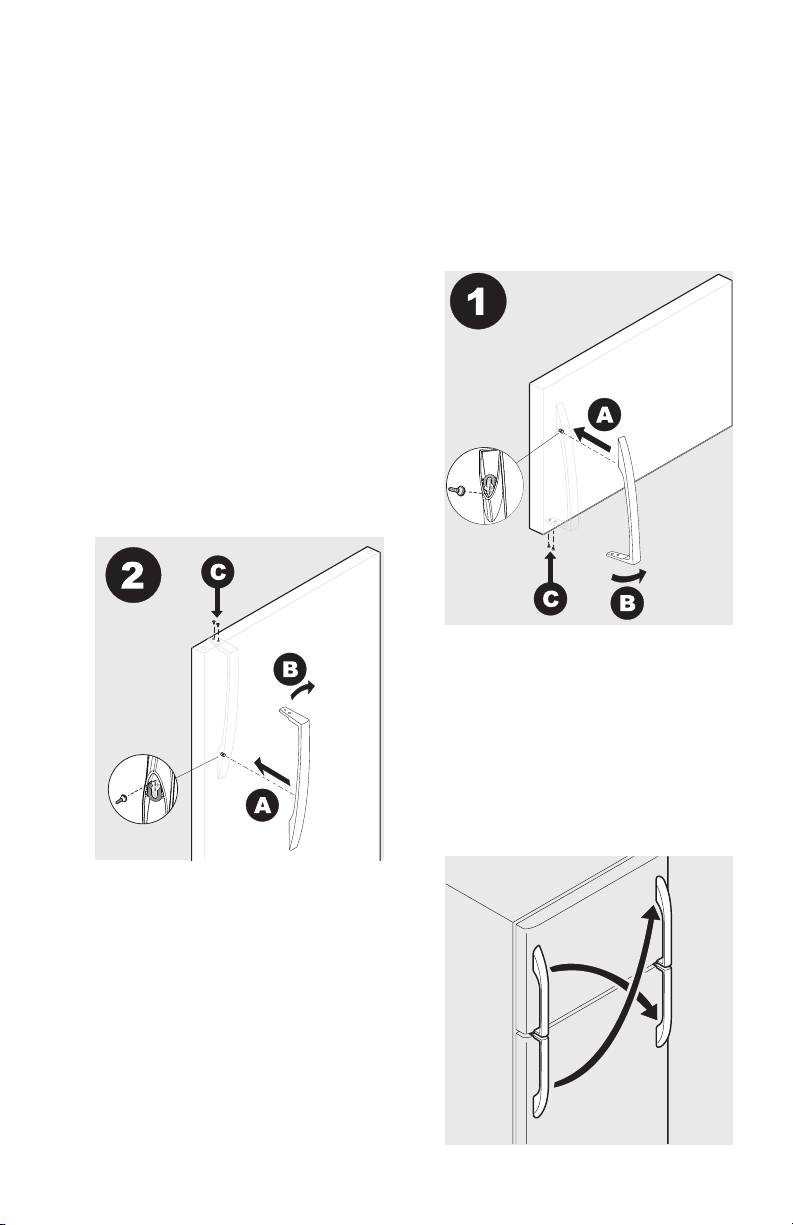
To remove refrigerator handle:
(Handles may be easier to reverse while
To attach refrigerator handle:
Mounting
Screw
Nameplate
Screw
Lock Handle
Over Mounting
Screw
Handle
IMPORTANT
proper installation of all three handle
Handle Installation/Removal
To remove freezer handle:
(Handles may be easier to reverse while
To attach freezer handle:
CAUTION
Wear gloves and use extreme CAUTION
when installing these handles. The rounded
end of the handles may be sharp.
To reverse refrigerator/freezer handles:
Handles may be easier to reverse while
Reverse freezer
and refrigerator
handles by
inverting the
handle removed
from the
refrigerator door
removed from
freezer door
14
Handle Style 2
To remove refrigerator metal handle:
To attach refrigerator metal handle:
align the 2 holes in top of handle with
part of the handle until the handle is
Mounting
Screw
Screw
Handle
Set
Screw
Button
Plug
To remove freezer handle:
Mounting
Screw
Set
Screw
Nameplate
Screw
Handle
To reverse refrigerator/freezer handles:
Handles may be easier to reverse while
Reverse freezer
and refrigerator
handles by
inverting the
handle removed
from the
refrigerator door
to the freezer
handle removed
First Steps
To attach freezer handle:
align the 2 holes in bottom of handle
Handle should be mounted with set
part of the handle until the handle is
15
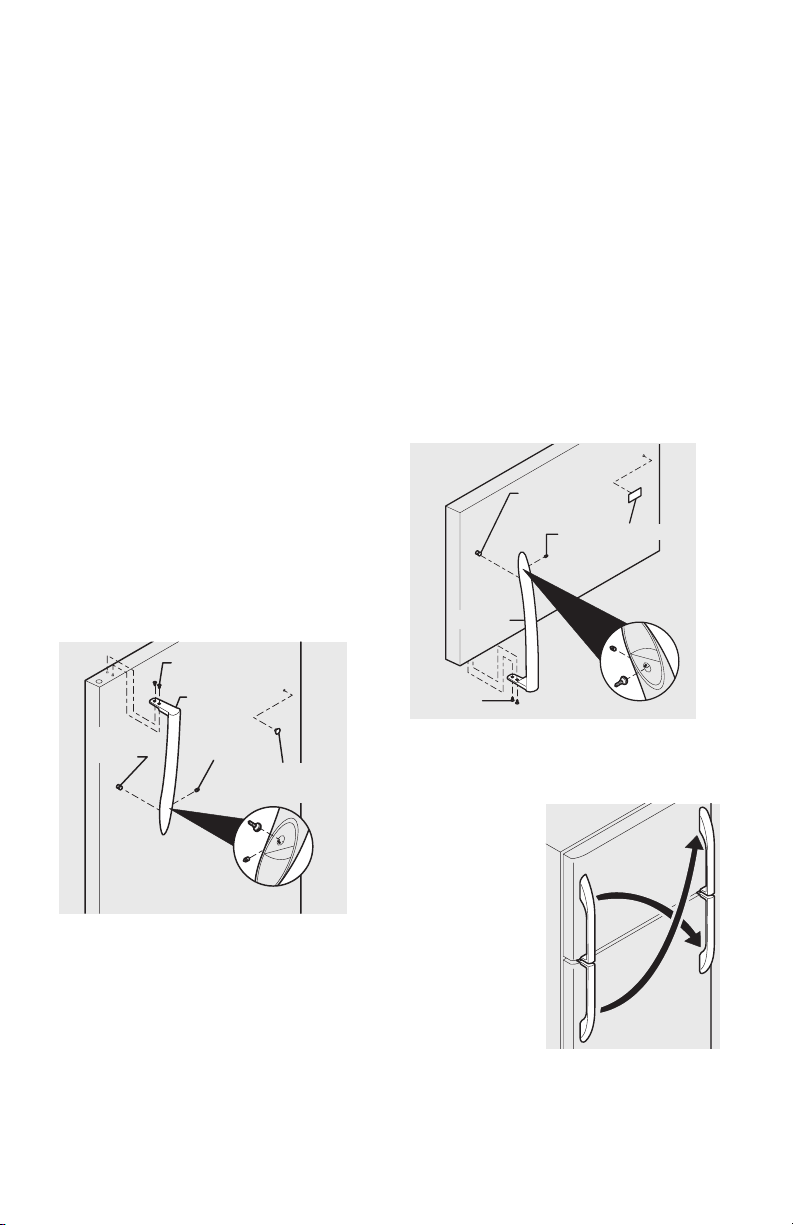
First Steps
To reverse refrigerator/freezer handles:
Handles may be easier to reverse while
Reverse freezer and refrigerator handles
by inverting the handle removed from the
Handle Style 3
To remove refrigerator handle:
(Handles may be easier to reverse while
To attach refrigerator handle:
To remove freezer handle:
(Handles may be easier to reverse while
To attach freezer handle:
16
Before installing the water supply line,
you will need:
• Basic Tools:
•
•
•
DO
NOT
•
•
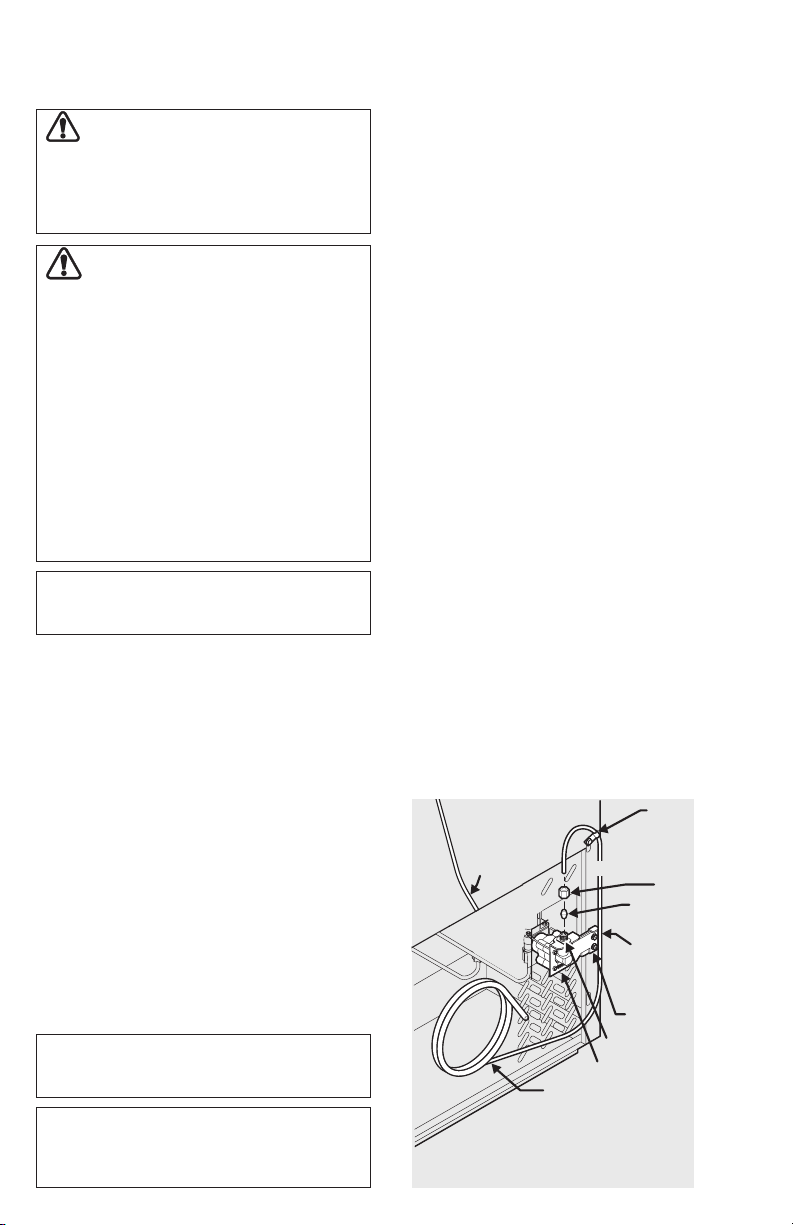
To Connect Water Supply Line To Ice
Maker Inlet Valve:
ferrule (sleeve) into valve inlet and
DO NOT
water supply line to rear panel of
turns) behind refrigerator as shown and
Plastic Water
Tubing to Ice
Maker Fill
Tube
Steel
Clamp
Ferrule
(Sleeve)
Copper
Wire Line
Water
Valve
Bracket
Valve Inlet
Water Valve
Copper Water Line
from Household
Water Supply
(Include enough tubing in loop to allow
moving refrigerator out for cleaning.)
Brass
Compression
Nut
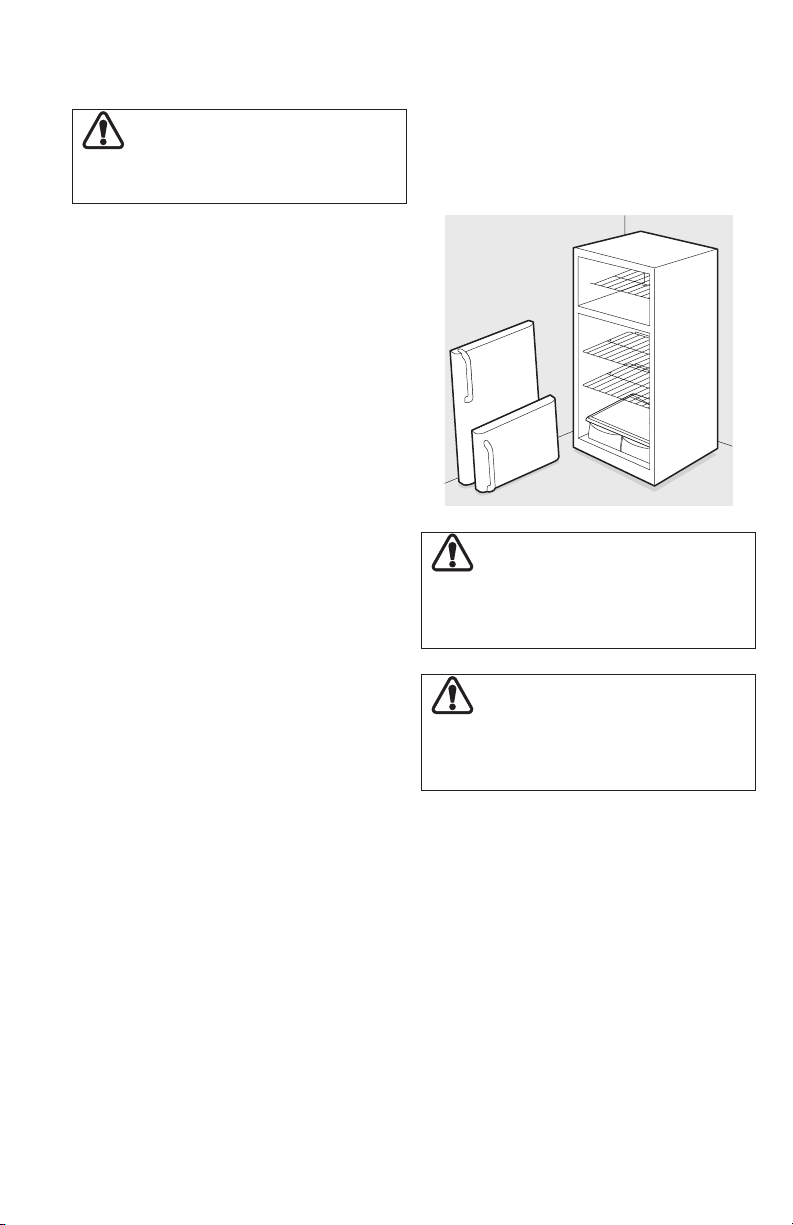
WARNING
To avoid electric shock, which can
cause death or severe personal injury,
disconnect the refrigerator from
electrical power before connecting a
water supply line to the refrigerator.
IMPORTANT
NOTE
CAUTION
To Avoid Property Damage:
• Copper tubing is recommended for the
water supply line. Water supply tubing
made of ¼” plastic is not recommended
since it greatly increases the potential for
water leaks. Manufacturer nor retailer
will be responsible for any damage if
plastic tubing is used for supply line.
• DO NOT install water supply tubing
in areas where temperatures fall
below freezing.
• Chemicals from a malfunctioning
softener can damage the ice maker.
If the ice maker is connected to soft
water, ensure that the softener is
maintained and working properly.
Connecting Household Water Supply To Refrigerator
NOTE
17
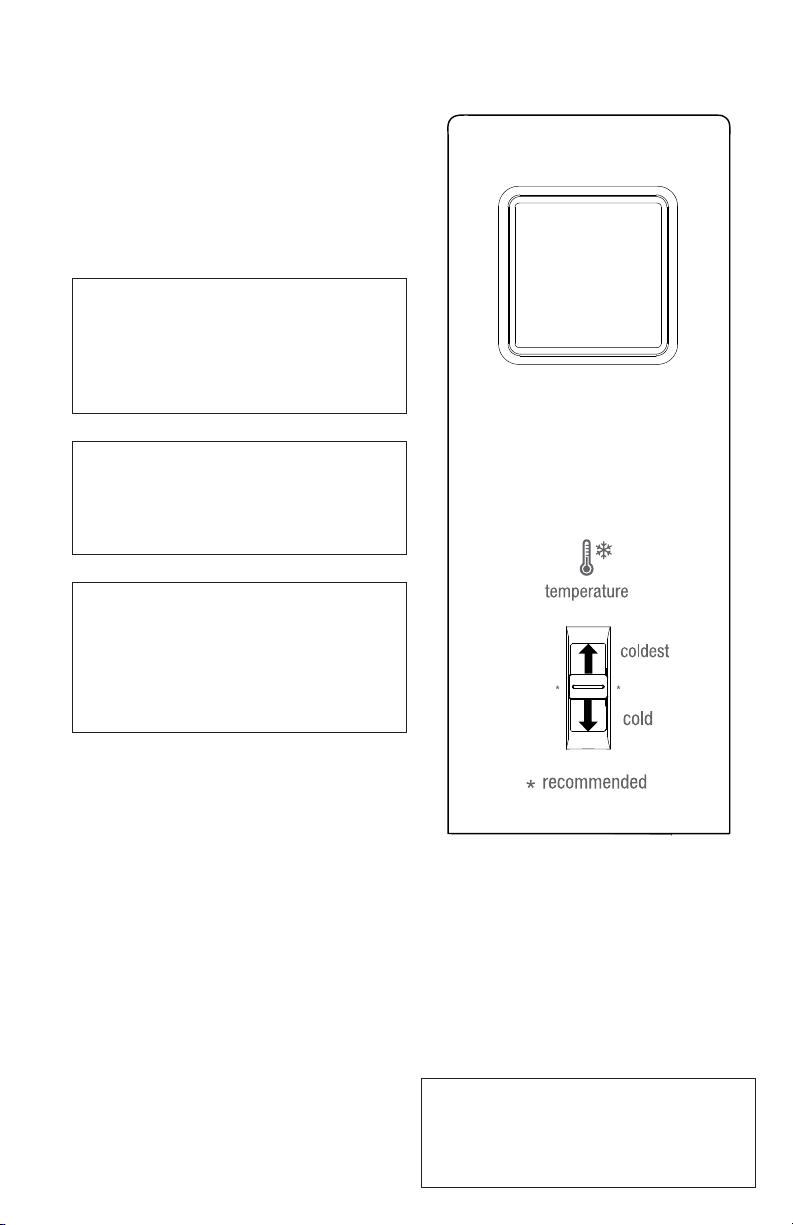
Setting the Temperature Controls
Auxiliary Freezer Control
Cool Down Period
Refrigerator & Freezer Controls
(some models)
Cool Down Period
refrigerator to operate with the doors
Refrigerator & Freezer Controls
(some models)
NOTE
NOTE
Sustained exposure to ambient
result in freezing of food and beverages
NOTE
NOTE
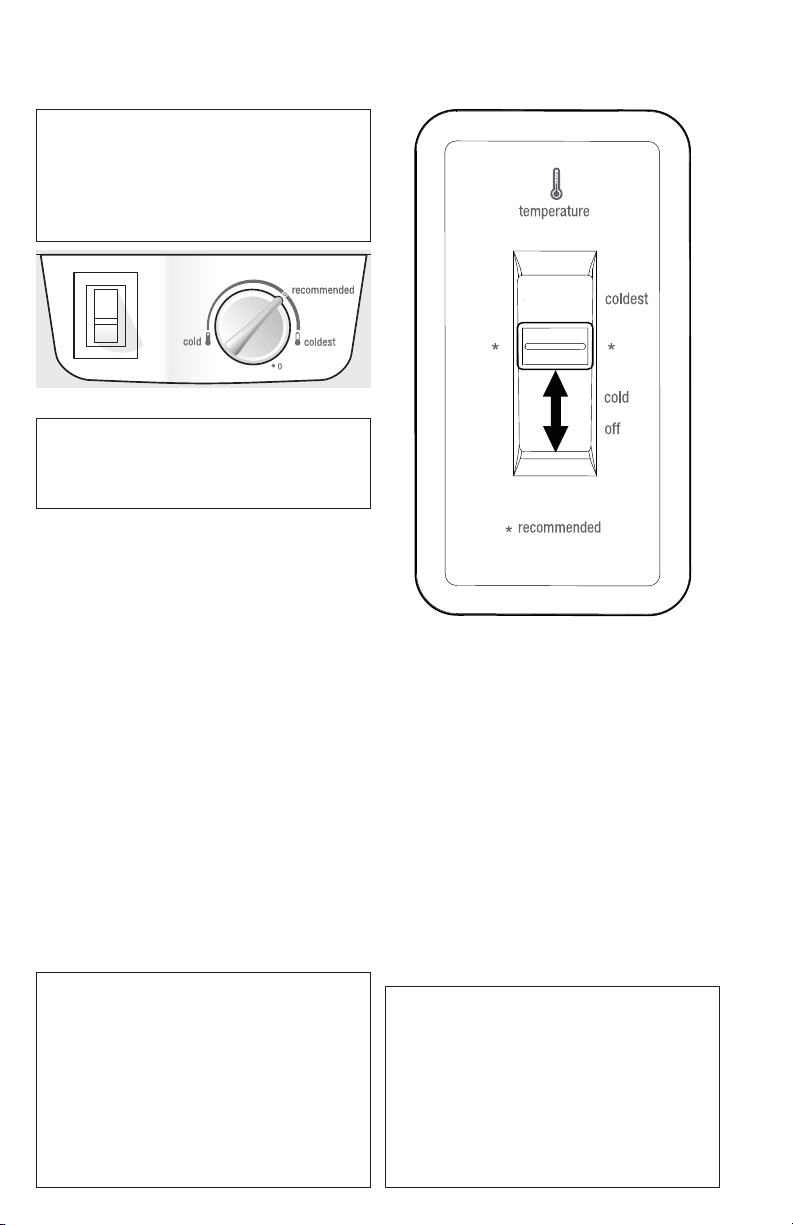
18
Temperature Adjustment
• Adjust temperature gradually: adjust the
•
•
air in the refrigerator and freezer
NOTE
IMPORTANT
Adjusting the refrigerator/freezer
the power to the light bulb and other
Refrigerator Control
Temperature Adjustment
• Adjust temperature gradually: adjust the
air in the refrigerator and freezer
Setting the Temperature Controls
Refrigerator Control
Allow 24 hrs for adjustments
NOTE
IMPORTANT
Adjusting the refrigerator temperature
and prevents the refrigerator from
power to the light bulb and other
19
CAUTION
Do not clean glass shelves or covers
with warm water when they are
cold. Shelves and covers may break
if exposed to sudden temperature
changes or impact, such as bumping.
Tempered glass is designed to shatter
into many small, pebble-size pieces.
This is normal. Glass shelves and
covers are heavy. Use both hands when
removing them to avoid dropping.
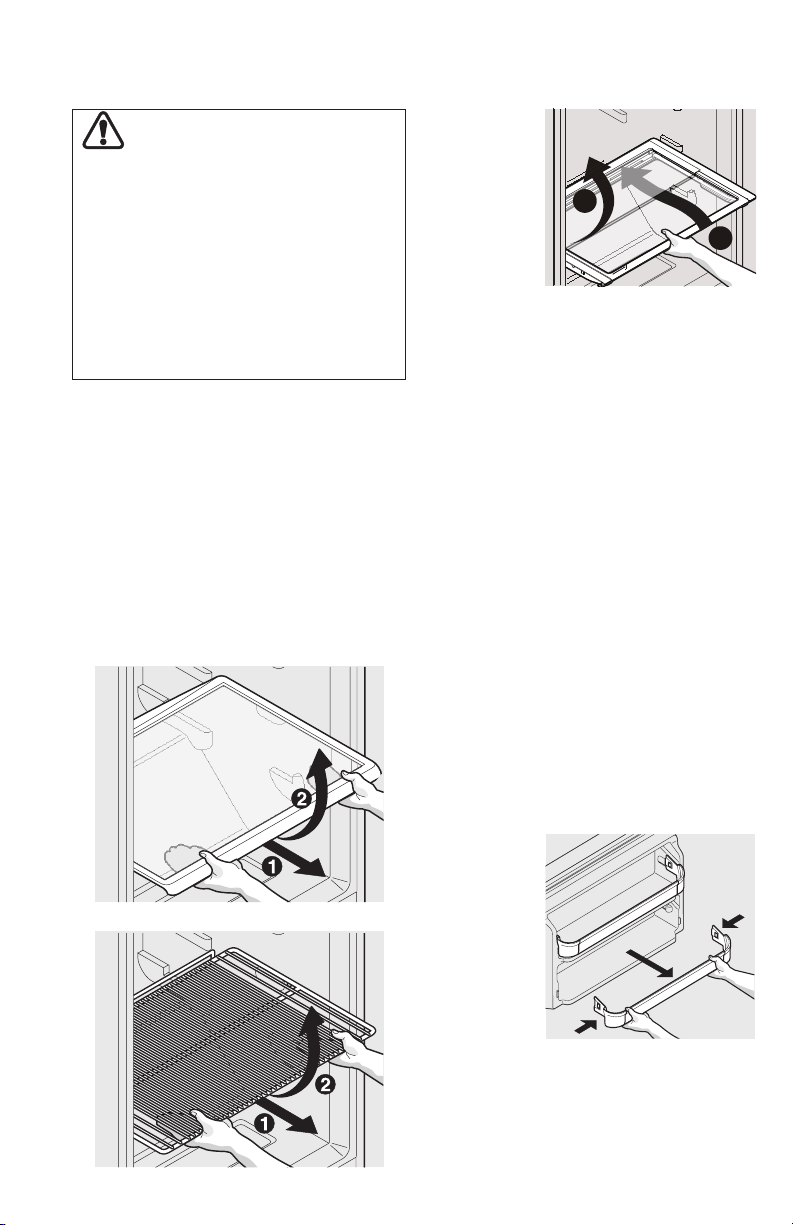
Shelf Adjustment
Refrigerator shelves are easily adjusted to
To adjust sliding shelves:
Sliding Glass Shelf
Sliding Wire Shelf
Optional Features
1
2
Slide-Under/Flip Shelf
To adjust
slide-under/
ip shelf:
half shelf
forward
until its
drops
then
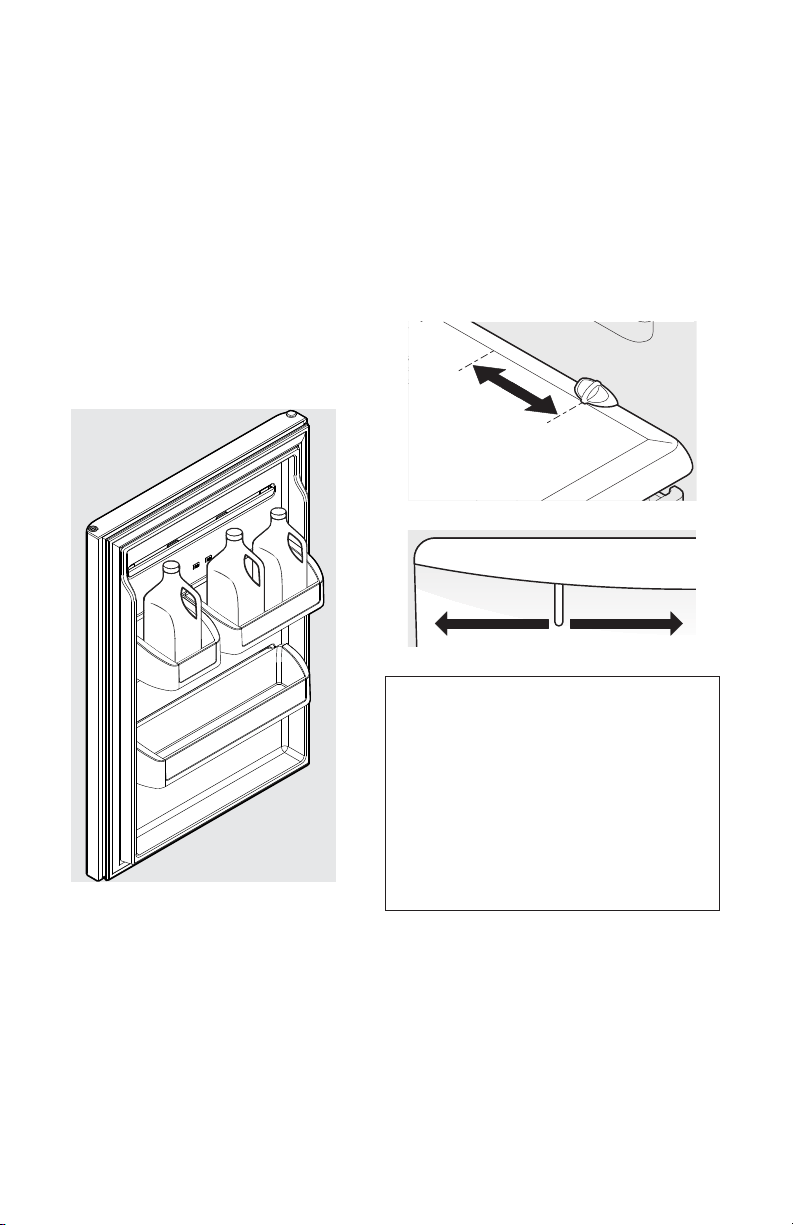
Door storage
Door Rack
Door rack
To remove door rack:
to release
from
straight
To install door
rack:
20
Optional Features
Crisper Humidity Control (some
models)
allows you to adjust the humidity within
Low
Humidity
High
Humidity
Adjustable door bins (some models)
Some models have adjustable door bins
To move door bin along a rail:
To move door bin from rail to rail:
Higher Humidity Lower Humidity
NOTE
with the Humidity Control set on High
air to a minimum and maintains
leafy vegetables and fruits still in their
21
Crispers (some models)
Pantry Drawer (some models)
Please be sure to support glass when
Optional Features
Store-More Drawer (some models)
To install the Store-More Drawer:
Apply
Downward Pressure
Clip Passes Through Opening
Tab Fits
into Pocket
Lift Drawer
and Separate
Slide Drawer
Hold "Slide"
with One Hand
"Rear Upper
Side Tab"
"Rear Upper
Side Tab"
Pocket on
"Clip"
Pocket
on "Clip"
3. For removal, hold slide with one hand and
lift drawer with the other to separate.
passes through opening in drawer to
NOTE

22
Energy saving ideas
•
refrigerator in
and away from
•
• Refer to this Use & Care Manual for the
•
will help the refrigerator run more
•
•
•
Food storage Ideas
Fresh Food Storage
•
•
of air around the food and results in
Fruits and Vegetables
•
Meat
• Raw meat and poultry should be
Frozen Food Storage
•
•
Packaging Foods for Freezing
•
•
•
Loading the Freezer
•
Food Storage & Energy Saving Ideas
•
•
best stored in the freezer interior where
23
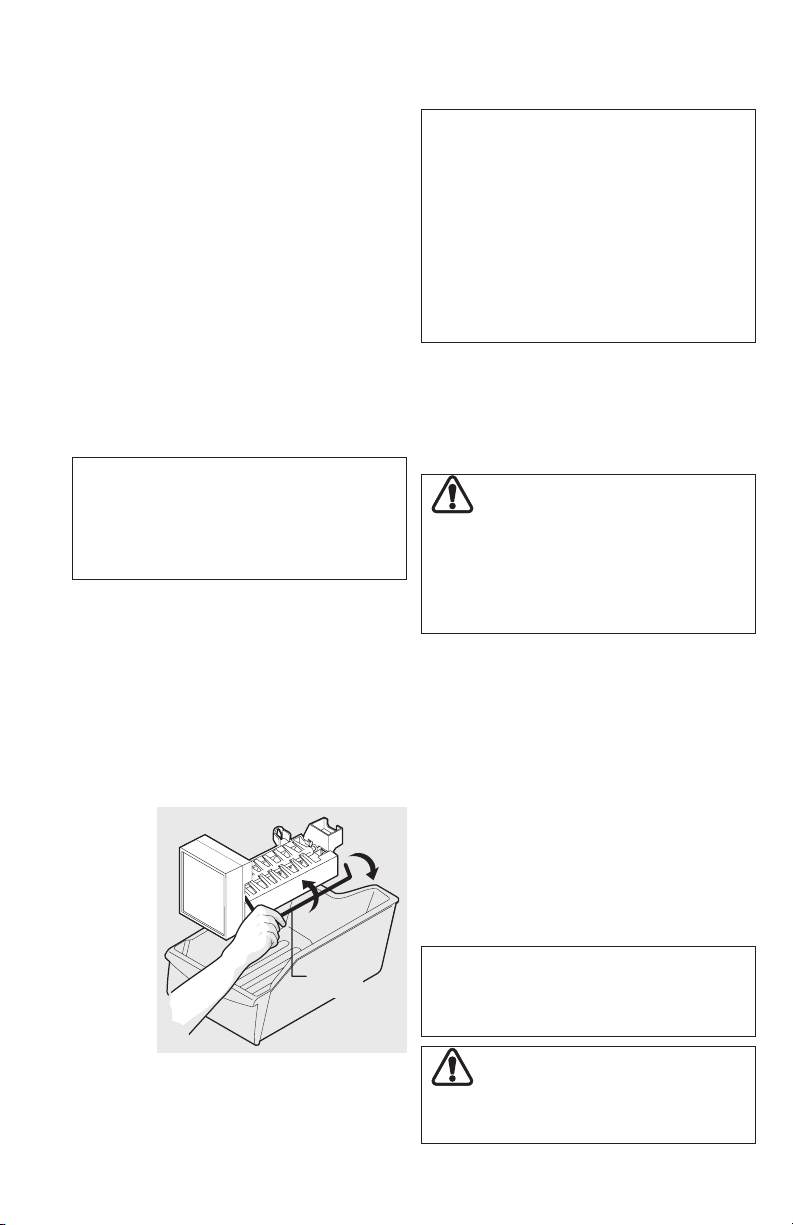
Ice Service
ON
OFF
Wire
Signal Arm
Turning your ice maker on
Turning your ice maker o
To stop the
lift the
wire signal
arm until
NOTE
Call 1-844-553-6667 for information.
Ice Production: What To Expect
IMPORTANT
•
Ice Maker Tips
•
and ensure that the wire signal arm is
•
•
•
CAUTION
Chemicals from a malfunctioning
softener can damage the ice maker.
If the ice maker is connected to soft
water, ensure that the softener is
maintained and working properly.
NOTE
Normal Operating Sounds
CAUTION
DO NOT place the ice container in your
dishwasher.
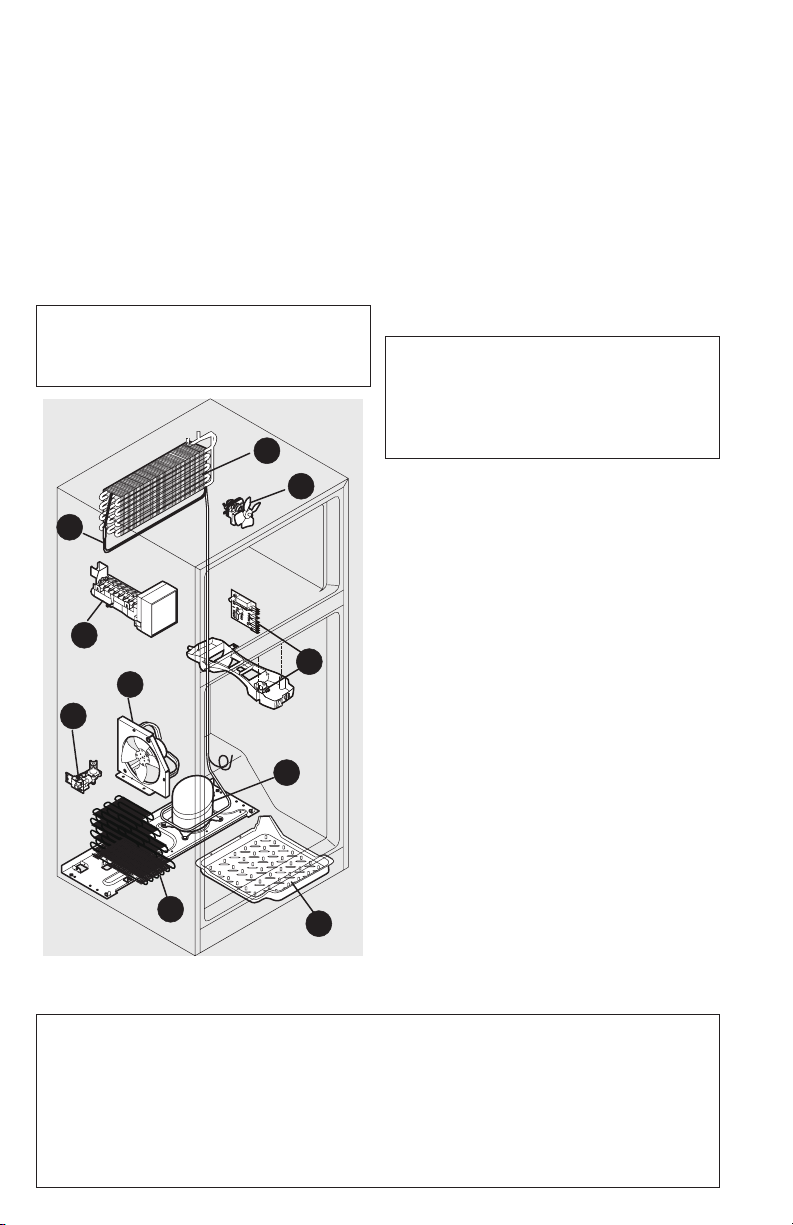
24
NOTE
Rigid foam insulation is very energy
IMPORTANT
Normal Operating Sounds
Understanding the sounds you
may hear
Automatic ice maker
E Electronic defrost control These parts
F Condenser fan You may hear air
G Compressor
H Water valve
Drain pan (not removable) You may
hear water dripping into the drain
Condenser
A
B
C
D
F
G
H
I
J
E
IMPORTANT
A Evaporator Refrigerant through the
B Evaporator fan You may hear air
C Defrost heater
dripping onto the defrost heater may
25
Care & Cleaning
IMPORTANT
CAUTION
Pull the refrigerator straight out to
move it. Shifting it from side to side
may damage ooring. Be careful not
to move the refrigerator beyond the
plumbing connections.
Damp objects stick to cold metal
surfaces. Do not touch refrigerated
surfaces with wet or damp hands.
NOTE
Protecting Your investment
•
•
•
•
not use razor blades or other sharp
•
26
Care & Cleaning
Care & Cleaning Tips
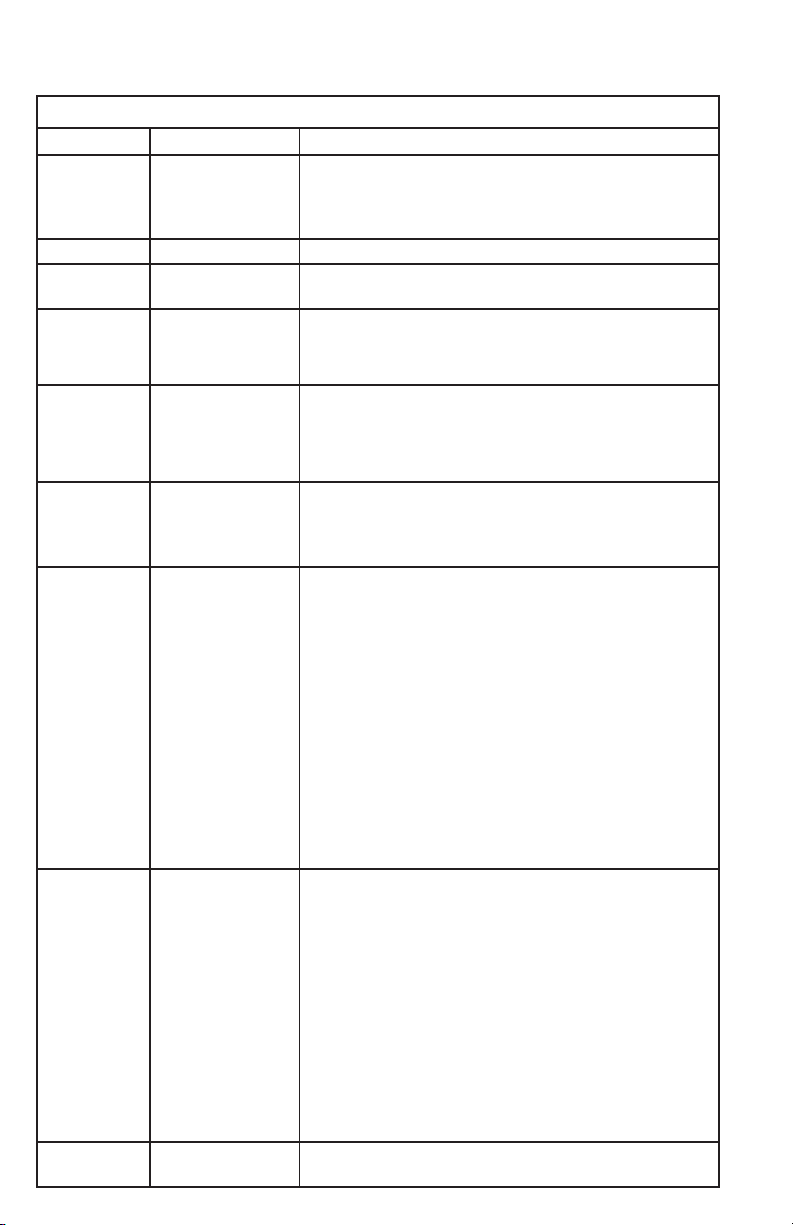
Part What To Use Tips and Precautions
• Soap and water
•
and water
• Soap and water
Bins
• Soap and
water
Glass
Shelves
• Soap and water
•
•
Allow glass to warm to room temperature before
Toe Grille • Soap and water
•
•
Exterior &
Handles
• Soap and water
• Non Abrasive
Glass Cleaner
Exterior &
Handles
(Stainless
Steel Models
• Soap and water
• Stainless Steel
Cleaners
Clean stainless steel front and handles with non-
• Unplug
refrigerator
•
• Remove light
models)
•
•
models)
• Plug in the
refrigerator
CAUTION
•
WARNING
27
Never Clean Condenser (some models)
Care & Cleaning
Vacation and Moving Tips
Short
•
•
•
•
•
•
•
•
Moving •
•
•
•
28
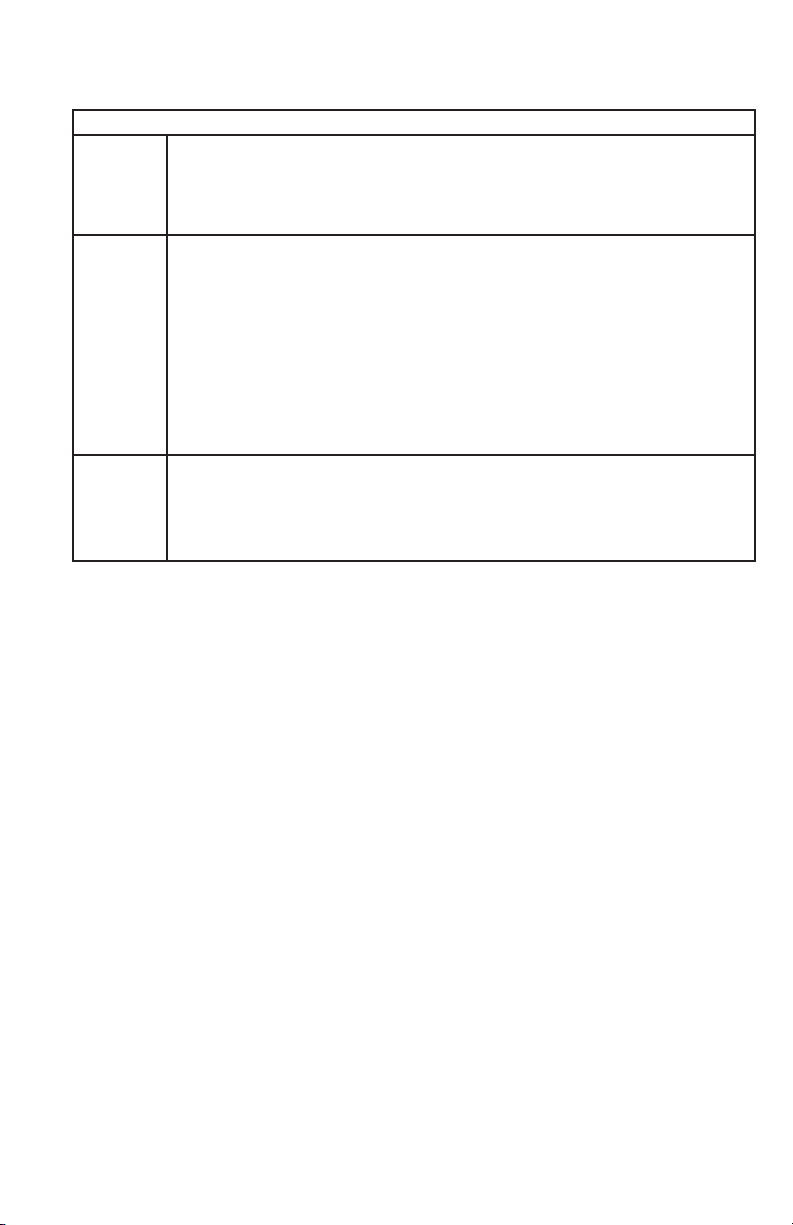
TROUBLESHOOTING
GUIDE
PROBLEM CAUSE CORRECTION
AUTOMATIC ICE MAKER (some models)
•
• Household water line
•
•
• Move wire signal arm to the
• Turn on household water line
•
•
•
•
• Household water line
•
•
• Turn on household water line
•
arm is being held
down by some item in
• Move item and release wire signal
are frozen together over the wire
•
•
•
•
•
•
•
strong food stored in
•
•
•
•
•
LIGHT BULB IS NOT ON
•
•
• CARE
•
Before You Call
29
Before You Call
PROBLEM CAUSE CORRECTION
ODORS IN REFRIGERATOR
•
• Food with strong odors
• See table of Care and Cleaning
•
OPENING/CLOSING OF DOORS/DRAWERS
•
• Refrigerator is not
•
•
•
•
• Remove top layer of items in
• Ensure drawer is properly installed
•
See table of Care and Cleaning
•
•
•
•
RUNNING OF REFRIGERATOR
Compressor and/or fan
• Refrigerator is in
•
• House fuse blown or
•
• Refrigerator is
going through a self
•
• Ensure plug is tightly pushed into
•
•
•
Refrigerator runs too
• Room or outside
•
•
•
• Fresh Food/freezer
door may be slightly
• Fresh Food/freezer
•
•
•
•
•
•
to run longer in order to maintain
•
the refrigerator at a
•
30
Before You Call
PROBLEM CAUSE CORRECTION
TEMPERATURE TOO COLD IN REFRIGERATOR (FRESH FOOD) OR FREEZER
Freezer temperature
Food temperature is
•
•
Fresh Food temperature
temperature is
•
•
Food stored in drawers
•
•
TEMPERATURE TOO WARM IN REFRIGERATOR (FRESH FOOD) OR FREEZER
Freezer/Fresh Food
•
•
•
•
Freezer temperature
Food temperature is
•
•
Fresh Food temperature
temperature is
•
•
WATER/MOISTURE/FROST INSIDE REFRIGERATOR
inside of refrigerator
•
•
•
•
• The rate of frost buildup and
•
•
•
bottom side of drawer
•
•
•
•
and fruit drain while in
•
WATER/MOISTURE/FROST OUTSIDE REFRIGERATOR
outside of refrigerator or
•
•
inside refrigerator to
meet warm air from
•
•