Loading ...
Loading ...
Loading ...
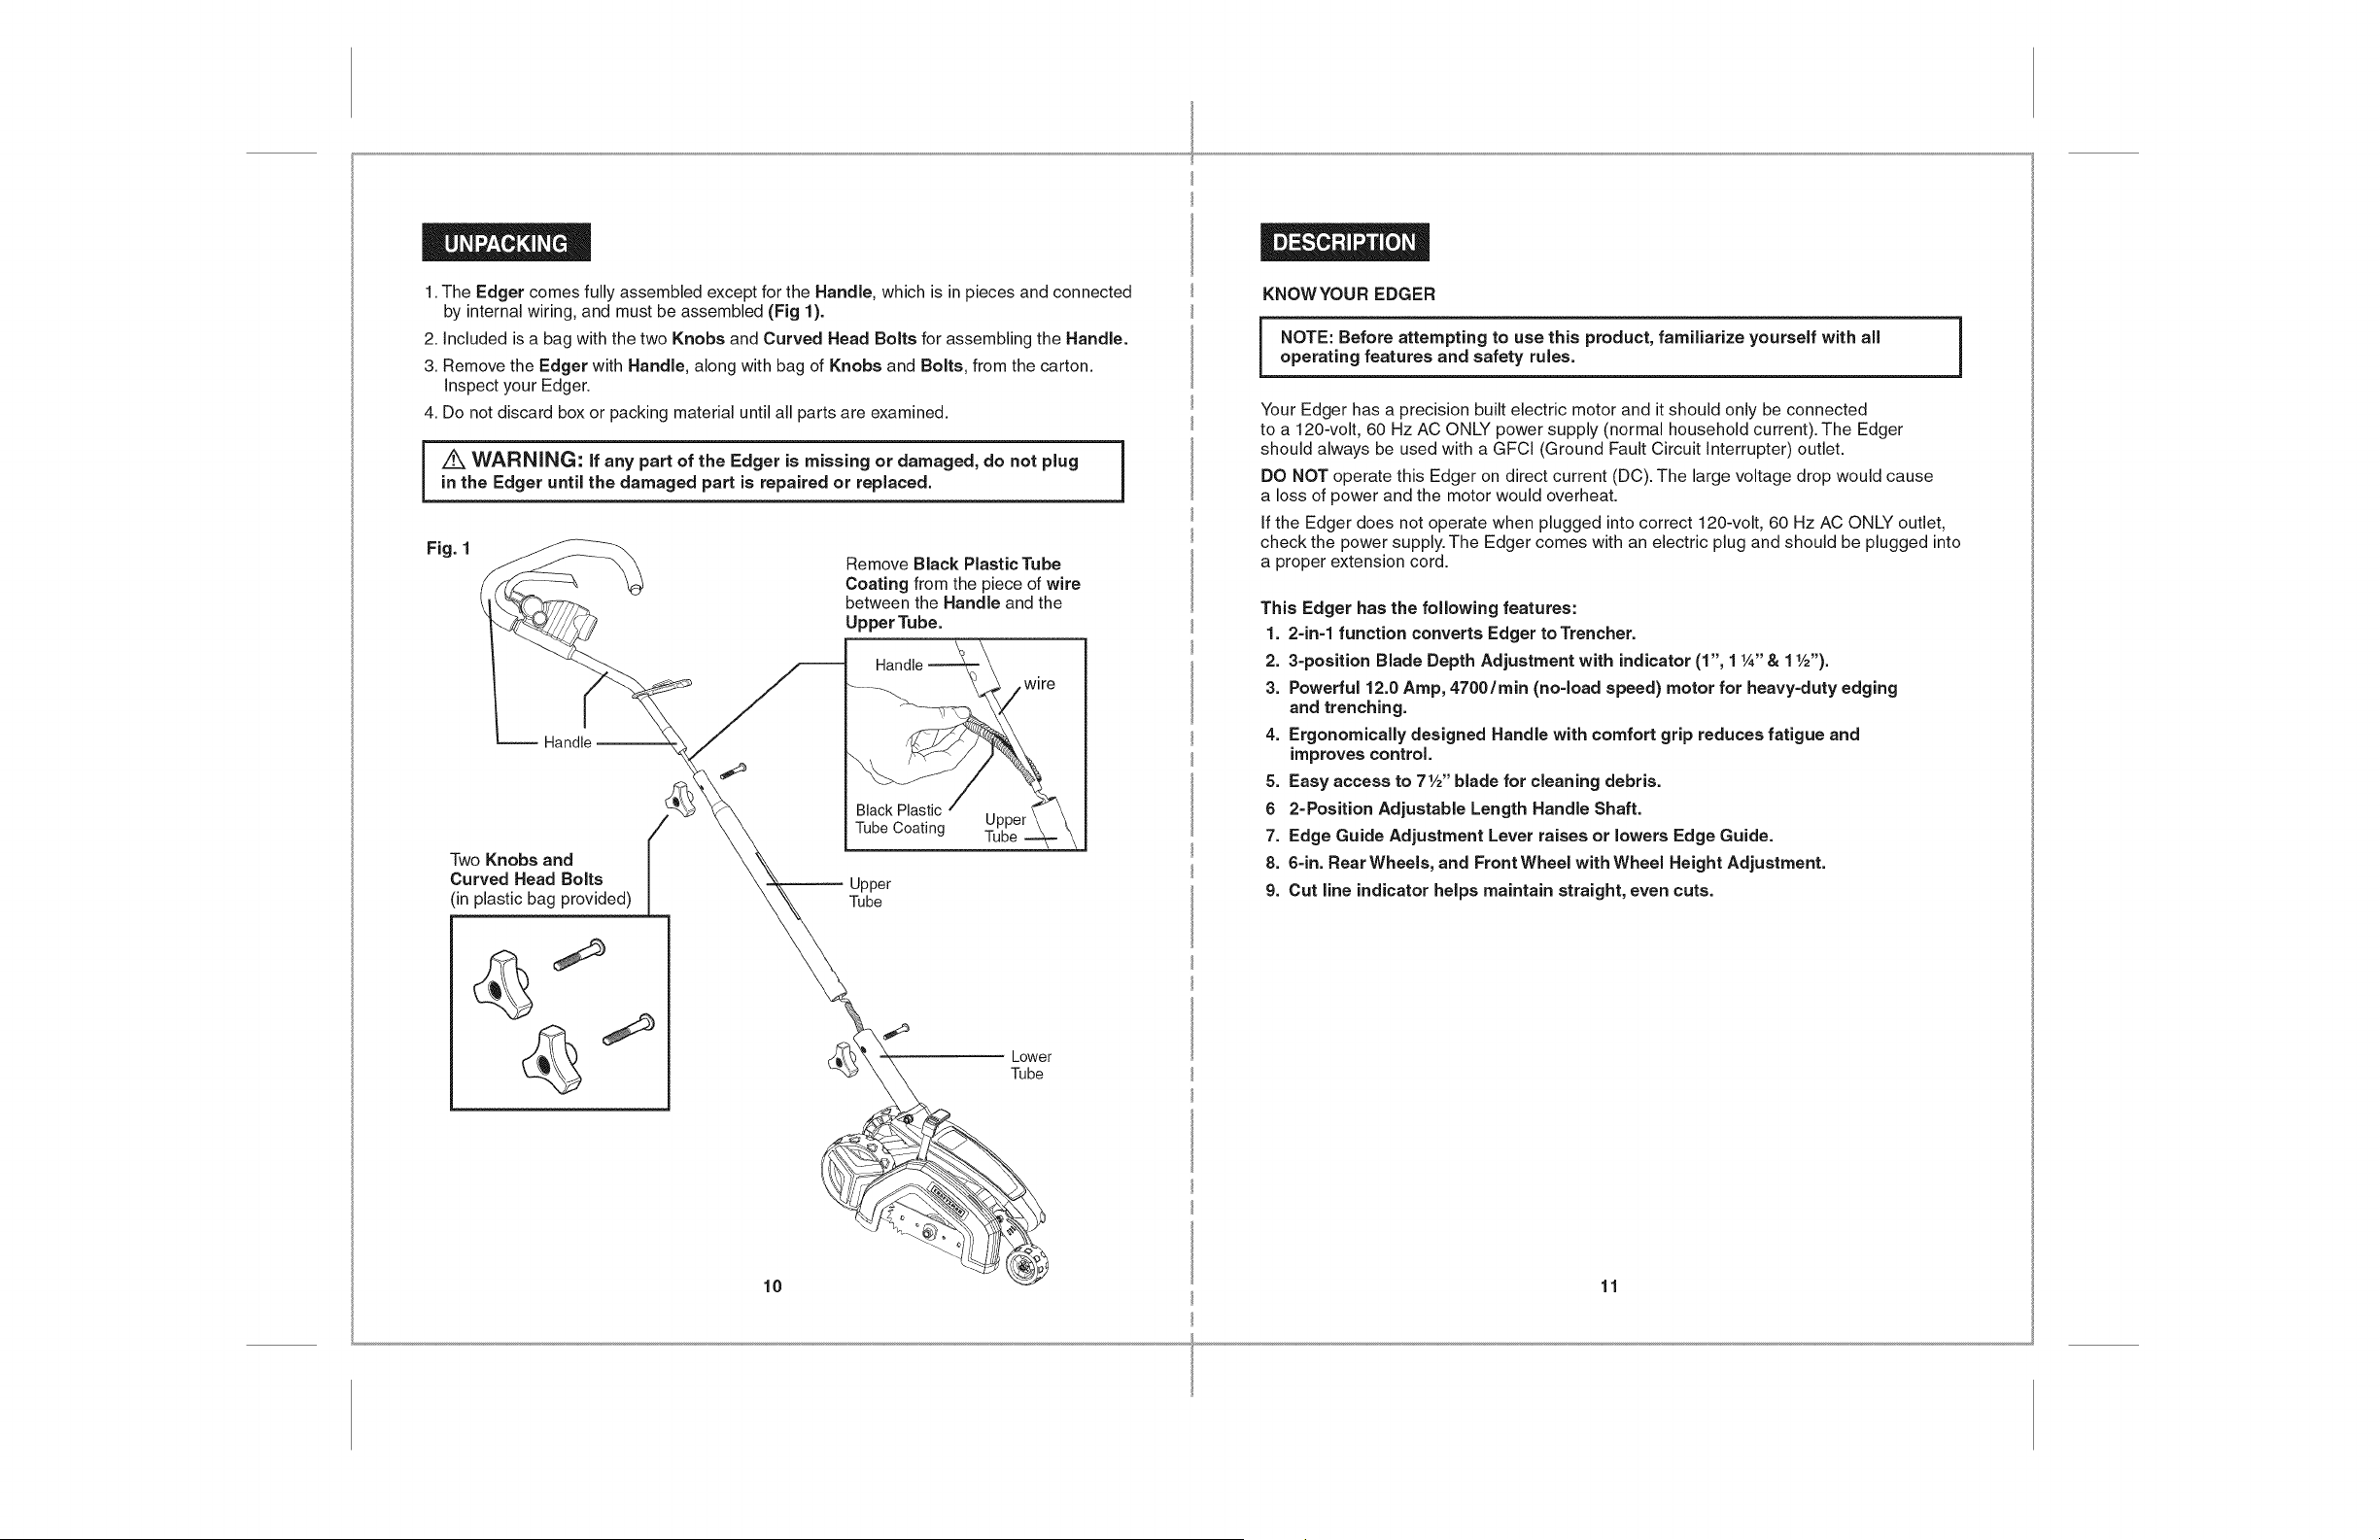
1.TheEdgercomesfullyassembledexceptfortheHandle,whichisinpiecesandconnected
byinternalwiring,andmustbeassembled(Fig1).
2.Included is a bag with the two Knobs and Curved Head Bolts for assembling the Handle.
3. Remove the Edger with Handle, along with bag of Knobs and Bolts, from the carton.
Inspect your Edger.
4. Do not discard box or packing material until all parts are examined.
z_ WARNING: if any part of the Edger is missing or damaged, do not plug
in the Edger until the damaged part is repaired or replaced. 1
Remove Black Plastic Tube
Coating from the piece of wire
between the Handle and the
UpperTube.
Handle
Two Knobs and
Curved Head Bolts
(in plastic bag provided)
10
Black Plastic
Tube Coating Upper
Tube
Upper
Tube
Lower
Tube
KNOWYOUR EDGER
NOTE: Before attempting to use this product, familiarize yourself with all i
operating features and safety rules.
1
Your Edger has a precision built electric motor and it should only be connected
to a 120-volt, 60 Hz AC ONLY power supply (normal household current). The Edger
should always be used with a GFCI (Ground Fault Circuit Interrupter) outlet.
DO NOT operate this Edger on direct current (DC). The large voltage drop would cause
a loss of power and the motor would overheat.
If the Edger does not operate when plugged into correct 120-volt, 60 Hz AC ONLY outlet,
check the power supply. The Edger comes with an electric plug and should be plugged into
a proper extension cord.
This Edger has the following features:
1. 2=in=l function converts Edger to Trencher.
2. 3=position Blade Depth Adjustment with indicator (1", 1 1A" & 1V2").
3. Powerful 12.0 Amp, 4700/rain (no=load speed) motor for heavy=duty edging
and trenching.
4. Ergonomically designed Handle with comfort grip reduces fatigue and
improves control.
5. Easy access to 7W' blade for cleaning debris.
6 2=Position Adjustable Length Handle Shaft.
7. Edge Guide Adjustment Lever raises or lowers Edge Guide.
8. 6=in. Rear Wheels, and Front Wheel with Wheel Height Adjustment.
9. Cut line indicator helps maintain straight, even cuts.
11
Loading ...
Loading ...
Loading ...