Loading ...
Loading ...
Loading ...
ninjakitchen.com
ninjakitchen.com
ENGLISH
IMPORTANT: Review all warnings before proceeding.
IMPORTANT: Review all warnings before proceeding.
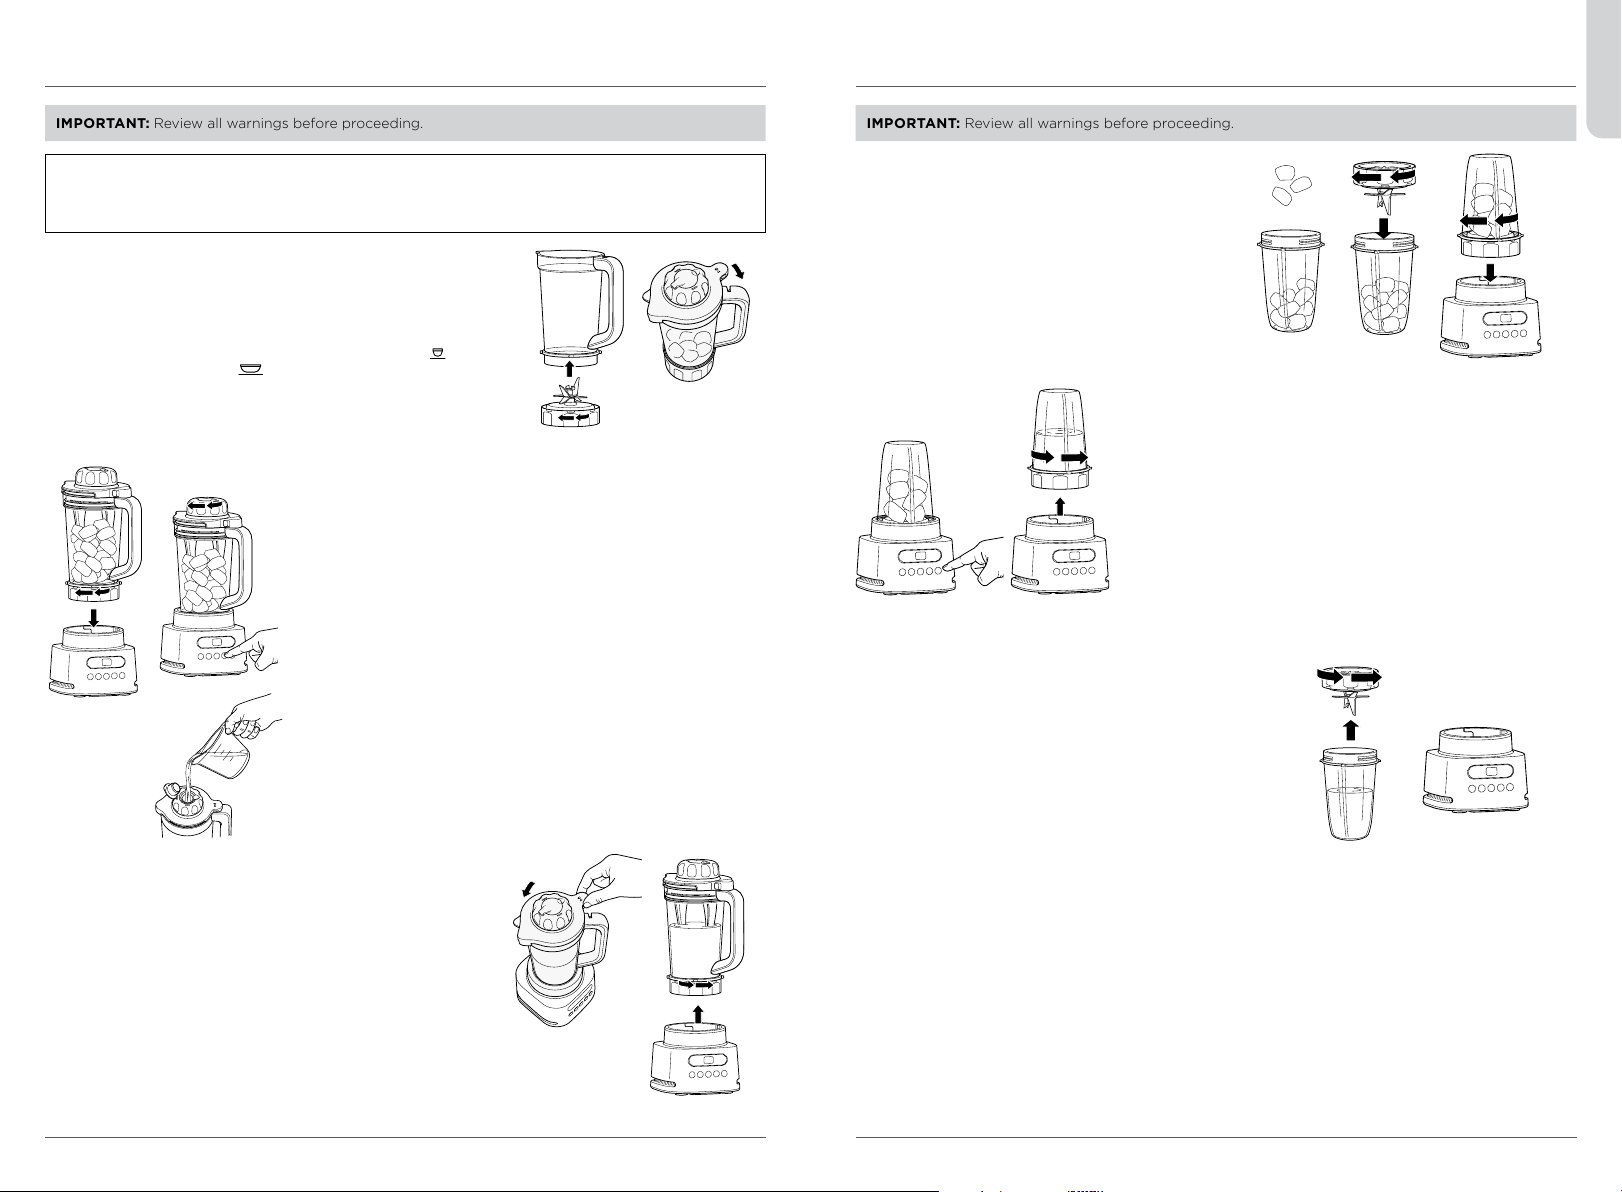
1 Place motor base on a clean, dry, level surface such as a
countertop or table, then plug in the unit.
2 Screw on the Hybrid Edge™ Blade Assembly until you have a
tight seal. Fill pitcher with desired contents up to your chosen
serving lines.
3 If making a smoothie bowl, for single serving, use the lines or
for two servings, use the lines.
4 Install the lid by aligning the red rectangle on the lid with the
red line on the top surface of the pitcher handle. Rotate the
tab of the lid with the release button clockwise into the pitcher
handle to lock into place.
1 Place motor base on a clean, dry, level surface such
as a countertop or table, then plug in the unit.
2 Add ingredients to the Nutrient Extraction* Cup.
DO NOT exceed the MAX LIQUID line.
3 Place the Hybrid Edge Blades Assembly on the top
of the cup and turn clockwise to seal.
4 Turn the cup upside down and install on the
motor base by aligning the tabs on the cup with
the slots on the base. Then, rotate cup clockwise
until it clicks. Once locked in place, the programs
illuminate and the unit is ready for use.
5 Install the pitcher on the motor base by aligning the tabs on
the pitcher to the slots on the base. Rotate pitcher clockwise
until it clicks into place. Programs will illuminate when unit is
ready to use.
6a If using an Auto-iQ® program, select the program that best suits
your desired output. For thick outputs, twist the built-in tamper
on the lid counterclockwise continuously while processing. To stop
the unit at any time, press the currently active program again.
6b If using START/STOP, when the ingredients have reached your
desired consistency, press the button again, or wait for the unit
to come to a complete stop after 60 seconds. If making thick
outputs, twist the built-in tamper counterclockwise continuously
while processing. If using PULSE, use short presses for short
pulses and long presses for long pulses.
5a If using an Auto-iQ® program, select the program that best
suits your desired output. The preset feature will automatically
stop at the end of the program. To stop the unit at any time,
press the currently active program again.
5b If using START/STOP, when the ingredients have reached your
desired consistency, press the button again, or wait for the unit to
come to a complete stop after 60 seconds. If using PULSE, use
short presses for short pulses and long presses for long pulses.
6 Remove the cup from the motor base by turning the cup
counterclockwise, then lifting it up.
NOTE:
• While processing thick ingredients, twist the built-in tamper counterclockwise continuously.
• Keep the drizzle cap closed while processing liquids.
7 Remove the lid by pressing the button on the tab until
it opens. Lift up to remove. Remove the pitcher from the
motor base by turning it counterclockwise, then lifting up.
8 To enjoy on the go, pour into a Nutrient Extraction Cup, place
the Spout Lid on the top, and twist lid clockwise until firmly
sealed. Or pour into a resusable cup of choice.
9 Remove the blade assembly by twisting counterclockwise.
DO NOT store blended contents with the blade assembly
attached. Exercise care when handling the blade assembly,
as the blades are sharp.
10 Unplug the unit when finished. Refer to the Care & Maintenance
section for cleaning and storage instructions.
7 Remove the blade assembly by twisting counterclockwise.
DO NOT store blended contents with the blade assembly
attached. Only use the Spout Lid. Exercise care when
handling the blade assembly, as the blades are sharp.
8 To enjoy on the go, place the Spout Lid onto the cup and
twist lid clockwise until firmly sealed.
9 Unplug the unit when finished. Refer to the Care & Maintenance
section for cleaning and storage instructions.
USING THE NINJA® TWISTI™ PITCHER USING THE NINJA® NUTRIENT EXTRACTION* CUP
* Extract a drink containing vitamins and nutrients from fruits and vegetables.
6c If results are too thick, open the drizzle hole cap and add
more liquid. Close the cap and continue twisting the tamper
counterclockwise during blending.
Loading ...
Loading ...
Loading ...