Loading ...
Loading ...
Loading ...

Accessories en
7
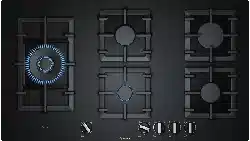
4.2 Burner
You can find an overview of the parts of the burner
here.
2
3
4
1
1
Burner cover
2
Burner cup
3
Thermocouple for the flame monitoring
4
Ignition plug
4.3 Pan supports
Insert the pan supports correctly.
Place the cookware correctly on the pan supports.
Never place the cookware directly on the burner.
Always carefully remove the pan supports. When mov-
ing a pan support, the pan supports next to it may also
move.
Tip:You can remove the metal residue that remains
when some items of cookware are moved on the pan
support by cleaning it properly.
→"Cleaning the pan supports", Page10
5 Accessories
You can buy accessories from the after-sales service,
from specialist retailers or online. Only use original ac-
cessories, as these have been specifically designed for
your appliance.
Accessories vary from one appliance to another. When
purchasing accessories, always quote the exact
product number (E no.) of your appliance. →Page12
You can find out which accessories are available for
your appliance in our catalogue, in the online shop or
from our after-sales service.
www.bosch-home.com
Accessories Description Use
Additional wok grid ¡ Only use on the multi-crown burner.
¡ Always use for cookware with a rounded
base.
¡ Recommended in order to extend the ser-
vice life of the appliance.
Additional espresso maker
grid
¡ Only use on the burner with the lowest
power setting.
¡ Use with cookware with a diameter smal-
ler than 12.
Simmer cap ¡ Secure this above the economy burner
cap.
¡ Use only with the lowest power setting of
the burner.
¡ Place the cookware on the pan support,
never directly on the simmer cap.
Simmer plate ¡ For cooking on a low heat.
¡ Use the economy burner or the standard-
output burner. If there are several stand-
ard-output burners, it is preferable to use
the rear or front-right burner.
¡ Place it on the pan support with the
bumps facing up – never place it directly
on the burner.
Loading ...
Loading ...
Loading ...