Loading ...
Loading ...
Loading ...
6
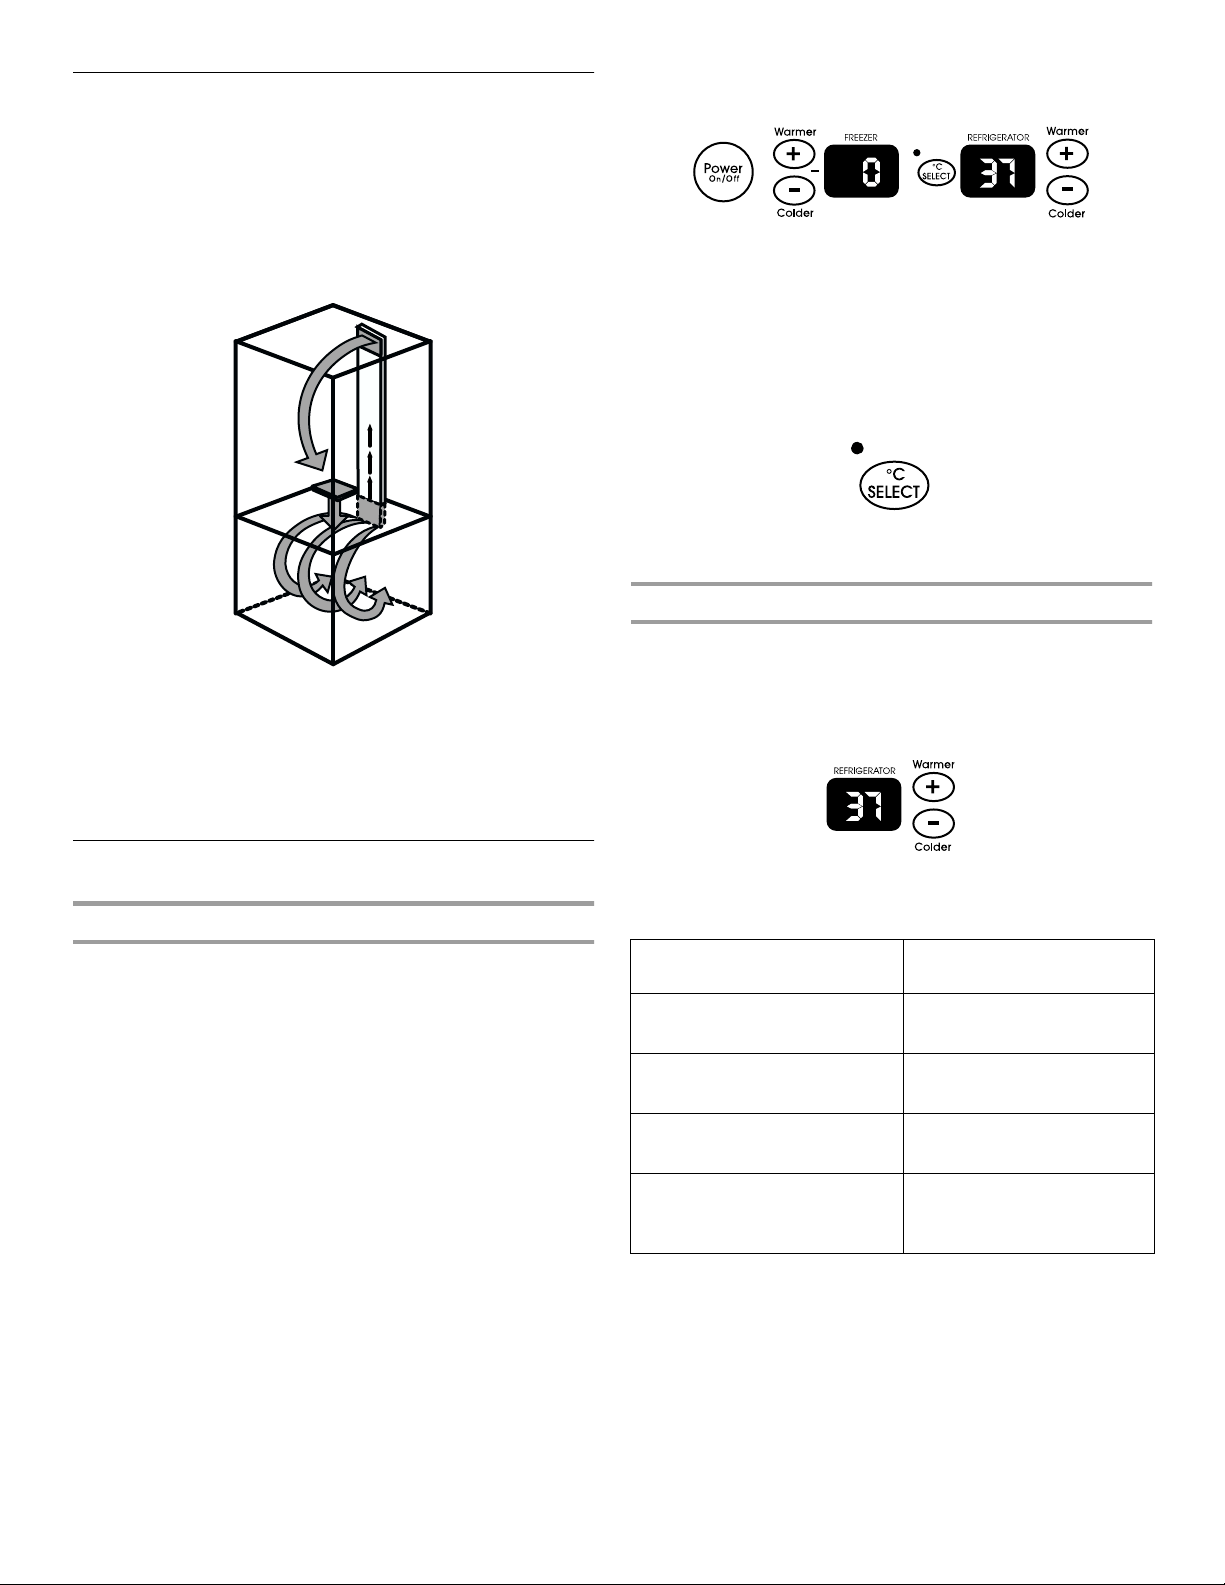
Ensuring Proper Air Circulation
In order to ensure proper temperatures, you need to permit
airflow between the refrigerator and freezer sections. As shown in
the illustration, cool air enters the freezer section through vents in
the rear and top. The air flows forward through the freezer section
and recirculates under the freezer floor. Cool air enters the
refrigerator section through the top, flows down and across
shelves to the doors and recirculates to return air vents at the
top.
Do not block any of these vents with food packages. If the vents
are blocked, airflow will be prevented and temperature and
moisture problems may occur.
IMPORTANT:
Because air circulates between both sections, any
odors formed in one section will transfer to the other. You must
thoroughly clean both sections to eliminate odors. To prevent
odor transfer and drying out of food, wrap or cover foods tightly.
Using the Controls
Digital Controls
IMPORTANT:
■
The Refrigerator Control adjusts the refrigerator compartment
temperature. The Freezer Control adjusts the freezer
compartment temperature.
■
Wait 24 hours after you turn on the refrigerator before you put
food into it. If you add food before the refrigerator has cooled
completely, your food may spoil.
NOTE:
Adjusting the Refrigerator and Freezer Controls to a
lower (colder) setting will not cool the compartments any
faster.
■
If the temperature is too warm or too cold in the refrigerator or
freezer, first check the air vents to be sure they are not
blocked before adjusting the controls.
■
The preset settings should be correct for normal household
usage. The controls are set correctly when milk or juice is as
cold as you like and when ice cream is firm.
For your convenience, your controls are preset at the factory.
When installing your refrigerator, make sure that the controls are
still preset to the “mid-settings” as shown. The digital control
panel is located at the top of the refrigerator compartment.
NOTE:
The factory recommended set points are 0°F (-18°C) for
the freezer and 37°F (3°C) for the refrigerator.
To turn refrigerator on and view set points:
■
Press and hold POWER (ON/OFF) for 2 seconds.
NOTE:
After the refrigerator is turned on, the Over Temperature
audio alarm and indicator light will activate every 1
¹⁄₂
hours until
the refrigerator and freezer temperatures are below 48°F (9°C)
and 15°F (-9°C), respectively. To turn off the alarm and indicator
light, press the OVER TEMPERATURE RESET. (See the “Over
Temperature Reset” section.)
To view the Celsius temperatures:
■
Press °C SELECT touch pad. The negative sign (-) will light
up. To redisplay degrees Fahrenheit, press °C SELECT again.
NOTE:
If the freezer temperature is below zero, the negative sign
next to the freezer display will light up. This is normal.
Adjusting Digital Controls
NOTE:
Wait at least 24 hours between adjustments. Recheck the
temperatures before other adjustments are made.
To adjust set point temperatures:
■
Press the refrigerator or freezer PLUS (+) or MINUS (-) key
pad until the desired temperature is reached.
The set point range for the freezer is -9°F to 9°F (-23°C to
-13°C). The set point range for the refrigerator is 32°F to 46°F
(0°C to 8°C).
CONDITION/REASON: TEMPERATURE
ADJUSTMENT:
REFRIGERATOR too cold
Not set correctly for conditions
REFRIGERATOR Control 1
°
higher
REFRIGERATOR too warm
High use or room very warm
REFRIGERATOR Control 1
°
lower
FREEZER too cold
Not set correctly for conditions
FREEZER Control 1
°
higher
Freezer too warm/too little
ice
High use or heavy ice use
FREEZER Control 1
°
lower
Loading ...
Loading ...
Loading ...