Loading ...
Loading ...
Loading ...

8
Unpacking
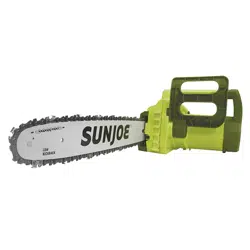
Carton Contents
• Electric chain saw
• 16 in. (40.6 cm) cutting chain
• 16 in. (40.6 cm) guide bar
• Dual-tipped hex key wrench/blade screwdriver
• Cutting bar sheath
• Manual with registration card
1. Carefully remove the chain saw and check to see that all
of the above items are supplied.
2. Inspect the product carefully to make sure no breakage or
damage occurred during shipping. If you nd damaged or
missing parts, DO NOT return the unit to the store. Please
call the Snow Joe
®
+ Sun Joe
®
customer service center at
1-866-SNOWJOE (1-866-766-9563).
NOTE: Do not discard the shipping carton and packaging
material until you are ready to use your new electric chain
saw. The packaging is made of recyclable materials.
Properly dispose of these materials in accordance with
local regulations.
IMPORTANT! The equipment and packaging material are
not toys. Do not let children play with plastic bags, foils, or
small parts. These items can be swallowed and pose a
suocation risk!
Assembly
m
WARNING! Always wear heavy-duty gloves when
handling the bar and chain. Mount the bar and chain very
carefully so as not to impair the safety and eciency of the
machine. If in doubt, contact an authorized Snow Joe
®
+
Sun Joe
®
dealer or call the Snow Joe
®
+ Sun Joe
®
customer
service center at 1-866-SNOWJOE (1-866-766-9563).
mWARNING! Unpacking and assembly should be
completed on a at and stable surface, with adequate space
for moving the machine and its packaging.
mDANGER! Never start the motor before installing the
guide bar, chain, and end cover. Without all these parts in
place, the clutch/sprocket can y o or explode, exposing the
user to potentially serious injuries.
mWARNING! To avoid serious personal injury, read and
understand all safety instructions provided.
mWARNING! Before performing any maintenance, make
sure the tool is unplugged from the power supply. Failure to
heed this warning could result in serious personal injury.
Installing the Guide Bar and Chain
Tools and supplies required:
• Dual-tipped hex key wrench/blade screwdriver (supplied)
• Heavy-duty work gloves
NOTE: When replacing the guide bar and chain, use only
identical replacement parts. Make sure the chain saw is
disconnected from the power supply before proceeding
with installation.
1. Using the supplied at-tip blade screwdriver, remove the
end cover nut cap from the chain/sprocket end cover to
expose the end cover nut (Fig. 1).
2. Using the supplied hex key wrench, unscrew the end
cover nut and remove the chain/sprocket end cover
(Fig. 1).
3. Lay out the new saw chain in a loop and straighten any
kinks. THE SHARP SIDE OF THE TEETH MUST FACE
AWAY FROM YOU AND IN THE DIRECTION OF THE
CHAIN ROTATION INDICATED ON THE GUIDE BAR. If
the teeth face backwards, turn the loop over (Fig. 2).
Fig. 1
End cover
nut cap
End cover
nut
Hex key wrench
End cover
Fig. 2
Loading ...
Loading ...
Loading ...