Loading ...
Loading ...
Loading ...
,_ WARNING: Always stop engine and
disconnect spark plug wire before
cleaning, lubricating or doing any kind of
maintenance on your string trimmer
mower.
Lubrication
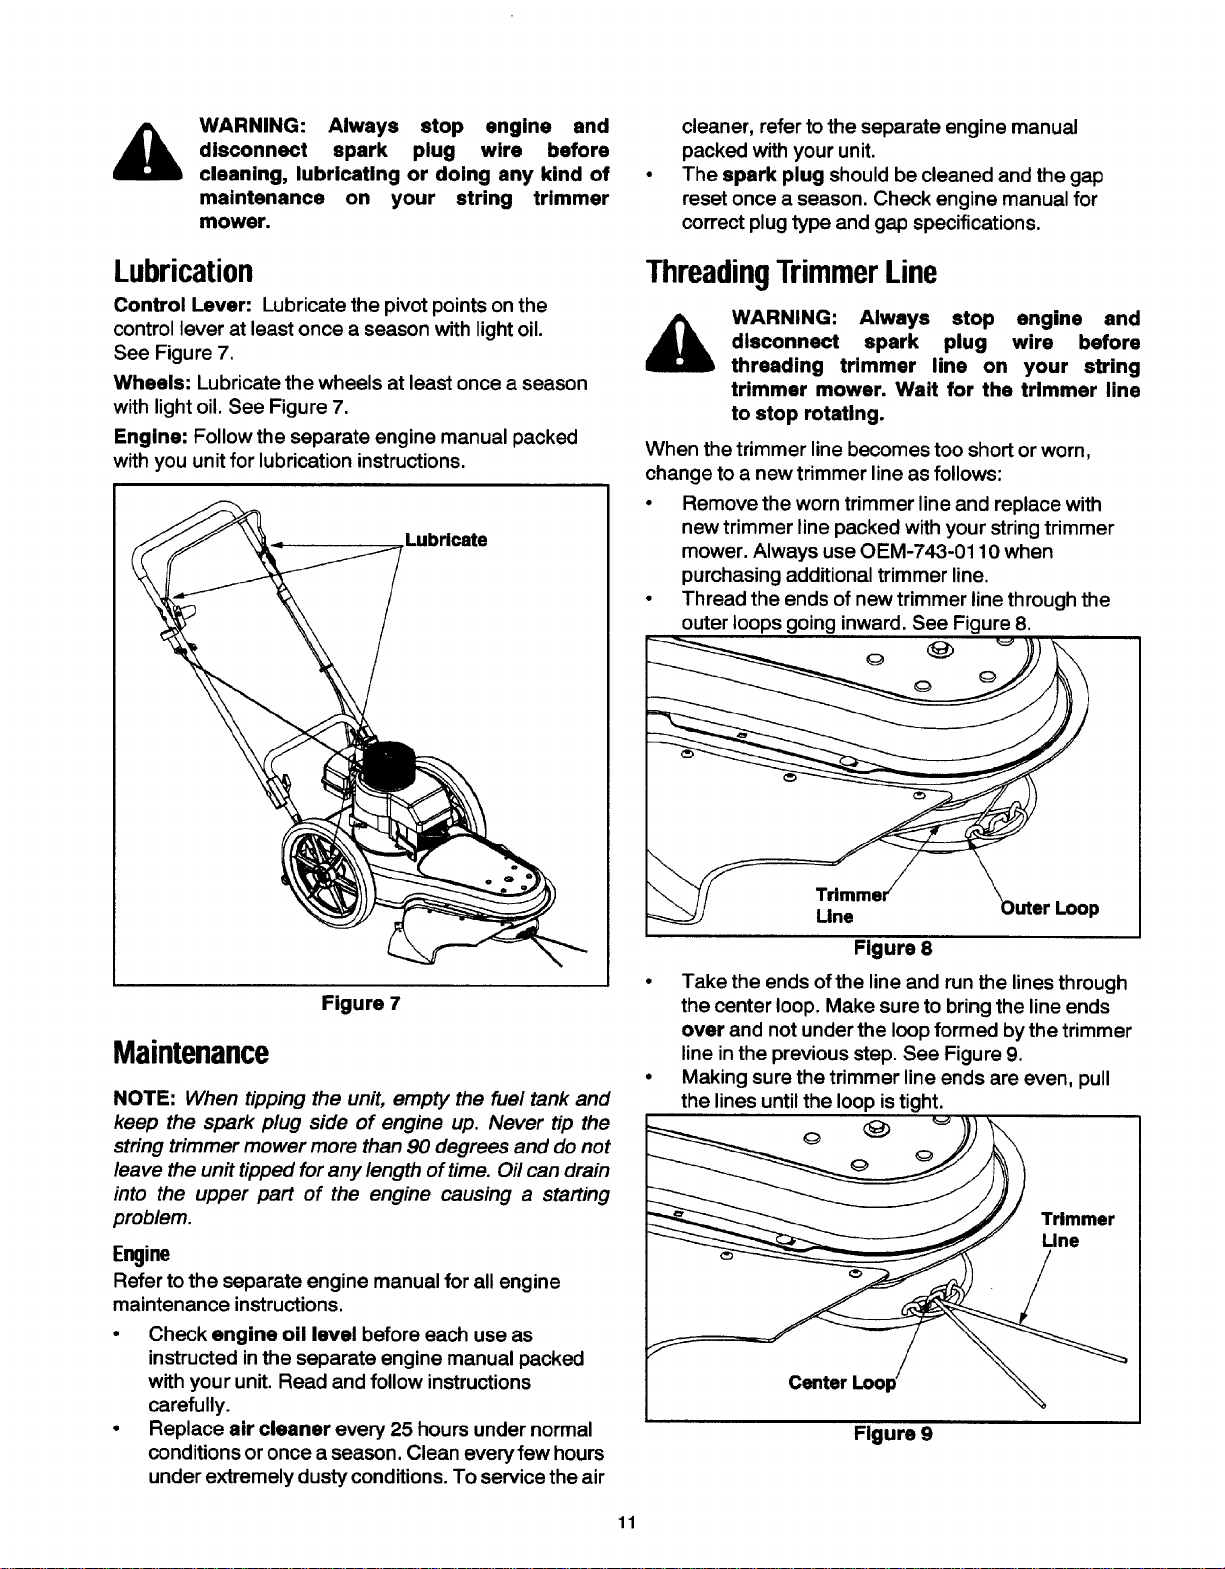
Control Lever: Lubricate the pivot points on the
control lever at least once a season with lightoil.
See Figure 7.
Wheels: Lubricate the wheels at least once a season
with light oil. See Figure 7.
Engine: Follow the separate engine manual packed
with you unitfor lubrication instructions.
Lubricate
Figure 7
Maintenance
NOTE: When tipping the unit, empty the fuel tank and
keep the spark plug side of engine up. Never tip the
string trimmer mower more than 90 degrees and do not
leave the unit tipped for any length oftime. Oil can drain
into the upper part of the engine causing a starting
problem.
Engine
Refer to the separate engine manual for all engine
maintenance instructions.
• Check engine oil level before each use as
instructed in the separate engine manual packed
with your unit. Read and follow instructions
carefully.
• Replace air cleaner every 25 hours under normal
conditions or once a season. Clean every few hours
under extremely dusty conditions. To service the air
cleaner, refer to the separate engine manual
packed with your unit.
The spark plug should be cleaned and the gap
reset once a season. Check engine manual for
correct plug type and gap specifications.
ThreadingTrimmerLine
WARNING: Always stop engine and
disconnect spark plug wire before
threading trimmer line on your string
trimmer mower. Wait for the trimmer line
to stop rotating.
When the trimmer line becomes too short or worn,
change to a new trimmer line as follows:
• Remove the worn trimmer line and replace with
new trimmer line packed with your string trimmer
mower. Always use OEM-743-0110 when
purchasing additional trimmer line.
• Thread the ends of new trimmer line through the
outer loops going inward. See Figure 8.
o
Une
Figure 8
Take the ends of the line and runthe lines through
the center loop. Make sure to bringthe line ends
over and not under the loop formed by the trimmer
line inthe previous step. See Figure 9.
Making sure the trimmer line ends are even, pull
the lines until the loop is tight.
o
Trimmer
Line
Center Loop
Figure 9
11
Loading ...
Loading ...
Loading ...