Loading ...
Loading ...
Loading ...
HS8/HS7/HS5/HS8I/HS7I/HS5I/HS8S Owner’s Manual
11
English
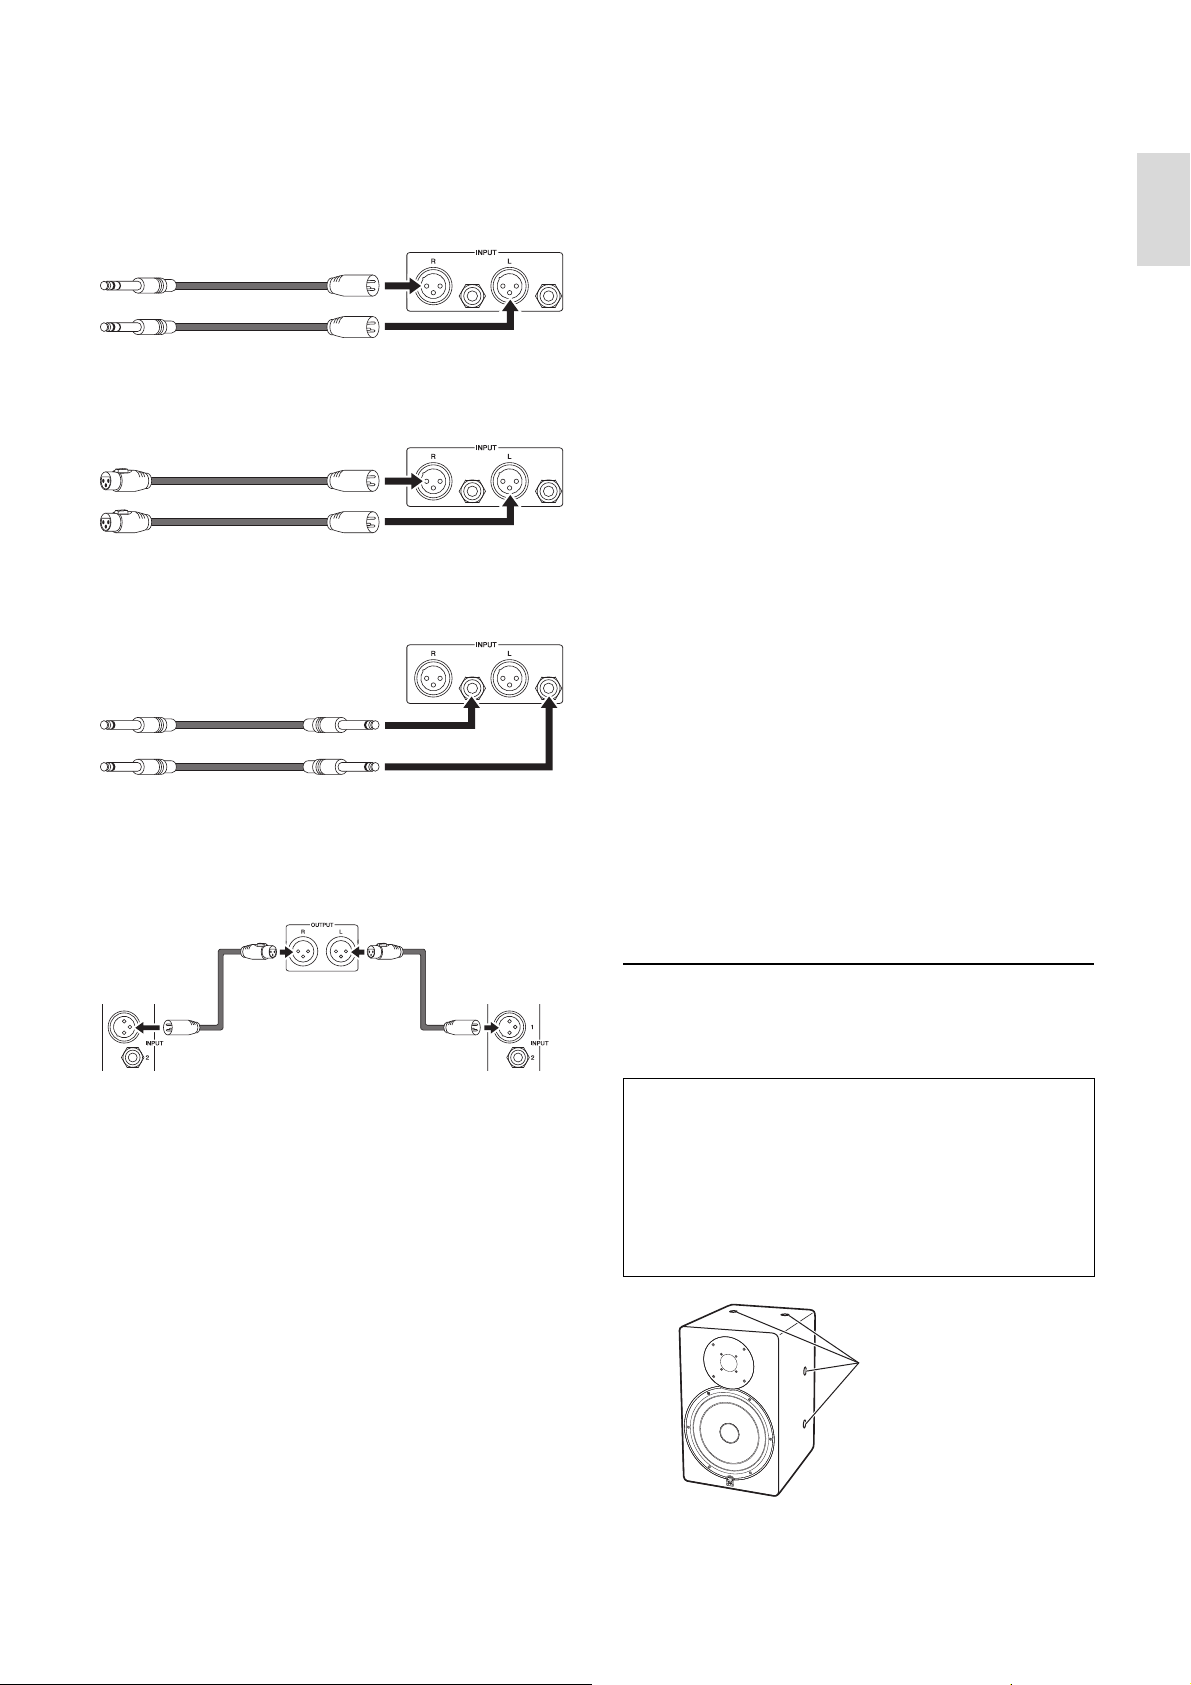
Recommended cables
Cables for connecting the audio source (audio
interface, etc.) to the HS8S
For connection to a balanced phone jack input.
For connection to a balanced XLR input.
For connection to an unbalanced phone jack input.
Cables for connection between the HS8S and
HS8/HS7/HS5
NOTE Refer to “Connectable cables” on page 5 for more connector
details. The configurations of the balanced and unbalanced
phone jack connectors are different.
Settings for Speakers Plus Subwoofer
Once the subwoofer connections have been made and
the layout is finalized, you can begin making the
following settings.
1 Turn the level/volume controls on all
source equipment (audio interface, etc.) all
the way down.
2 Set the HS8/HS7/HS5 LEVEL control to the
12-o’clock position, and set both ROOM
CONTROL and HIGH TRIM switches to 0
dB.
3 Set the HS8S LEVEL control to 0, the HIGH
CUT and LOW CUT controls to their 12-
o’clock positions, and set the LOW CUT
switch to OFF.
4 Turn power on in the following order: audio
source devices, then subwoofer, and finally
the full-range speakers.
NOTICE
Turn power off in the following order: full-range speakers, then
subwoofer, and finally audio source devices.
5 Play some source material and gradually
raise the level/volume controls on the
source equipment.
NOTICE
Be careful not to suddenly apply an excessively loud signal to the
system. Excessive level can damage the speakers.
6 Set the HS8S LEVEL control to between 10
and 12 o’clock, and turn the LOW CUT
switch ON.
7 Set the listening level to a level at which
you can listen comfortably without fatigue
for an extended period of time.
NOTE • If necessary, adjust the ROOM CONTROL and HIGH TRIM
switches for the most natural response (refer to page 6).
• If necessary, adjust the LOW CUT and HIGH CUT controls
and the PHASE switch for the most natural response (refer
to page 7).
Installing Brackets
(HS8I/HS7I/HS5I only)
HS8I/HS7I/HS5I can be installed with optional brackets.
Two screw holes for installing the brackets are located
on each of the four surfaces (top, bottom, left and right).
HS8S
HS8S
HS8S
HS8S
HS8
HS7
HS5
HS8
HS7
HS5
Refer also to the bracket installation manual.
Note that there are two sets of screws: those that are
originally installed in the speaker cabinet (to plug the
installation holes) and those (for bracket installation)
that are included in the product package. When
installing brackets to the speaker, remove the original
screws and make sure to use only the screws included
in the product package for bracket installation.
Screw holes for installing
brackets
Loading ...
Loading ...
Loading ...