
Body Camera
User's Manual
V2.2.0

I
Foreword
General
This manual introduces the functions and operations of the body camera (hereinafter referred to as
"the Device"). Read carefully before using the device, and keep the manual safe for future reference.
Safety Instructions
The following signal words might appear in the manual.
Signal Words Meaning
Indicates a high potential hazard which, if not avoided, will result in
death or serious injury.
Indicates a medium or low potential hazard which, if not avoided,
could result in slight or moderate injury.
Indicates a potential risk which, if not avoided, could result in
property damage, data loss, reductions in performance, or
unpredictable results.
Provides methods to help you solve a problem or save time.
Provides additional information as a supplement to the text.
Revision History
Version Revision Content Release Time
V2.2.0
●
Added
Face Settings
function.
●
Added
Plate Settings
function.
●
Added
Local login no certification
function.
●
Added
Online Update
function.
●
Added
Remote Debugging
function.
●
Added
Signal Strength and Band
function.
February 2023
V2.1.0 Added 2 models. June 2022
V2.0.0 Added platform operations. December 2021
V1.0.0 First release. November 2020
Privacy Protection Notice
As the device user or data controller, you might collect the personal data of others such as their face,
fingerprints, and license plate number. You need to be in compliance with your local privacy
protection laws and regulations to protect the legitimate rights and interests of other people by
implementing measures which include but are not limited: Providing clear and visible identification
to inform people of the existence of the surveillance area and provide required contact information.

II
About the Manual
●
The manual is for reference only. Slight differences might be found between the manual and the
product.
●
We are not liable for losses incurred due to operating the product in ways that are not in
compliance with the manual.
●
The manual will be updated according to the latest laws and regulations of related jurisdictions.
For detailed information, see the paper user’s manual, use our CD-ROM, scan the QR code or visit
our official website. The manual is for reference only. Slight differences might be found between
the electronic version and the paper version.
●
All designs and software are subject to change without prior written notice. Product updates
might result in some differences appearing between the actual product and the manual. Please
contact customer service for the latest program and supplementary documentation.
●
There might be errors in the print or deviations in the description of the functions, operations
and technical data. If there is any doubt or dispute, we reserve the right of final explanation.
●
Upgrade the reader software or try other mainstream reader software if the manual (in PDF
format) cannot be opened.
●
All trademarks, registered trademarks and company names in the manual are properties of their
respective owners.
●
Please visit our website, contact the supplier or customer service if any problems occur while
using the device.
●
If there is any uncertainty or controversy, we reserve the right of final explanation.
III
Important Safeguards and Warnings
This section introduces content covering the proper handling of the Device, hazard prevention, and
prevention of property damage. Read carefully before using the Device, and comply with the
guidelines when using it.
Transportation Requirements
Transport the Device under allowed humidity and temperature conditions.
Storage Requirements
●
Store the Device under allowed humidity and temperature conditions.
●
To avoid short circuits caused by metal objects touching the battery anode and cathode, do not
store the battery with other metals.
●
If the Device will not be used for a week or longer, charge it to 60%, take the battery out of the
Device, and store it in a clean, dry and ventilated room with an ambient temperature of 20 ± 5 °C.
●
Charge the battery once every four months during storage.
Installation Requirements
Do not expose the battery to environments with extremely low air pressure, or extremely high or low
temperatures. Also, it is strictly prohibited to throw the battery into a fire or furnace, and to cut or
put mechanical pressure on the battery. This is to avoid the risk of fire and explosion.
Operation Requirements
Use the power adapter and cables provided with the Device. We assume no responsibility for injuries
or damage caused by using the incorrect power adapter and cables..
●
To prevent possible hearing damage, do not listen at high volume levels for long periods.
●
Use the Device under allowed humidity and temperature conditions.
●
Do not continuously charge the battery for 24 hours or longer. When it is finished charging or it
no longer needs charging, disconnect the adapter from the Device, and unplug it from the power
socket.
●
Please be advised that your configurations will be lost after performing a factory reset.
Maintenance Requirements
Make sure to use the same model when replacing the battery to avoid fire or explosion. Dispose the
battery strictly according to the instructions on it.

IV
The battery is a consumable accessory. We recommend replacing it after it has been used for a year.

V
Table of Contents
Foreword
........................................................................................................................................................................................................I
Important Safeguards and Warnings
............................................................................................................................................ III
1 Product Introduction
.......................................................................................................................................................................... 1
2 Structure and Installation
................................................................................................................................................................ 2
2.1 Packing List
................................................................................................................................................................................... 2
2.2 Device Structure
......................................................................................................................................................................... 2
2.3 Indicator Lights
........................................................................................................................................................................... 4
2.4 Installing Shoulder Clip
.......................................................................................................................................................... 4
3 Basic Operations
................................................................................................................................................................................... 5
3.1 Starting and Shutting Down
................................................................................................................................................ 5
3.2 Initialization
................................................................................................................................................................................. 5
3.3 Home Screen
................................................................................................................................................................................ 7
3.4 User Management
..................................................................................................................................................................... 7
3.4.1 Changing the Password
............................................................................................................................................... 7
3.4.2 Setting the Pattern Lock
.............................................................................................................................................. 7
3.5 Configuring the Device
........................................................................................................................................................... 8
3.5.1 Network
............................................................................................................................................................................... 8
3.5.1.1 Platform
.................................................................................................................................................................... 9
3.5.1.1.1 Auto Register
.............................................................................................................................................. 9
3.5.1.1.2 ONVIF
............................................................................................................................................................ 10
3.5.1.1.3 RTSP
............................................................................................................................................................... 11
3.5.1.2 WLAN
........................................................................................................................................................................ 11
3.5.1.2.1 Adding Network
...................................................................................................................................... 12
3.5.1.2.2 Configuring Wi-Fi Preferences
......................................................................................................... 13
3.5.1.2.3 Managing Saved Networks
................................................................................................................ 13
3.5.1.3 Mobile Data
........................................................................................................................................................... 14
3.5.1.4 Positioning
............................................................................................................................................................ 15
3.5.1.5 Bluetooth
............................................................................................................................................................... 17
3.5.2 Device
................................................................................................................................................................................. 18
3.5.2.1 Audio Recording Settings
.............................................................................................................................. 18
3.5.2.2 Camera Settings
................................................................................................................................................. 19
3.5.2.3 Face Settings
........................................................................................................................................................ 22
3.5.2.4 Plate Settings
....................................................................................................................................................... 22
3.5.2.5 Infrared Settings
................................................................................................................................................ 23
3.5.2.6 Volume
.................................................................................................................................................................... 23

VI
3.5.2.7 NFC
............................................................................................................................................................................ 24
3.5.2.8 Voice Prompt
........................................................................................................................................................ 24
3.5.2.9 Data Overwrite
.................................................................................................................................................... 24
3.5.2.10 Auto Start Video
.............................................................................................................................................. 25
3.5.2.11 Force Transfer Encoded Streams through Network
...................................................................... 25
3.5.3 System
................................................................................................................................................................................ 25
3.5.3.1 Back Operation
................................................................................................................................................... 26
3.5.3.2 Security
................................................................................................................................................................... 26
3.5.3.3 Display
..................................................................................................................................................................... 27
3.5.3.4 Date and Time
...................................................................................................................................................... 28
3.5.3.5 Language
............................................................................................................................................................... 29
3.5.3.6 Storage
.................................................................................................................................................................... 29
3.5.3.7 About Device
........................................................................................................................................................ 29
3.5.3.8 App Management
.............................................................................................................................................. 29
3.5.3.8.1 Viewing App Information
................................................................................................................... 29
3.5.3.8.2 Configuring the Startup App
............................................................................................................ 30
3.5.3.8.3 Installing Platform Apps
..................................................................................................................... 30
3.5.3.9 Reset
......................................................................................................................................................................... 30
3.5.3.10 Local login without certification
............................................................................................................. 31
3.6 System Maintenance
.............................................................................................................................................................. 31
3.6.1 Online Update
................................................................................................................................................................ 32
3.6.2 Local System Upgrade
................................................................................................................................................ 33
3.6.3 Scan to Update
............................................................................................................................................................... 33
3.6.4 Ping Test
............................................................................................................................................................................ 34
3.6.5 Network Capture
........................................................................................................................................................... 34
3.6.6 Log Package
.................................................................................................................................................................... 35
3.6.7 Automatic Maintenance
............................................................................................................................................ 35
3.6.8 Remote Debugging
...................................................................................................................................................... 36
3.6.9 Signal Strength and Band
......................................................................................................................................... 36
3.6.10 ADB Network Debugging
....................................................................................................................................... 36
3.7 Audio Recording
...................................................................................................................................................................... 36
3.7.1 Recording Audio
............................................................................................................................................................ 36
3.7.2 One Press to Record Audio
....................................................................................................................................... 37
3.8 Video Recording
....................................................................................................................................................................... 37
3.8.1 Recording Video
............................................................................................................................................................ 37
3.8.2 One Press to Record a Video
................................................................................................................................... 39
3.8.3 Focusing
............................................................................................................................................................................ 39
3.8.4 Marking Important Videos
....................................................................................................................................... 39

VII
3.9 Pictures
......................................................................................................................................................................................... 39
3.9.1 Taking a Picture
............................................................................................................................................................. 39
3.9.2 One Press to Take a Picture
...................................................................................................................................... 39
3.10 Smart Operation
.................................................................................................................................................................... 39
3.10.1 Face Detection
............................................................................................................................................................. 39
3.10.2 ANPR
................................................................................................................................................................................. 40
3.11 Files
.............................................................................................................................................................................................. 40
3.11.1 Viewing Pictures
......................................................................................................................................................... 40
3.11.2 Playing Video
............................................................................................................................................................... 43
3.11.3 Playing Audio
............................................................................................................................................................... 43
3.12 Switching between Video and Audio Recording
.................................................................................................. 44
3.13 Recording Audio & Video at the Same Time
............................................................................................................ 44
3.14 IR Light
....................................................................................................................................................................................... 45
3.15 White Light
............................................................................................................................................................................... 45
3.16 Data Transmission
................................................................................................................................................................ 45
4 System Update
..................................................................................................................................................................................... 46
4.1 Updating on MPT Manager
................................................................................................................................................. 46
4.2 Updating on Local Device
.................................................................................................................................................... 47
5 Platform Operations
......................................................................................................................................................................... 48
5.1 Adding the Device to the Platform
................................................................................................................................. 48
5.2 Connecting to the Platform
................................................................................................................................................ 50
6 SIM Card and Battery Installation
.............................................................................................................................................. 51
6.1 Installing SIM Card
.................................................................................................................................................................. 51
6.2 Replacing Main Battery
........................................................................................................................................................ 53
7 FAQ
............................................................................................................................................................................................................ 54
Appendix 1 Cybersecurity Recommendations
........................................................................................................................ 55

1
1 Product Introduction
This product is a mobile portable terminal for persons of public security, insurance, traffic police and
more. It integrates audio/video record and snapshot together.
This product can record the data during the whole law enforcement process. It is light and has small
compact design, easy to install. It is waterproof and shockproof. The built-in IR light can guarantee
clear video at night. The recorded video supports onsite playback and prevents the file from being
tampered. The recorded data is fair and can be recognized by the authorities to solve a case and
provide as the evidence on the court.
2
2 Structure and Installation
2.1 Packing List
Table 2-1 Packing list
Name Quantity
Device 1
Shoulder clip 1
USB cable 1
Micro USB-to-mini USB adapter 1
Battery 1
Power adapter 1
Quick Start Guide 1
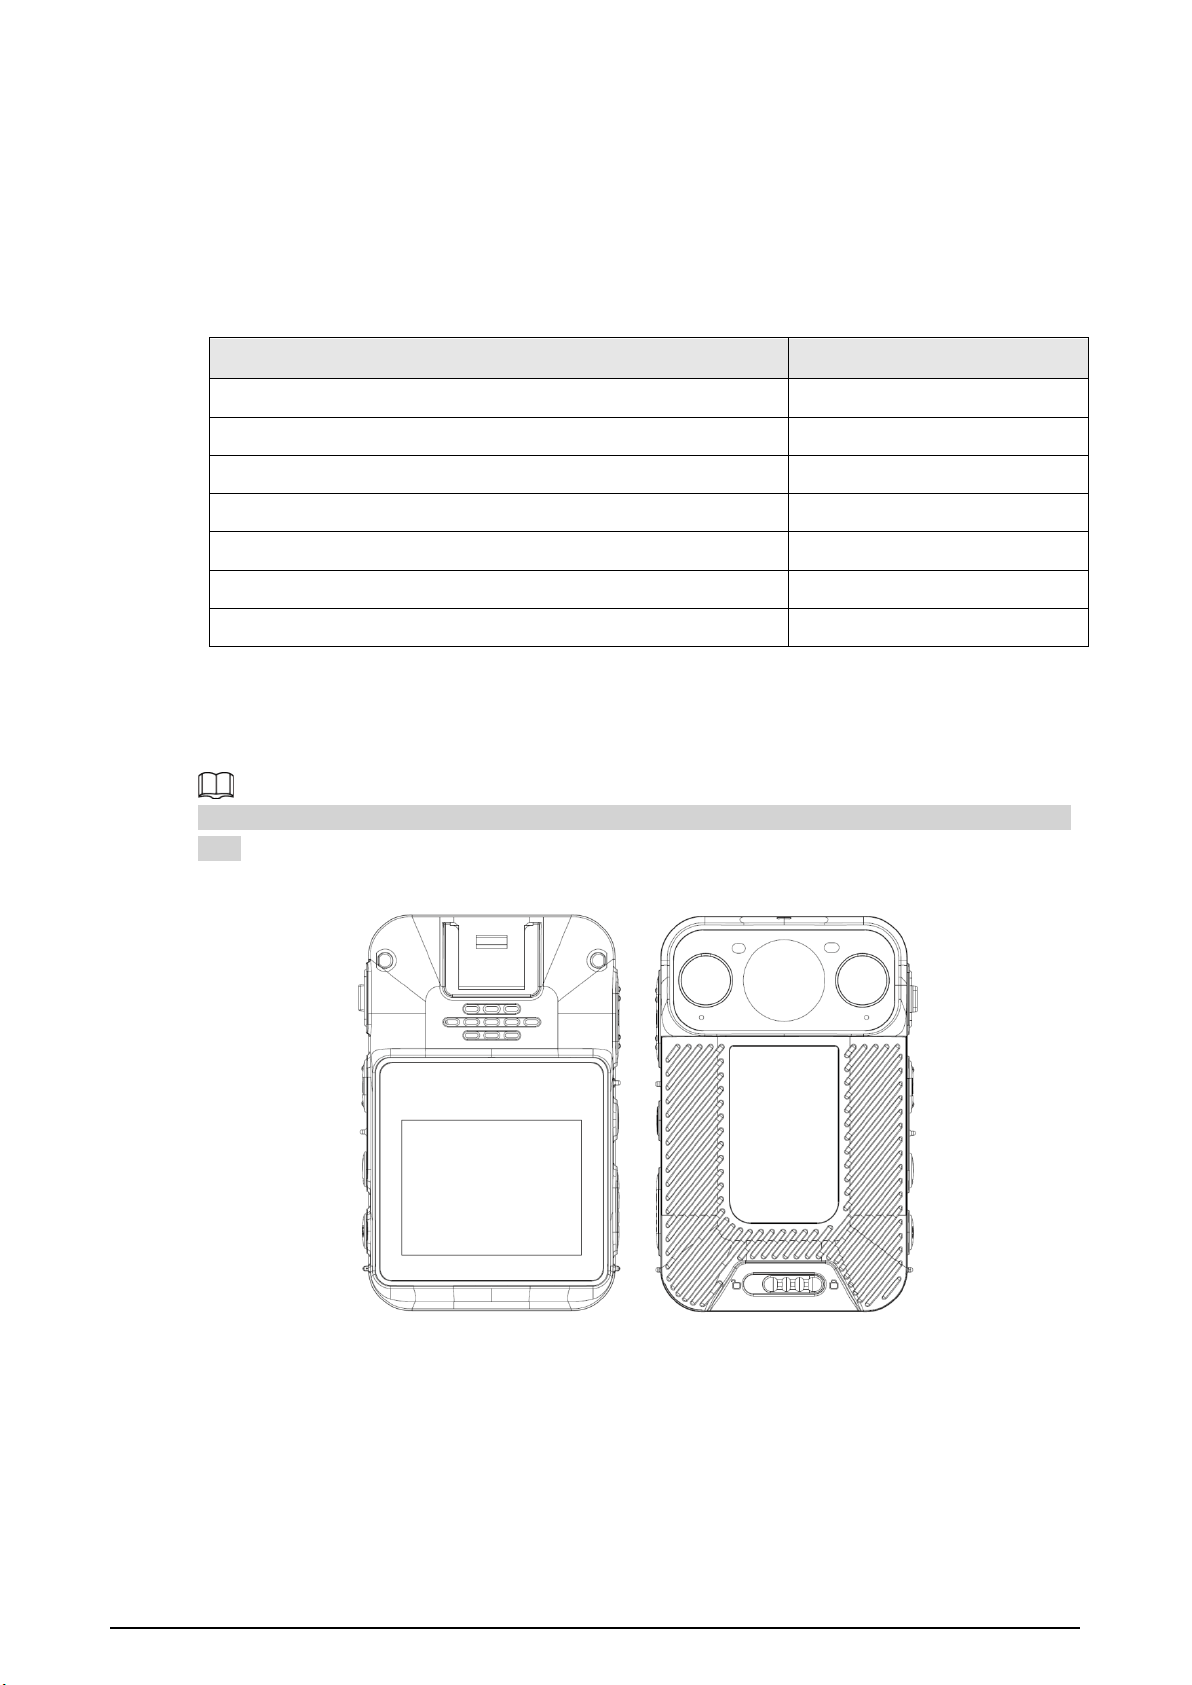
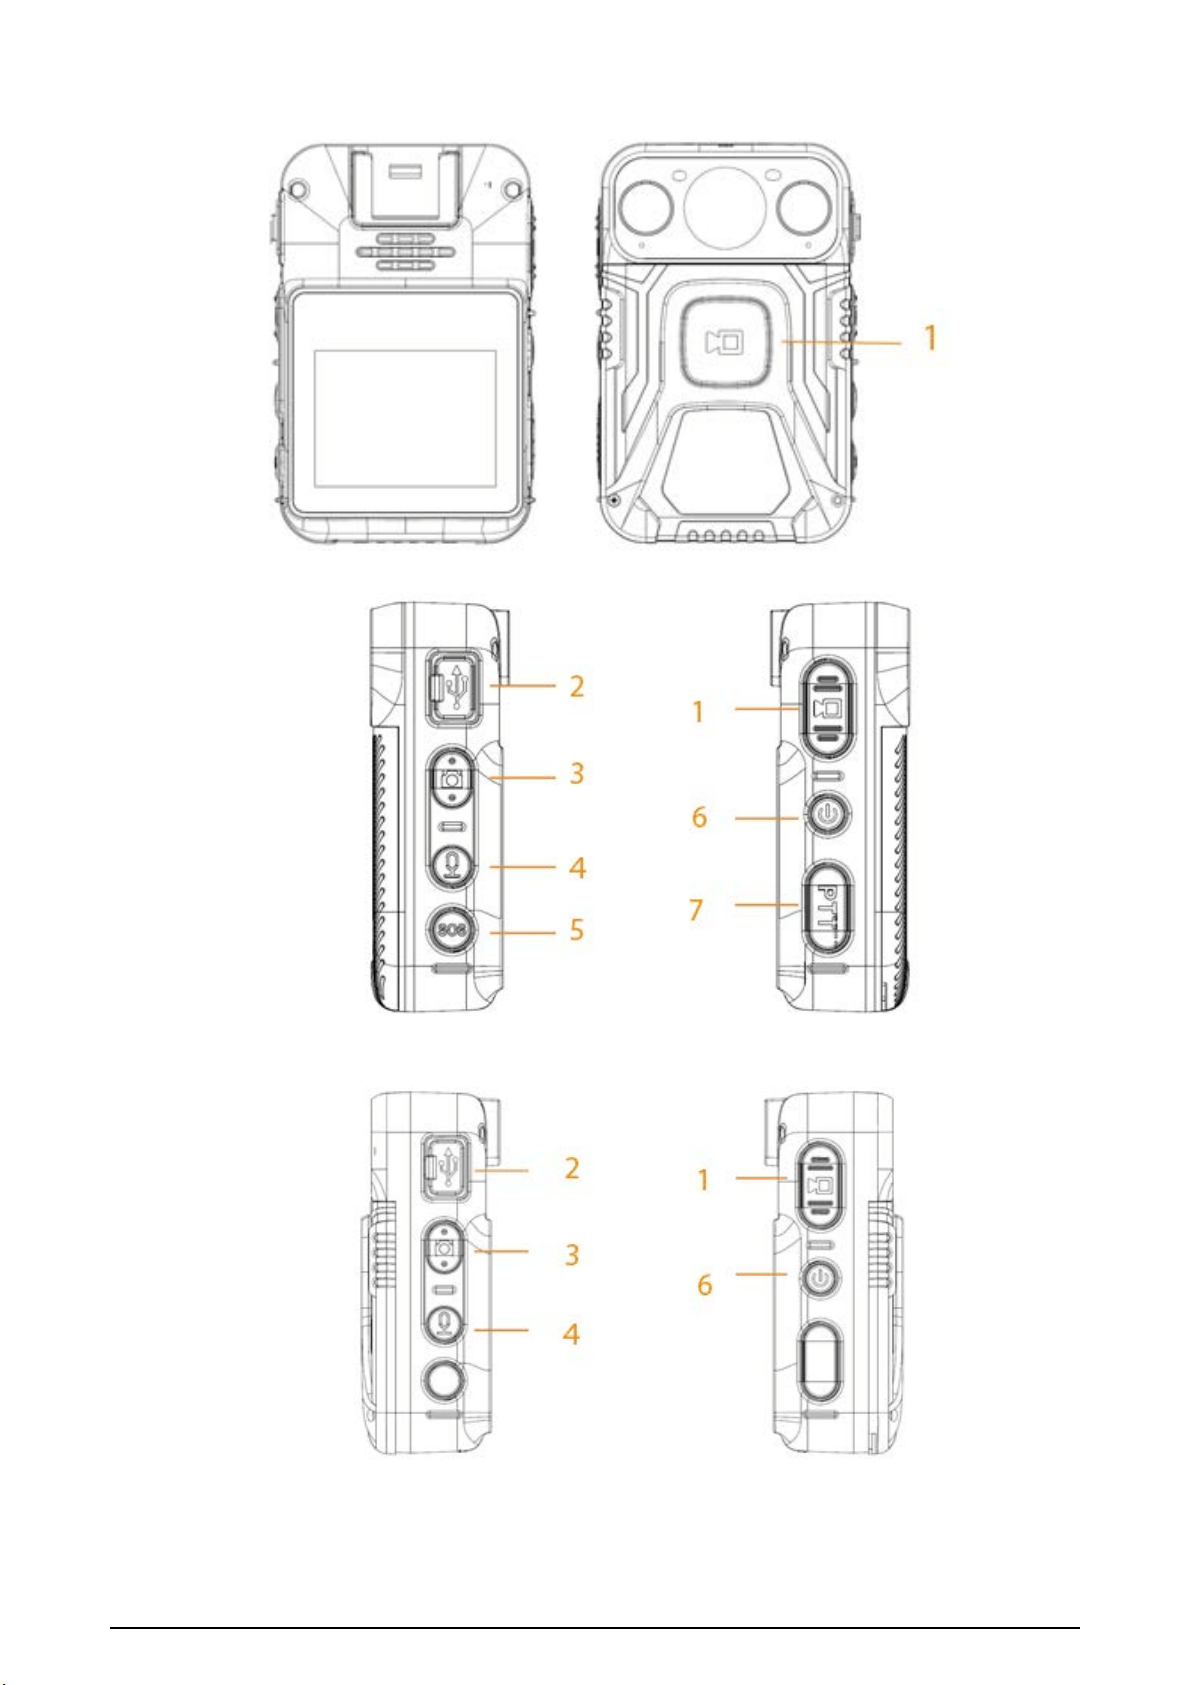
2.2 Device Structure
The structure differs depending on the model you are using. The following figures are for reference
only.
Figure 2-1 Front and rear panels (1)
3
Figure 2-2 Front and rear panels (2)
Figure 2-3 Sides (1)
Figure 2-4 Sides (2)
4
Table 2-2 Structure introduction
No. Name No. Name
1 Record video 5 SOS button
2 USB port and power input 6 Power button
3 Capture button 7 Voice talk
4 Record audio — —
2.3 Indicator Lights
The states of the indicator indicate different statuses of the Device.
For the model that does not support network connection, platform is not available. The following
indicator behaviors are for reference only.
Table 2-3 Indicator lights
Working Status Indicator Light Working Status Indicator Light
Standby Solid green. Recording audio Flashes yellow.
Standby (battery
level≤ 5%)
Solid red. Charging Solid red.
Recording video Flashes red. Battery fully charged Solid green.
Snapshot Flashes red.
Platform is pulling
stream
Flashes blue.
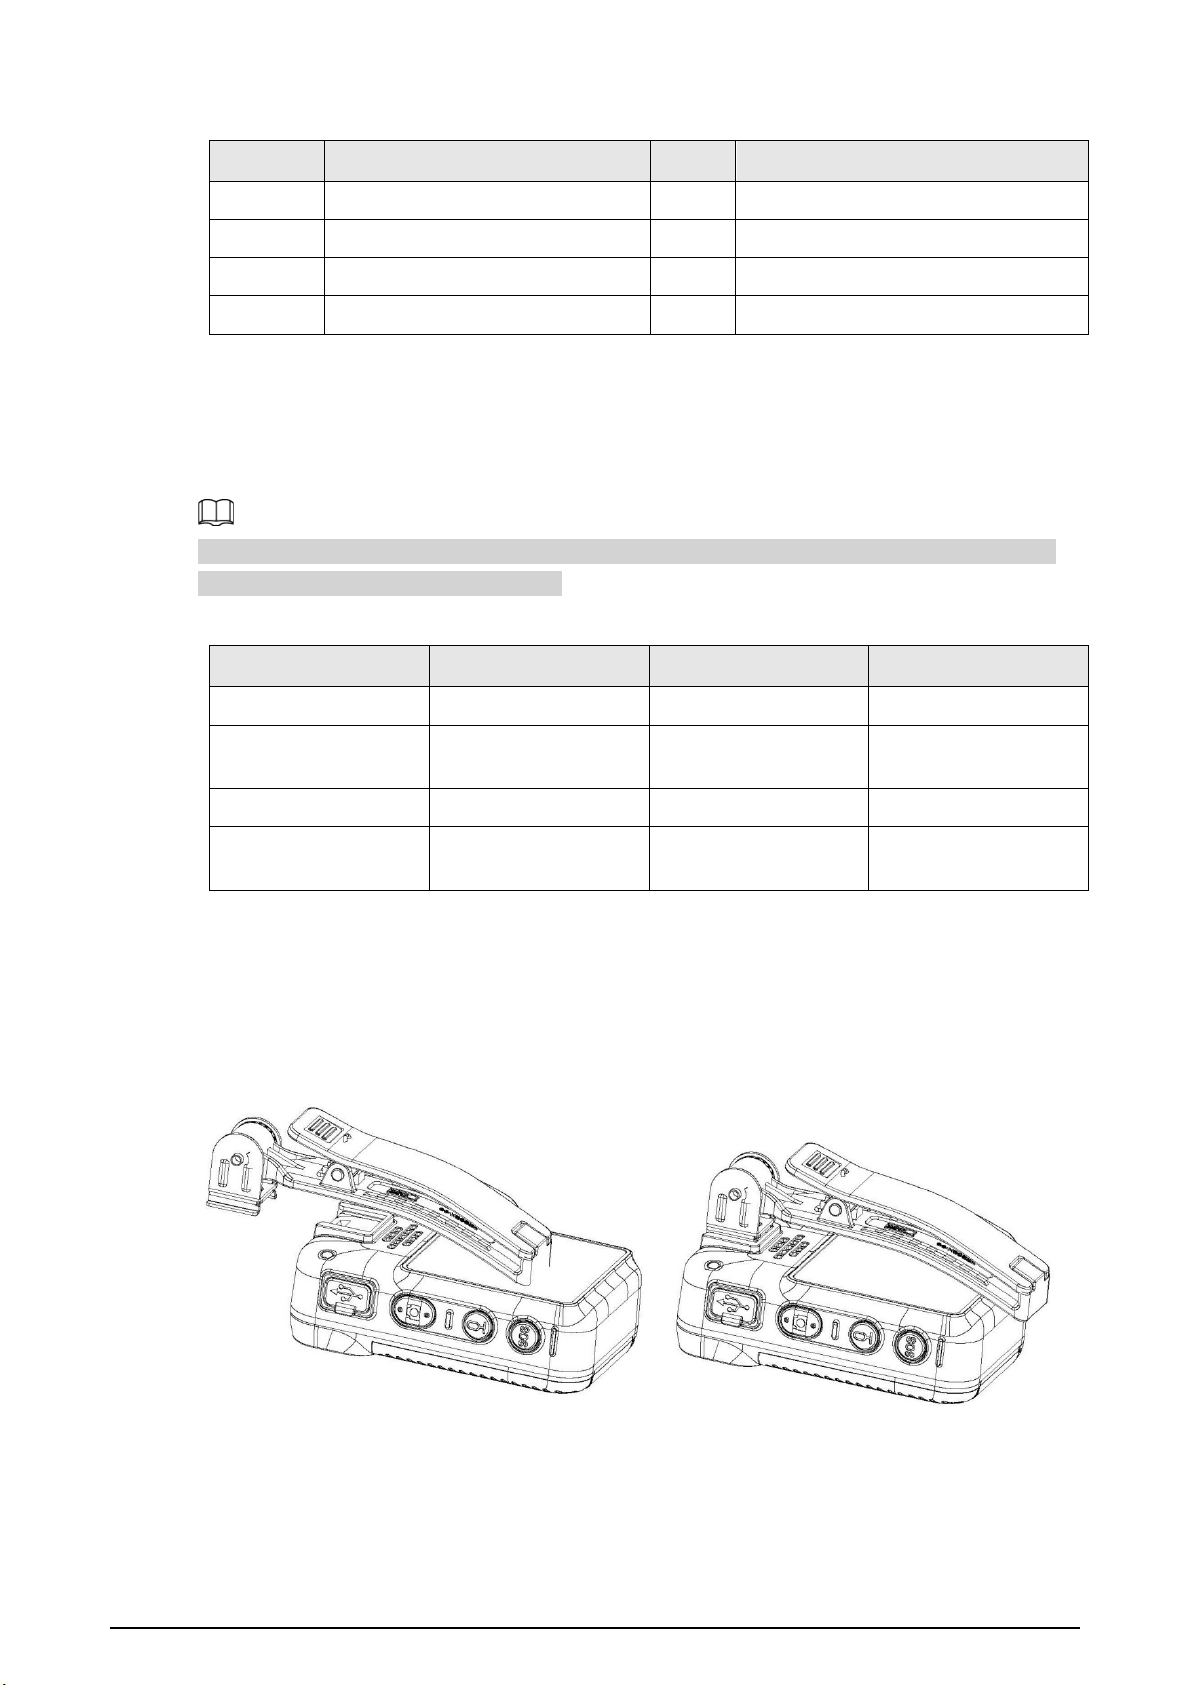
2.4 Installing Shoulder Clip
Slide the shoulder clip down.
Figure 2-5 Install shoulder clip

5
3 Basic Operations
3.1 Starting and Shutting Down
Press on the right side to start, shut down, restart or let the Device sleep.
●
When the Device is shut down, press and hold to start the Device.
●
When the Device is running, press and hold , and then tap
Power off
to shut down the
Device.
●
When Device is running, press and hold , and then tap
Restart
to restart the Device.
●
When the Device is running, press and hold for 10 s to shut down the Device forcibly.
●
When the Device is running, press to let the Device sleep; press again to activate the Device.
3.2 Initialization
Background Information
For the first-time use, set device login password and at least 3 security questions. If you forget the
password, tap
Forgot Password
, and then answer the security questions to reset the login
password.
●
The password resetting function is only available for admin user.
●
Password resetting will delete the pattern lock. You need to set it again after resetting the
password.
Procedure
Step 1 When the Device is shut down, press and hold to start the Device.
Step 2 Select a language.
Step 3 Select the checkbox of the software license agreement, and then tap
Next
.
For some devices, no software license agreement is found on the screen. You can tap
Next
directly.
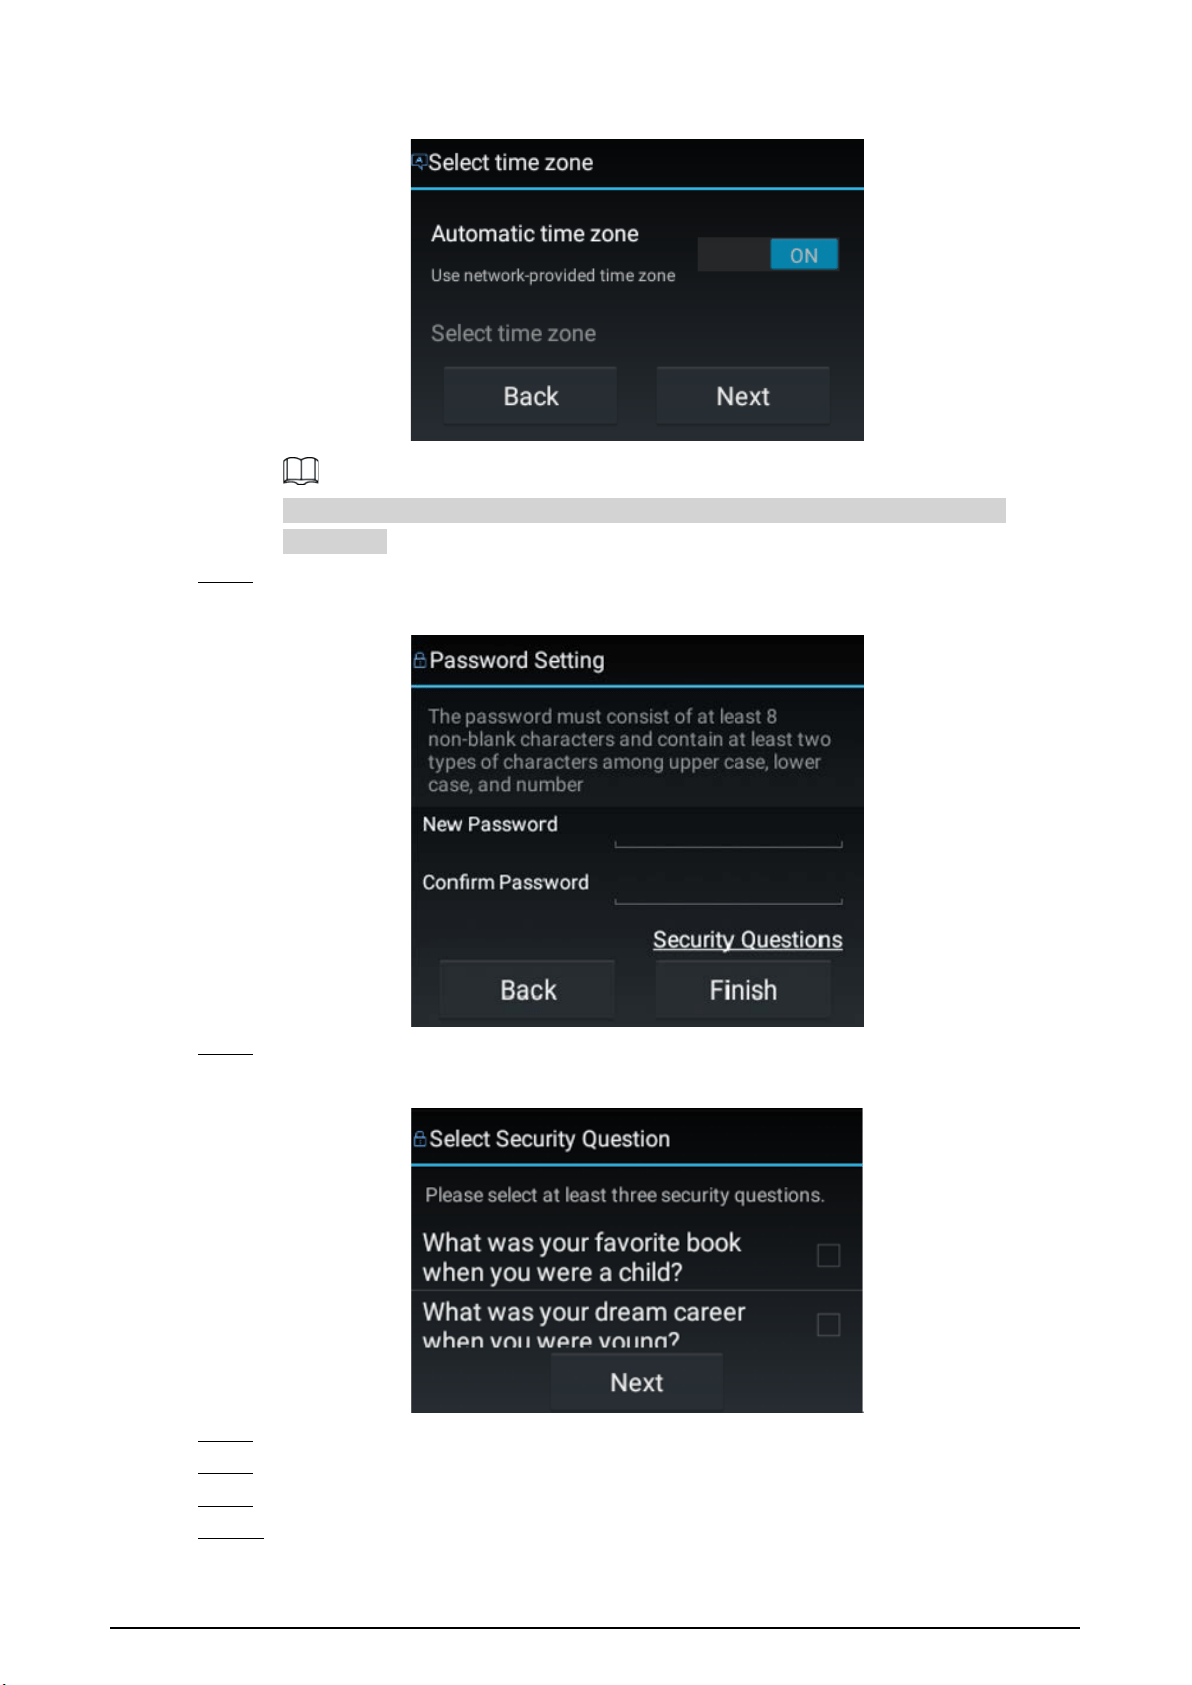
Step 4 Select time zone.
6
Figure 3-1 Set time zone
Automatic time zone is not available on the model that does not support network
connection.
Step 5 Enter the new password and then confirm.
Figure 3-2 Set password
Step 6 Tap
Security Questions
to set security questions.
Figure 3-3 Select security question
Step 7 Select at least 3 security questions, and then tap
Next
.
Step 8 Enter the answers and then tap
Save
.
Step 9 On the
Password Setting
screen, tap
Finish
.
Step 10 Follow the on-screen instructions to learn gestures.
7
The Device is initialized successfully.
3.3 Home Screen
●
The notification bar displays message, working status, and operator status. Swipe down to view
time and date, and select the white light or IR light.
●
Swipe left or right on the home screen to switch the screen.
3.4 User Management
3.4.1 Changing the Password
Background Information
We recommend you change the password regularly to enhance the device security.
Procedure
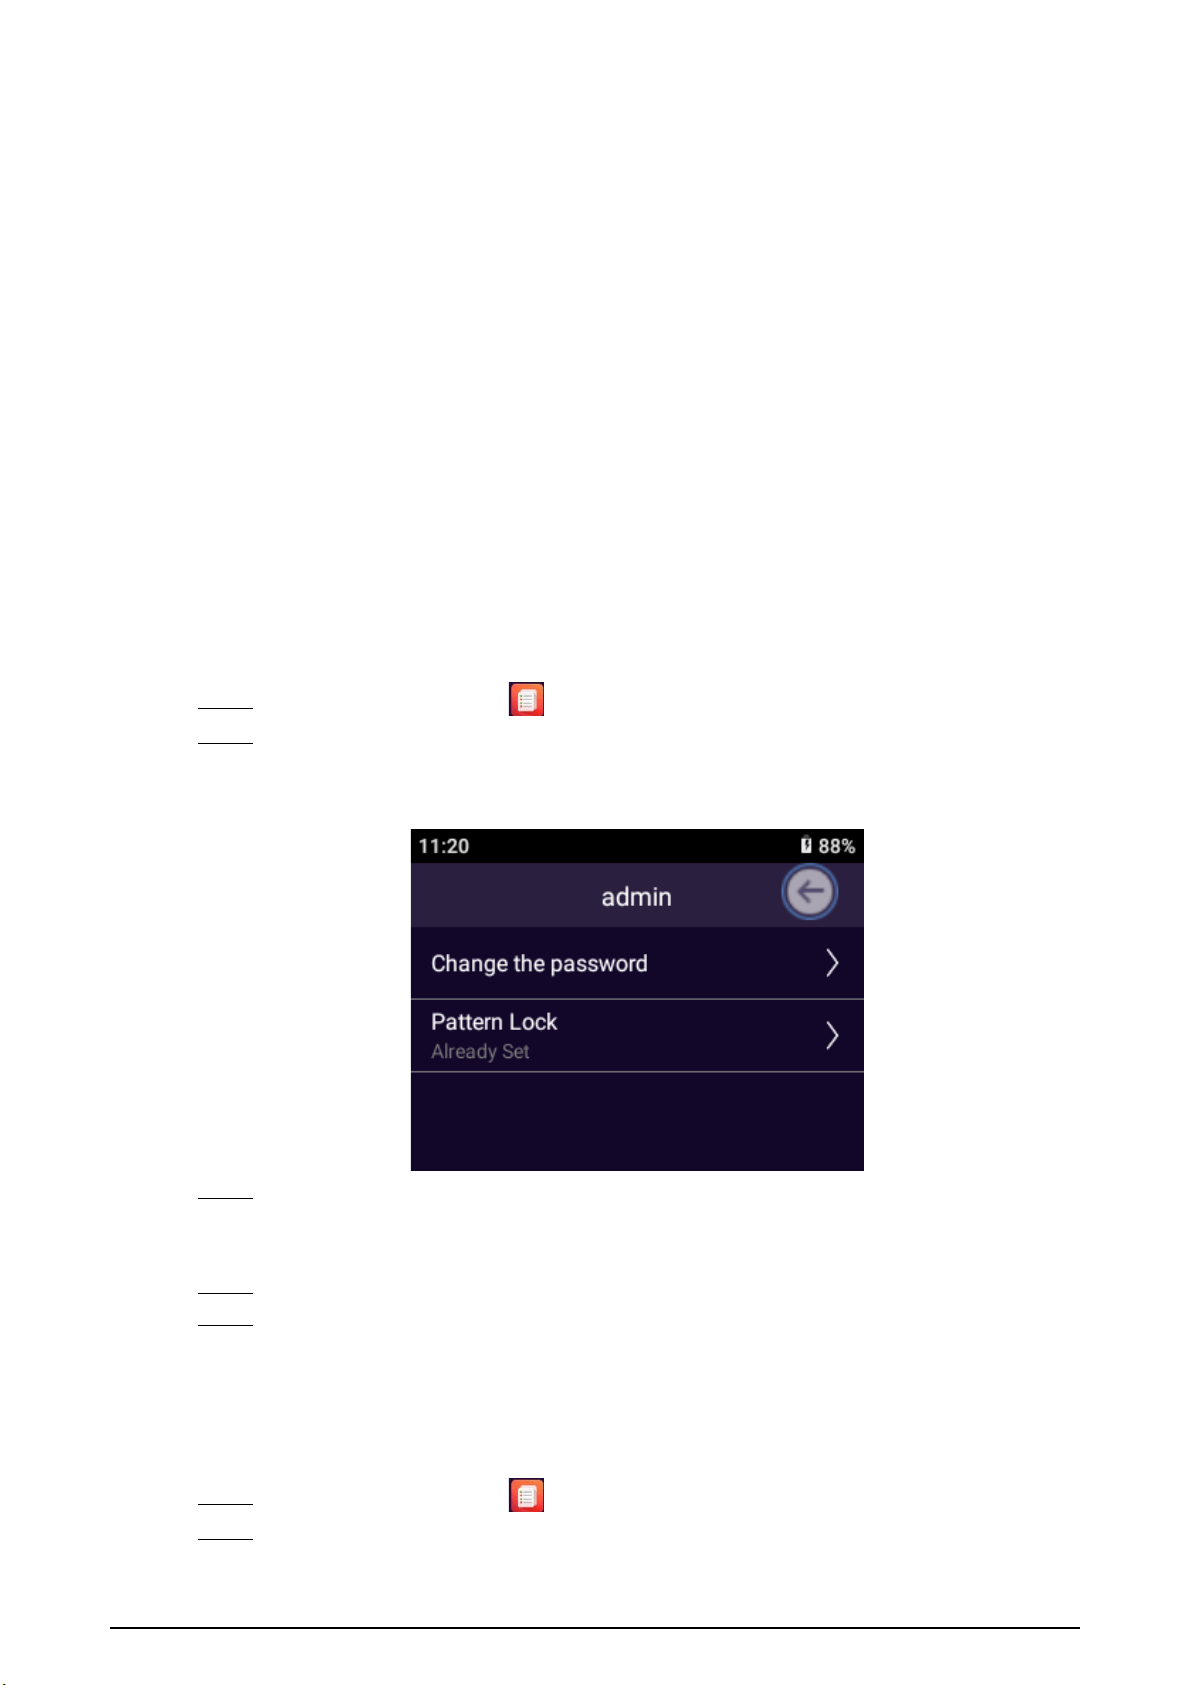
Step 1 On the home screen, tap .
Step 2 Select the account whose password you want to change, and then tap
Change the
password
.
Figure 3-4 Change password
Step 3 Enter the old password, new password and confirm password.
The password must contain at least two character types (number, uppercase letters, and
lowercase letters).
Step 4 Set the password validity period.
Step 5 Tap
OK
.
3.4.2 Setting the Pattern Lock
Procedure
Step 1 On the home screen, tap .
Step 2 Select an account, and then tap
Pattern Lock
.
8
Step 3 Enter the login password.
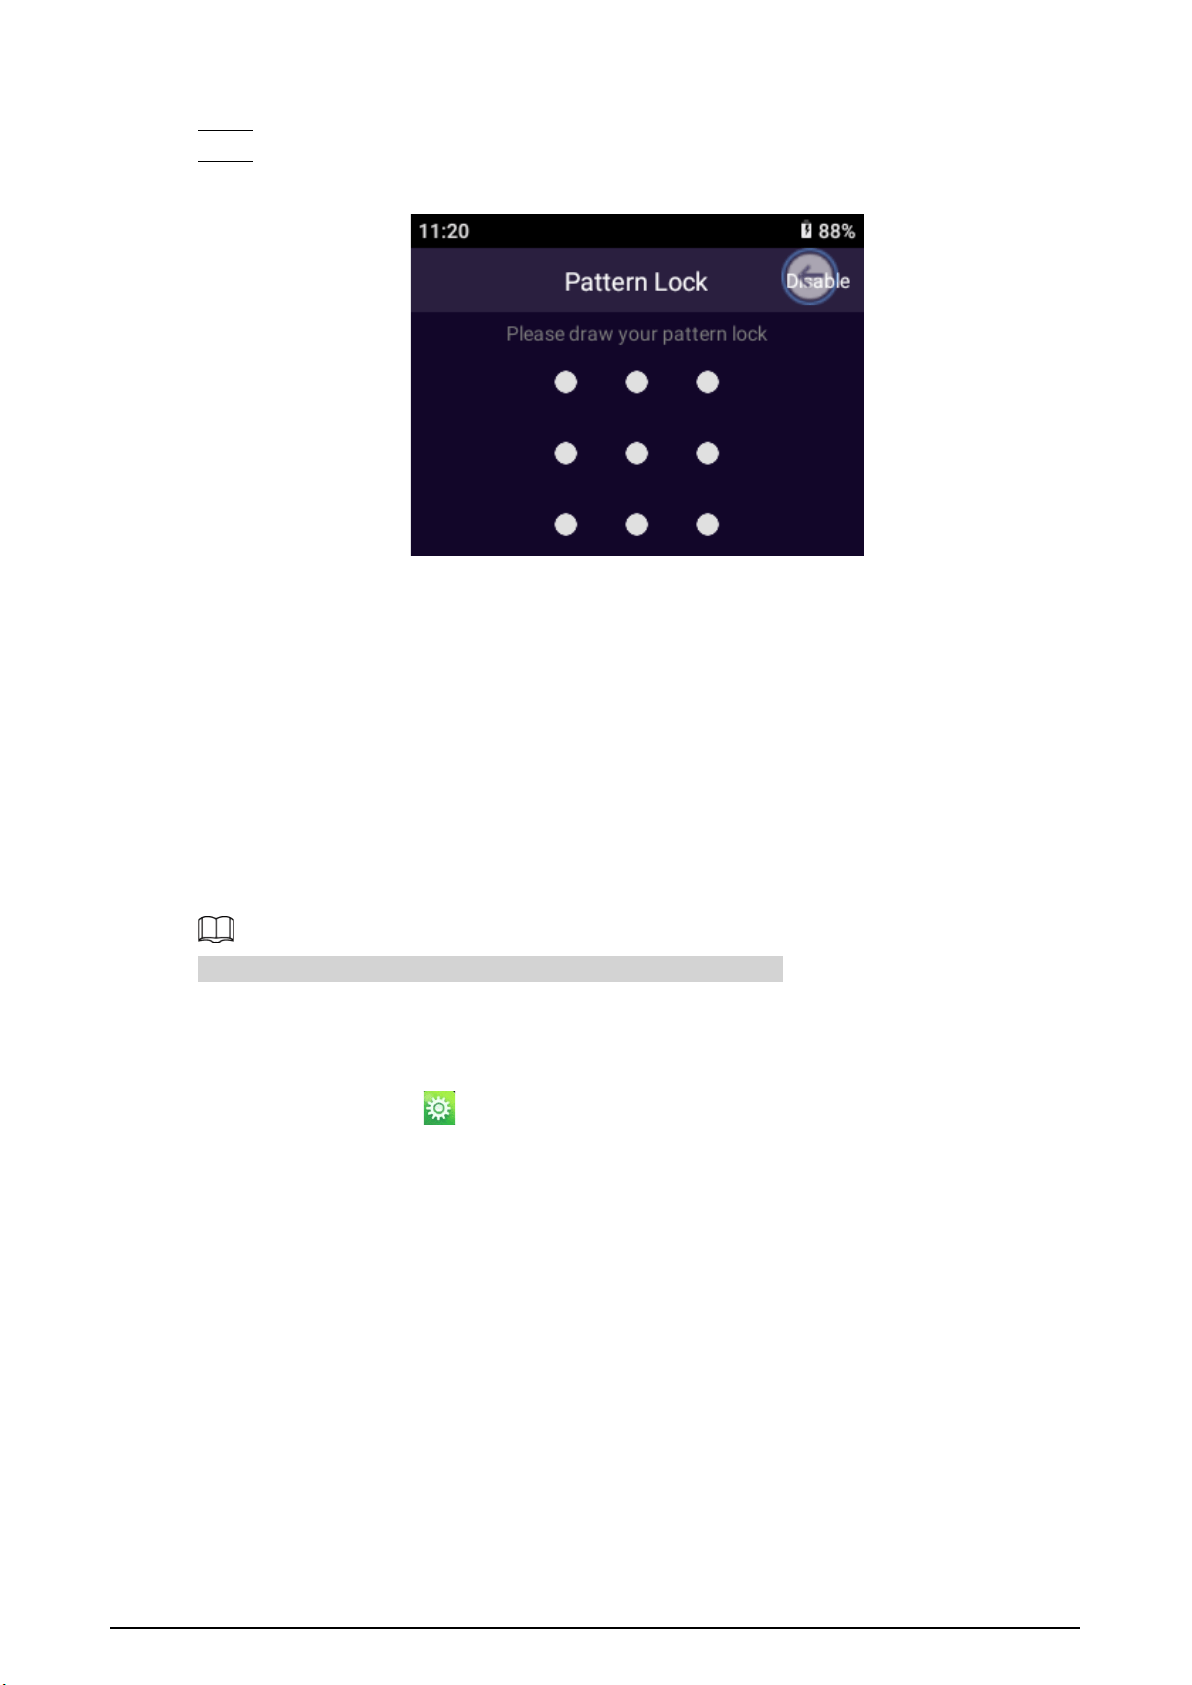
Step 4 Draw the pattern lock.
Figure 3-5 Draw the pattern lock
●
A pattern lock must contain at least 4 points.
●
If you have configured the pattern lock, you can tap
Disable
to disable the pattern lock.
●
After you set the pattern lock, the pattern lock will be required on the login screen by
default. If you have not set pattern lock, password is required on the login screen by
default.
3.5 Configuring the Device
Before using the Device, configure recording parameters, camera parameters, network mode, and
more.
The parameters might vary depending on the model you are using.
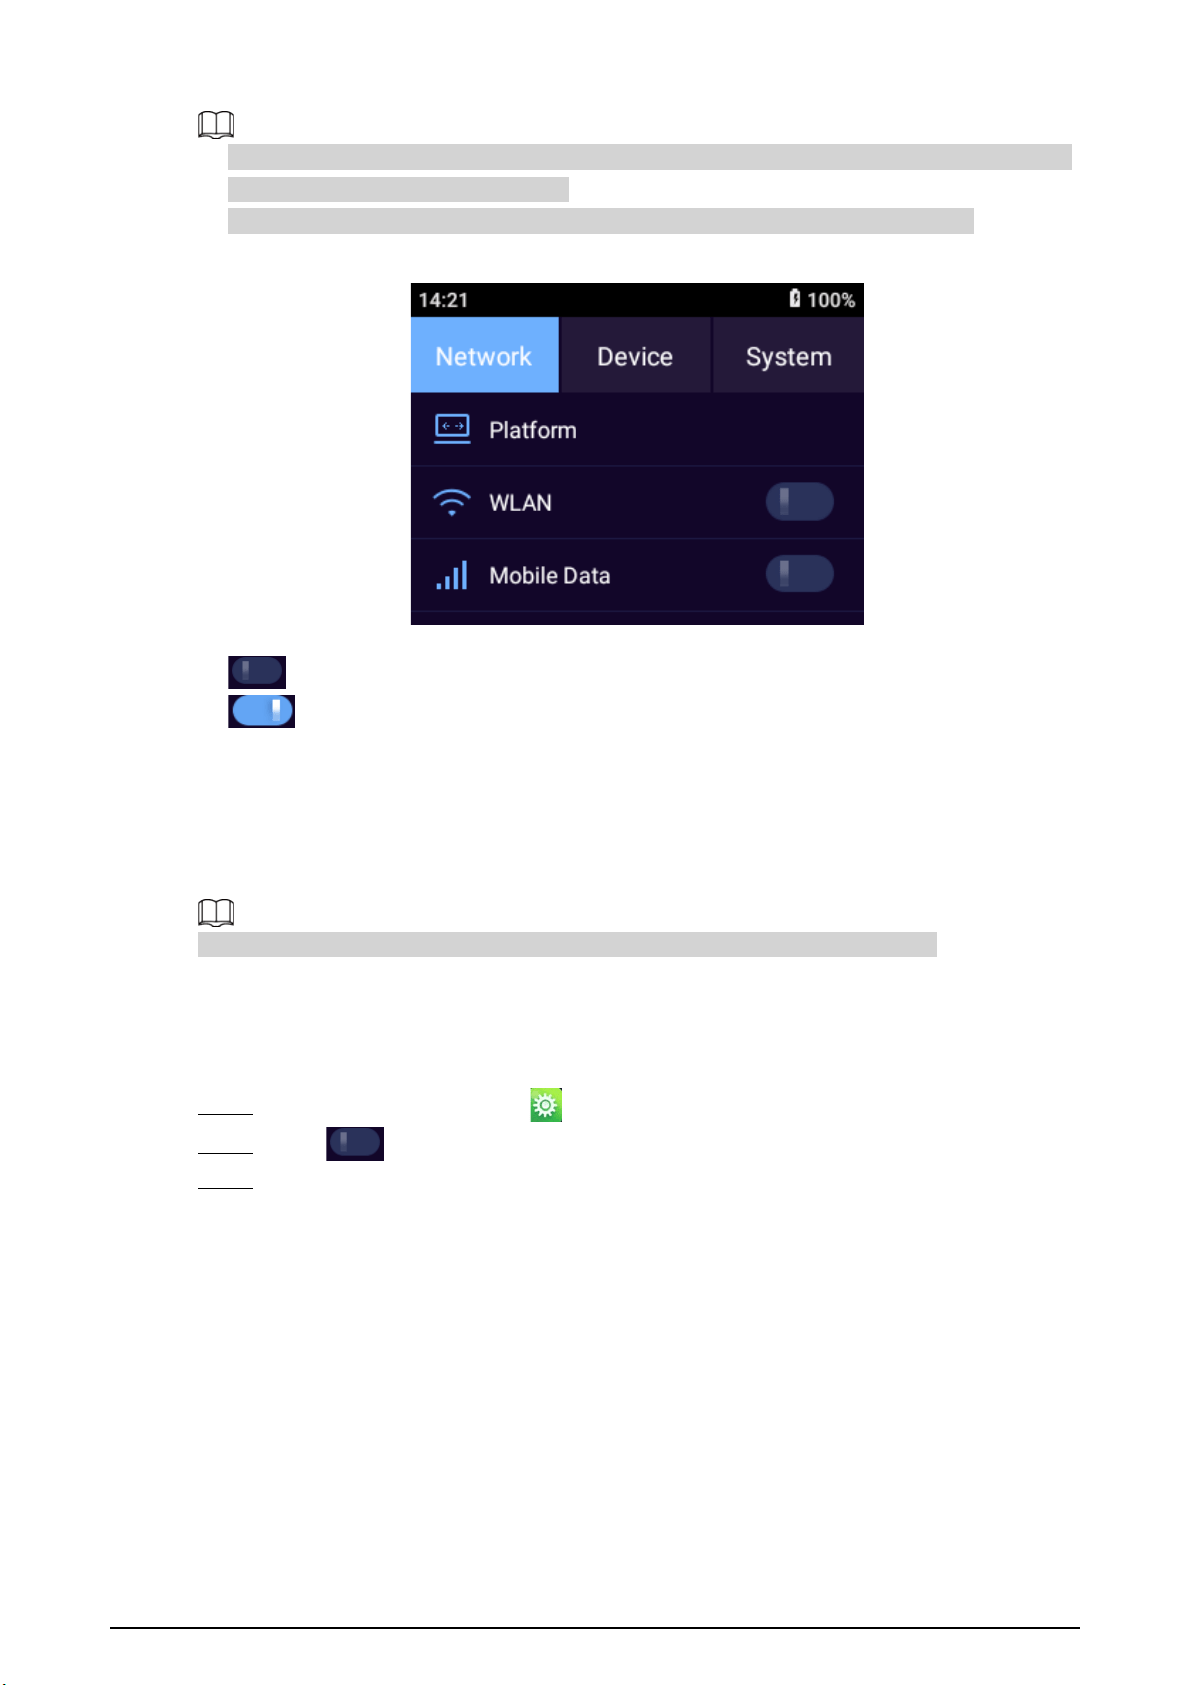
3.5.1 Network
On the home screen, tap to go to the
Network
or
Location
screen.
9
●
For the model that does not support network connection,
Location
screen is displayed and you
can only configure the location service.
●
When the Device does not have a SIM card, the
Mobile Data
switch appears dimmed.
Figure 3-6 Network
●
Tap an icon to go to the corresponding screen for configuration.
●
means that the function is disabled.
●
means that the function is enabled.
3.5.1.1 Platform
You can add the Device to platform for remote management. You can configure platform
connection, WLAN, location service and more.
Private protocol is enabled, otherwise you cannot figure the parameters successfully.
3.5.1.1.1 Auto Register
Procedure
Step 1 On the home screen, select >
Network
>
Platform
>
Register
.
Step 2 Tap to enable the Auto Register function.
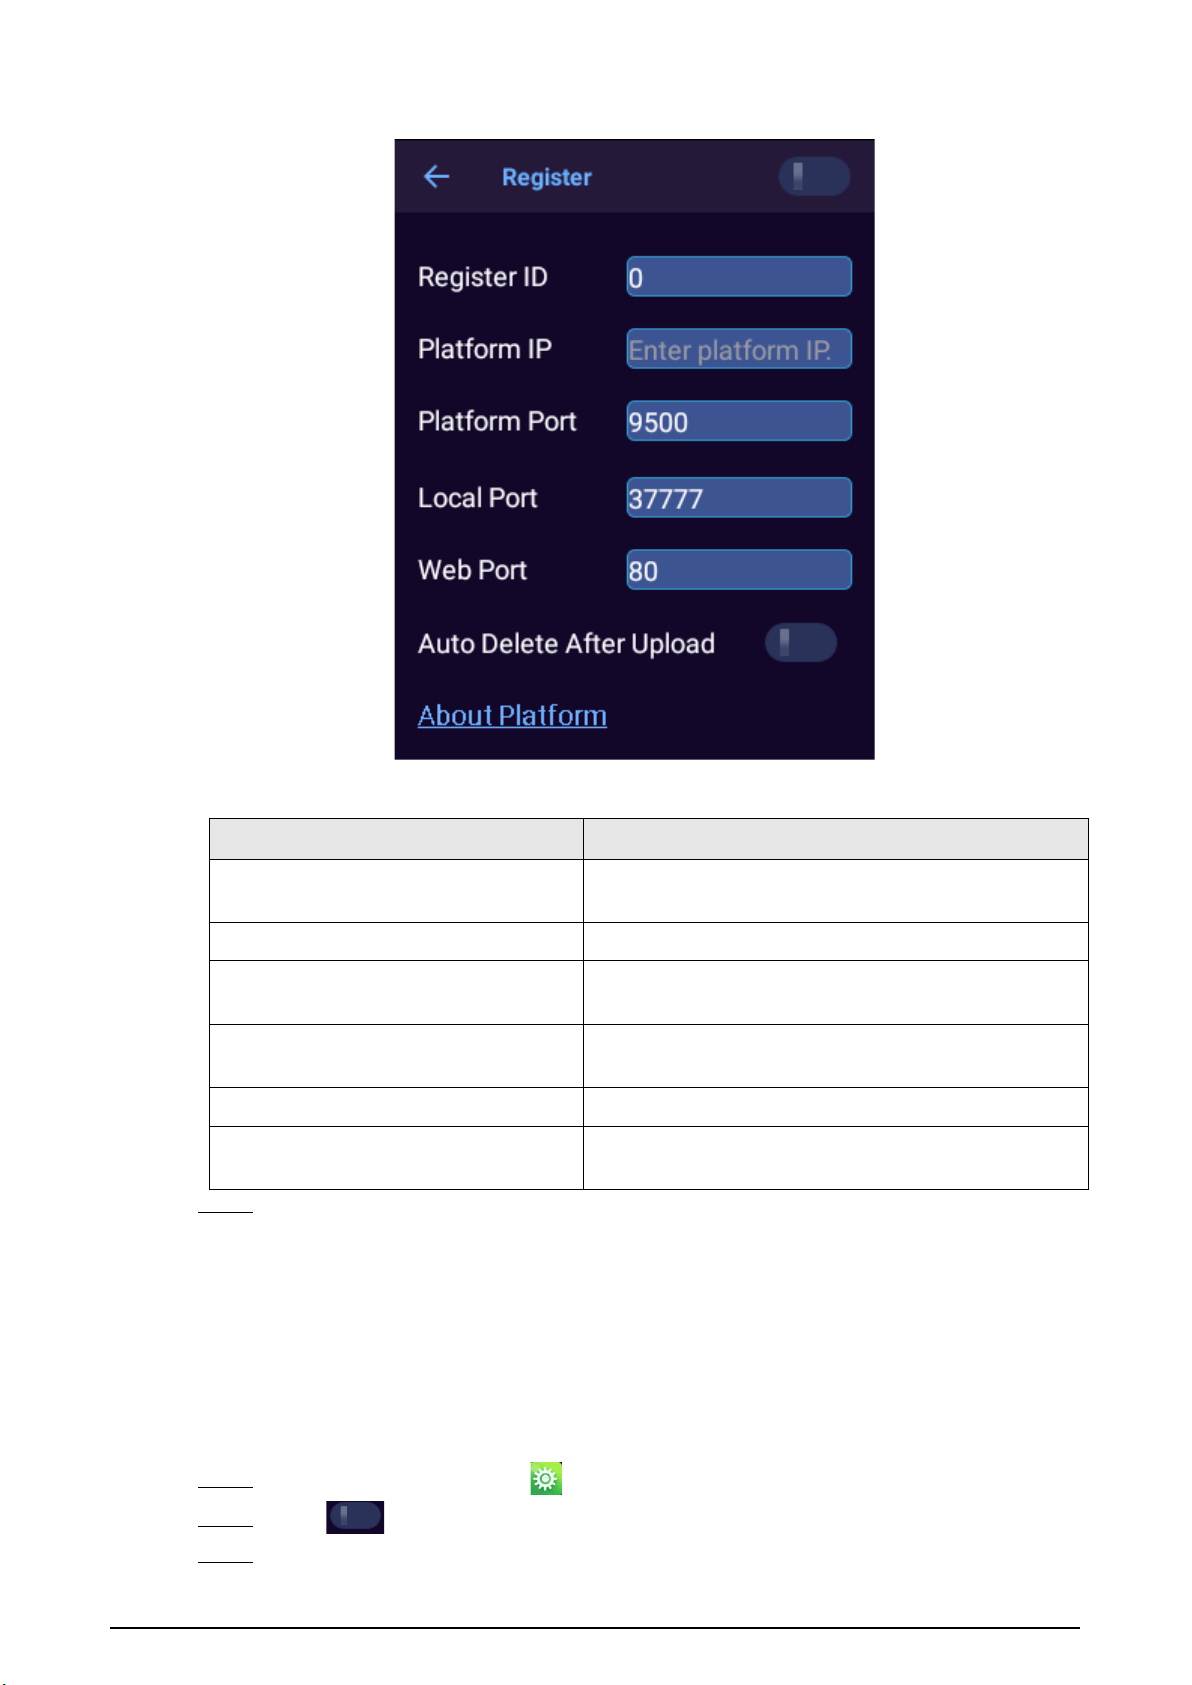
Step 3 Configure the parameters.
10
Figure 3-7 Register
Table 3-1 Register parameters
Parameter Description
Register ID
Enter an ID for registration. Make sure that the same ID
is used when you add the Device to the platform.
Platform IP Enter the IP address of the platform server.
Platform Port
Enter the ARS (Active Register Server) port number of
the platform.
Local Port
Enter the registration port of the Device. By default,
the port is 37777.
Web Port Enter the registration port of the platform server.
Auto Delete After Upload
Enable the Device to automatically delete the files that
have been uploaded to the platform.
Step 4 Tap
OK
.
3.5.1.1.2 ONVIF
Background Information
When a remote device is connecting with the Device through ONVIF protocol, use the verified ONVIF
account.
Procedure
Step 1 On the home screen, select >
Network
>
Platform
>
Onvif
.
Step 2 Tap to enable the ONVIF function.
Step 3 Tap
Add User
.

11
Step 4 Enter username and password, and then confirm the password.
Step 5 Tap
OK
.
3.5.1.1.3 RTSP
Procedure
Step 1 On the home screen, select >
Network
>
Platform
>
RTSP
.
Step 2 Tap to enable RTSP over TLS encryption.
Step 3 On the pop-up window, tap
OK
.
Step 4 Enter the RTSP port and then tap
OK
.
Figure 3-8 RTSP
3.5.1.2 WLAN
Background Information
When WLAN is turned on, you can search for or add WLAN networks.
Procedure
Step 1 On the home screen, select >
Network
>
WLAN
.
Step 2 Tap to enable the WLAN function.
Step 3 Select the Wi-Fi that you want to connect to, and then enter the password.
Figure 3-9 WLAN
12
3.5.1.2.1 Adding Network
Procedure
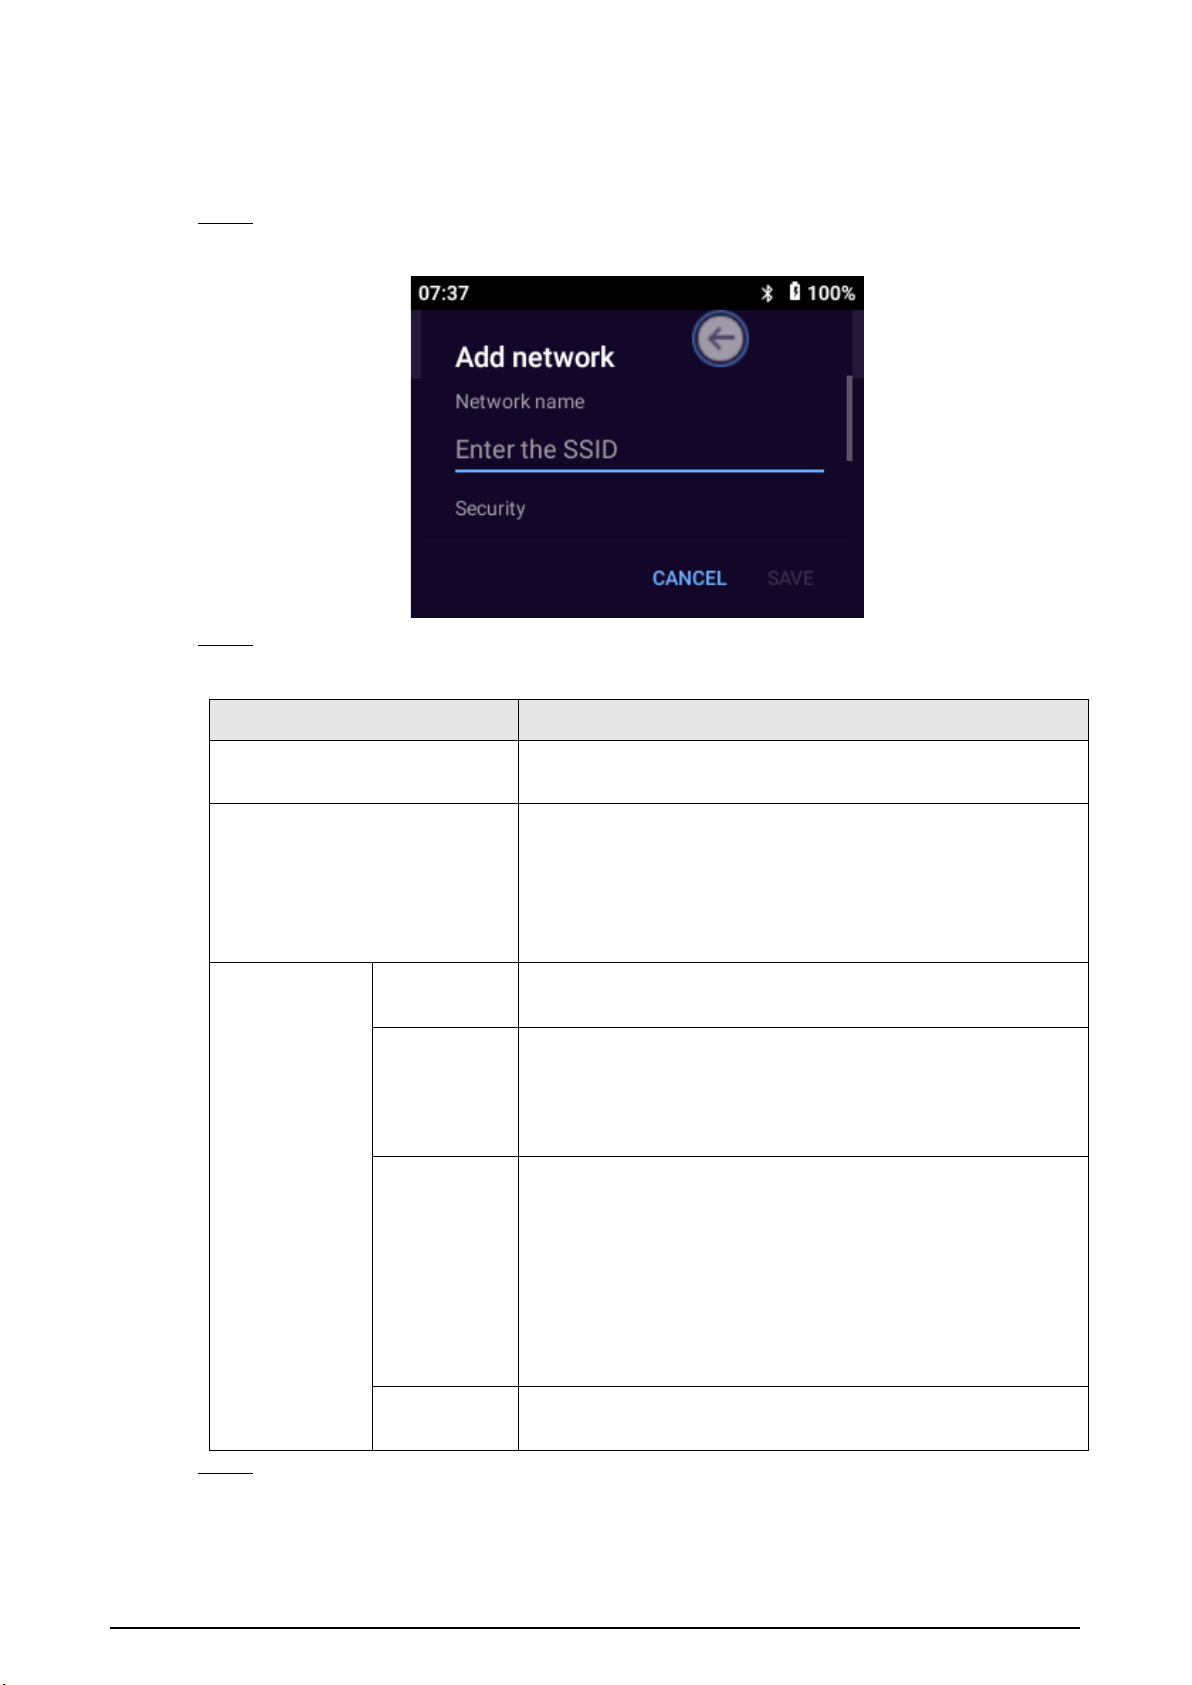
Step 1 On the
Wi-Fi
screen, tap
Add network
.
Figure 3-10 Adding network
Step 2 Configure the parameters.
Table 3-2 Adding network description
Parameter Description
Network name
Enter the router SSID (the name of the WLAN) that needs to
be connected.
Security
Set security settings.
●
If you select
None,
you do not need to enter a password
to log in to the WLAN.
●
If you select a different type, you need to enter a
password or certificate.
Advanced
Options
Metered
Select
Detect automatically
,
Treat as metered
and
Treat as
unmetered
.
Proxy
●
None
: Do not need proxy.
●
Manual
: Set the proxy server parameters manually.
●
Proxy Auto-Config
: The Device will automatically set
proxy server parameters.
IP settings
●
DHCP
: The Device automatically searches for WLAN IP.
●
Static
: You need to manually configure the
IP address
,
Gateway
,
Network prefix length
,
DNS 1
, and
DNS 2
.
◇
IP address must be on the same segment as the
router.
◇
Other parameters must be consistent with those on
the router.
Hidden
network
Select
Yes
if you want to hide the current Wi-Fi.
Step 3 Tap
SAVE
.
13
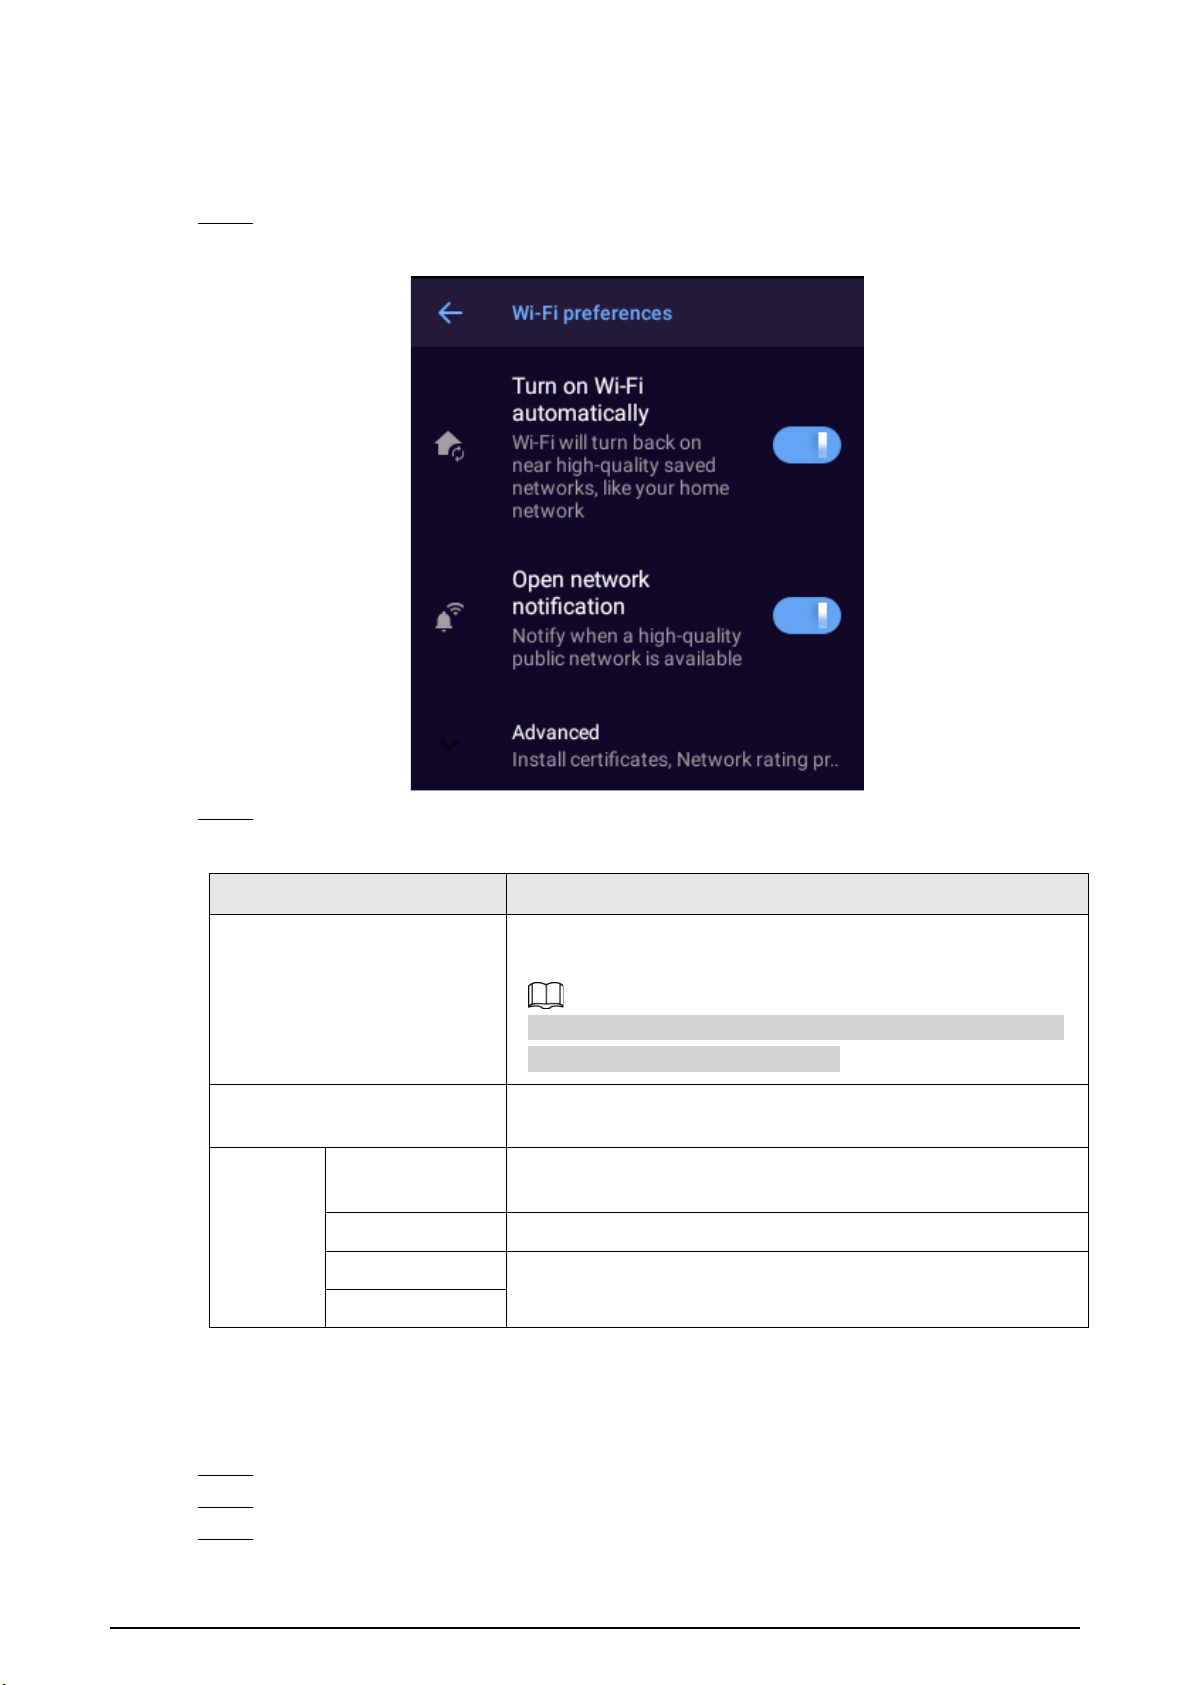
3.5.1.2.2 Configuring Wi-Fi Preferences
Procedure
Step 1 On the
Wi-Fi
screen, tap
Wi-Fi preferences
.
Figure 3-11 Wi-Fi preferences
Step 2 Configure the parameters.
Table 3-3 Parameters of Wi-Fi preferences
Parameter Description
Turn on Wi-Fi automatically
Automatically enables Wi-Fi when the Device is on a saved
high-quality Wi-Fi network.
To use the function, you need to enable the location service.
For details, see "3.5.1.4 Positioning".
Open network notification
Sends notifications when a high-quality public network is
available.
Advance
d
Install certificates
After upload the security certificate to your device, tap
Install
certificates
to select and install the certificate.
Wi-Fi Direct Transfers files over Wi-Fi.
MAC address
Displays the MAC address and IP address of the network
adapter.
IP address
3.5.1.2.3 Managing Saved Networks
Procedure
Step 1 On the
Wi-Fi
screen, tap
Saved networks
.
Step 2 You can view the networks that were connected or added.
Step 3 (Optional) Select a network, and then tap
Forget
to remove the network.
14
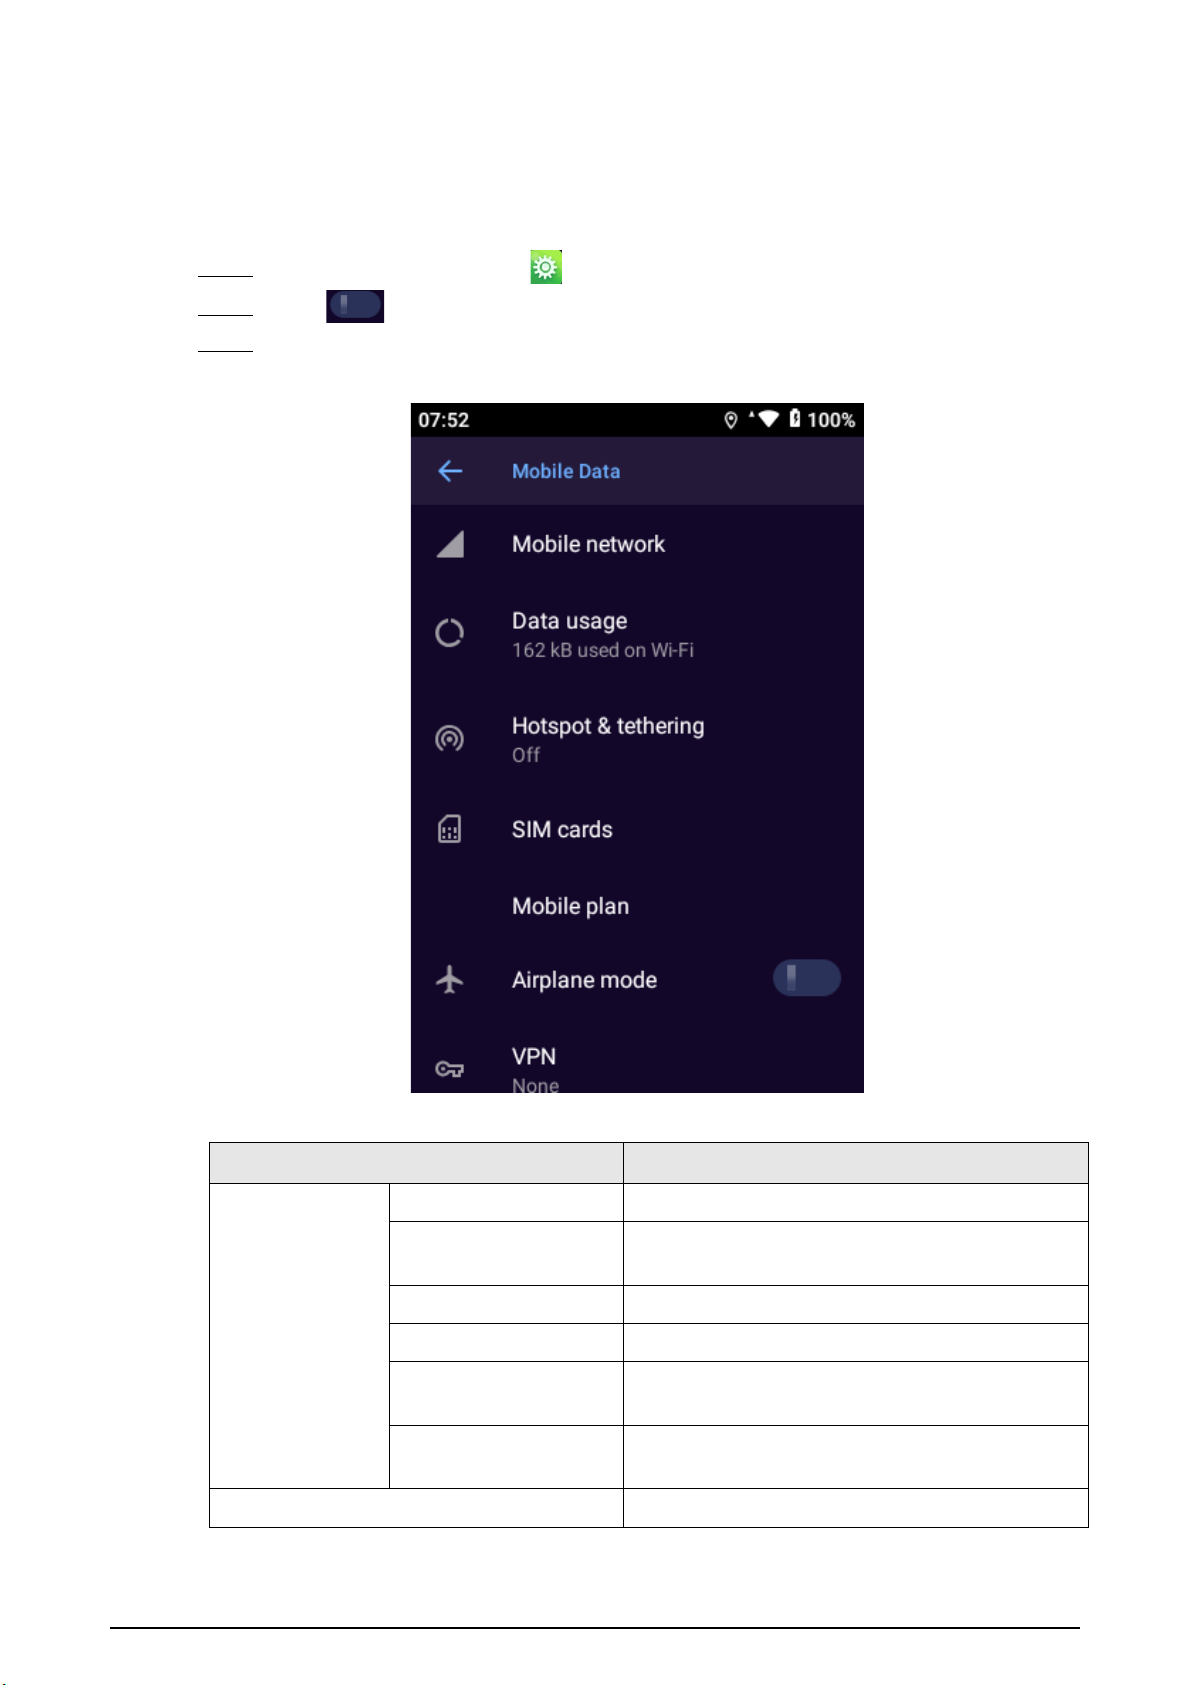
3.5.1.3 Mobile Data
The Device can connect to network through mobile data.
Procedure
Step 1 On the home screen, select >
Network
>
Mobile Data
.
Step 2 Tap to enable
Mobile Data
.
Step 3 Configure the parameters.
Figure 3-12 Mobile data
Table 3-4 Mobile data description
Parameter Description
Mobile network
Mobile data Enable mobile network.
Roaming
Enable the Device to connect to the mobile
network service while roaming.
User Controlled PLMN Define the preferred order of the PLMN.
Preferred network type Configure the preferred network mode.
Network
Enable the Device to select the network operator
automatically.
Access Point Names
APN determines how the Device accesses the
network.
Data usage Check data usage.

15
Parameter Description
Hotspot and &
tethering
Wi-Fi hotspot
Share Internet connection or content with other
devices. The hotspot can be accessed by entering
a password.
USB tethering Share your mobile Internet connection over USB.
Bluetooth tethering
Share your mobile Internet connection through
Bluetooth.
SIM cards
After inserting SIM cards, select preferred SIM
card for cellular data, calls, and SMS messages.
Airplane mode
In airplane mode, cellular, Wi-Fi, and Bluetooth
functions are disabled.
VPN Add the appropriate VPN as needed.
3.5.1.4 Positioning
You can enable the satellite-based positioning service for the Device. After connecting the Device to
the platform and enabling track record in
Network
>
Location Service
, the Device reports its
location information to the platform.
Procedure
Step 1 On the home screen, select >
Network
>
Location Service
.
Step 2 Tap to enable the location service.
Step 3 Configure the parameters.
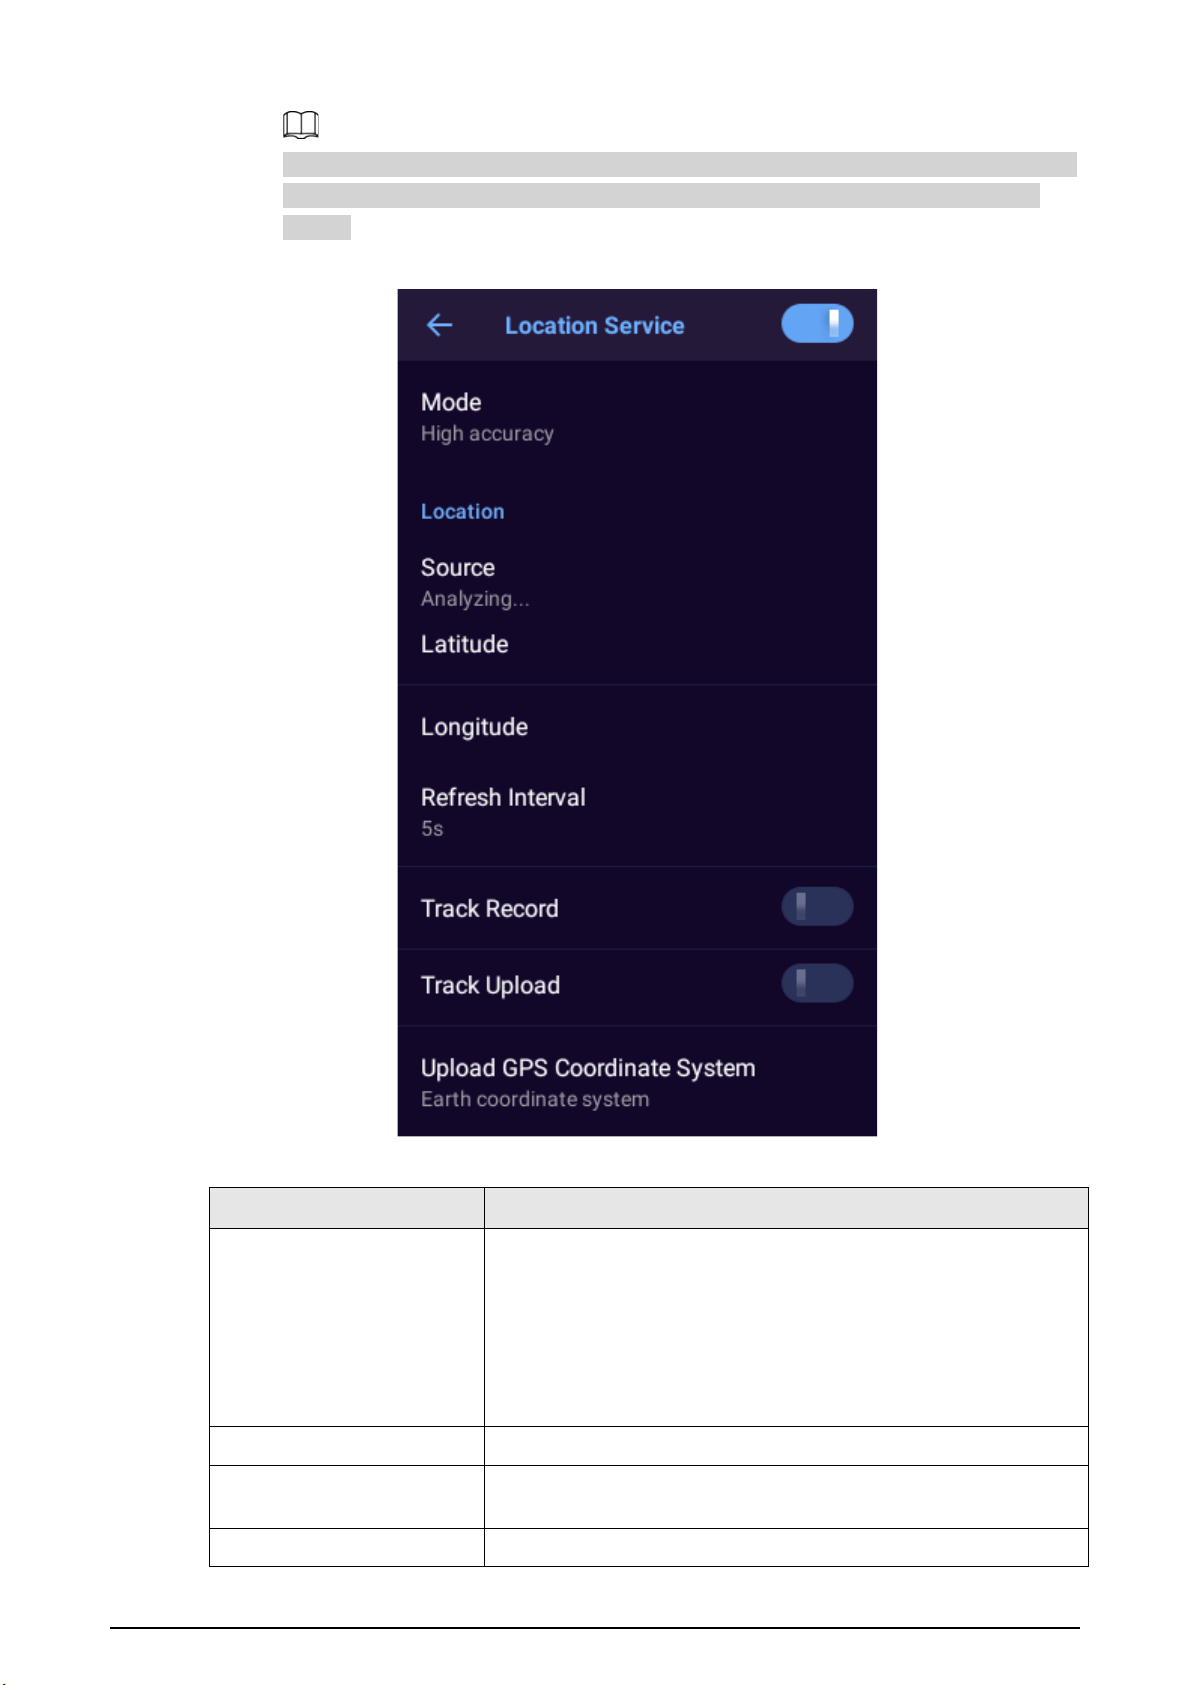
16
For the model that does not support network connection, you cannot configure the mode,
location source, refresh interval, track record, track upload and upload GPS Coordinate
System.
Figure 3-13 Location service
Table 3-5 Positioning description
Parameter Description
Mode
●
Configure device positioning mode.
●
High accuracy
: Locate through satellite, Wi-Fi, Bluetooth, or
mobile network.
●
Battery saving
: Locate through Wi-Fi, Bluetooth, or mobile
network.
●
Device only
: Locate through satellite.
Location Displays the current location source, latitude, and longitude.
Refresh Interval
Select the interval at which the Device reports location
information to the platform.
Track Record Enable the Device to keep track of its historical locations.
17
Parameter Description
Track Upload
Enable the Device to automatically delete the files that have been
uploaded to the platform.
Upload GPS Coordinate
System
Select the GPS Coordinate System from
Earth coordinate system
or
Mars coordinate system
.
The selected coordinate system must be the same with the
coordinate system on the platform.
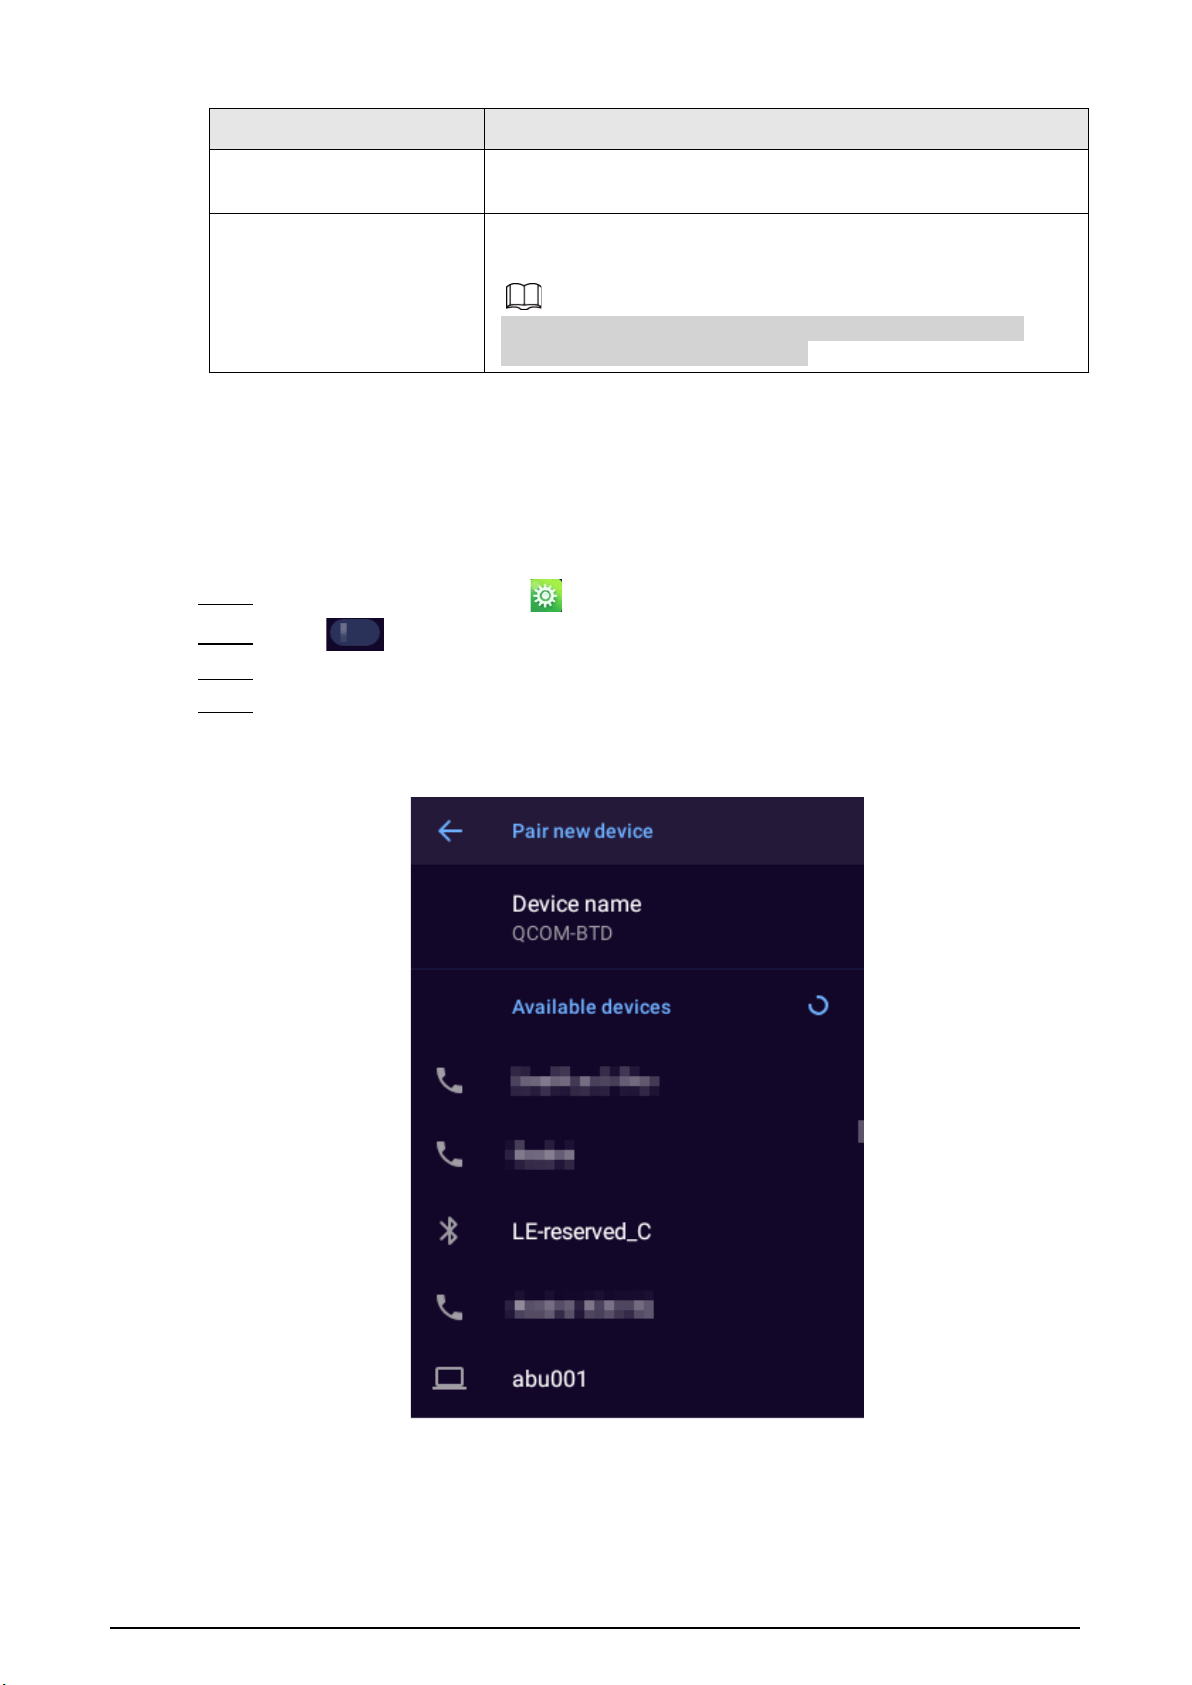
3.5.1.5 Bluetooth
When Bluetooth is enabled, a nearby device will be able to detect the Device, and then you can
receive and share files through Bluetooth.
Procedure
Step 1 On the home screen, select >
Network
>
Bluetooth
.
Step 2 Tap to enable Bluetooth.
Step 3 Tap
Pair new device
.
Step 4 Select the Bluetooth device to pair with, and then tap
Pair
.
After confirmation on both devices, pairing is successful.
Figure 3-14 Bluetooth
Related Operations
●
To rename the Device, tap
Device Name
.
●
To connect with devices that had been paired, tap
Previously connected devices
and then tap
the device. The Device will connect with the previously paired device automatically.
18
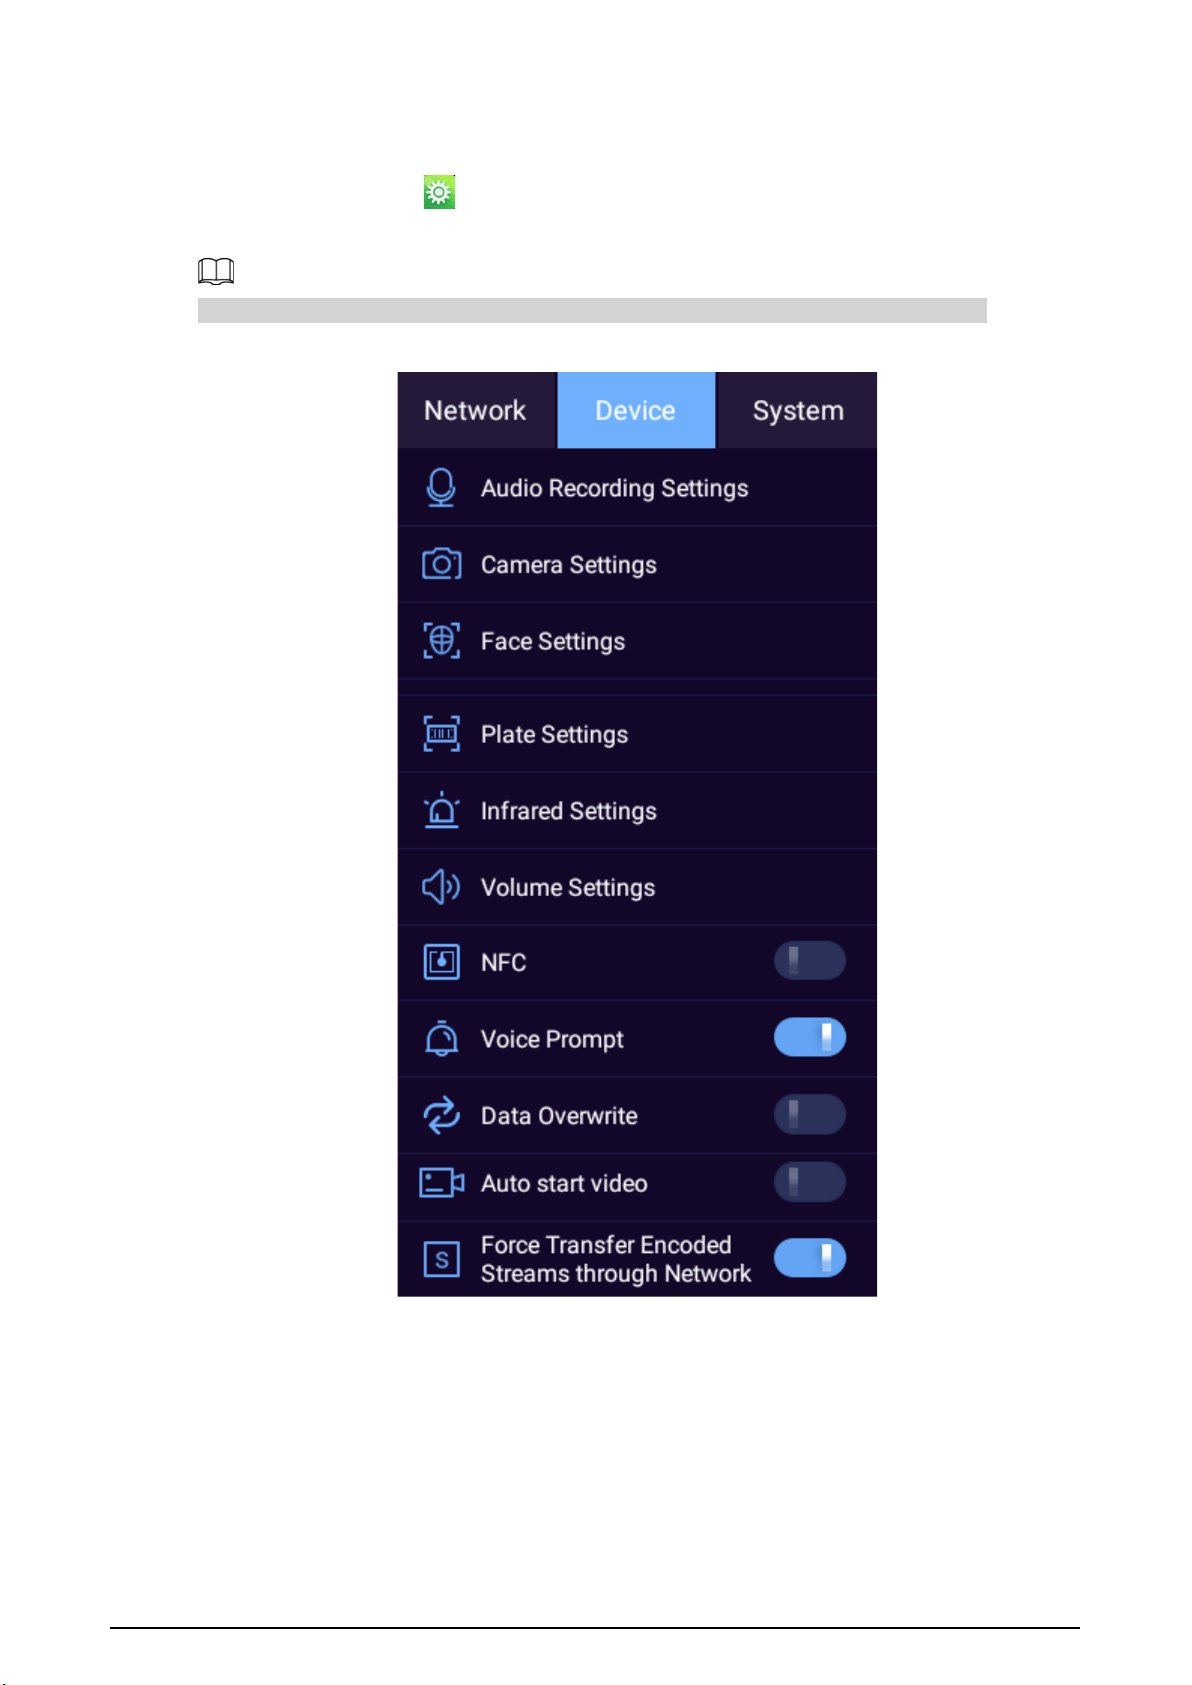
3.5.2 Device
On the home screen, tap , and then tap the
Device
tab to configure audio recording settings,
camera settings, and more.
The NFC function is not available on the model that does not support network connection.
Figure 3-15 Device
3.5.2.1 Audio Recording Settings
Select
Device
>
Audio Recording Settings
to configure audio recording parameters.

19
Figure 3-16 Audio recording
Table 3-6 Audio recording parameter description
Parameter Description
Audio Format
Select an audio format from
G.711A
and
AAC
.
File Type
●
If the
Audio Format
is
AAC
, both dav (default) and aac are
available
●
If the
Audio Format
is
G.711A
, only dav is available.
3.5.2.2 Camera Settings
Select
Device
>
Camera Settings
to configure camera settings.
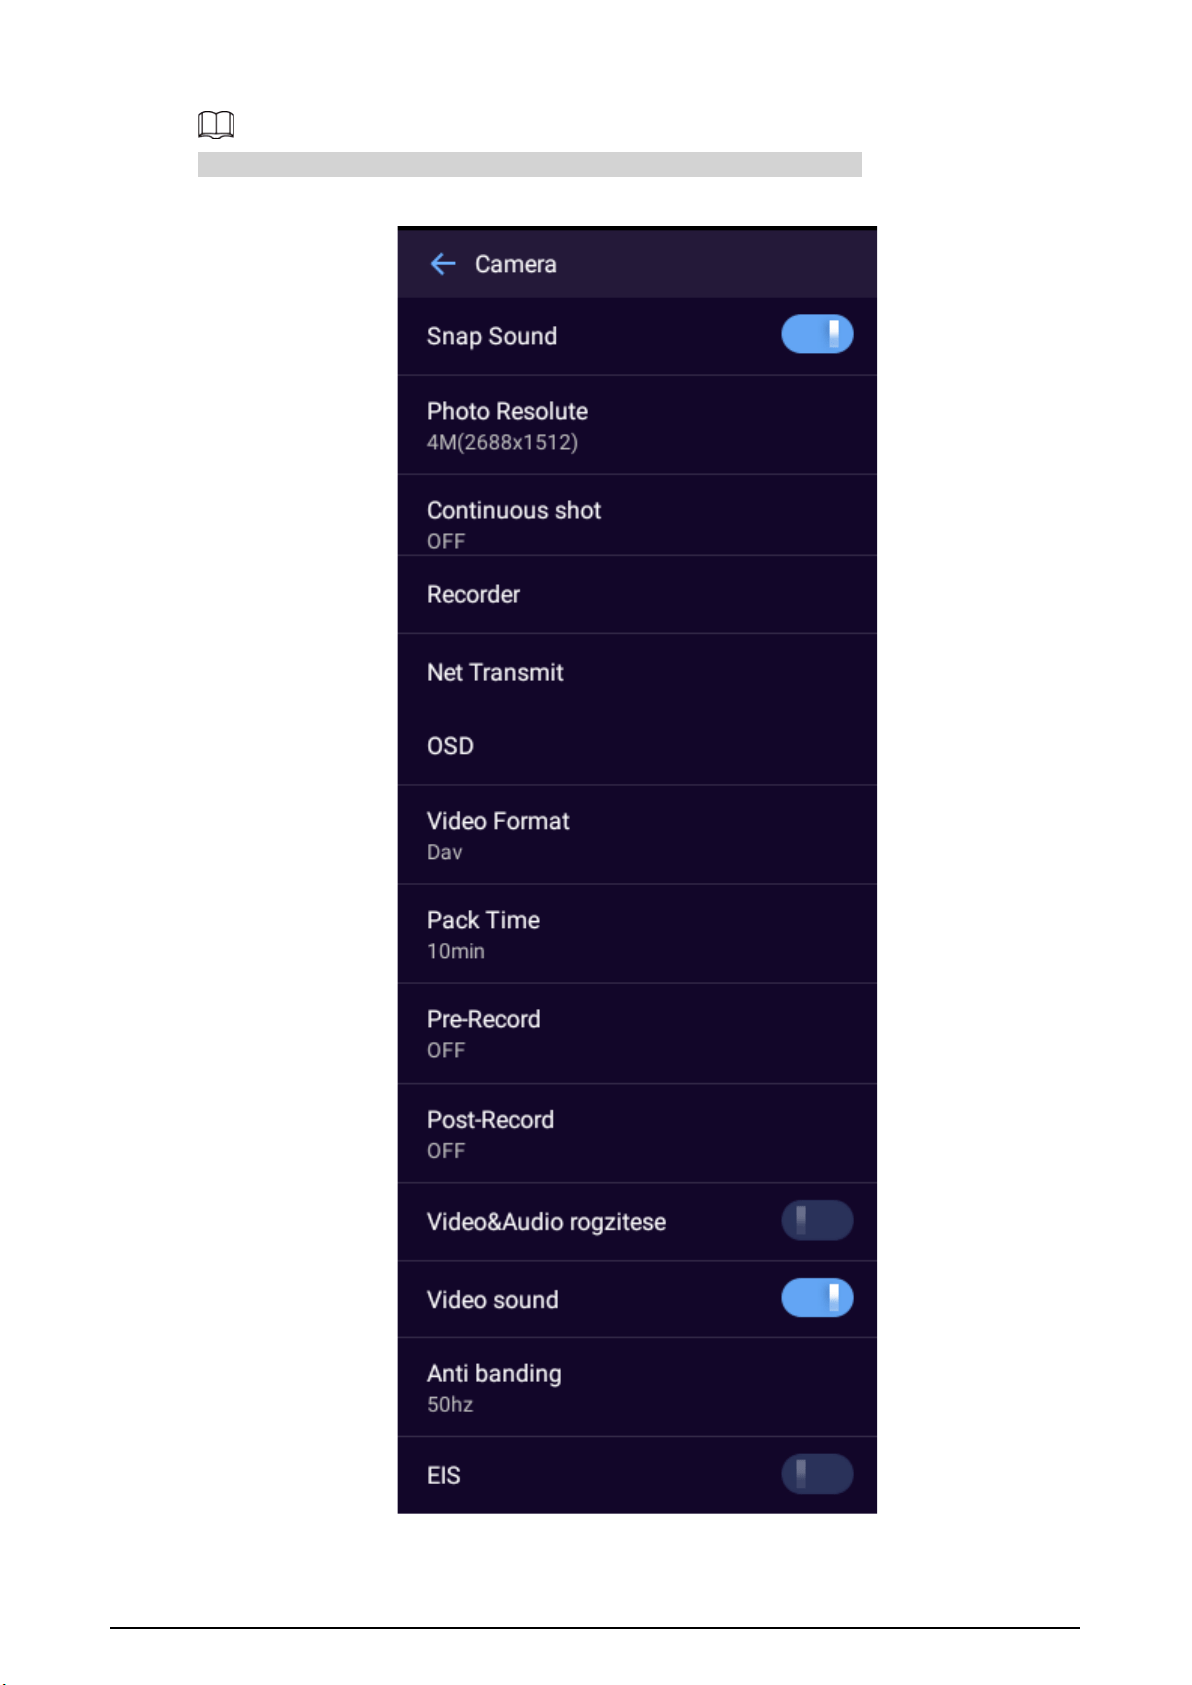
20
The camera parameters might differ depending on the model you are using.
Figure 3-17 Camera settings
21
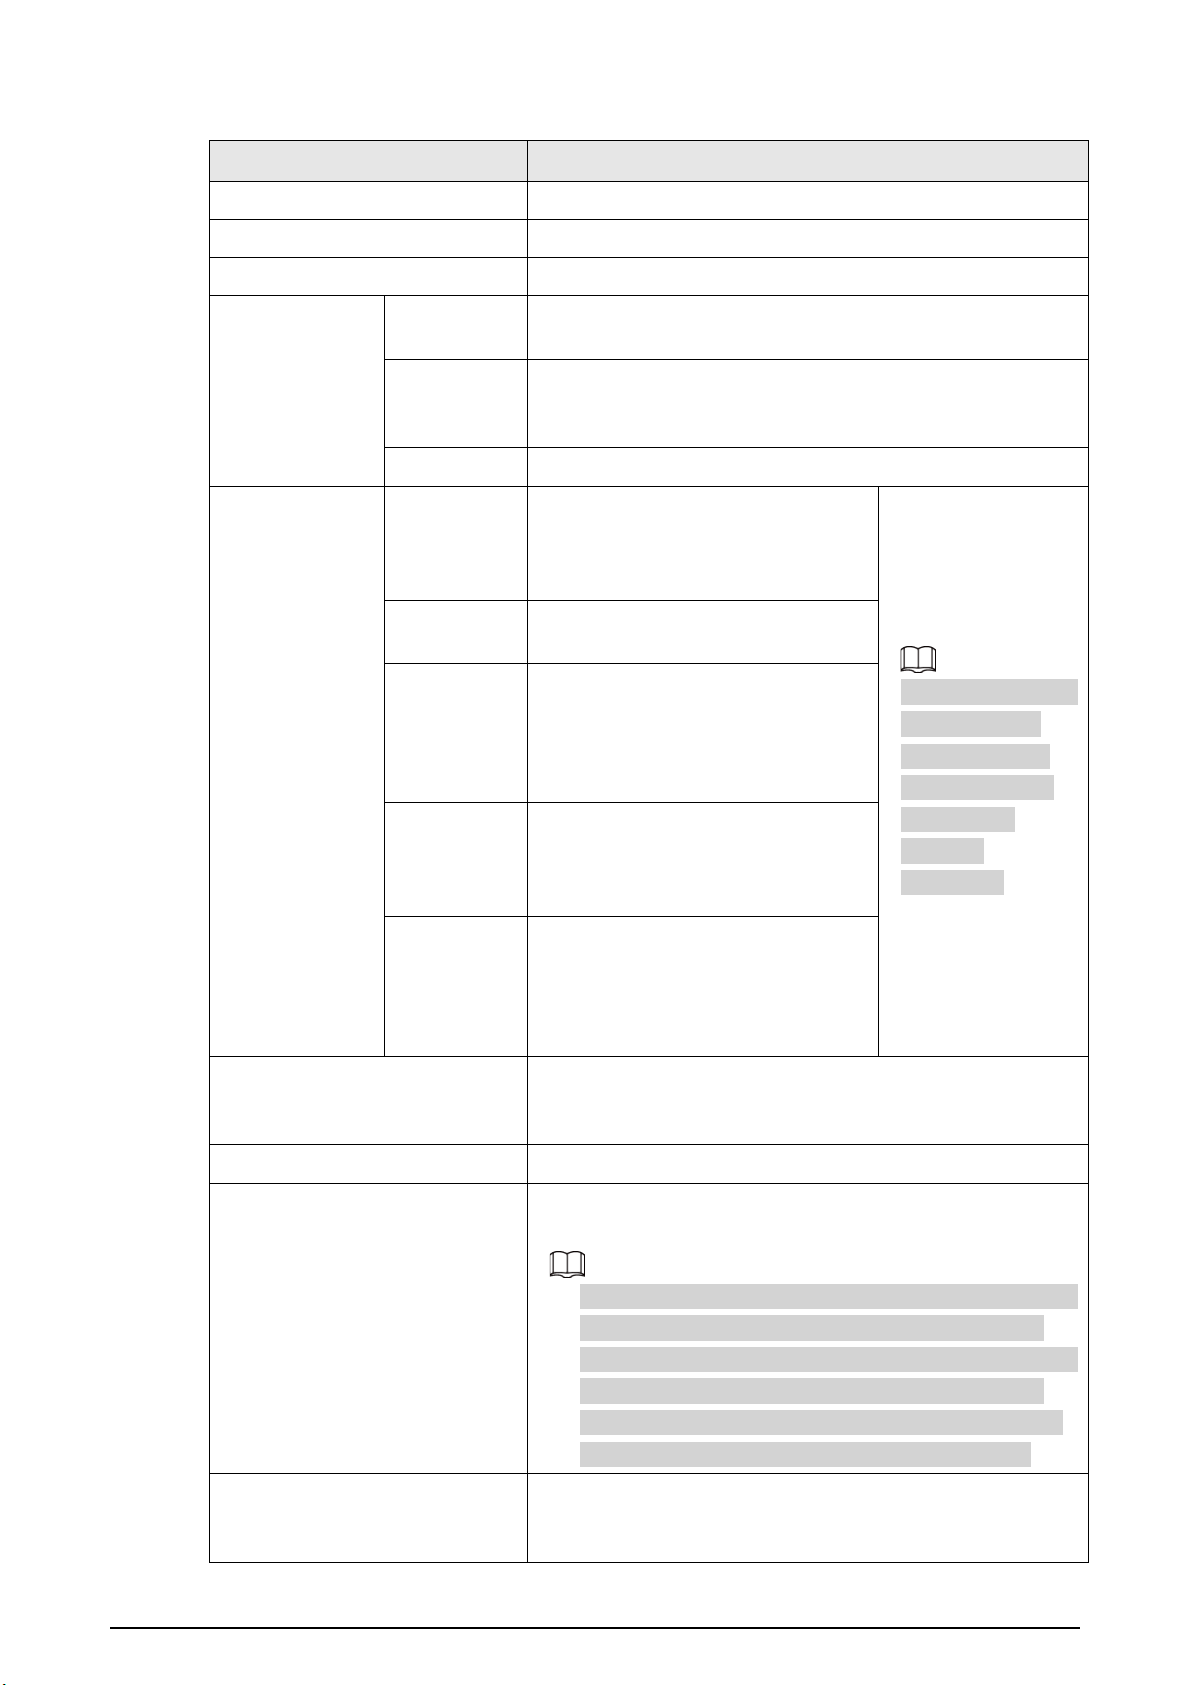
Table 3-7 Camera settings description
Parameter Description
Snap Sound Turn on or off the sound for shooting.
Resolution Configure image size.
Continuous shot Configure the number of continuous shooting.
Video Recording
Encoding
Settings
Video
Encoding
Configure the encoding type of video.
Resolution
Configure the video resolution. The higher the resolution,
the higher the video quality, but meanwhile the more the
storage space consumption.
Bit Rate Configure the bit rate of video.
Network
Encoding
Settings
Network
Self-
adaptation
Enable network adaptation so that
the device can adjust the video
quality automatically according to
the actual situation.
Network Encoding
Settings
is not
available on the
model that does
not support
network
connection.
Video
Encoding
Configure the encoding type of
video for network transmission.
Resolution
Configure the video resolution for
network transmission. The higher
the resolution, the higher the video
quality, but the more network
bandwidth consumption..
Frame Rate
Configure the frame rate of video for
network transmission. The higher
the frame rate, the smoother the
video.
Bit Rate
Configure the bit rate of video for
network transmission. The options
available are different depending on
the selected resolution and frame
rate.
Overlay
Configure whether to display device ID, police ID, time
information, GPS information, and custom information on
the live video image.
Video Format Select the video format from MP4 or dav.
Pack Time
Configure the interval at which the recorded video is saved
as a file.
●
To avoid small files, the packaging time will fluctuate. For
example, when you select 30 min, if the start time of
recording is 10:26, the stop time will be 11:00; if the start
time of recording is 10:14, the stop time will be 10:30.
●
A single recorded video file cannot exceed 2 GB in size
and is automatically repackaged if beyond the limit.
Pre-Record
Configure the pre-record time. For example, if you select 15
s, the 15 s video prior to recording will be saved
automatically.
22
Parameter Description
Post-Record
Configure the post-record time. For example, if you select 15
s, 15 s video after the recording ends will be saved
automatically.
Record Video & Audio
After you enable this function:
●
When the Device is recording video, press , or tap
on the home screen and then tap to start
recording audio at the same time.
●
When the Device is recording audio, press , or tap
on the home screen and then tap to start
recording video at the same time.
Video sound
Enable it to acquire sound when the Device is recording a
video.
Anti banding
Avoids flashing lines of the target during video recording.
●
50 Hz (AC frequency in China).
●
60 Hz (AC frequency in countries such as Japan and
United States).
EIS
Enable the function to reduce the effect from vibration and
shaking on video quality.
The smart functions (face setting and vehicle recognition)
and electronic image stabilization cannot be enabled at the
same time. Might differ depends on actual devices.
3.5.2.3 Face Settings
Select
Device
>
Face Settings
, and then tap next to
Face Detection
to enable the function.
●
The smart functions (face setting and vehicle recognition) and electronic image stabilization
cannot be enabled at the same time.
●
The face setting and vehicle recognition of some products cannot be enabled at the same time.
Might differ depends on actual devices.
3.5.2.4 Plate Settings
Select
Device
>
Plate Settings
, and then tap next to
ANPR
to enable the function.
23
●
The smart functions (face setting and vehicle recognition) and electronic image stabilization
cannot be enabled at the same time.
●
The face setting and vehicle recognition of some products cannot be enabled at the same time.
Might differ depends on actual devices.
●
Tap after
Vibrate
to enable the vibration reminder function after detected a license
plate.
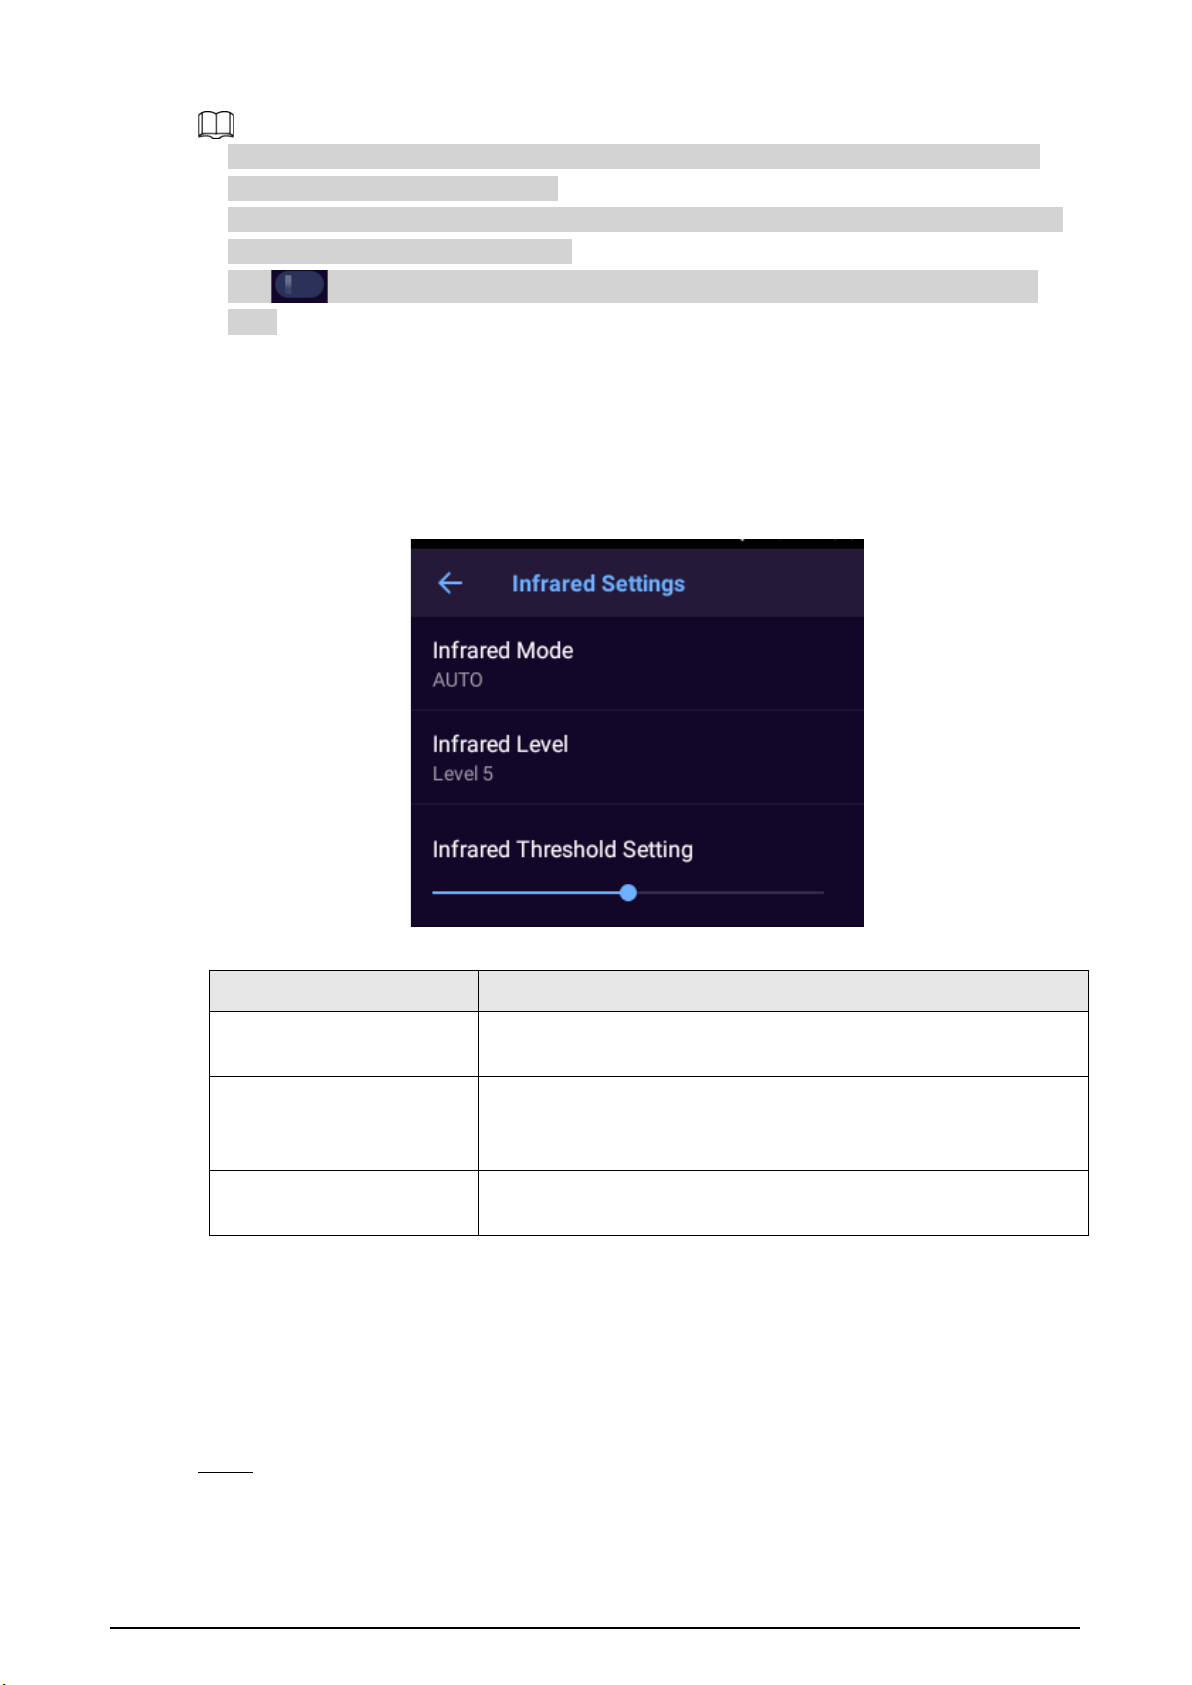
3.5.2.5 Infrared Settings
Turn on infrared mode as needed.
Select
Device
>
Infrared Settings
.
Figure 3-18 Infrared settings
Table 3-8 Infrared settings
Parameter Description
Infrared Mode
Night vision mode. Select the mode from
AUTO
,
OPEN
, and
CLOSE
.
CLOSE
is selected by default.
Infrared Level
Configure the brightness of the infrared light.
You can set the level to Level 1, Level 2, Level 3, Level 4, Level 5,
and Level 6, and it is Level 5 by default.
Infrared Threshold Setting
In the
AUTO
mode, the higher the value is, the easier the infrared
mode will switch.
3.5.2.6 Volume
Background Information
You can configure media and notification volume, enable or disable other sounds and vibrations.
Procedure
Step 1 Select
Device
>
Volume
, and then drag the slider to adjust the media and notification
volume.
●
Media volume involves video and audio playback.
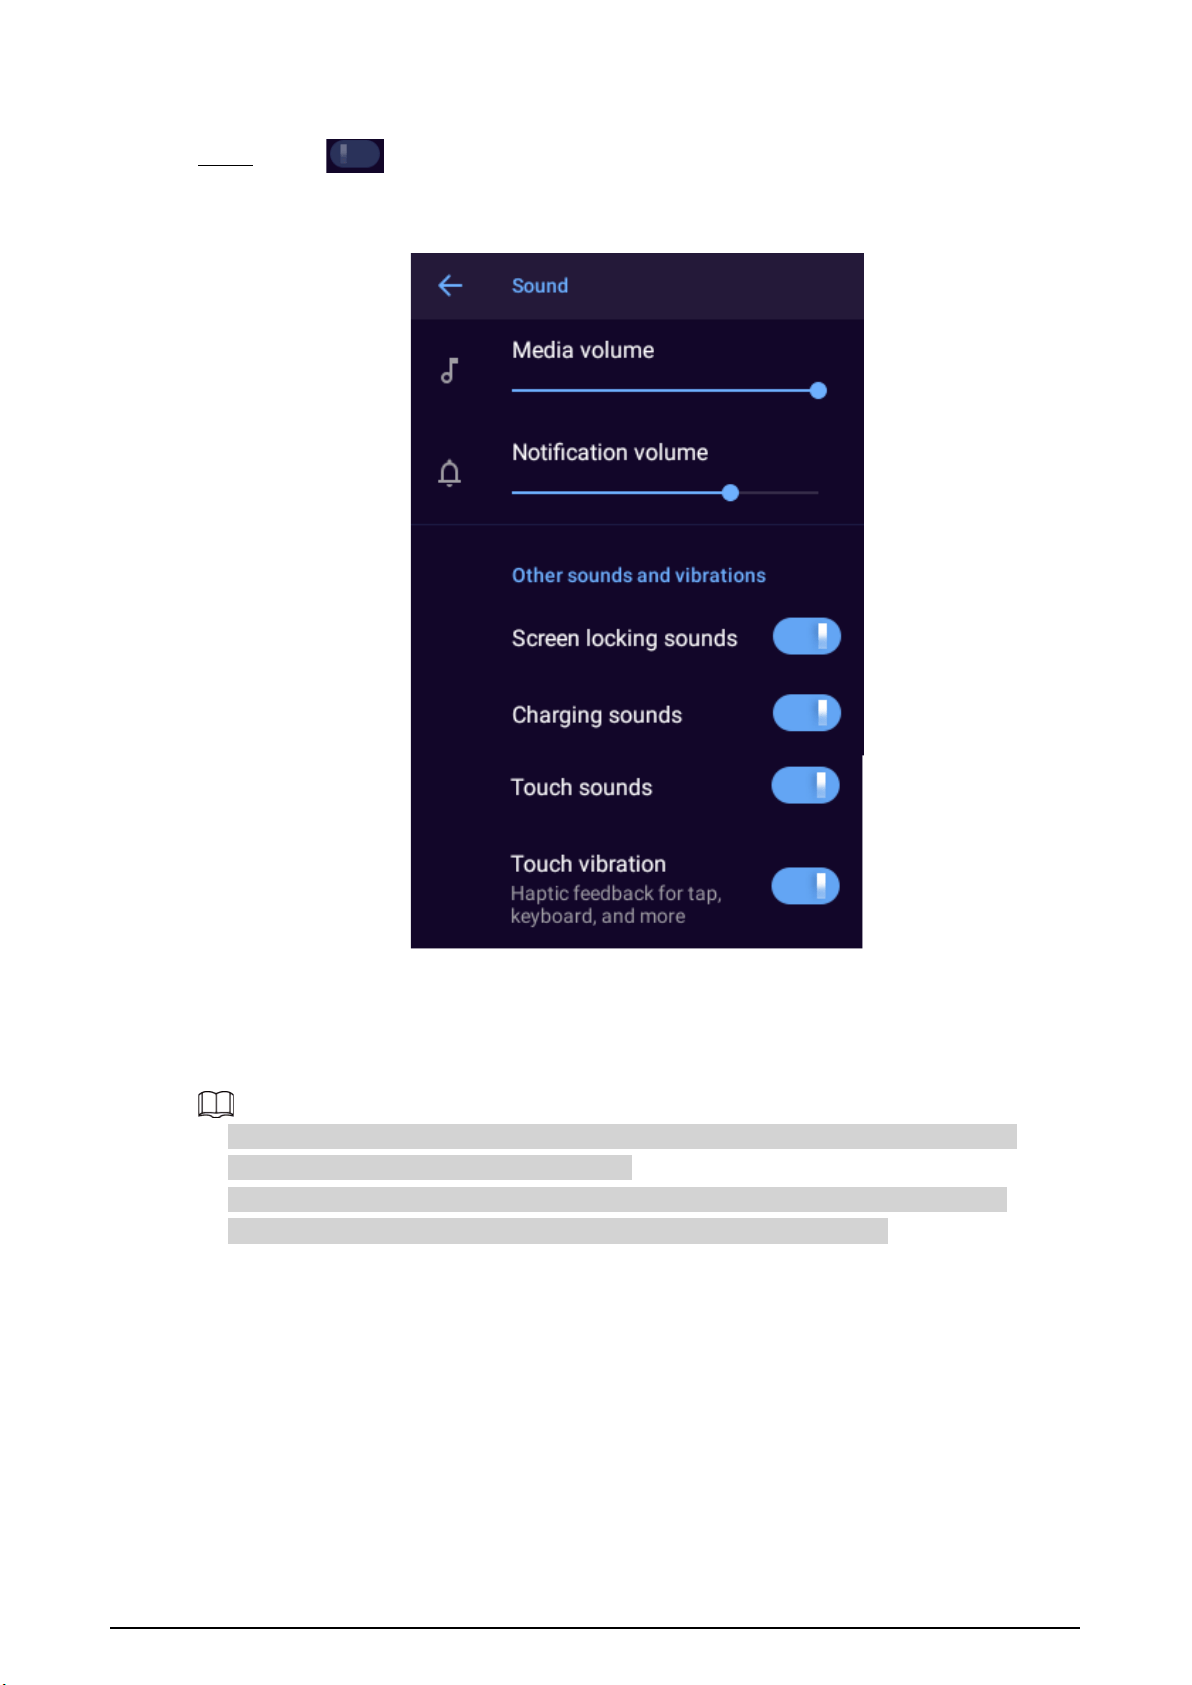
24
●
Notification volume includes key tones, capture success sound, and more.
Step 2 Tap to enable other sounds and vibrations, including screen locking sounds,
charging sounds, touch sounds, and touch vibration.
Figure 3-19 Adjust volume
3.5.2.7 NFC
Select
Device
>
NFC
, and then enable
NFC
. The Device exchanges data with other nearby devices.
●
The NFC function is not available on the model that does not support network connection.
●
The NFC can read data from TypeA and TypeB.
●
Before using NFC, install third-party software that supports NFC. If there is no third-party
software, there will be a sound prompt when the card is close to the Device.
3.5.2.8 Voice Prompt
Select
Device
>
Voice Prompt
to enable or disable voice prompt.
3.5.2.9 Data Overwrite
Select
Device
>
Data Overwrite
, and then enter the password of the admin account to enable or
disable data overwriting. After the function is enabled, the oldest non-key files will be overwritten
when the storage space is used up.

25
This function is only available for admin account.
3.5.2.10 Auto Start Video
Select
Device
>
Auto start video
, and then tap to enable the function. Enter the admin
password and then tap
OK
. The device will start video recording automatically after system starts up.
This function only can be enabled by the admin user.
3.5.2.11 Force Transfer Encoded Streams through Network
Select
Device
>
Force Transfer Encoded Streams through Network
, tap to enable the
function, and the tap
OK
to restart the device. When configured the transfer encoded streams
through network on the device, the platform will record the video with the configured streams. For
the detailed information, see "3.5.2.2 Camera Settings".
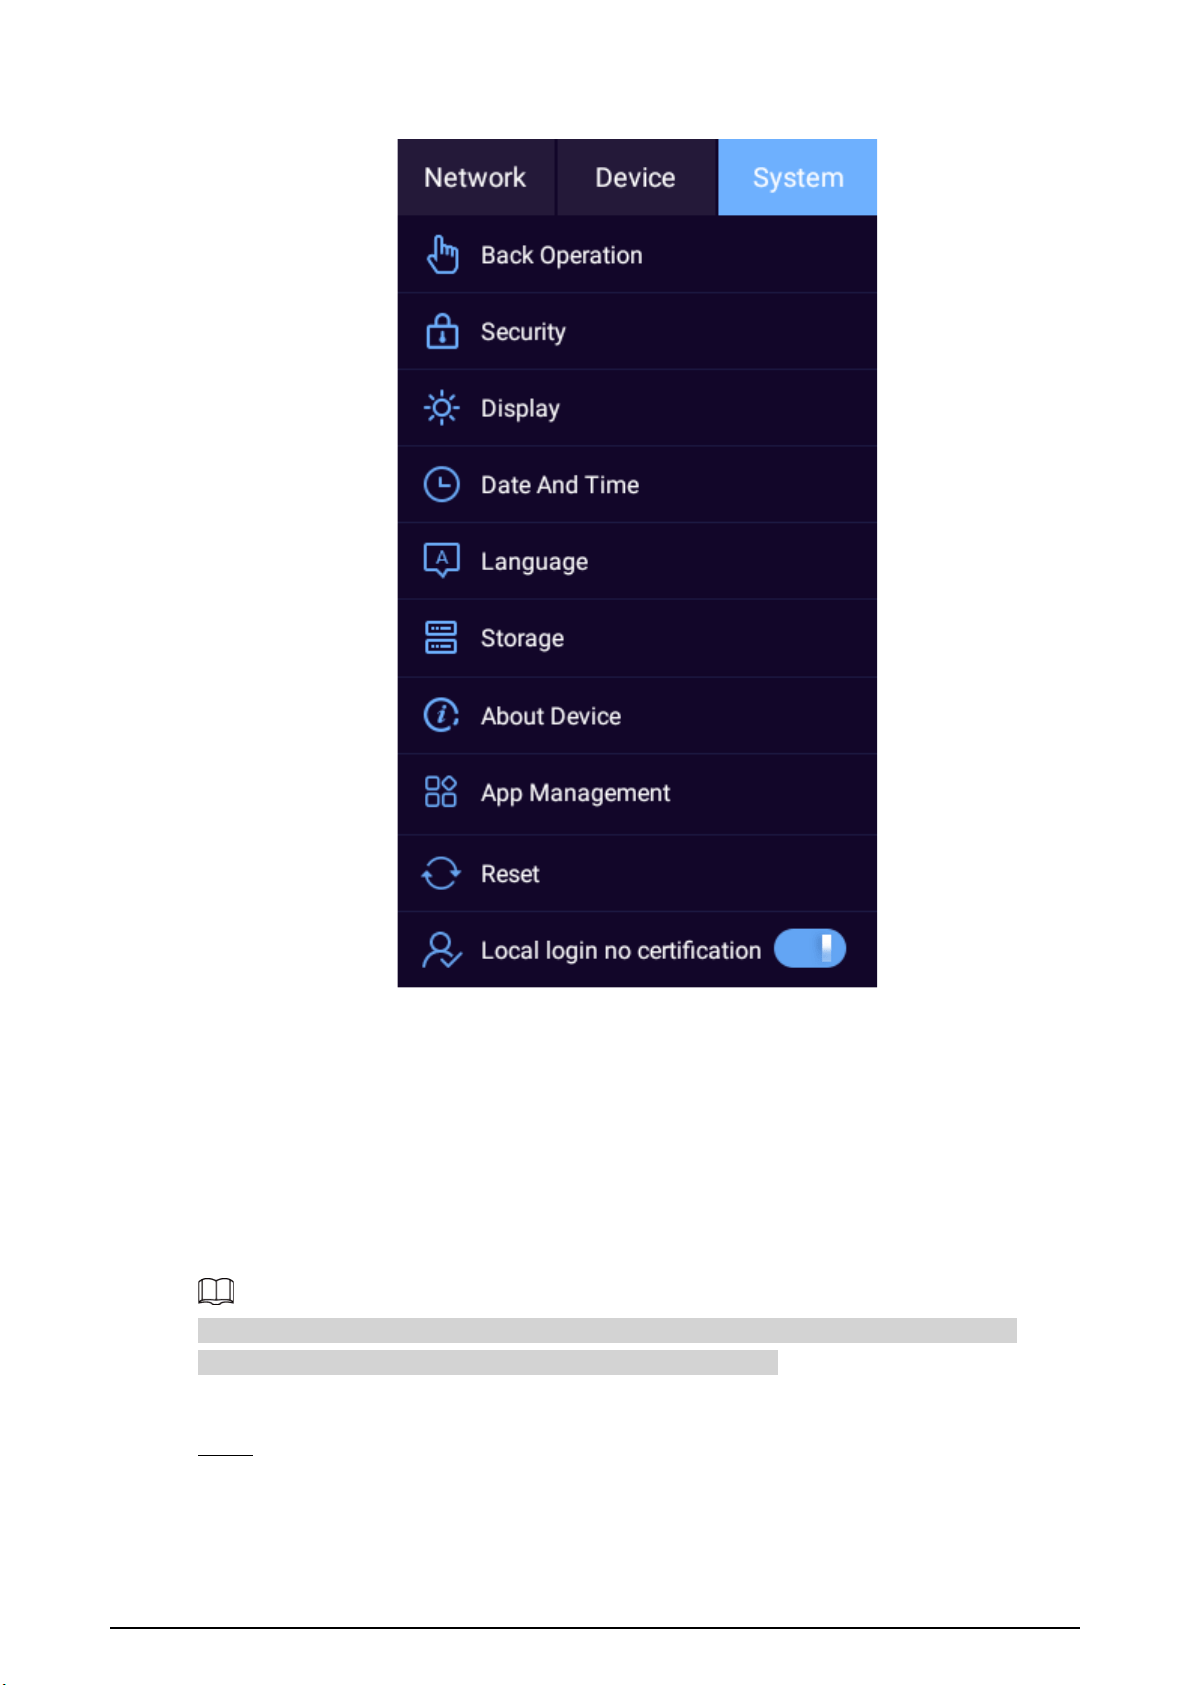
3.5.3 System
When the over temperature protection is triggered, the Device will notify prompt you to handle the
temperature anomaly to avoid slow screen response, system failure or data exception.
On the main screen, tap , and then select
System
. You can configure security, display, date and
time, language, and more.
26
Figure 3-20 System
3.5.3.1 Back Operation
You can select a mode for back operation.
Select
System
>
Back Operation
, and then select a mode from
Gesture
and
Floating Button
.
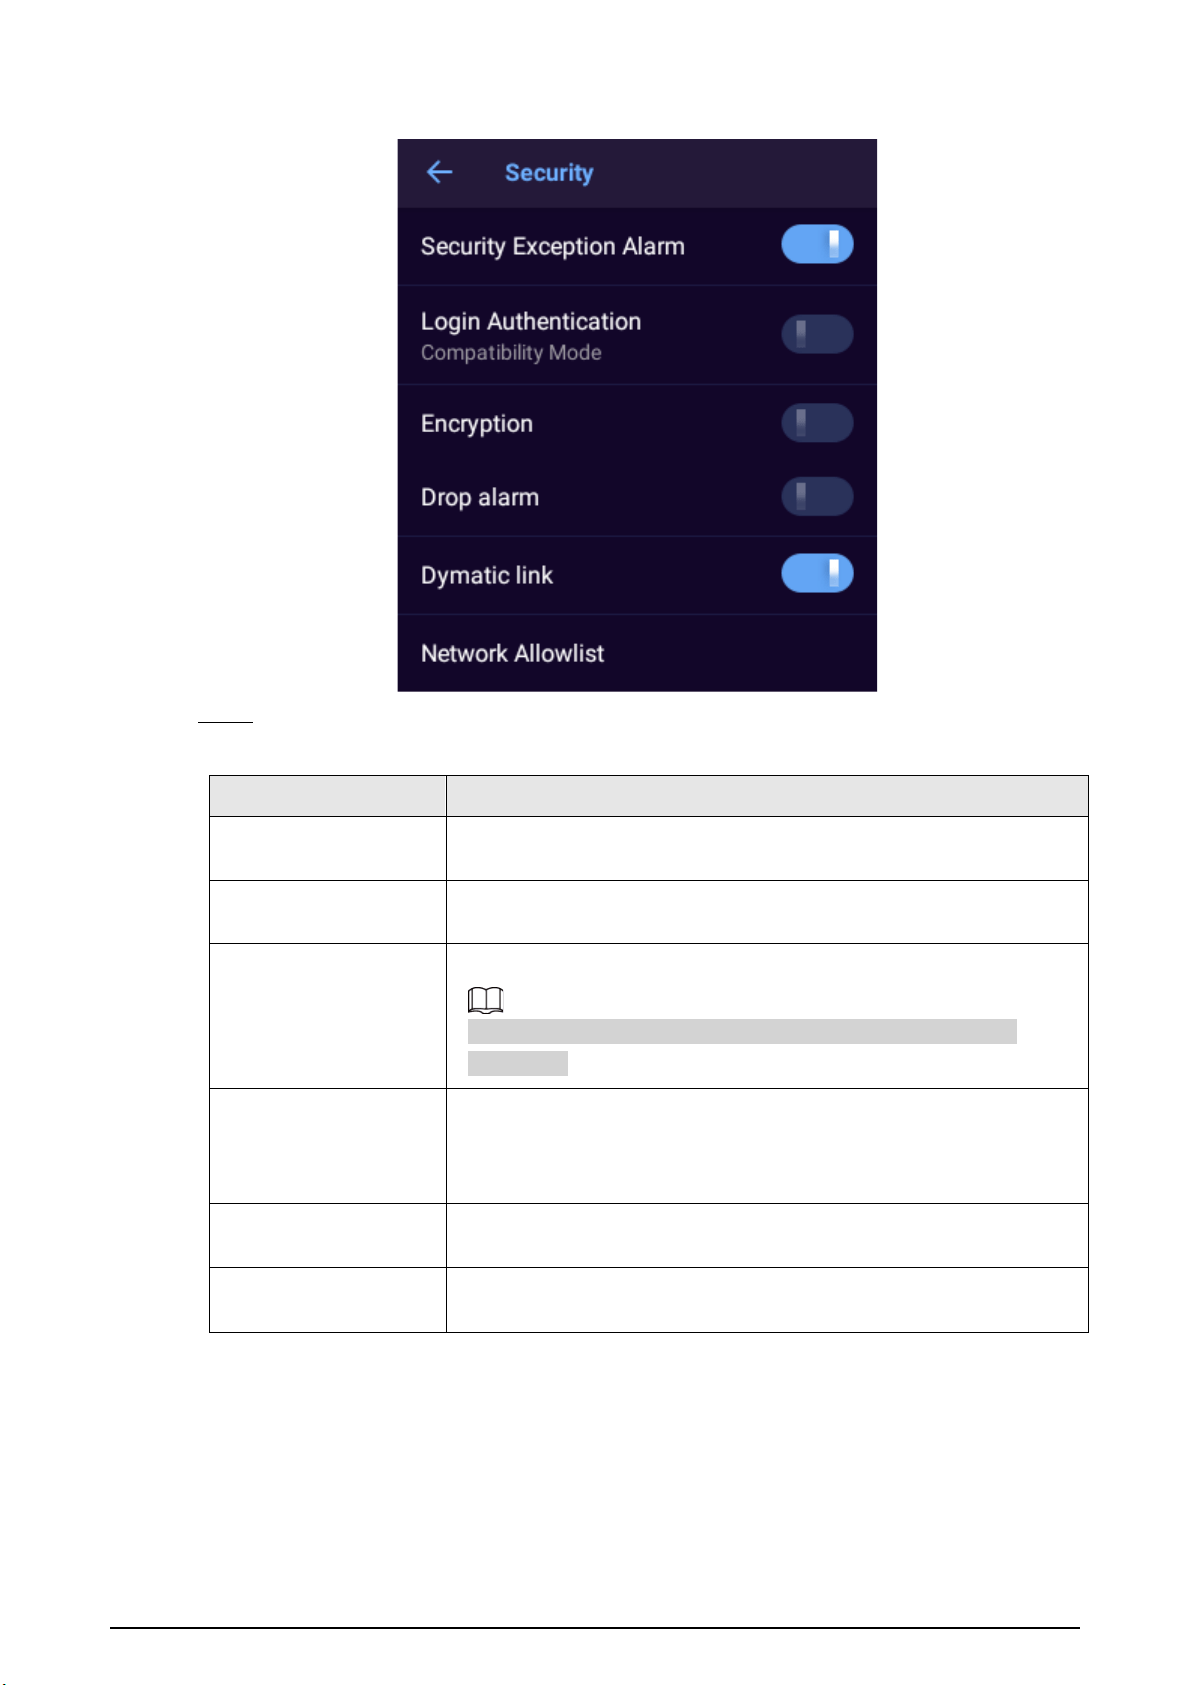
3.5.3.2 Security
You can allow apps from unknown sources to be installed.
Security exception alarm, encryption, drop alarm, dynamic link, and network allowlist are not
available on the model that does not support network connection.
Procedure
Step 1 Select
System
>
Security
.
27
Figure 3-21 Security
Step 2 Configure the parameters.
Table 3-9 Security parameters
Parameter Description
Security Exception
Alarm
Displays alarm information when an exception occurs.
Login Authentication
Configure login mode. We recommend you turn on security mode to
avoid security risks.
Encryption
Enable encryption for the pairing devices.
Make sure that the pairing devices or software supports video
decryption.
Drop alarm
When
Drop alarm
is enabled, the Device triggers an alarm message
when dropping from 30 cm or higher, the indicator light flashes red
and the Device starts recording a video which is marked as an
important file automatically.
Dynamic link
Enable it to set an independent link for each request. It is used during
live view video, voice talk and playback.
Network Allowlist
To allow access of only trusted IPs, MACs and ports, enable
Network
Allowlist
and then add the trusted IPs, MACs and ports.
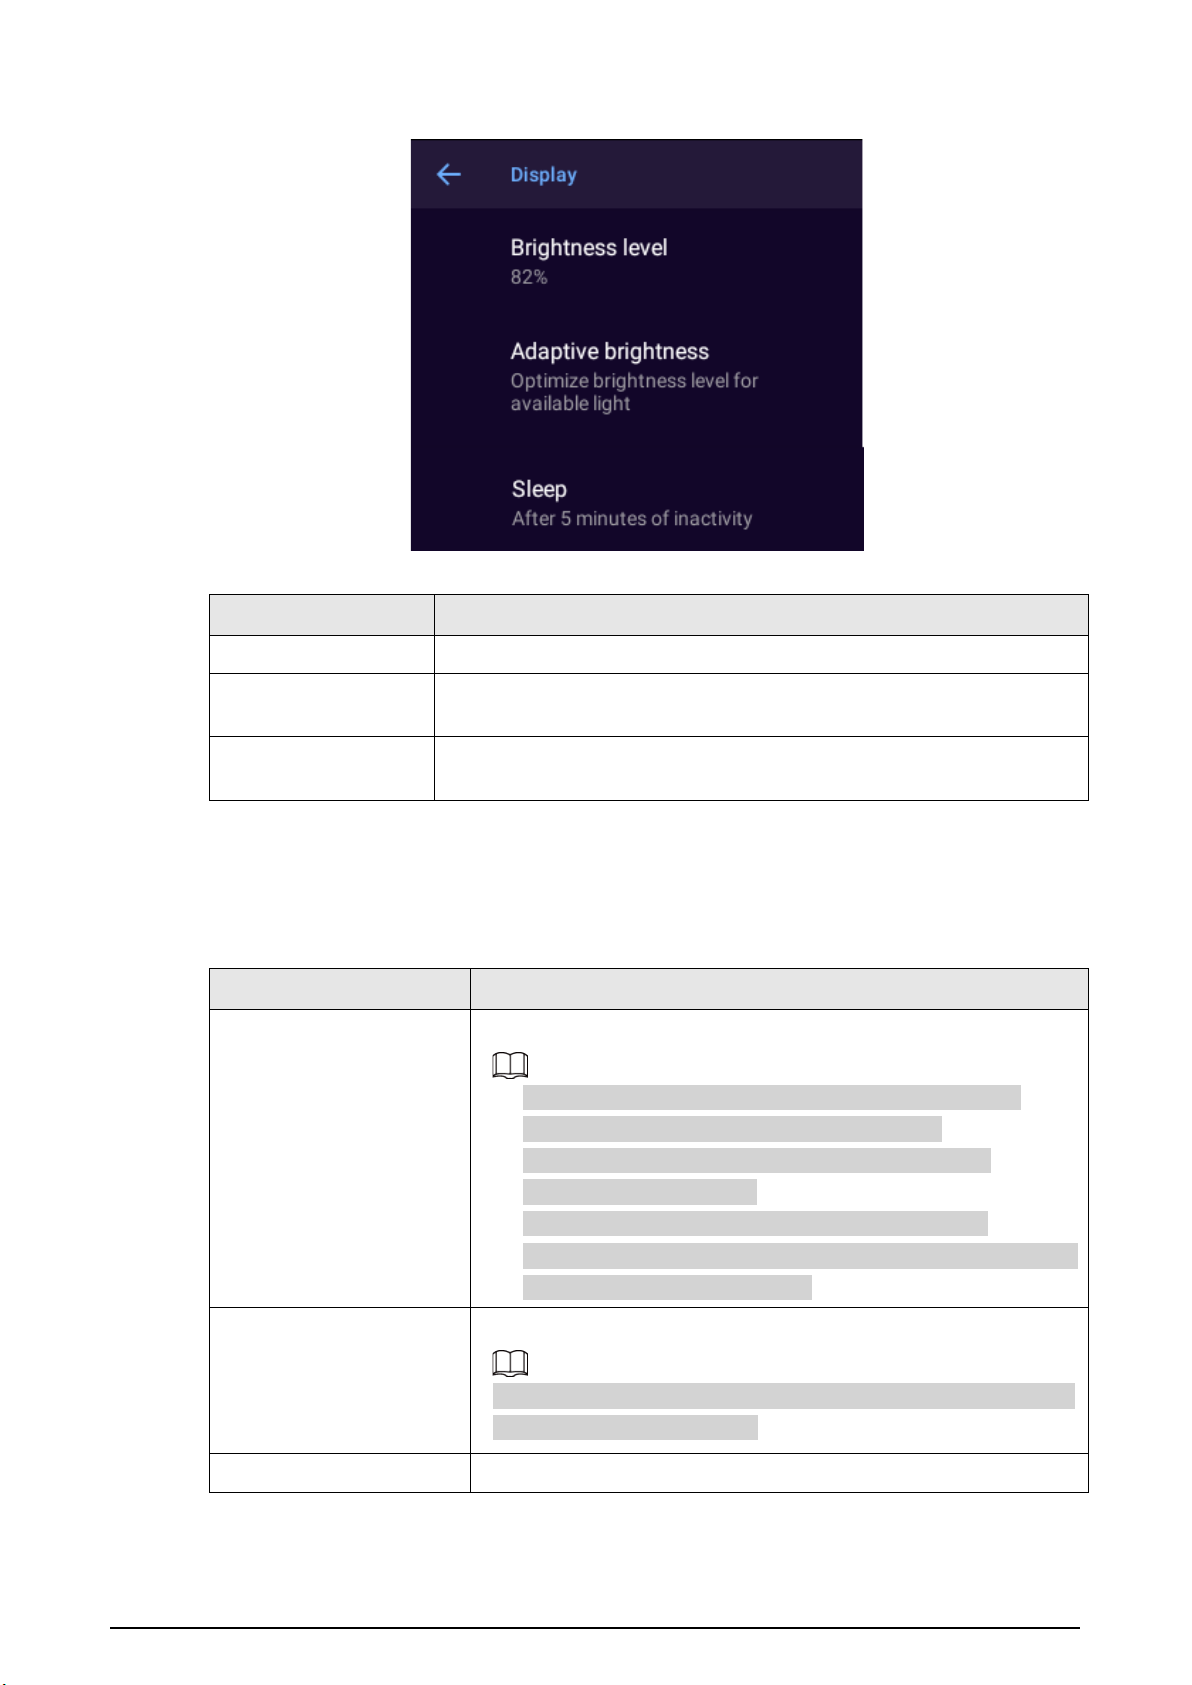
3.5.3.3 Display
Select
System
>
Display
to adjust the screen brightness and device hibernation time.
28
Figure 3-22 Display
Table 3-10 Display parameters
Parameter Description
Brightness level Adjust the screen brightness.
Adaptive brightness
Automatically adjusts the screen brightness according to the
environment and activity.
Sleep
Configure the hibernation time. The Device automatically hibernates
after the predefined time of inactivity.
3.5.3.4 Date and Time
Select
System
>
Date And Time
to configure date and time settings.
Table 3-11 Date and time parameters
Parameter Description
Date and time
Sync device time with the network or platform.
●
To sync with the network time, ensure that the Device is
connected to the network, such as a 4G or Wi-Fi.
●
To sync with platform time, ensure that the Device is
connected to the platform.
●
The Device can also sync time through MPT Manager.
●
Automatic date & time
is not available on the model that does
not support network connection.
Select time zone
Select the time zone.
Automatic time zone
is not available on the model that does not
support network connection.
Clock Striking
When
Clock Striking
is enabled, the Device strikes the hour.
29
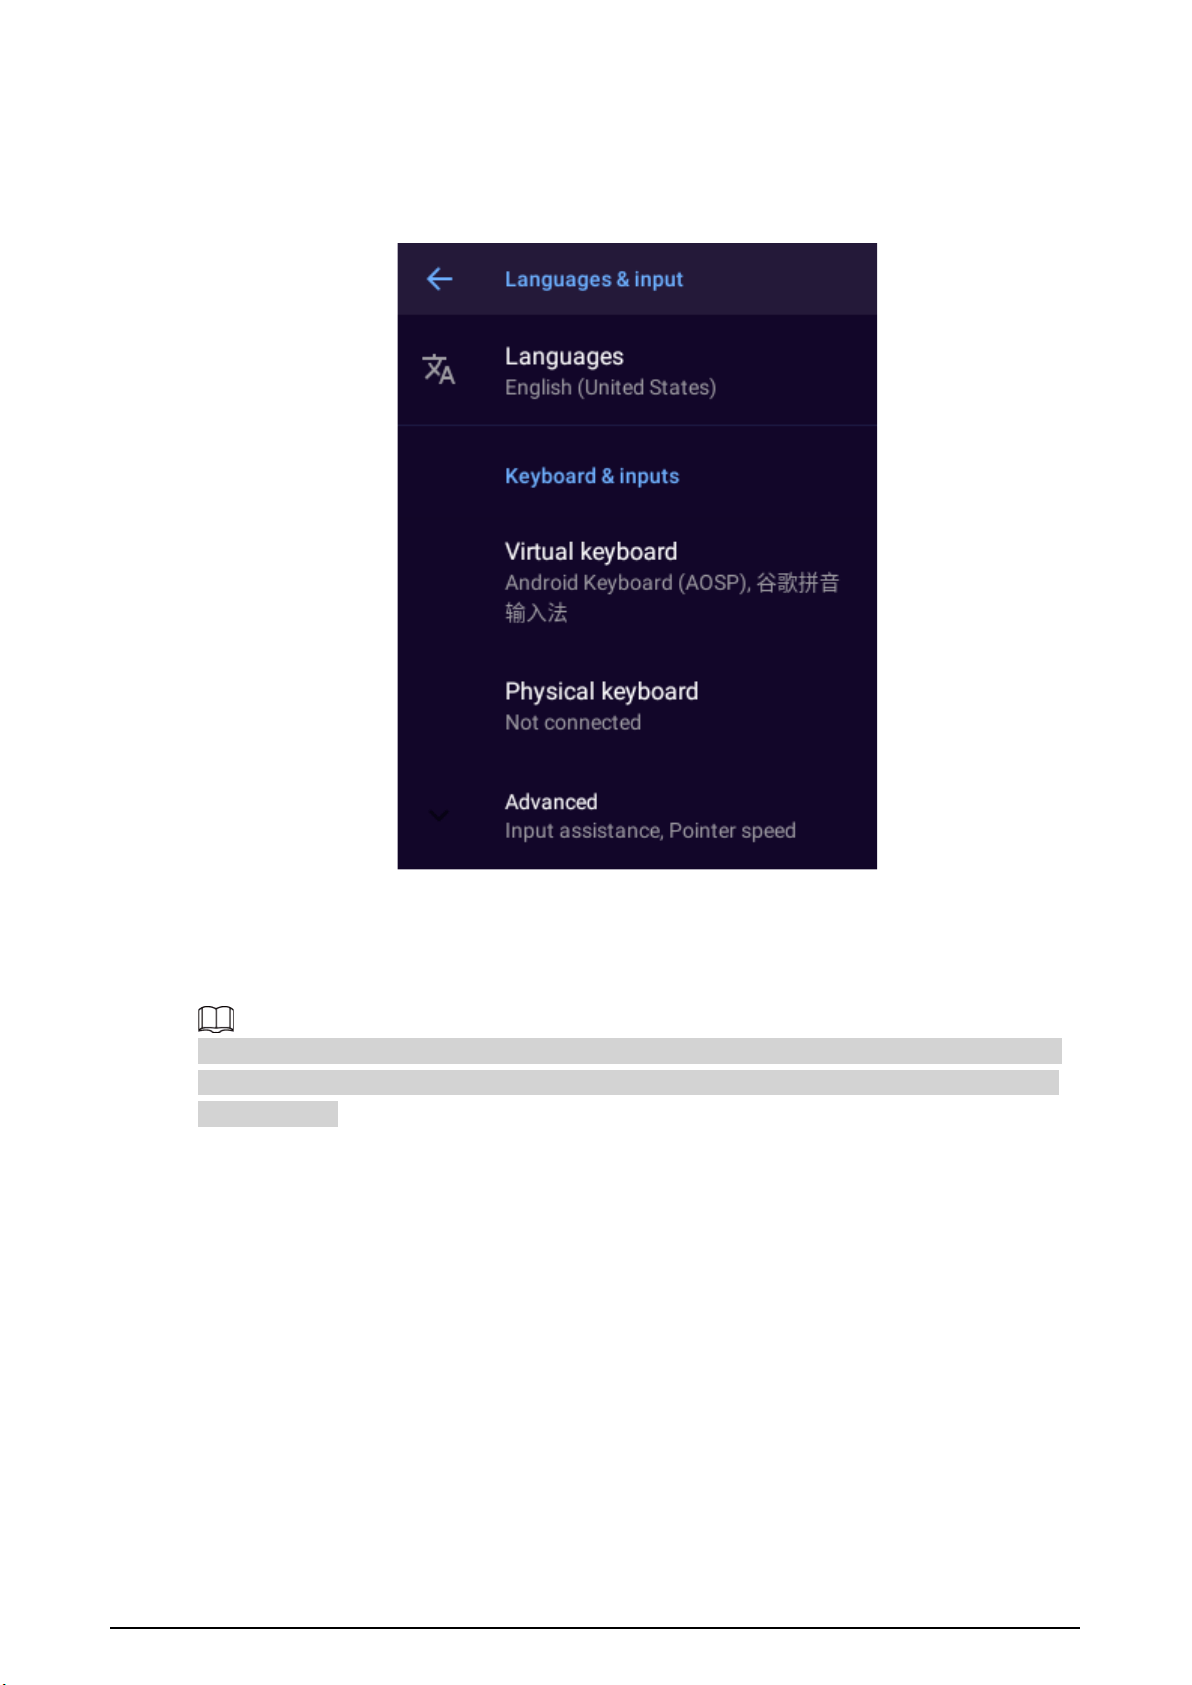
3.5.3.5 Language
Select
System
>
Language
to configure device language.
Figure 3-23 Configure language
3.5.3.6 Storage
Select
System
>
Storage
to view the used and total storage space.
If you want to use an SD card, make sure to format it to FAT32 first. After you insert an SD card, the
Device will display the used and total storage space of the SD card. If the format is wrong, you can
format the card.
3.5.3.7 About Device
Select
System
>
About Device
to view device information such as device name, serial number, and
Android version
3.5.3.8 App Management
3.5.3.8.1 Viewing App Information
Select
System
>
App Management
>
App info
, enter the password, and then you can view the
information on the apps.

30
Only the admin account has the permission to view the app information.
3.5.3.8.2 Configuring the Startup App
Select
System
>
App Management
>
Power On
, enter the password, and then you can set the
startup app that runs automatically after the system starts up.
●
Tap
Clear All
to remove all the startup settings.
●
You can set only one startup app.
●
Only the admin account has the permission to set the startup app.
3.5.3.8.3 Installing Platform Apps
Install the platforms apps that have been configured in advance.
You cannot install platform apps on the model that does not support network connection.
Procedure
Step 1 Select
System
>
App Management
>
Platform app installation
.
Step 2 Select a pre-configured platform apk file.
The apk files are configured before the Device leaves the factory. Contact the technical
support to get other apk files.
Step 3 Follow the on-screen instructions to install the app. The installed app will appear on the
home screen.
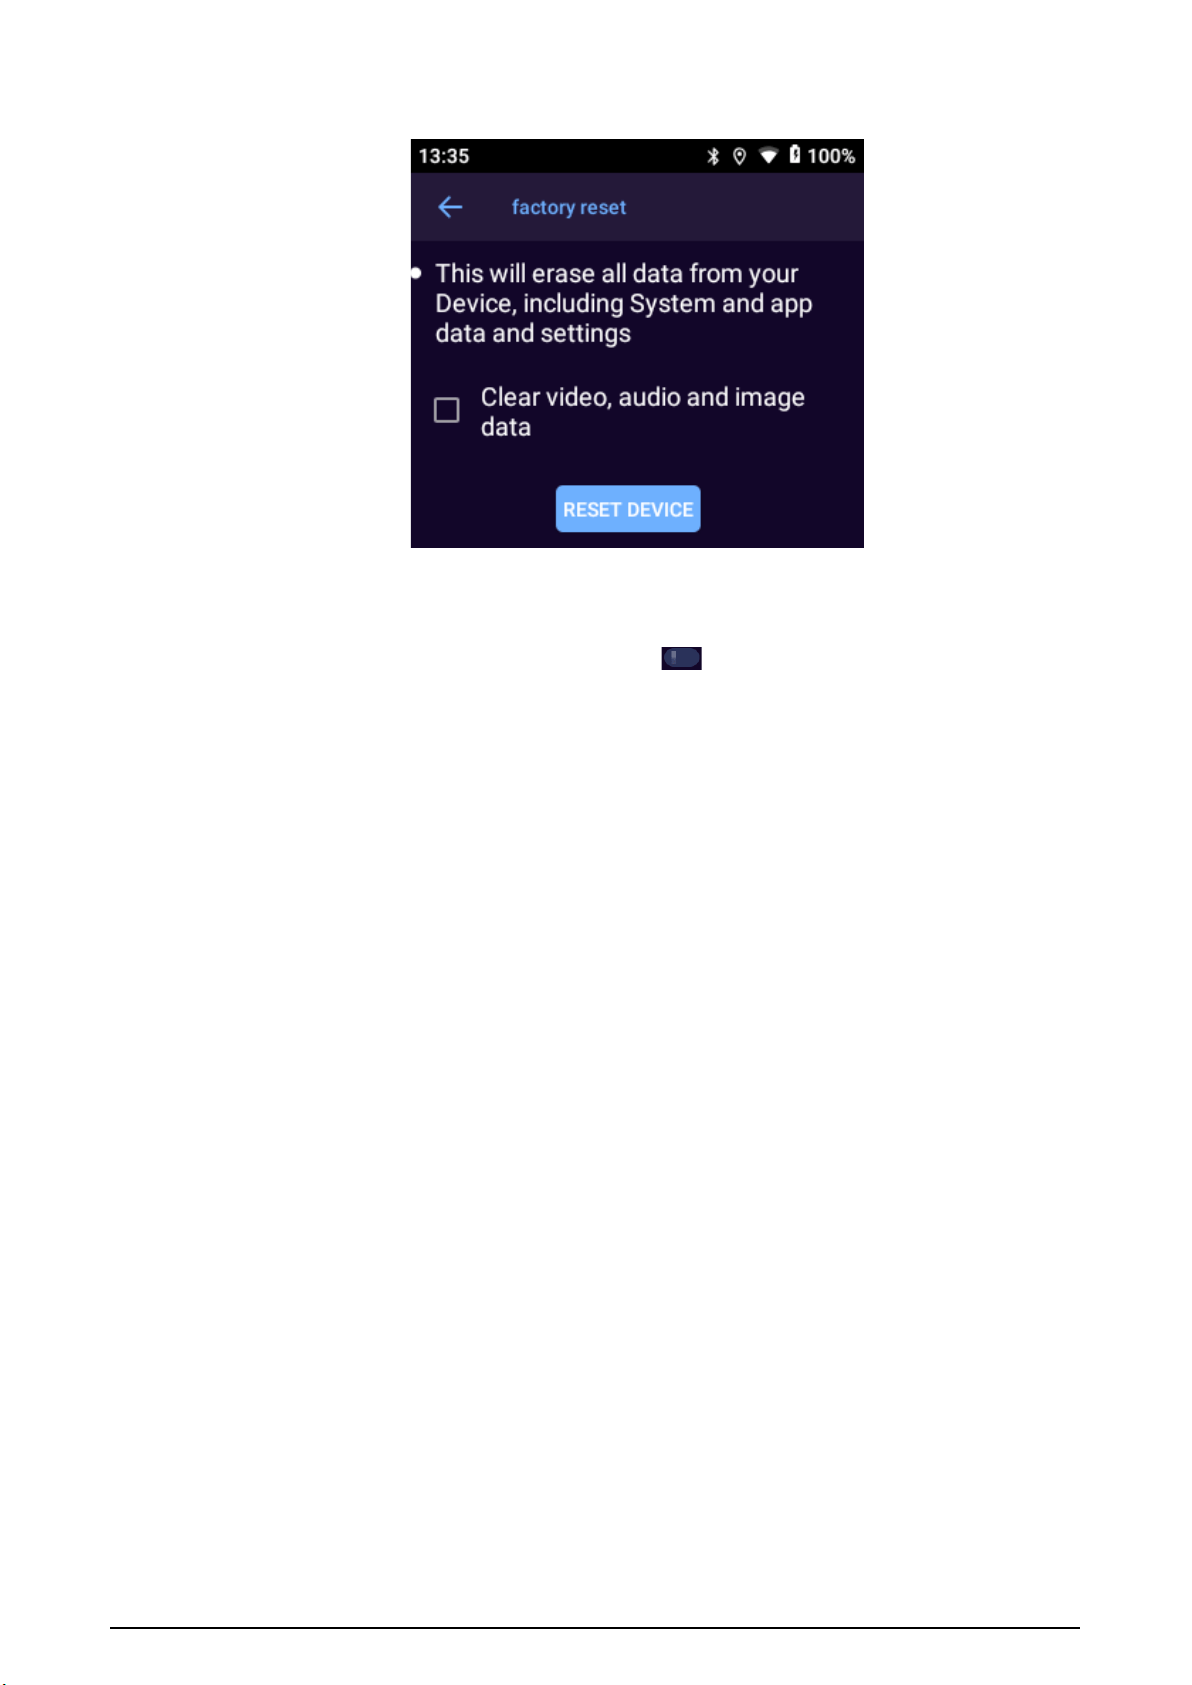
3.5.3.9 Reset
Restore the Device to default settings.
●
Restoring default settings will clear all data stored on your device, including system and app data
and settings. The Device still retains certain parameters, including audio, video, picture data, and
the serial number. You can select whether to clear video, audio and image data in the internal
storage and micro SD card. Proceed with caution.
●
Only the admin account has the permission to reset the Device.
Procedure
Step 1 Select
System
>
Reset
.
Step 2 (Optional) Select
Clear video, audio and image data
.
Step 3 Tap
RESET DEVICE
and then tap
ERASE EVERYTHING
.
Step 4 Enter the password, and then tap
OK
.
31
Figure 3-24 Reset
3.5.3.10 Local login without certification
Select
System
>
Local login no certification
. Tap and then enter the password to enable
the function. You do not need to enter the password for unlock the device or after device restarts up.
The other related operation still needs to enter the password.
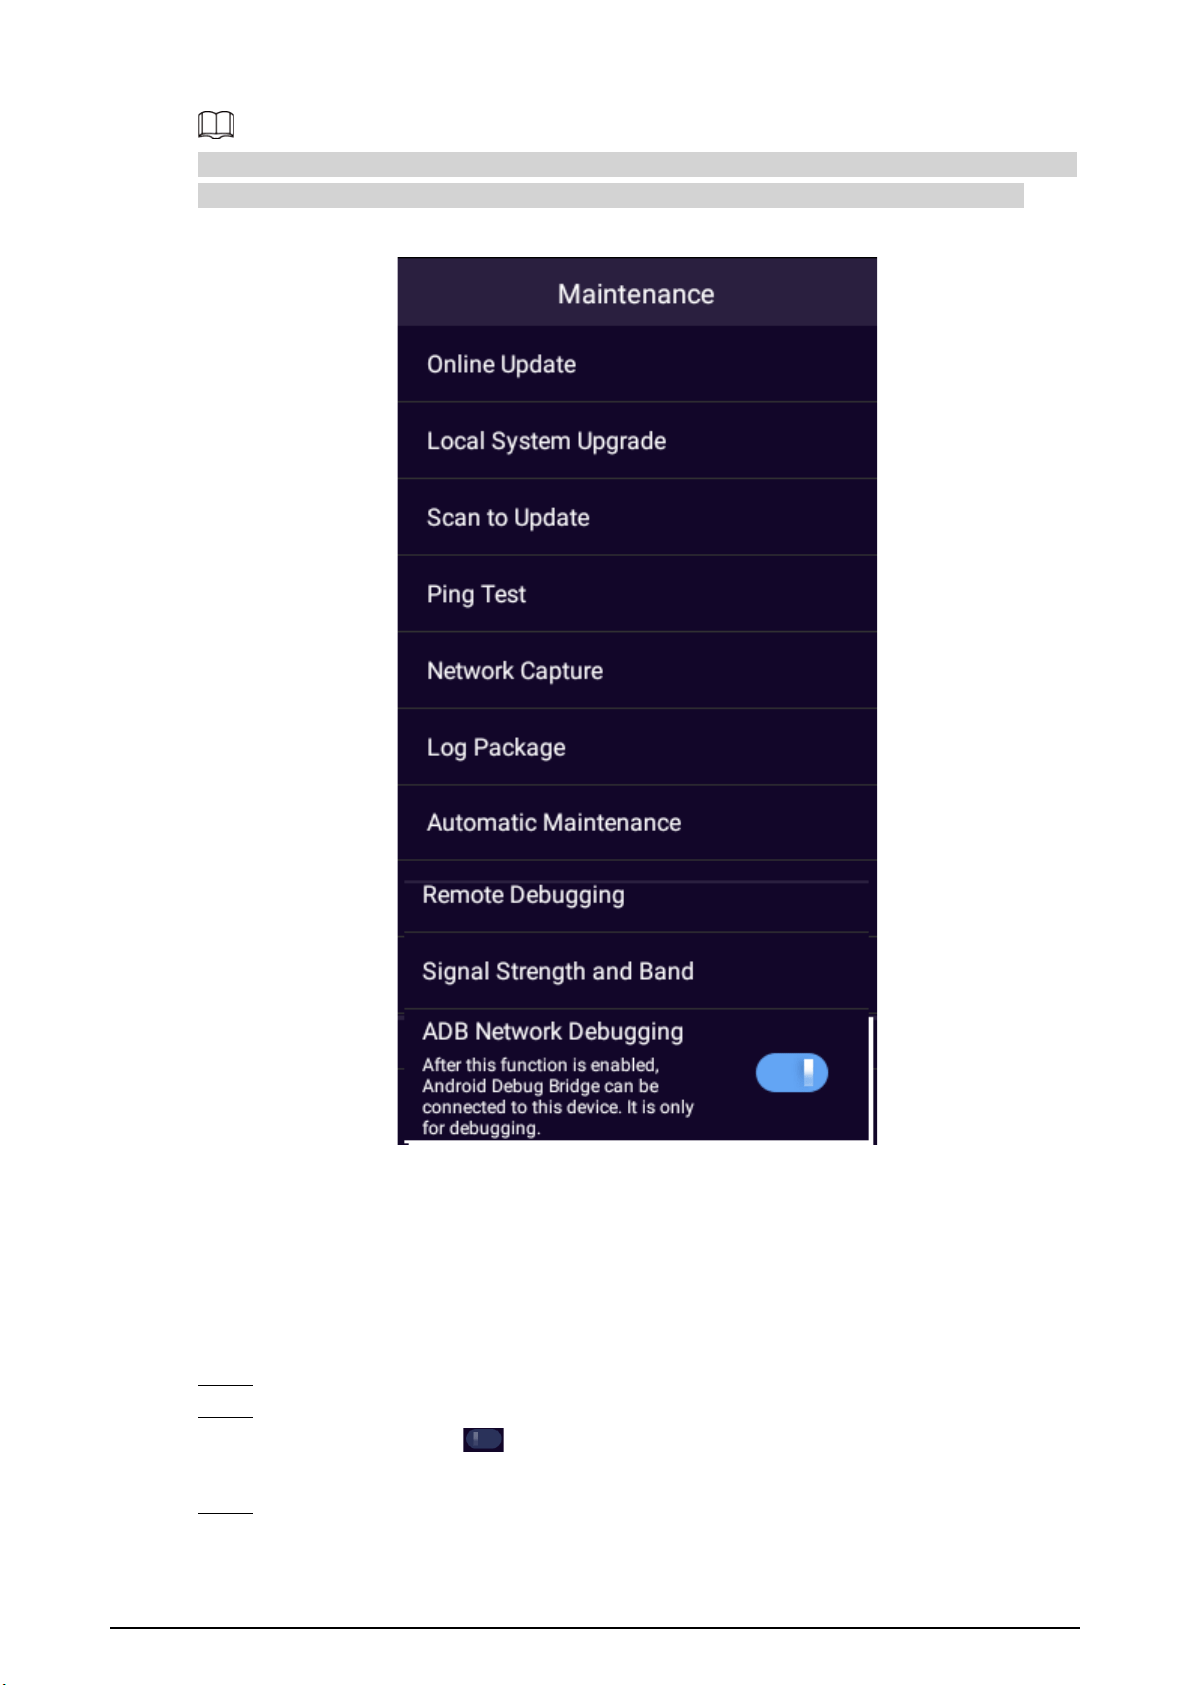
3.6 System Maintenance
On the home screen, tap
Maintenance
and then you can perform maintenance operations such as
system update, and ping test.
32
Online update, ping test, scan to update, network capture, log package, remote debugging and ADB
network debugging are not available on the model that does not support network connection.
Figure 3-25 Maintenance
3.6.1 Online Update
When the device is connected to the internet, it can be updated online. Before updated, you need to
check whether there is the latest version. The version check can be done automatically or manually.
Procedure
Step 1 On the home screen, select
Maintenance
>
Online Update
.
Step 2 Check the version.
●
Auto check: Tap to enable the
Auto check
function.
●
Manual check: Tap
Manual check
to check whether there is the latest version.
Step 3 Tap to update the system.
33
If the page shows "You are using the latest version", you do not need to update the system.
3.6.2 Local System Upgrade
You can update the system on the local device. For details, see "4.2 Updating on Local Device".
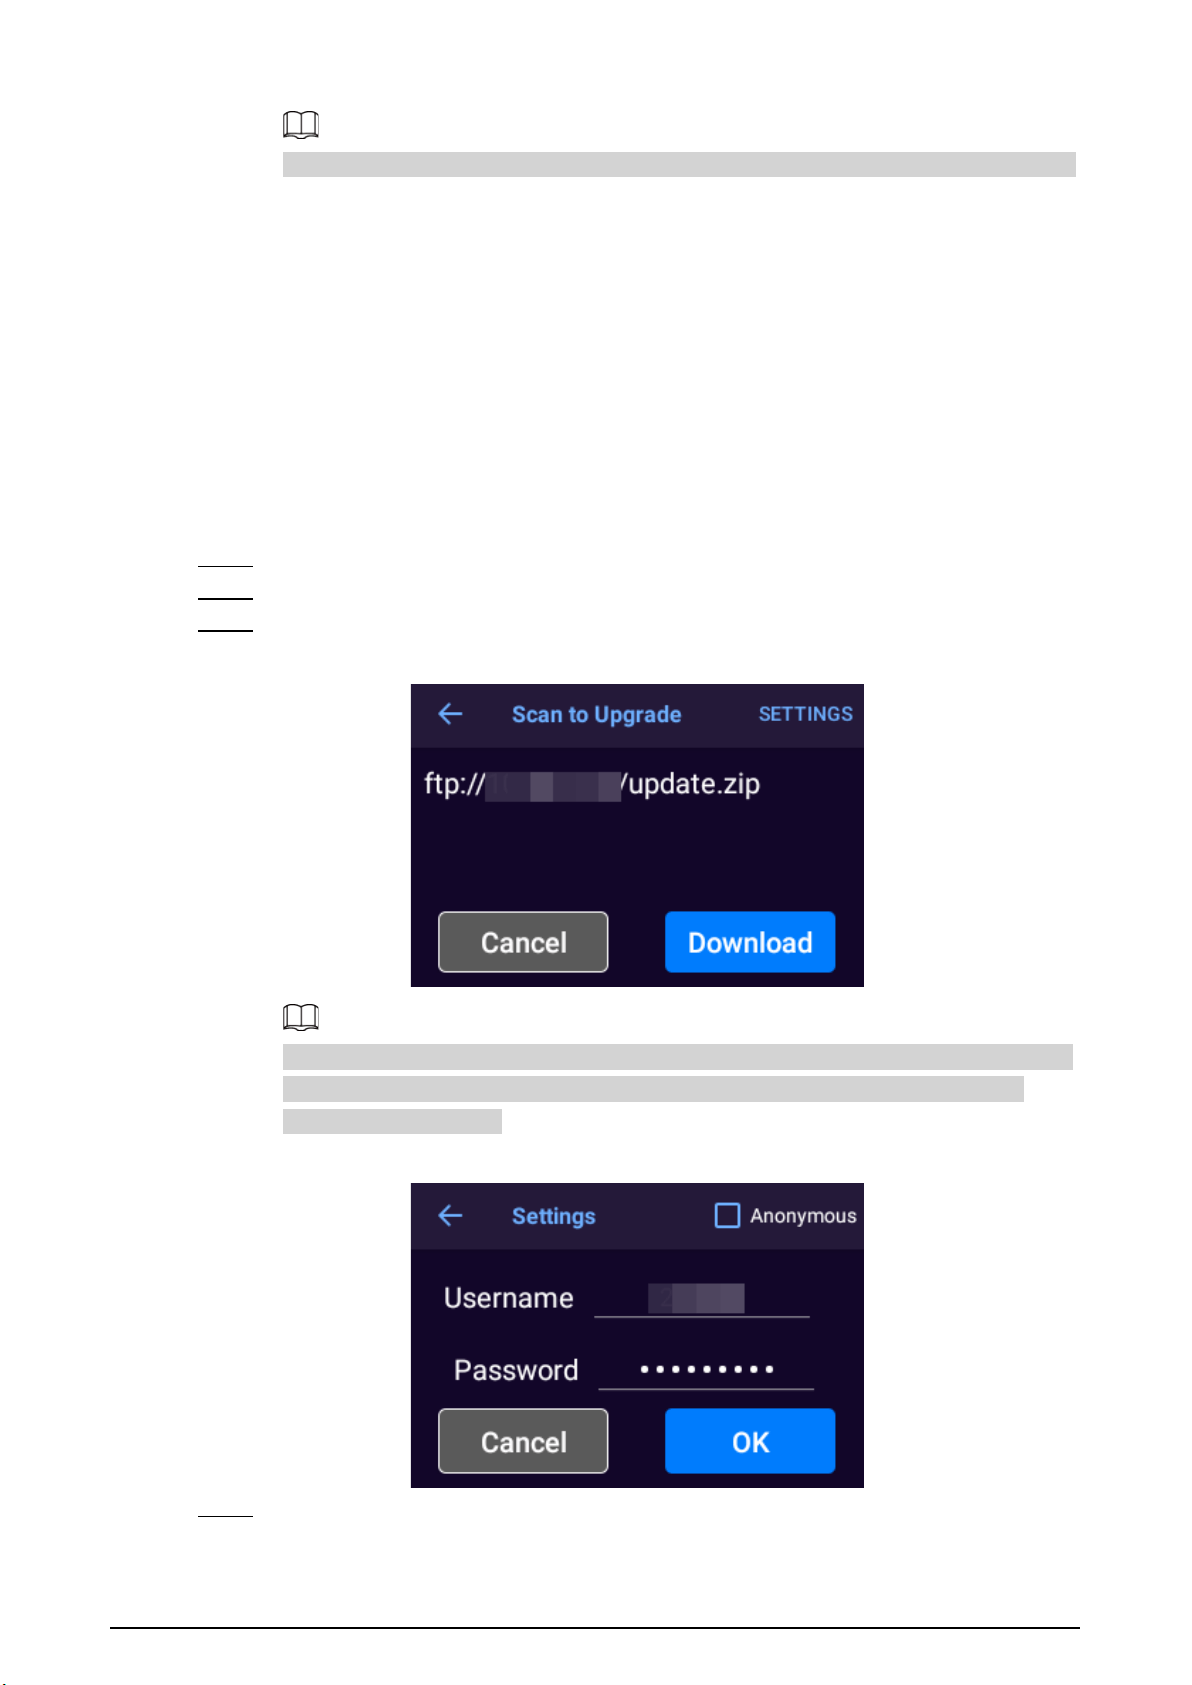
3.6.3 Scan to Update
Background Information
You can scan the QR code to get the update file and then update the system.
Procedure
Step 1 On the home screen, select
Maintenance
>
Scan to Update
.
Step 2 Scan the QR code that corresponds to the update file.
Step 3 Tap
Download
to download the update file.
Figure 3-26 Update file
Anonymous login is enabled by default. You can tap
SETTINGS
on the upper-right corner
of the
Scan to Update
screen, disable anonymous login and then configure the FTP
username and password.
Figure 3-27 Enter password
Step 4 After the download is complete, tap
OK
to update immediately.
You can also use the update file to update the system later. For details, see "4.2 Updating
34
on Local Device".
The Device suspends the download process when network breaks down and resumes
downloading when network is recovered.
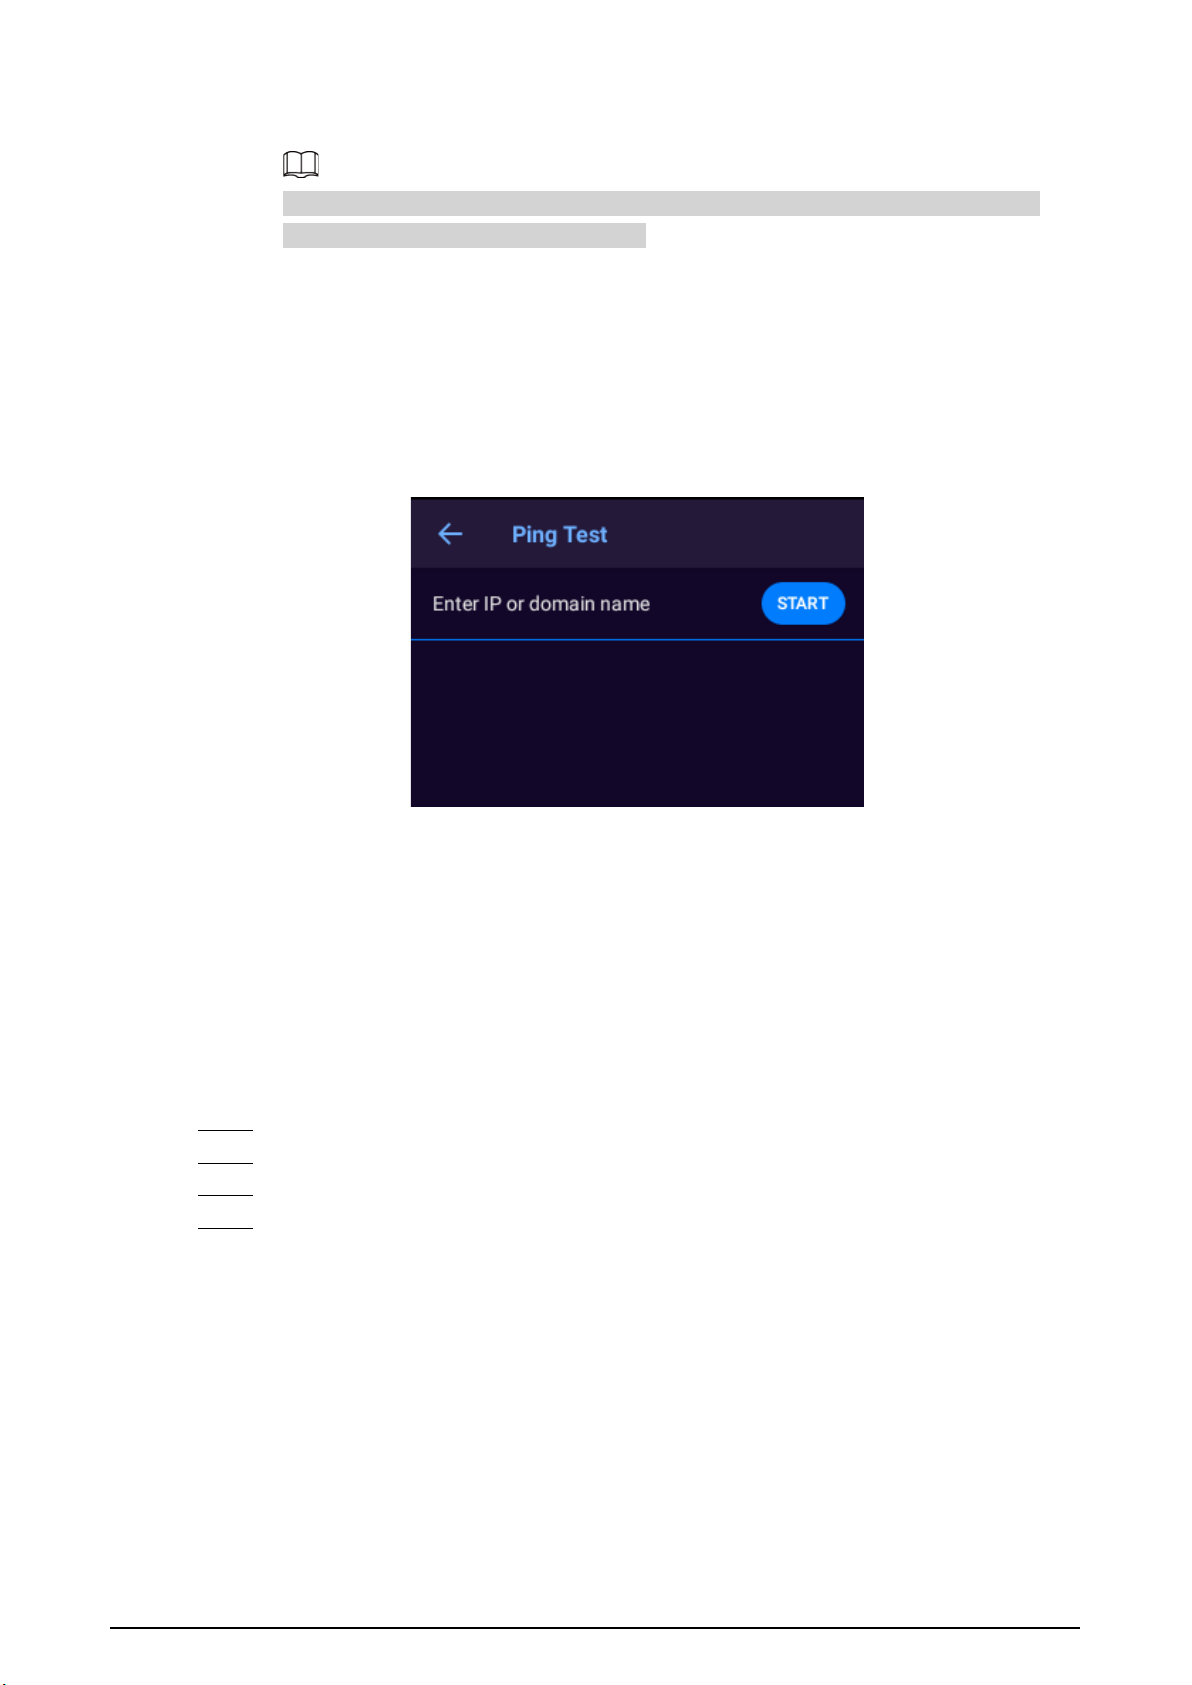
3.6.4 Ping Test
You can test the network connection.
On the home screen, select
Maintenance
>
PING test
, enter the target IP address, and then tap
START
.
Figure 3-28 Ping test
3.6.5 Network Capture
You can capture data packets and share them through Bluetooth. The packets help to diagnose and
solve network problems.
Prerequisites
To share captured packet, you need to turn on Bluetooth. For details, see "3.5.1.5 Bluetooth".
Procedure
Step 1 On the home screen, select
Maintenance
>
Network Capture
.
Step 2 Tap
Capture
to capture data packets.
Step 3 Tap
StopCap
.
Step 4 Tap
SHARE
to send the captured packet to a Bluetooth device.

35
The shared file will be deleted automatically. If you tap
Capture
again, the previously
captured packets will also be deleted automatically.
Figure 3-29 Network capture
3.6.6 Log Package
The logs record the information on the system operation, through which you can identify some
abnormal operations. You can package the logs and share them through Bluetooth.
Prerequisites
To share log package, you need to turn on Bluetooth. For details, see "3.5.1.5 Bluetooth".
Procedure
Step 1 On the home screen, select
Maintenance
>
Log Package
.
Step 2 Tap
Package
to compress logs into one package.
Step 3 Tap
SHARE
to send the log package to a Bluetooth device.
The shared file will be deleted automatically.
Figure 3-30 Network capture
3.6.7 Automatic Maintenance
On the home screen, select
Maintenance
>
Automatic Maintenance
, and then you can configure
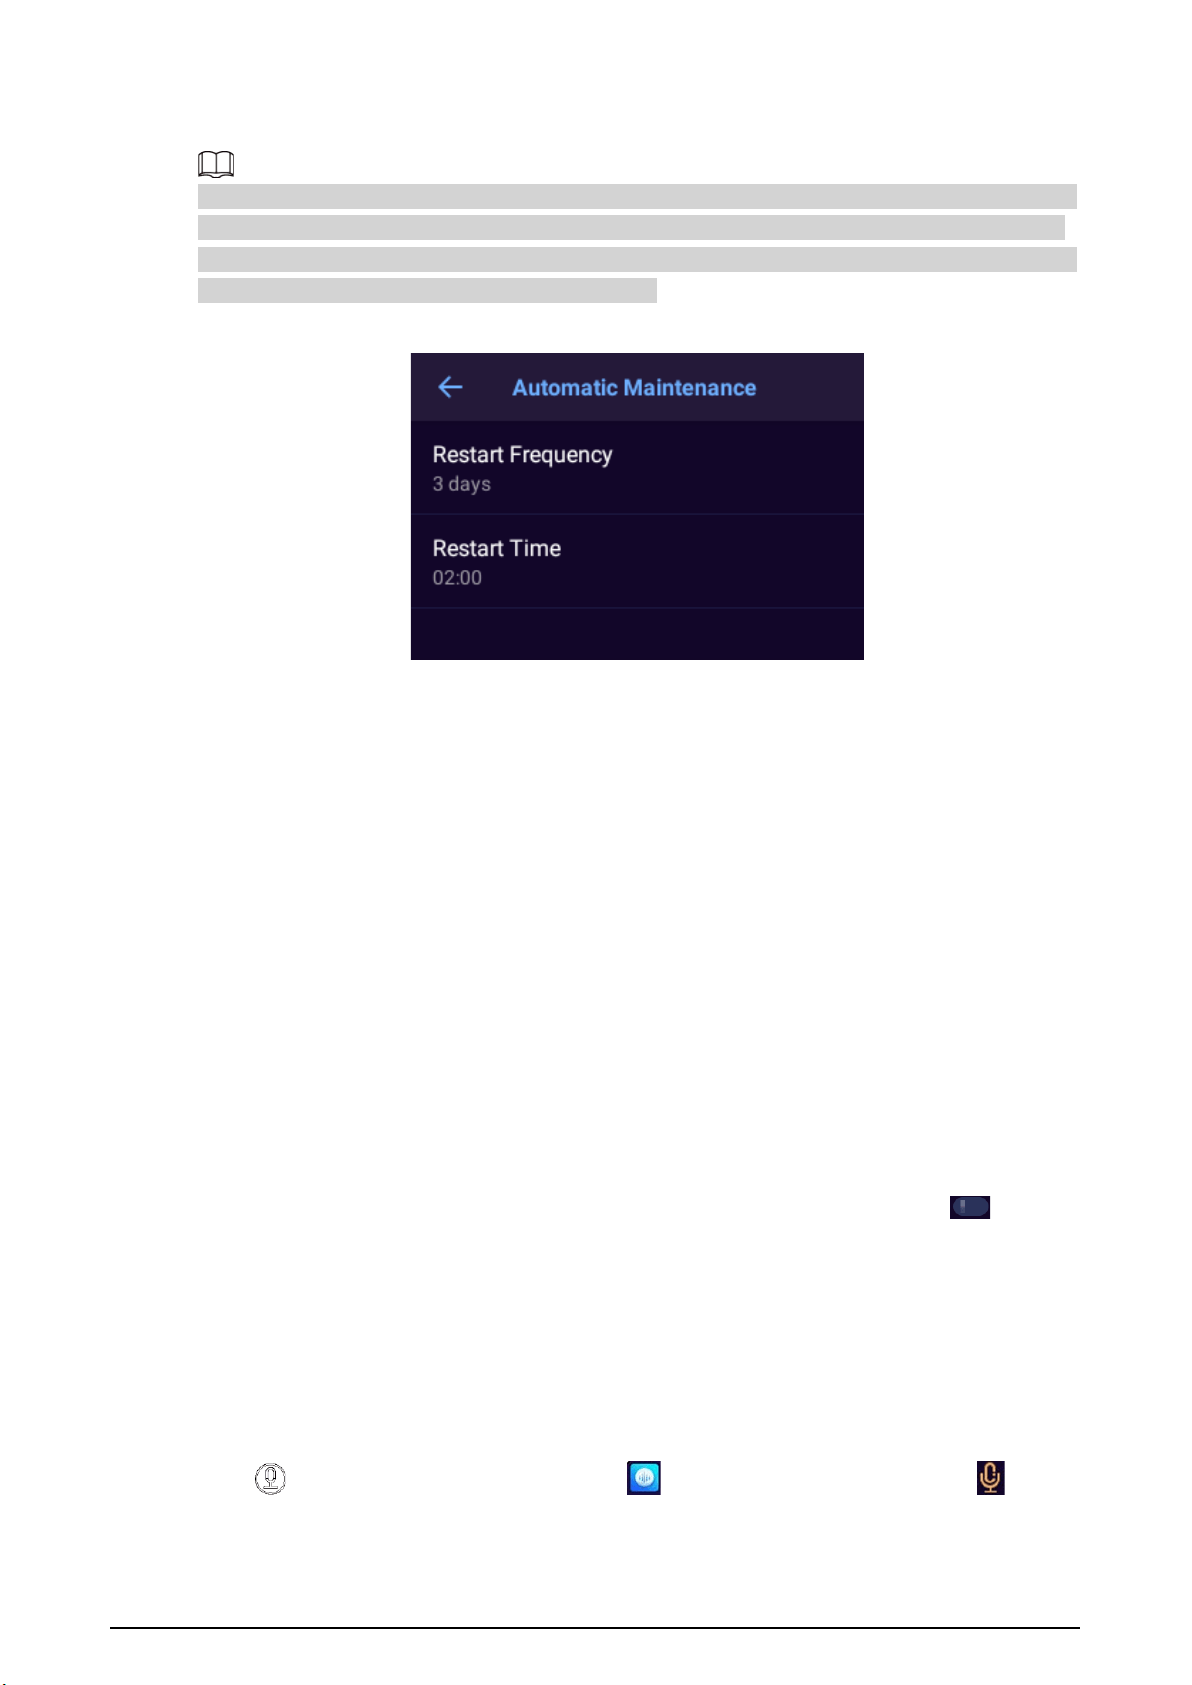
36
the restart frequency and time.
If the Device is recording audio or video at the defined restart time, restart will not happen until one
hour later. If the Device is still recording one hour later than the defined restart time, restart will be
postponed another hour. If the Device is still recording audio or video at that time, the Device will be
scheduled to restart at the predefined time next day.
Figure 3-31 Automatic maintenance
3.6.8 Remote Debugging
Though configuring the parameters such as server address, port and more, you can debug the
device remotely. You can get the network capture and log on the platform.
On the home screen, select
Maintenance
>
Remote Debugging
, configure the parameters and
then tap
START
.
3.6.9 Signal Strength and Band
Check the signal and band of SIM card.
On the home screen, select
Maintenance
>
Signal Strength and Band
, the network information,
signal intensity and band of SIM card will be displayed automatically.
3.6.10 ADB Network Debugging
On the home screen, select
Maintenance
>
ADB Network Debugging
, and then tap . After the
device connects to the network, you can debug the device through ADB network.
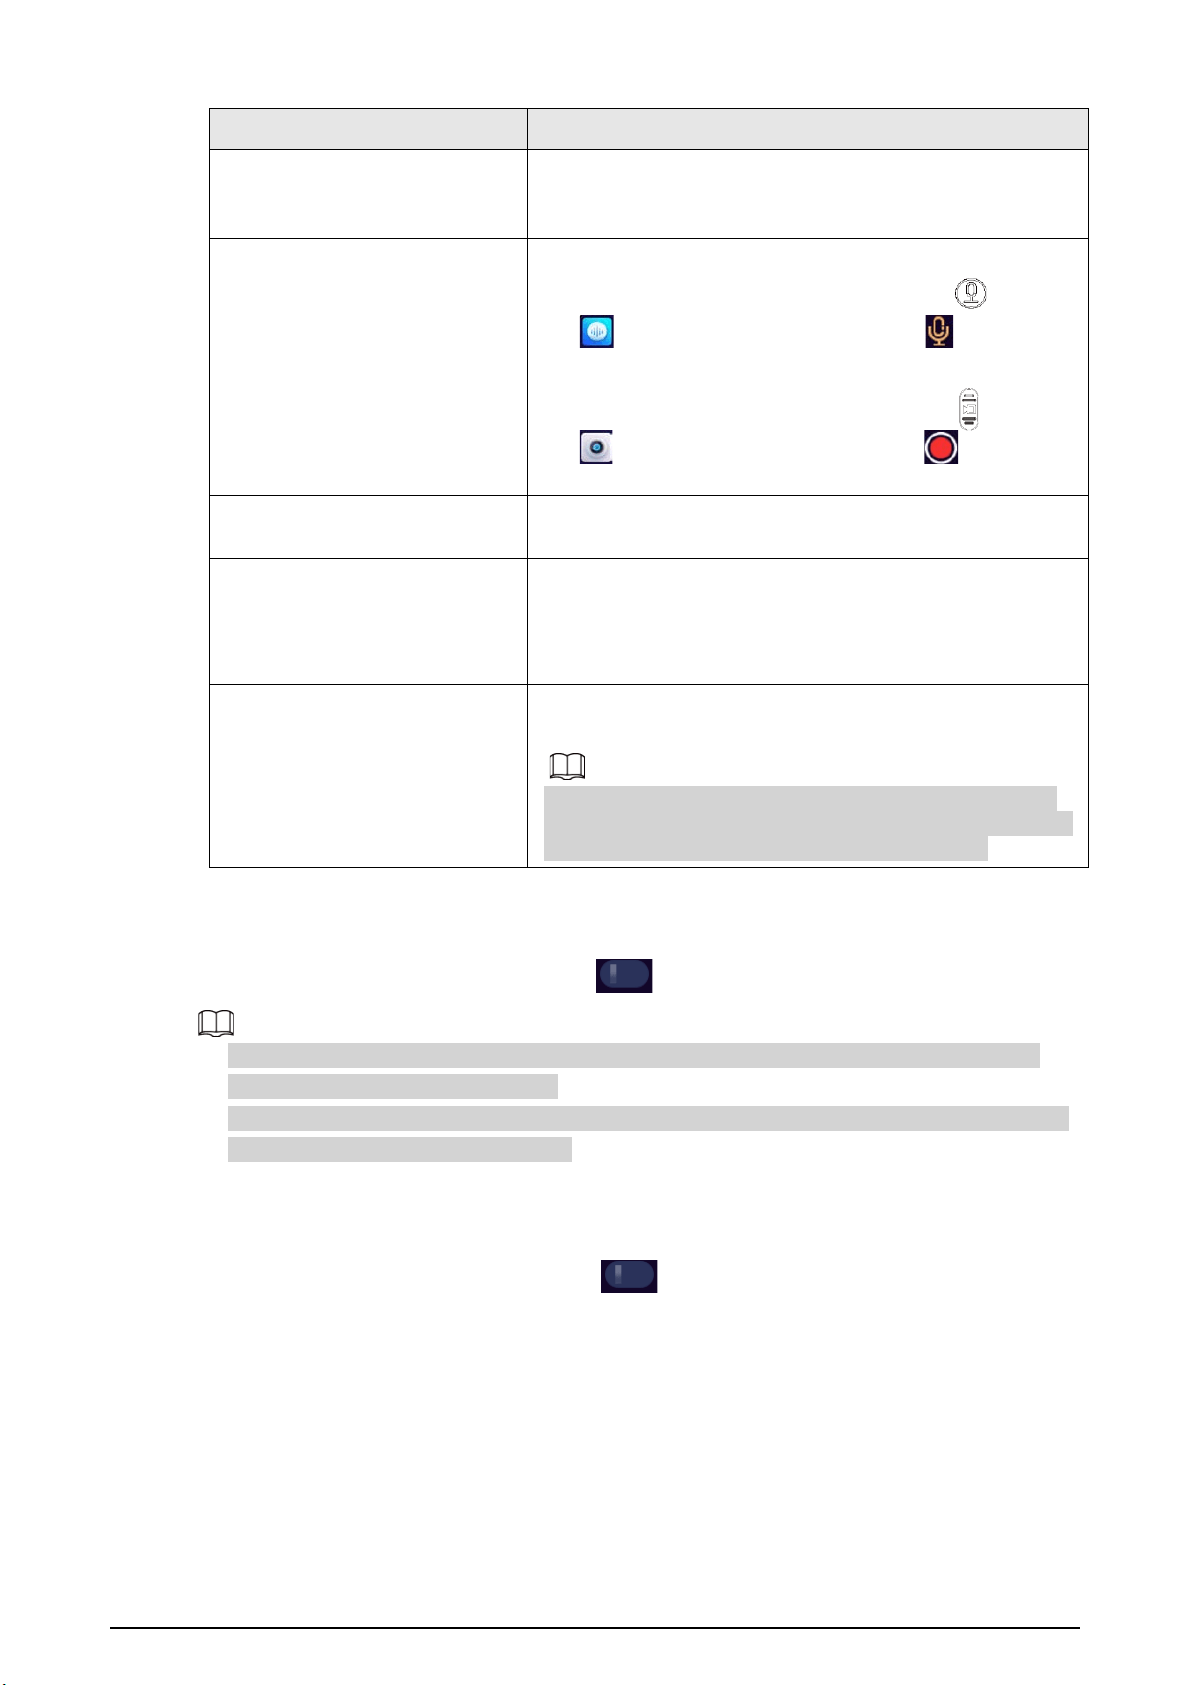
3.7 Audio Recording
3.7.1 Recording Audio
Press on any screen to record audio, or tap on the home screen, and then tap .
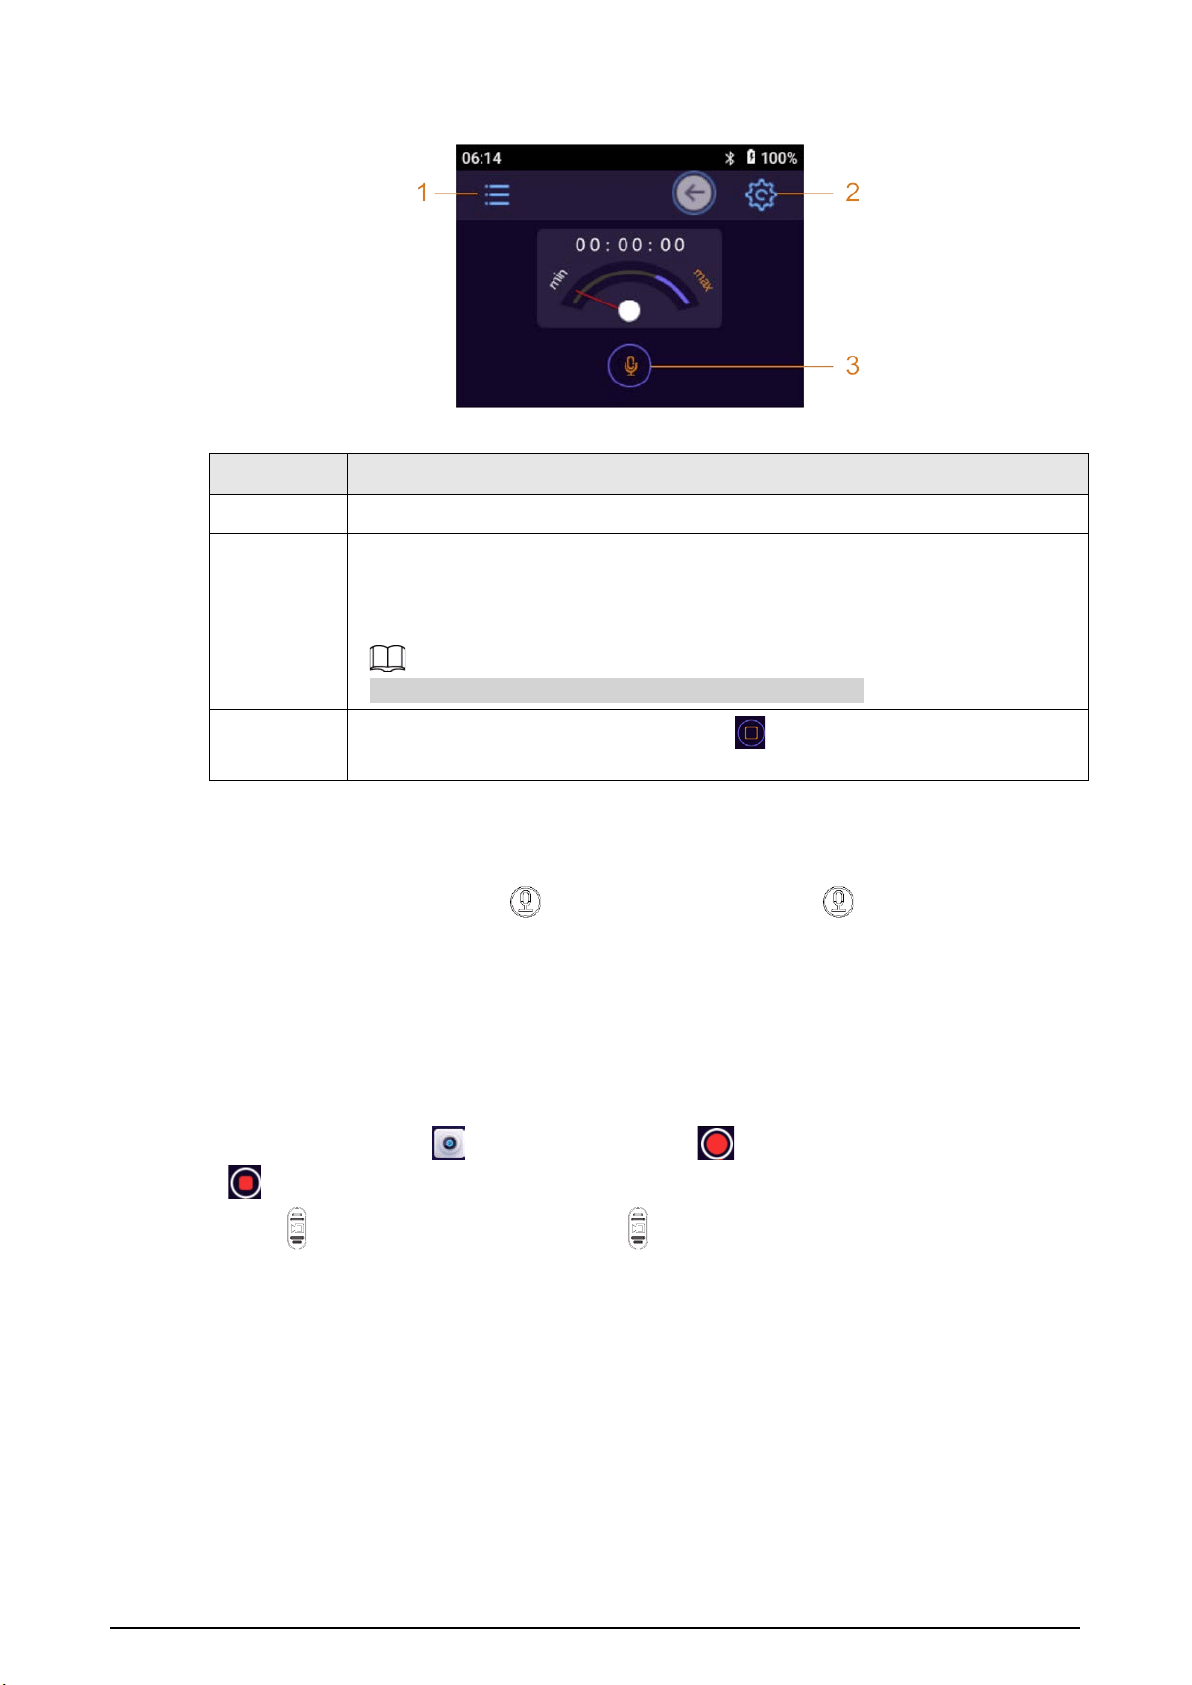
37
Figure 3-32 Record audio
Table 3-12 Audio recording functions
No. Function
1 Tap the icon and then enter password to view and manage audio files.
2
Tap the icon to set audio format and file format.
●
Audio format: AAC and G.711A.
●
File type: dav and aac.
During recording audio process, icon 1 and 2 are hidden.
3
Tap the icon to start recording audio. Tap to stop. System prompts "Stop
recording audio".
3.7.2 One Press to Record Audio
When the Device is sleeping, press to start recording audio. Press again to stop.
3.8 Video Recording
3.8.1 Recording Video
●
To start recording, tap on the home screen, tap to start recording video, and then tap
to stop recording.
●
Press to start recording video, and press again to stop recording.
38
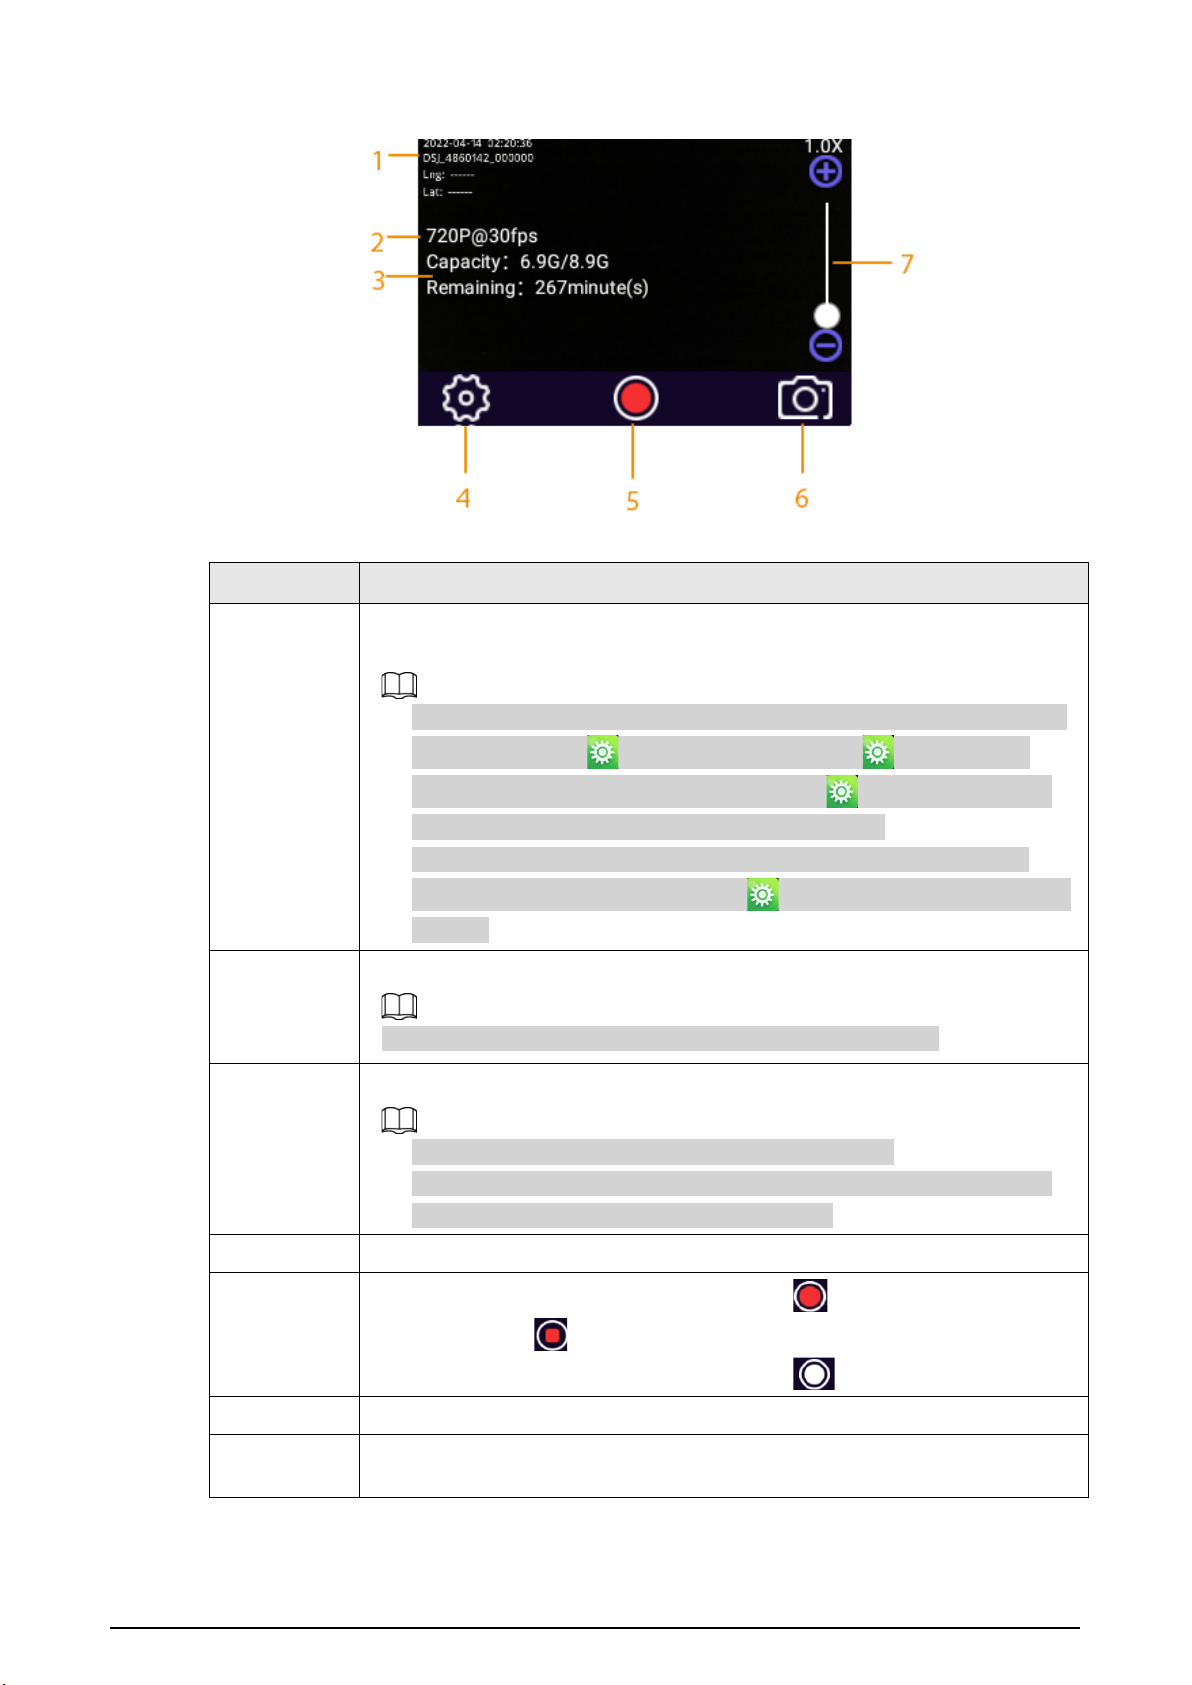
Figure 3-33 Record video
Table 3-13 Video recording functions
No. Description
1
Date, time, serial number, police officer number, GPS information, and custom
information.
●
To show GPS information, make sure that location service and GPS display
are enabled. Select >
Network
>
Location
or >
Location
>
Location Service
to enable positioning; select >
Device
>
Camera
Settings
>
Overlay
>
GPS OSD
to enable GPS display.
●
Supports to configure the custom OSD information on local, and then
enable custom information display in >
Device
>
Camera Settings
>
Overlay
.
2
Video quality.
Shows picture resolution when the Device is in capturing mode.
3
Remaining capacity/total capacity, and remaining recording time.
●
The remaining recording time varies with video quality.
●
Shows the remaining capacity/total capacity in capturing mode, and the
remaining number of pictures that you can take.
4 Camera settings. For details, see "3.5.2.2 Camera Settings".
5
●
When the Device is in recording mode, tap to start recording video
and then tap to stop.
●
When the Device is in capturing mode, tap to take a picture.
6 Tap to switch between recording mode and capturing mode.
7
Tap the screen to display the zoom bar. The bar can be zoomed at 1.0 to 8.0
times by dragging the zoom bar.

39
3.8.2 One Press to Record a Video
When the Device is sleeping, press to start recording video. The Device prompts "Start recording
video" and the login screen is displayed with a recording icon in the notification bar.
Press again to stop recording video, and you can hear a sound prompt "Stop recording video".
If the device you are using has a recording button on the back, you can press the button to start
recording a video.
3.8.3 Focusing
On the live view screen, tap the screen, and then a focus bar appears. Drag the focus bar to zoom in
or out the image at X1.0 to X8.0.
3.8.4 Marking Important Videos
Press and hold during recording, and a yellow mark
★
will appear on the top of the screen,
which means the video is marked as an important file. Tap to view files. The important files are
marked with
★
, and their names end with _IMP.
3.9 Pictures
3.9.1 Taking a Picture
On the live view screen, press or tap . The working indicator light flashes and system
prompts success.
3.9.2 One Press to Take a Picture
When the Device is sleeping, press to take a picture. If you have configured continuous shot, you
can press once to take the defined number of pictures.
3.10 Smart Operation
Intelligent detection is to extract key information through image processing and analysis, and
compare with the per-set detection rules. The device supports face detection and ANPR.
3.10.1 Face Detection
When the face image is detected in the face detection area, the detection result will be show on the
40
right side of the screen and a record be kept in file management.
On the home screen, select
Camera
, and then put the face in the detection area. The detection result
will be show on the right side of the screen.
●
The face detection function is enabled. For the detailed information, see
"3.5.2.3 Face Settings".
●
Tap or to expand or show less the detection result.
3.10.2 ANPR
When the license plate is detected in the detection area, the detection result will be show on the
right side of the screen and a record be kept in file management.
On the home screen, select
Camera
, and then put the license plate in the detection area. The
detection result will be show on the right side of the screen.
●
The ANPR function is enabled. For the detailed information, see
"3.5.2.4 Plate Settings".
●
When the
Vibrate
function is enabled, the device will vibrate when a license plate is detected.
●
Tap or to expand or show less the detection result.
3.11 Files
You can view pictures, videos, and audio files saved in your device.
You cannot upload or edit the files on the model that does not support network connection.
3.11.1 Viewing Pictures
Procedure
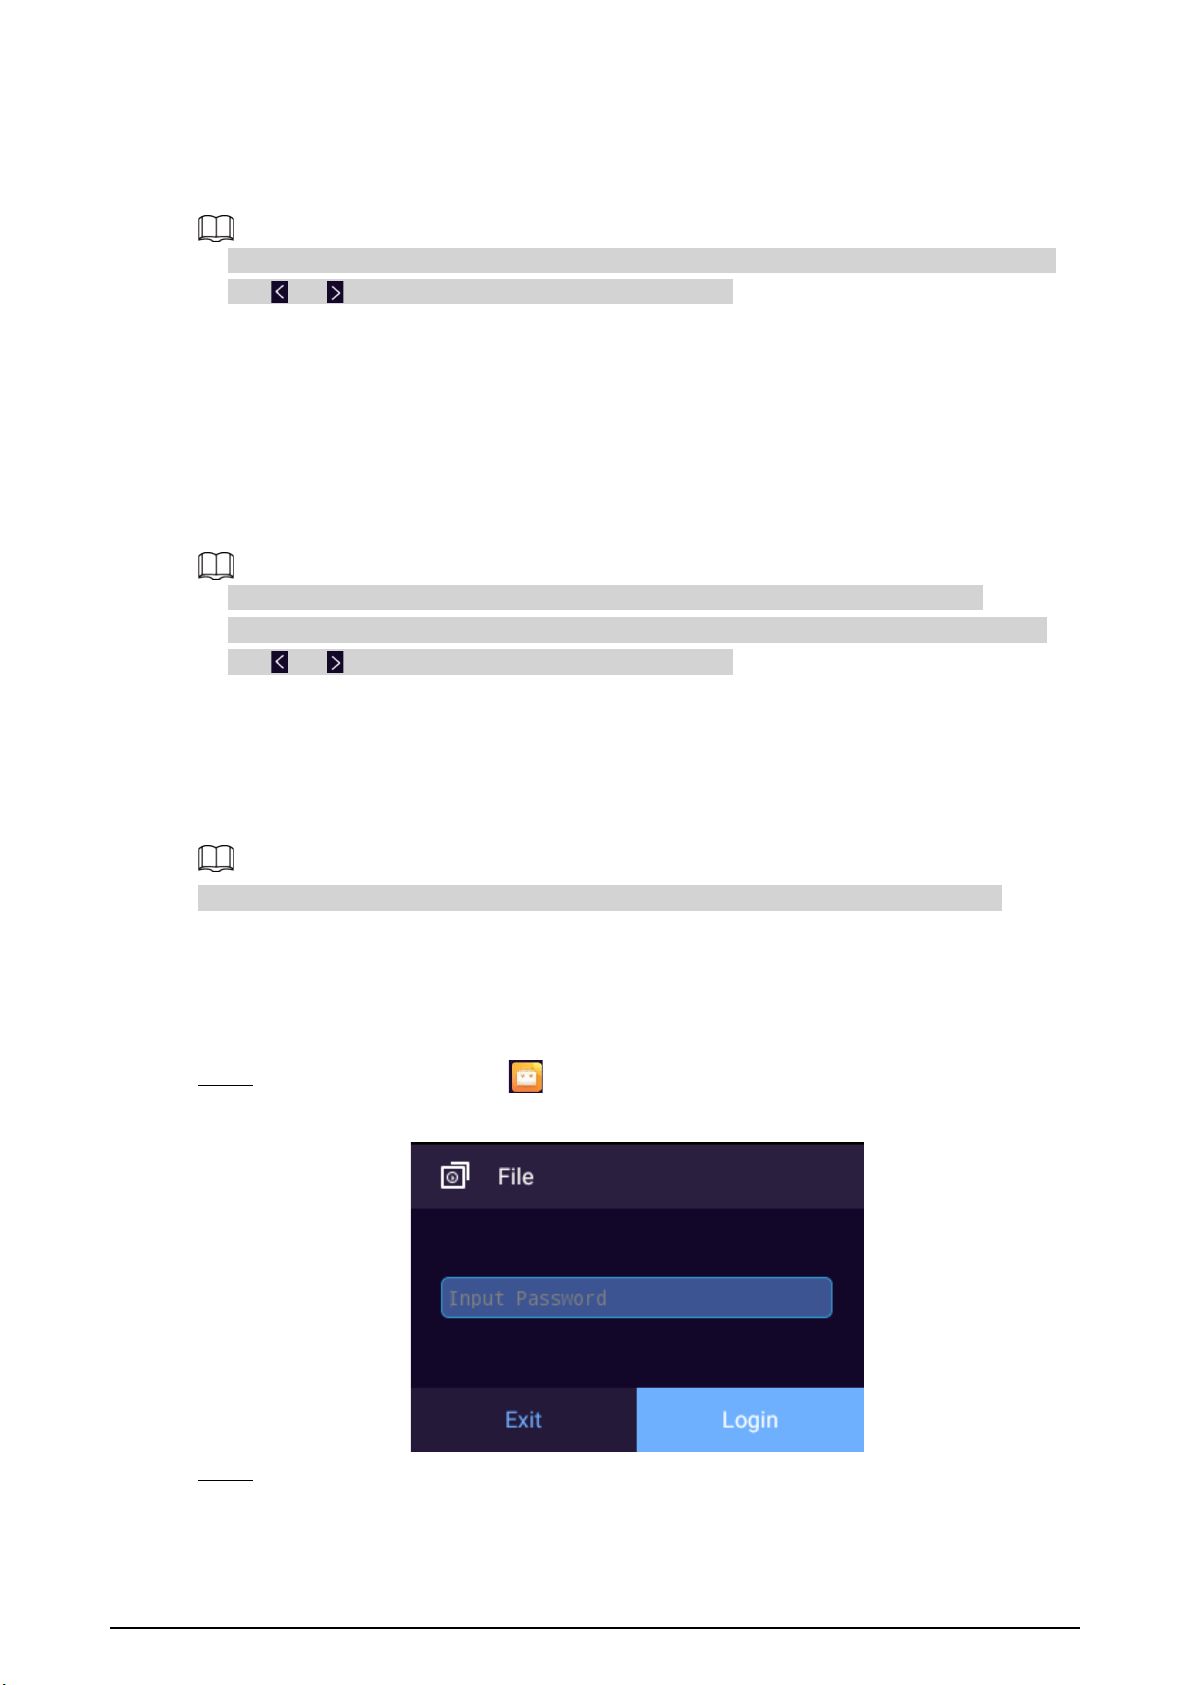
Step 1 On the home screen, tap .
Figure 3-34 Login for file management
Step 2 Enter your login password, and then tap
Login
.
41
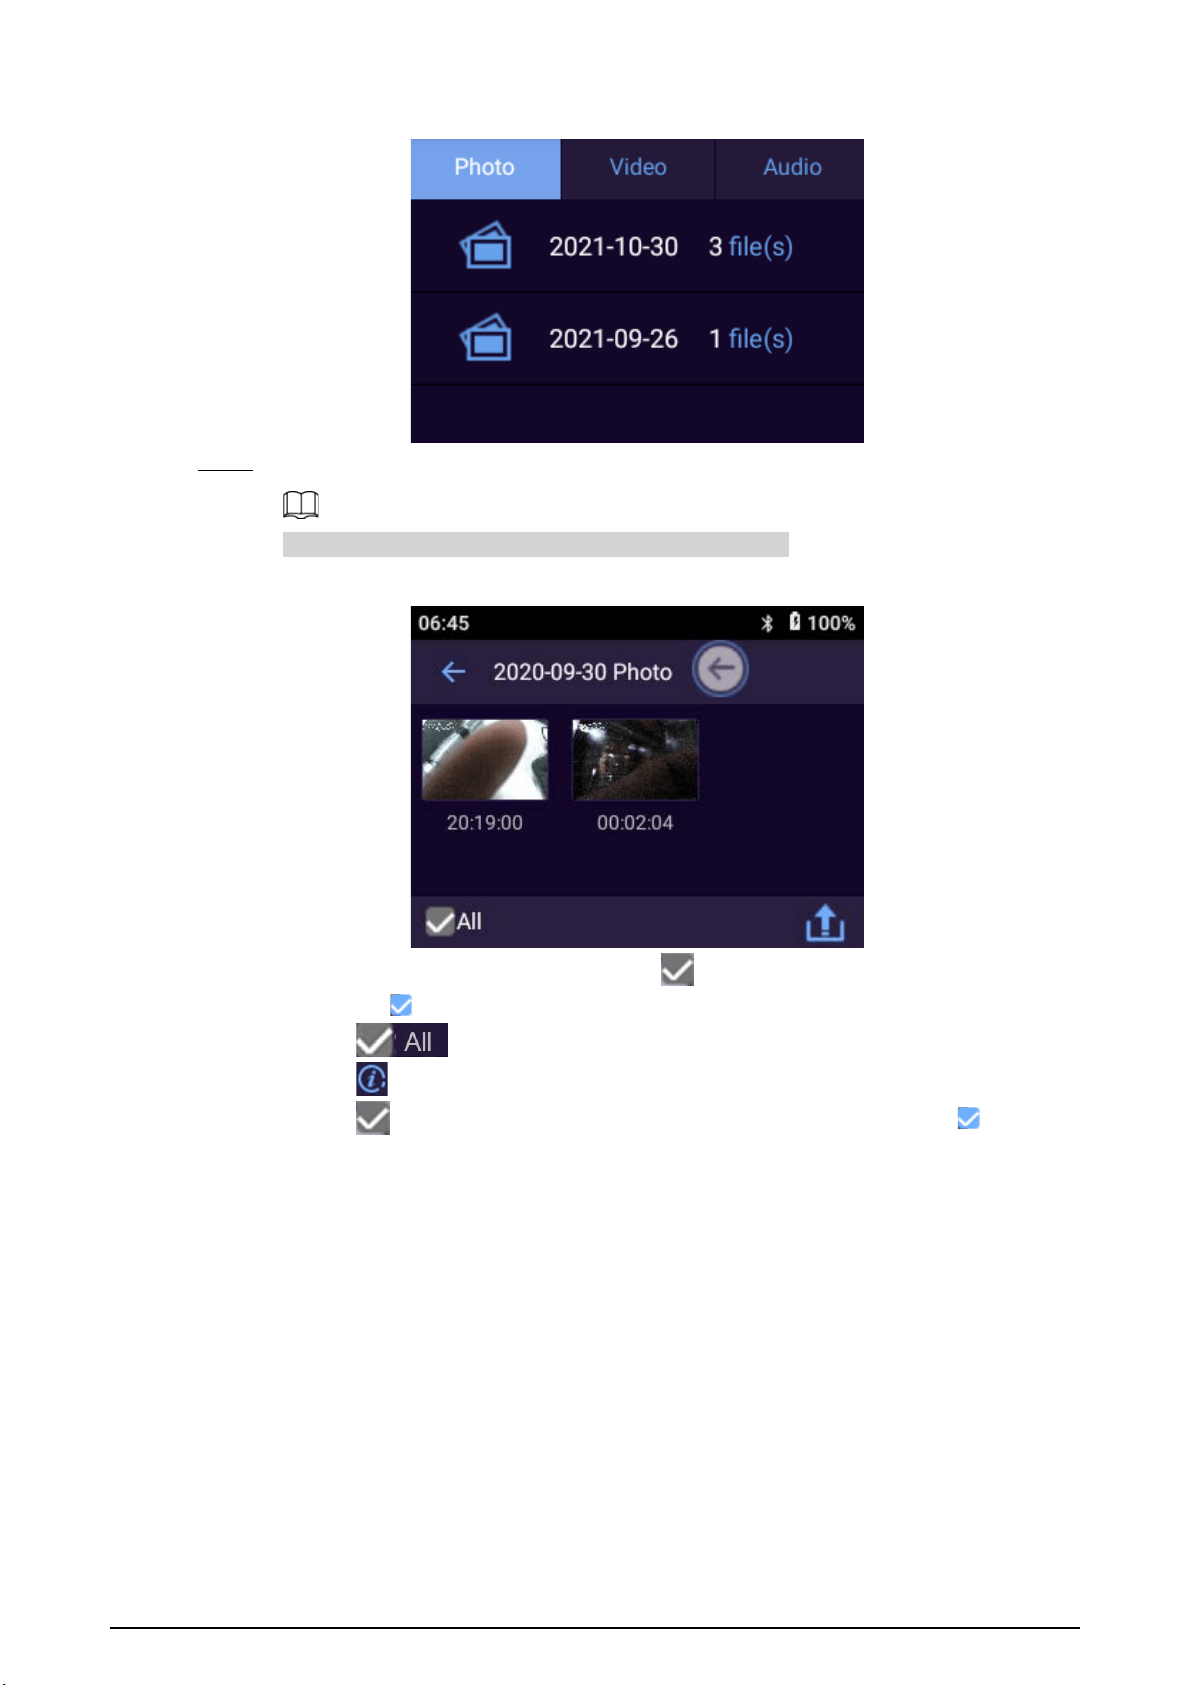
Figure 3-35 Files
Step 3 Select a folder, and then tap a picture to play.
Automatically creates folders after the device is initialized.
Figure 3-36 Select a picture
●
To select a picture, tap and hold it, and appears on the right-upper corner of the
picture. means the picture has been selected.
●
Tap to select all the pictures in the current folder.
●
Tap to view details of the selected picture, such as file type, size, and resolution.
Tap next to
Important
to mark the picture as an important file. Tap to cancel
the mark.
42
Whether you are marking a file as an important file or canceling the mark, you need to
tap
OK
to make the change effective.
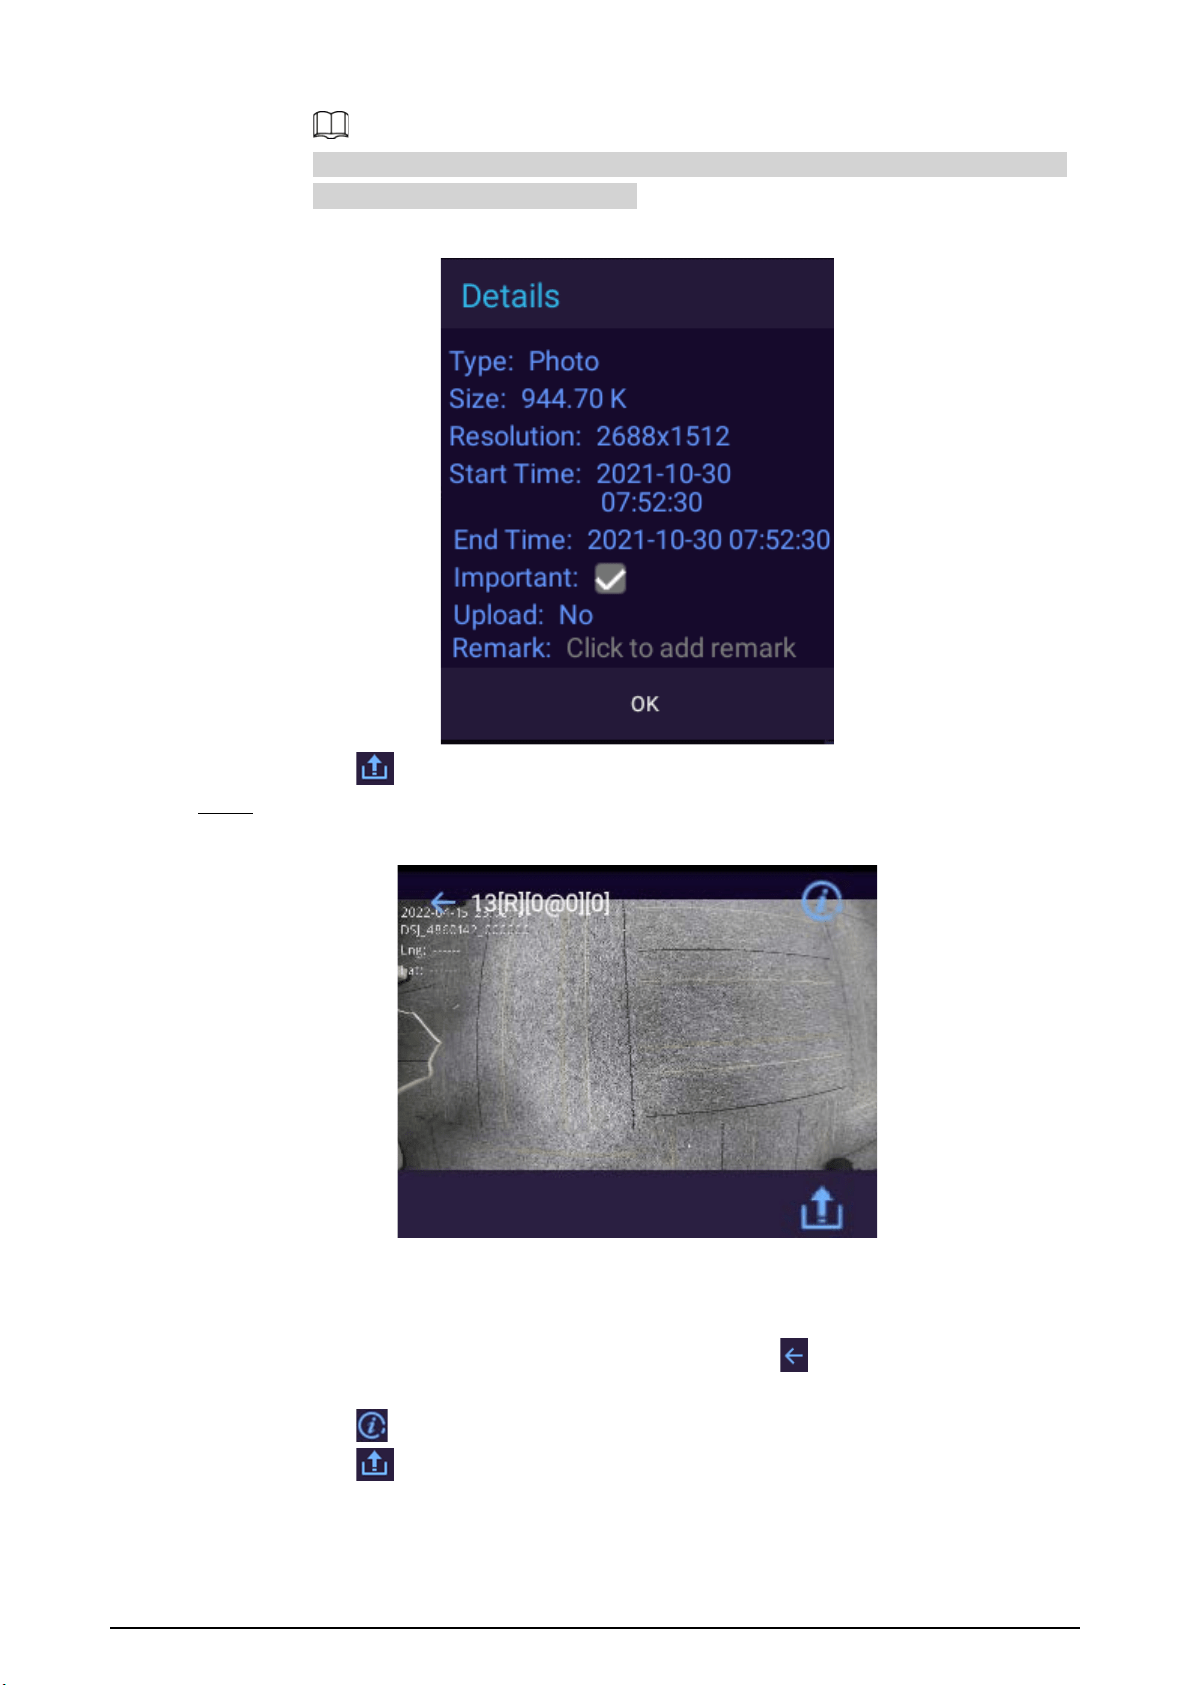
Figure 3-37 Details
●
Tap to upload the picture to the platform.
Step 4 Tap a picture.
Figure 3-38 View a picture
●
When viewing a picture, swipe left or right on the screen to see the previous or next
pictures.
●
Use two finger to zoom in or out the picture.
●
When floating button is used for back operation, tap to go back to the picture list;
when gesture is used, swipe left or right from the screen edge instead.
●
Tap to view picture details back operation.
●
Tap to upload the picture to platform..
43
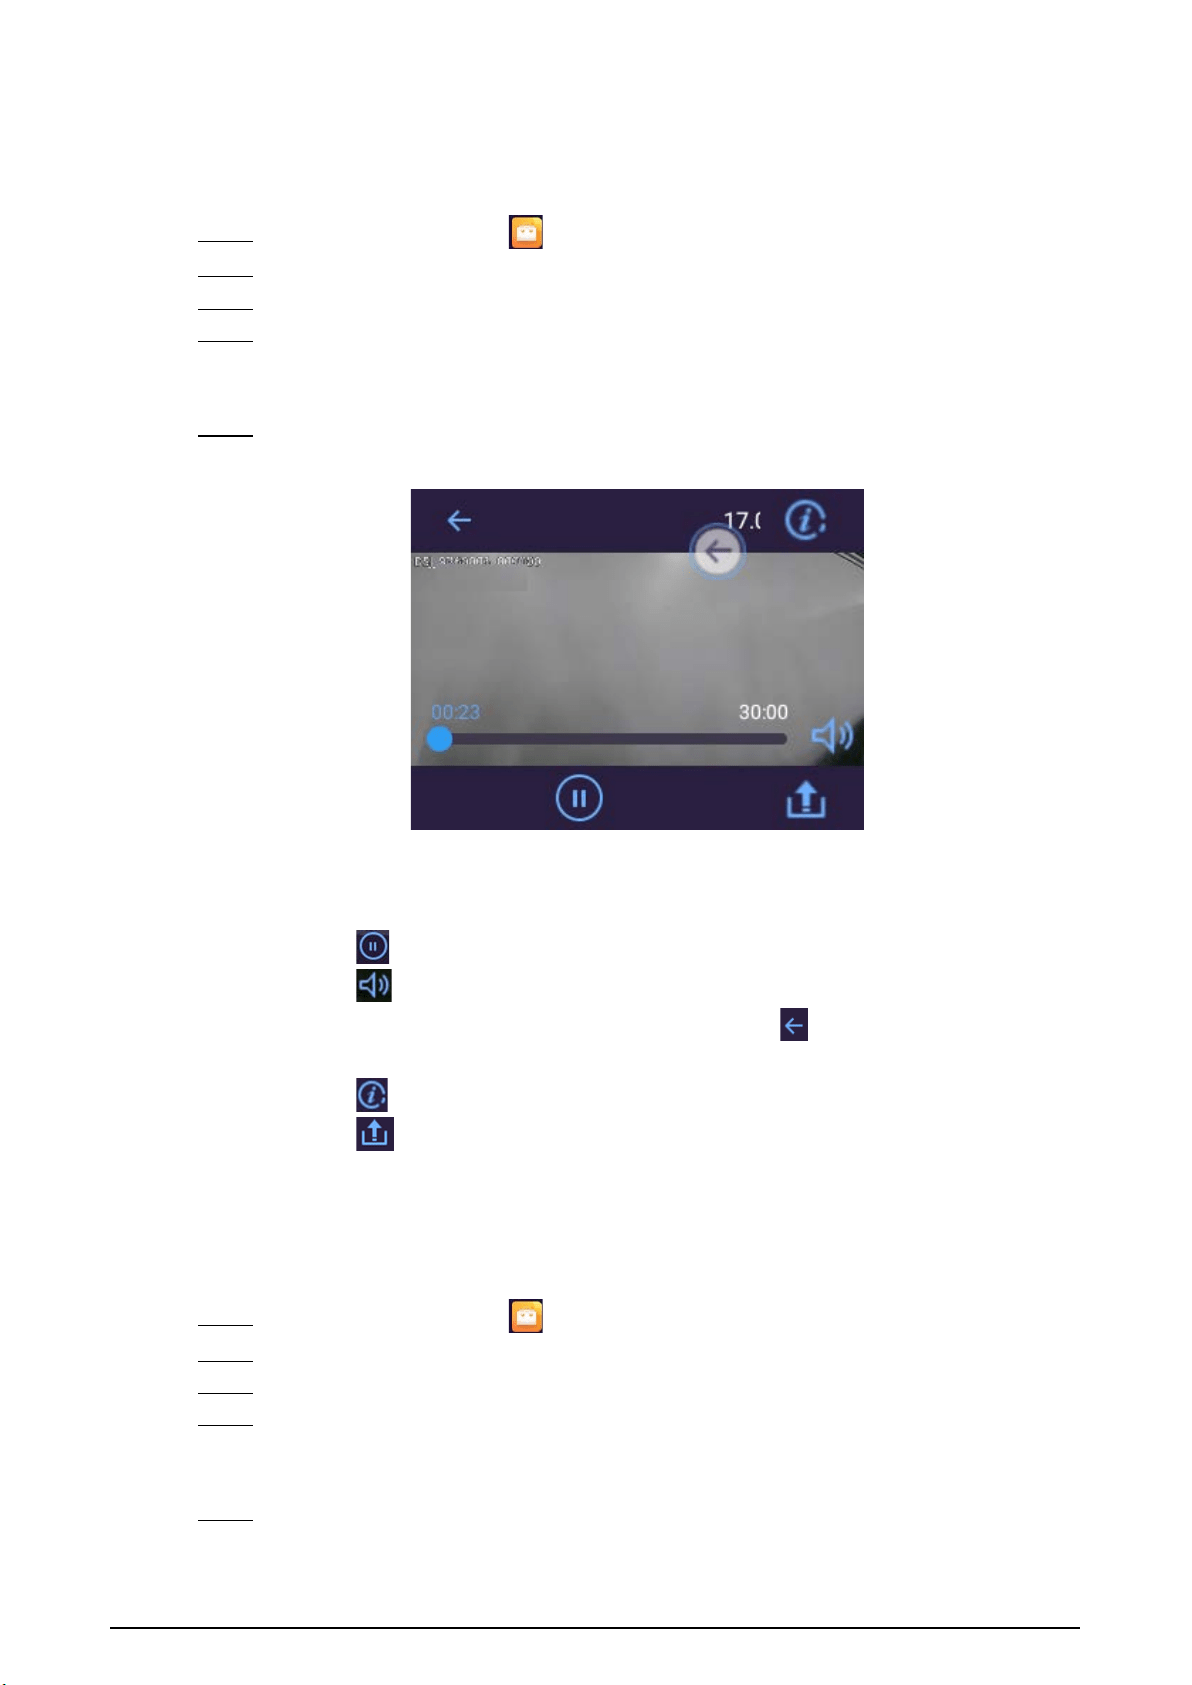
3.11.2 Playing Video
Procedure
Step 1 On the home screen, tap .
Step 2 Enter your login password, and then tap
Login
.
Step 3 Tap the
Video
tab.
Step 4 Select a folder.
The folders are displayed in chronological order, and the newest folder is on the top of the
list.
Step 5 Tap the video file to play.
Figure 3-39 Play video
●
When viewing a video, swipe left or right on the screen to play the previous or next
videos.
●
Drag the progress bar to fast-forward or rewind.
●
Tap to pause.
●
Tap to adjust volume.
●
When floating button is used for back operation, tap to go back to the video list;
when gesture is used, swipe left or right from the screen edge instead.
●
Tap to view video details.
●
Tap to upload the current video to the platform.
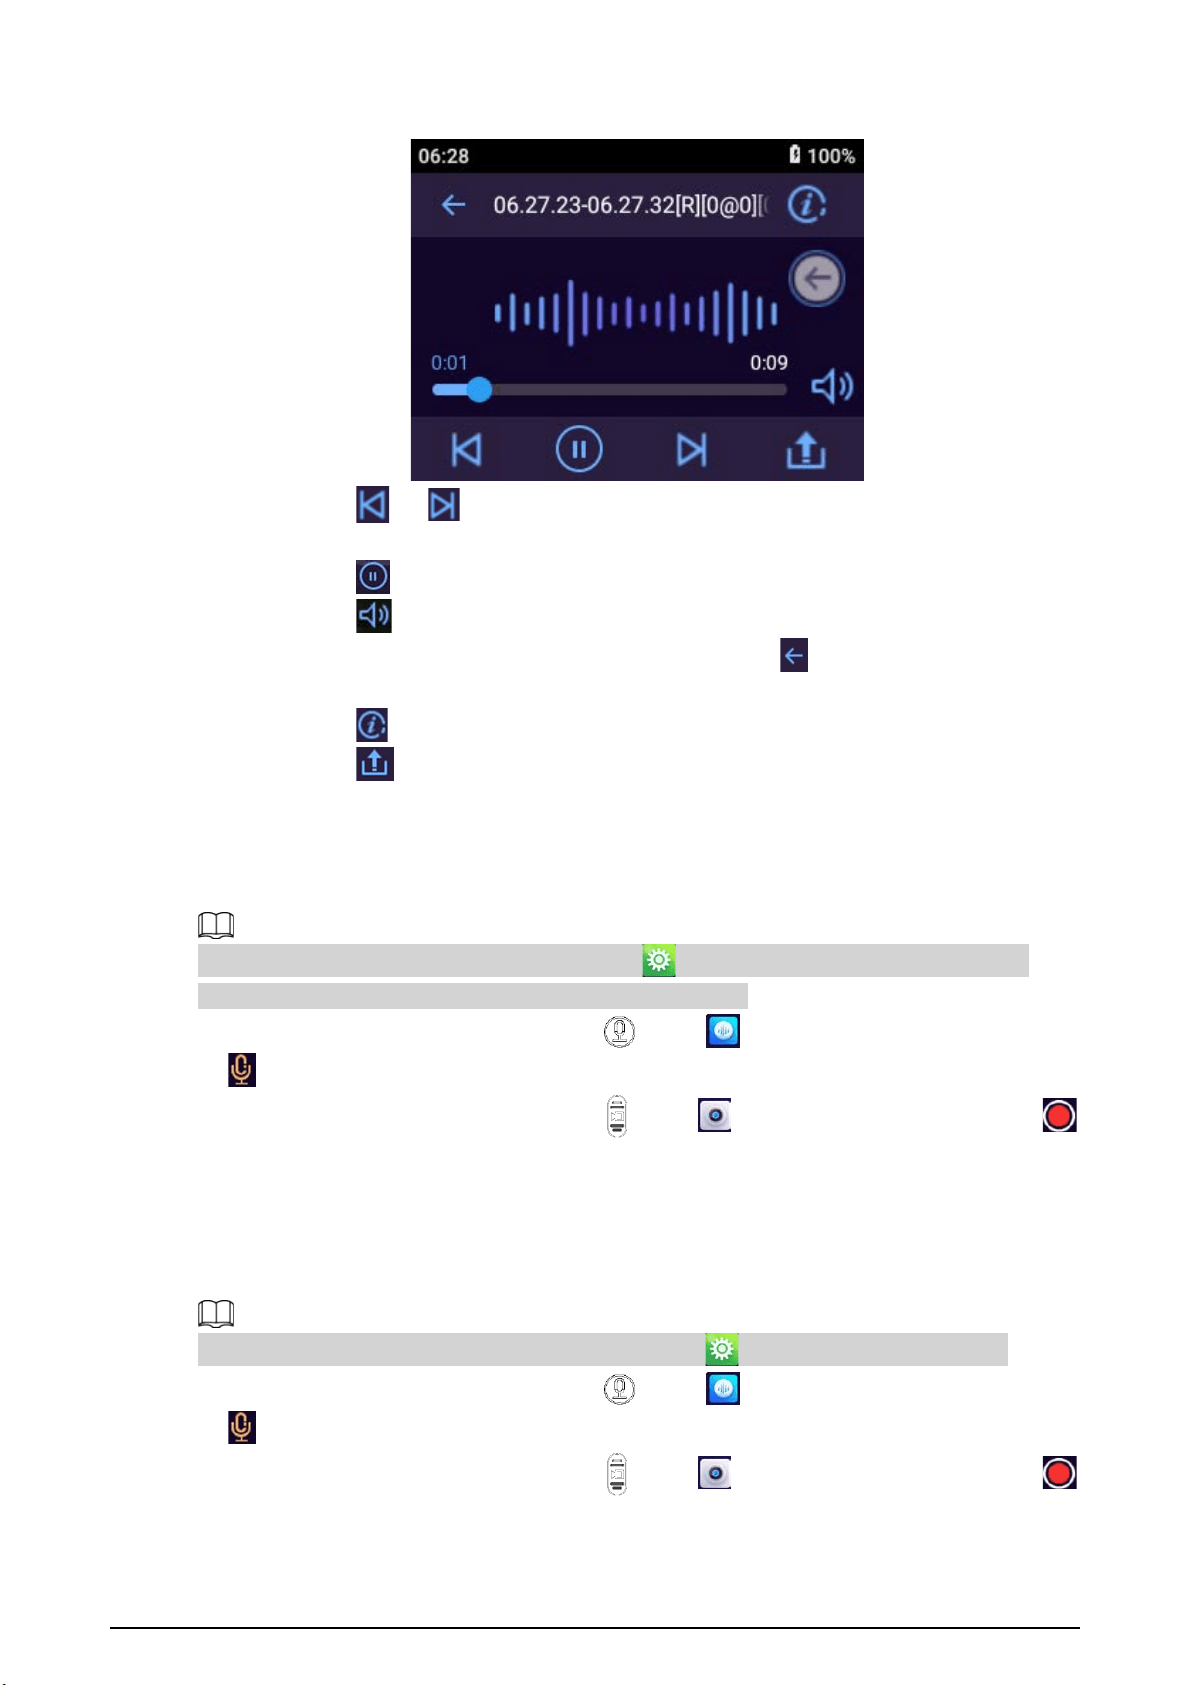
3.11.3 Playing Audio
Procedure
Step 1 On the home screen, tap .
Step 2 Enter your login password, and then tap
Login
.
Step 3 Tap the
Audio
tab.
Step 4 Select a folder.
The folders are displayed in chronological order, and the newest folder is on the top of the
list.
Step 5 Tap the audio file to play.
44
Figure 3-40 Play audio
●
Tap or to play the previous or next audio in the folder.
●
Drag the progress bar to fast-forward or rewind.
●
Tap to pause.
●
Tap to adjust volume.
●
When floating button is used for back operation, tap to go back to the audio list;
when gesture is used, swipe left or right from the screen edge instead.
●
Tap to view audio details.
●
Tap to upload the current audio to the platform.
3.12 Switching between Video and Audio Recording
With
Record Video&Audio
disabled by default in >
Device
>
Camera Settings
, you can
switch between video and audio recording with a simple press.
●
When the Device is recording video, press , or tap on the home screen and then tap
to stop recording video and start recording audio.
●
When the Device is recording audio, press , or tap on the home screen and then tap
to stop recording audio and start recording video.
3.13 Recording Audio & Video at the Same Time
Make sure that you have enabled Record Video&Audio in >
Device
>
Camera Settings
.
●
When the Device is recording video, press , or tap on the home screen and then tap
to start recording audio at the same time.
●
When the Device is recording audio, press , or tap on the home screen and then tap
to start recording video at the same time.
45
3.14 IR Light
IR light can be used to assist in shooting at night or with low illuminance.
Swipe down the notification bar, and then tap to enable the IR light, and the icon turns to .
Tap . to turn off the IR light.
The IR light cannot be enabled when the battery level is lower than 5%.
3.15 White Light
When shooting in dark, you can use white light to illuminate.
Swipe down the notification bar, and then tap to enable the white light, and the icon turns to
. Tap to turn off the white light.
The white light cannot be enabled when the battery level is lower than 5%.
3.16 Data Transmission
You can upload data from the Device to MPT Manager and data acquisition station.
For the model that does not support network connection, data transmission to the platform is not
available.
●
Make sure that the
Private Protocol
is enabled.
●
After starting the Device, use USB cable to connect the Device to the PC, start MPT Manager,
enter password, and then confirm to download the data.
●
Start the Device, and connect it to a legal data acquisition station through the USB cable. For the
first-time use, you need to enter the password, and then the data on the Device can be uploaded
to data acquisition station. If the device information is not displayed on the interface, unplug USB
and plug it again.
46
4 System Update
You can update the system on MPT Manager or on the local device.
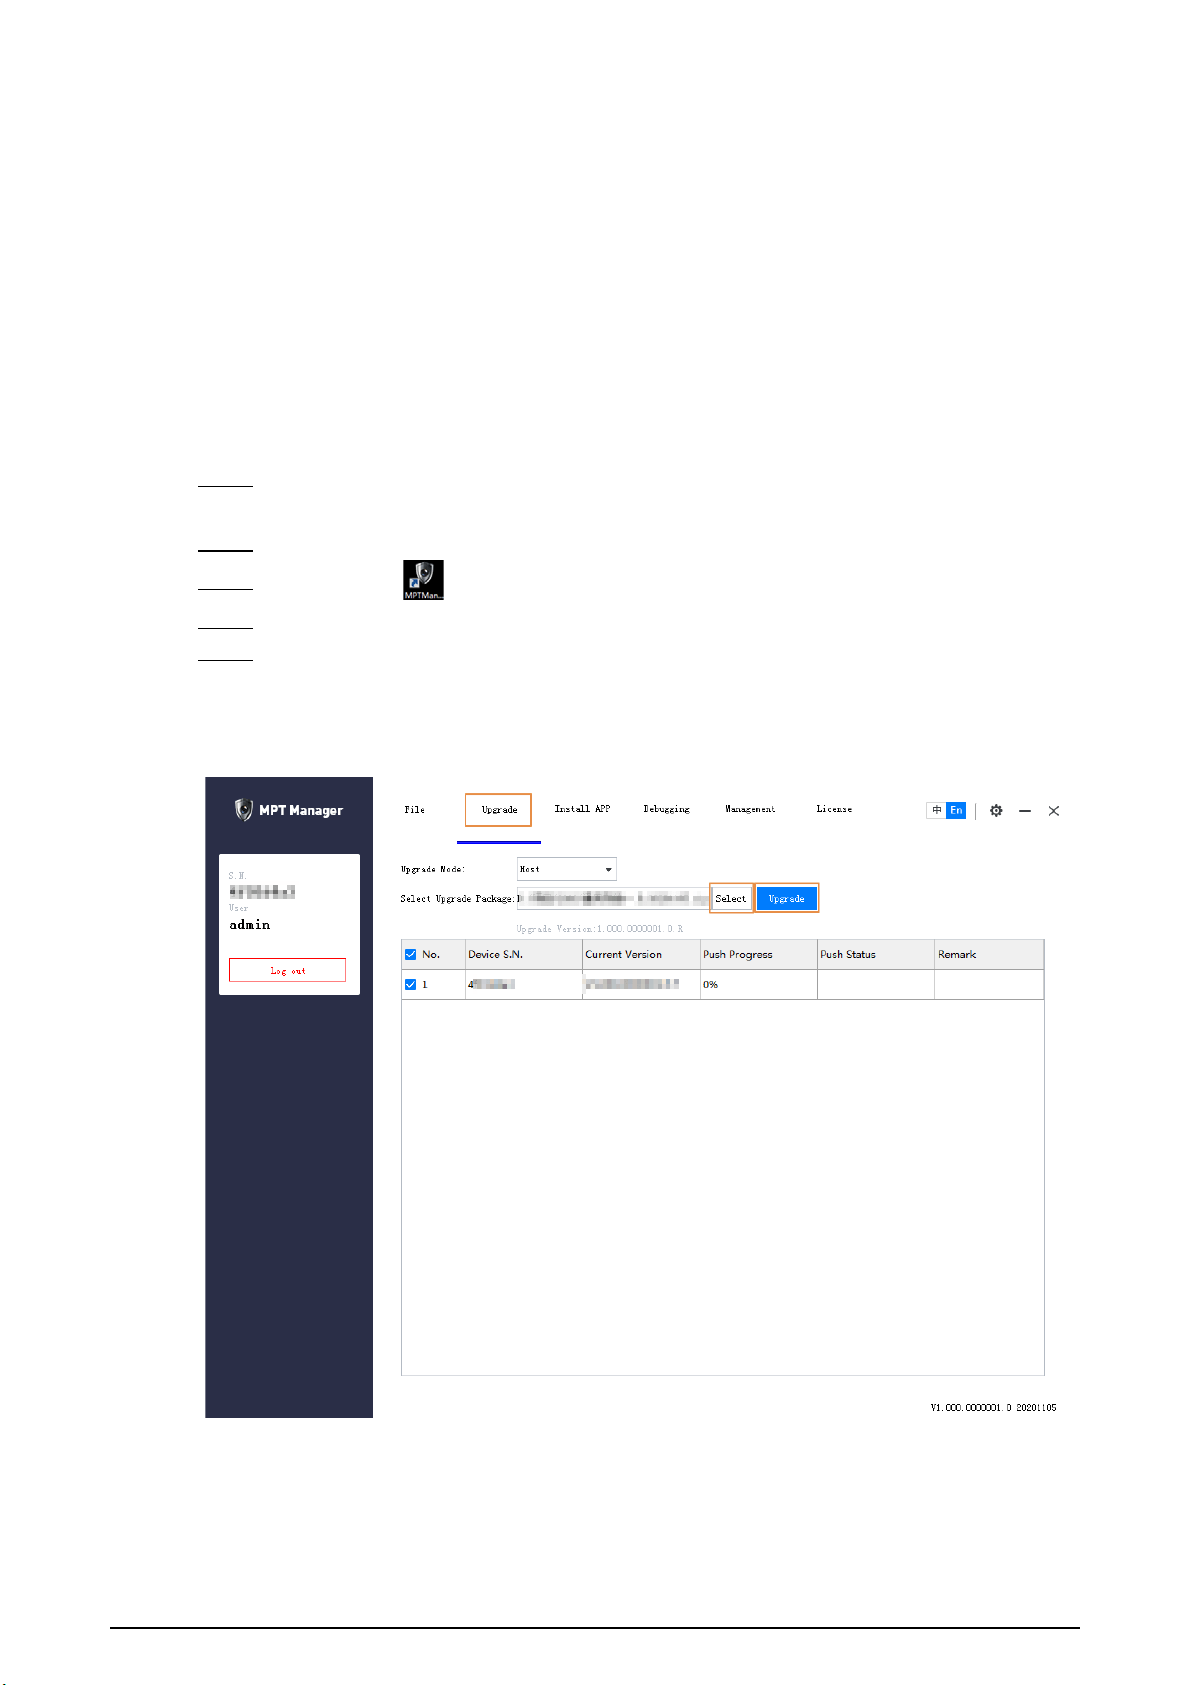
4.1 Updating on MPT Manager
Update the system on MPT Manager.
Procedure
Step 1 Install MPT Manager.
Follow the system prompts and click
Next
until the installation is complete.
Step 2 Start the Device, and then connect it to your computer through USB cable.
Step 3 Double-click on the desktop, enter device password, and then click
OK
.
Step 4 click the
Upgrade
tab.
Step 5 Select the update package, and then click
Upgrade
.
The push progress becomes 100% when the update package is successfully pushed to the
Device.
Figure 4-1 Update

47
4.2 Updating on Local Device
On the home screen, select
Maintenance
>
Local System Upgrade
. The Device detects update
package automatically. After local update package is detected, you can select the package to update
the system.

48
5 Platform Operations
After connecting the Device to the platform, users with corresponding permissions can access and
manage the Device on the platform.
Platform operations are not available for the model that does not support network connection.
5.1 Adding the Device to the Platform
Add the Device to the platform for remote management. For details on platform operations, see the
corresponding user's manual of the platform.
Prerequisites
●
The Device and the platform are on the same network segment.
●
If you want to add the device to the platform through registration, make sure to configure the
registration settings on the Device. For details on registration settings, see "3.5.1.1.1 Auto
Register".
Procedure
Step 1 Log in to the platform web manager.
Step 2 On the home page, select
Devices
, or if you have opened a tab, click , and then select
Devices
.
Step 3 On the
Devices
page, click
Add
.
49
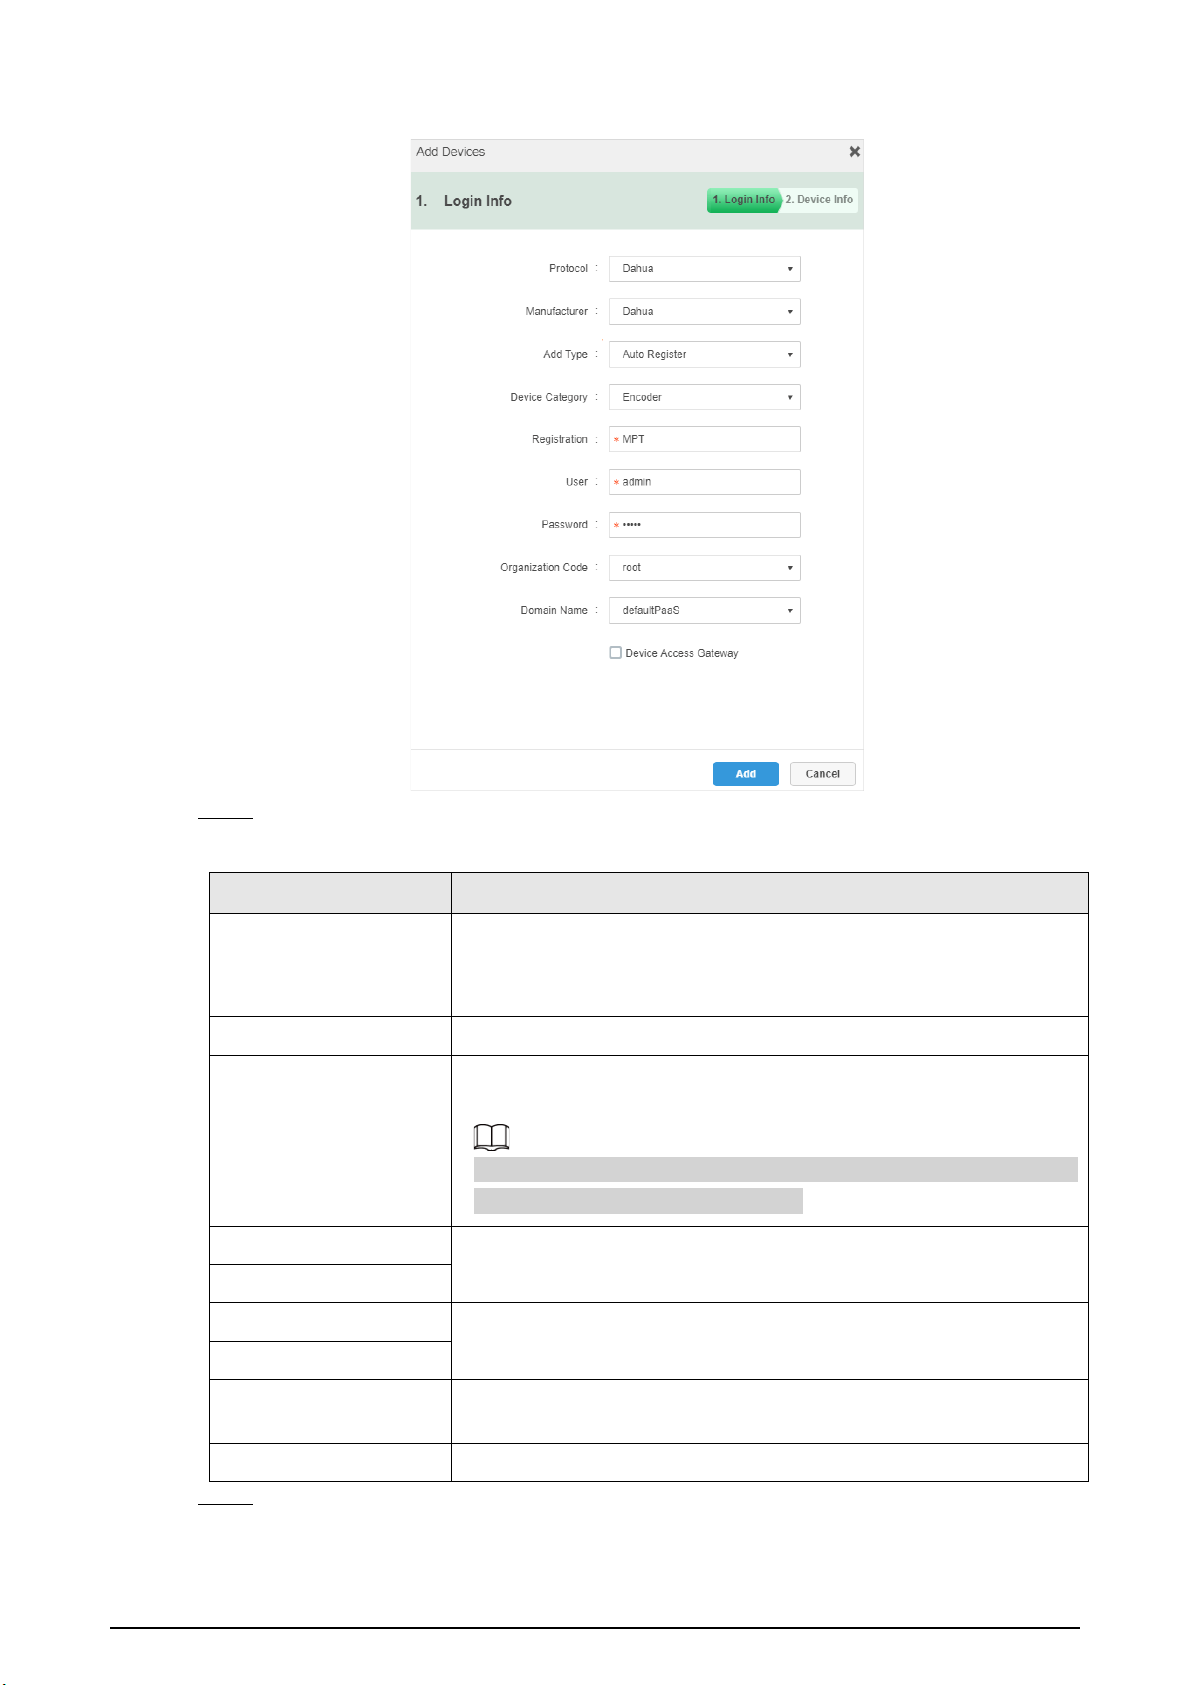
Figure 5-1 Add MPT (1)
Step 4 Configure the parameters.
Table 5-1 Parameters of adding the device
Parameter Description
Add Type
●
Auto Register
: Register the Device using the registration ID. It is
the most common method.
●
IP Address
: Register the Device using its IP address.
Device Category
Select
Encoder
.
Registration
If you select
Auto Register
as
Add Type
, enter the registration ID of
the Device.
The registration ID must be the same as the one entered on the MPT
device when registering the platform.
IP Address
If you select
IP Address
as
Add Type
, enter the IP address and port
number of the Device. The port is 37777 by default.
Device Port
User
Enter the username and password of the Device.
Password
Organization Code
Select the organization that the Device belongs to. The default
organization code is root. Y
Domain Name Enter the domain that is accessed.
Step 5 Click
Add
.
50
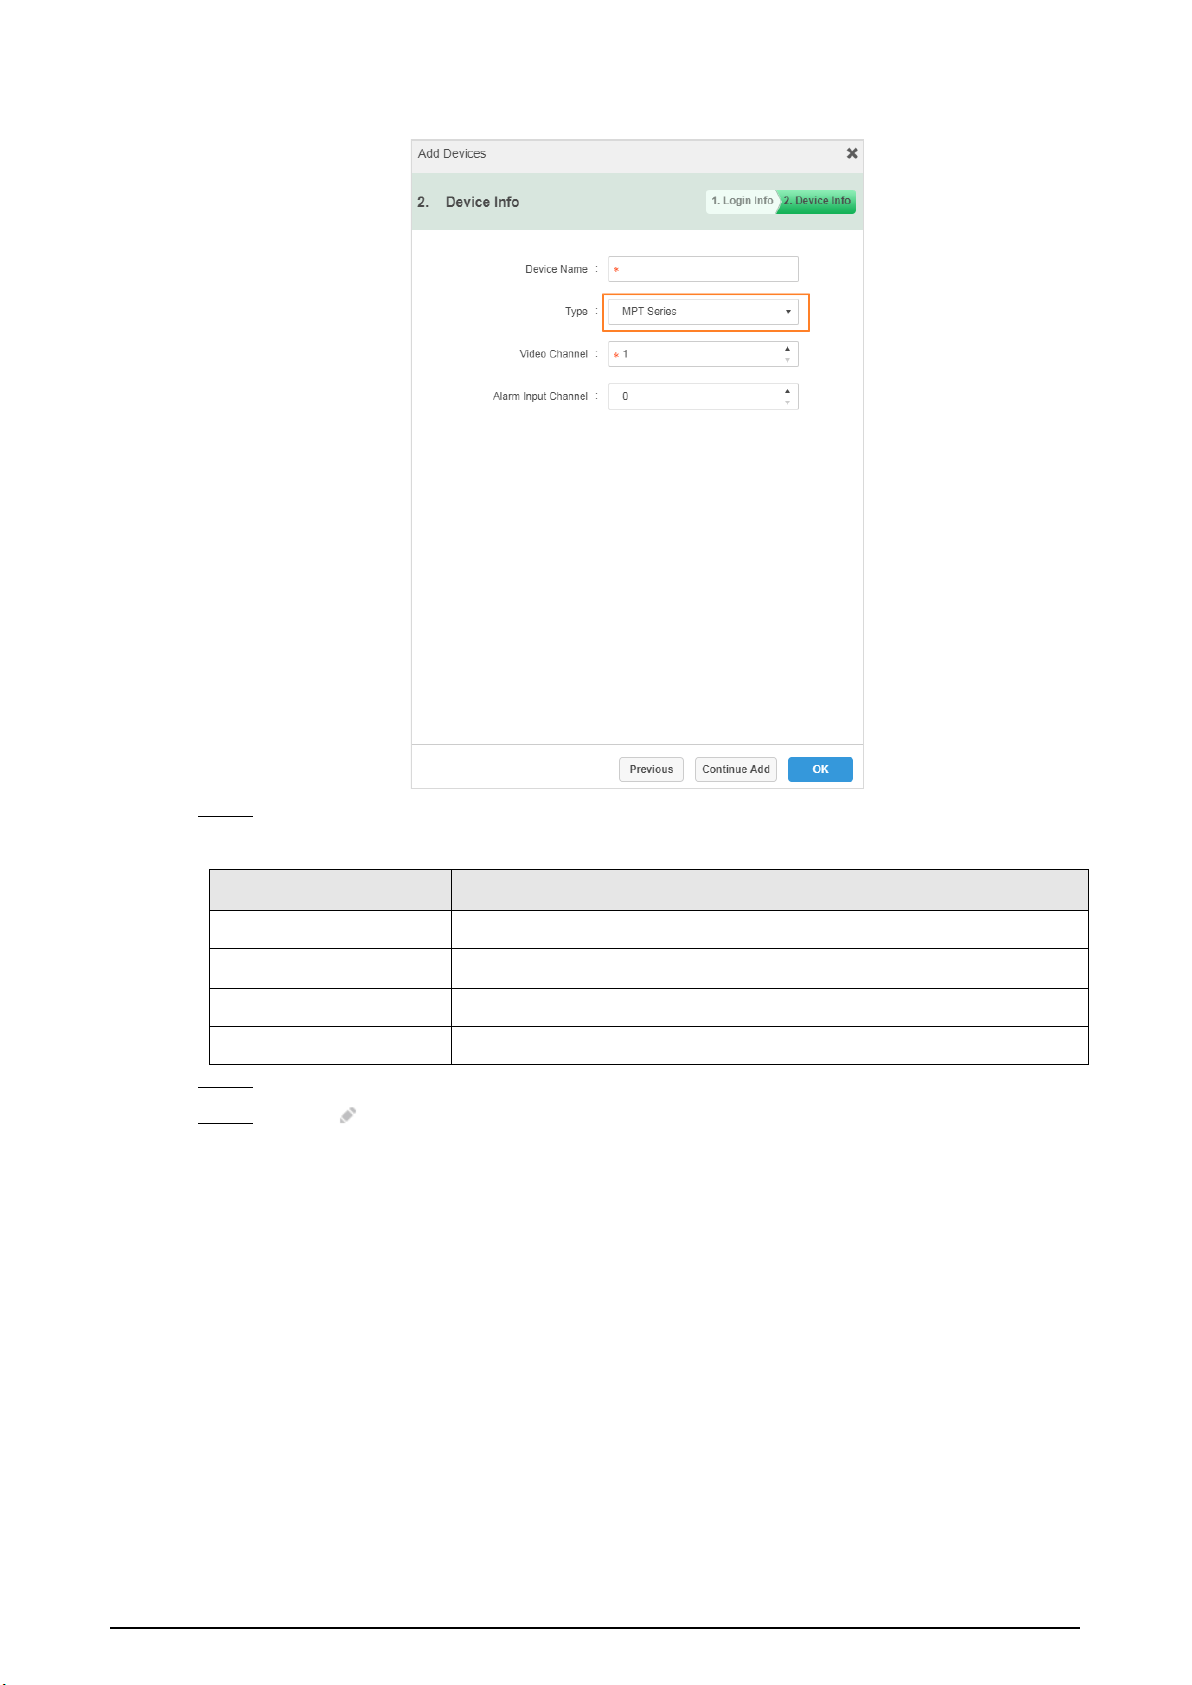
Figure 5-2 Add MPT (2)
Step 6 Configure the device information.
Table 5-2 Parameters of device information
Parameter Description
Device Name Customize the device name.
Type
Select
MPT Series
.
Video Channel The default value is 1.
Alarm Input Channel The default value is 0.
Step 7 Click
OK
.
Step 8 Click of the added device, select
Basic Info
, and then get device SN information.
Otherwise, you might fail to add the device.
5.2 Connecting to the Platform
Register the Device to the platform. For details, see "3.5.1.1.1 Auto Register".
51
6 SIM Card and Battery Installation
The product supports 5 VDC/2 A power recharge. When the battery power is low, recharge it in time.
●
When the Device has the main battery, the interface displays main battery percentage.
●
If you remove the main battery, the Device will shut down.
●
After installing the main battery, start the Device manually.
●
Recharge the battery if the Device is not in use for a long time.
●
The system triggers low battery alarm when the battery level is lower than 5%.
●
The Device automatically shuts down when the power runs out.
●
If the Device will not be used for a week or more, charge it to 60%, take the battery out of the
Device, and store it in a clean, dry and ventilated room with ambient temperature of 20 ± 5 °C.
●
Charge the battery at least once every three months during storage.
●
The battery is a consumable accessory. You are recommended to replace it after one year of use.
6.1 Installing SIM Card
Background Information
●
For the model that does not support network connection, you cannot install the SIM card.
●
SIM card and the peripheral accessories do not support hot swapping. The card becomes
activated after the Device restarts.
●
Shut down the Device before installing the SIM card; otherwise the Device might be damaged.
Procedure
Step 1 Remove the battery cover.
●
For the model without a recording button on the back, move the slider on the back of
the Device left, and then use your thumb to hold the groove on the lower-left corner of
the Device to remove the battery cover.
Figure 6-1 Remove the battery cover (1)
●
For the model with a recording button on the back, loosen the screws on the back, and
then use your thumb to hold the groove on the lower-left corner of the Device to
remove the battery cover.
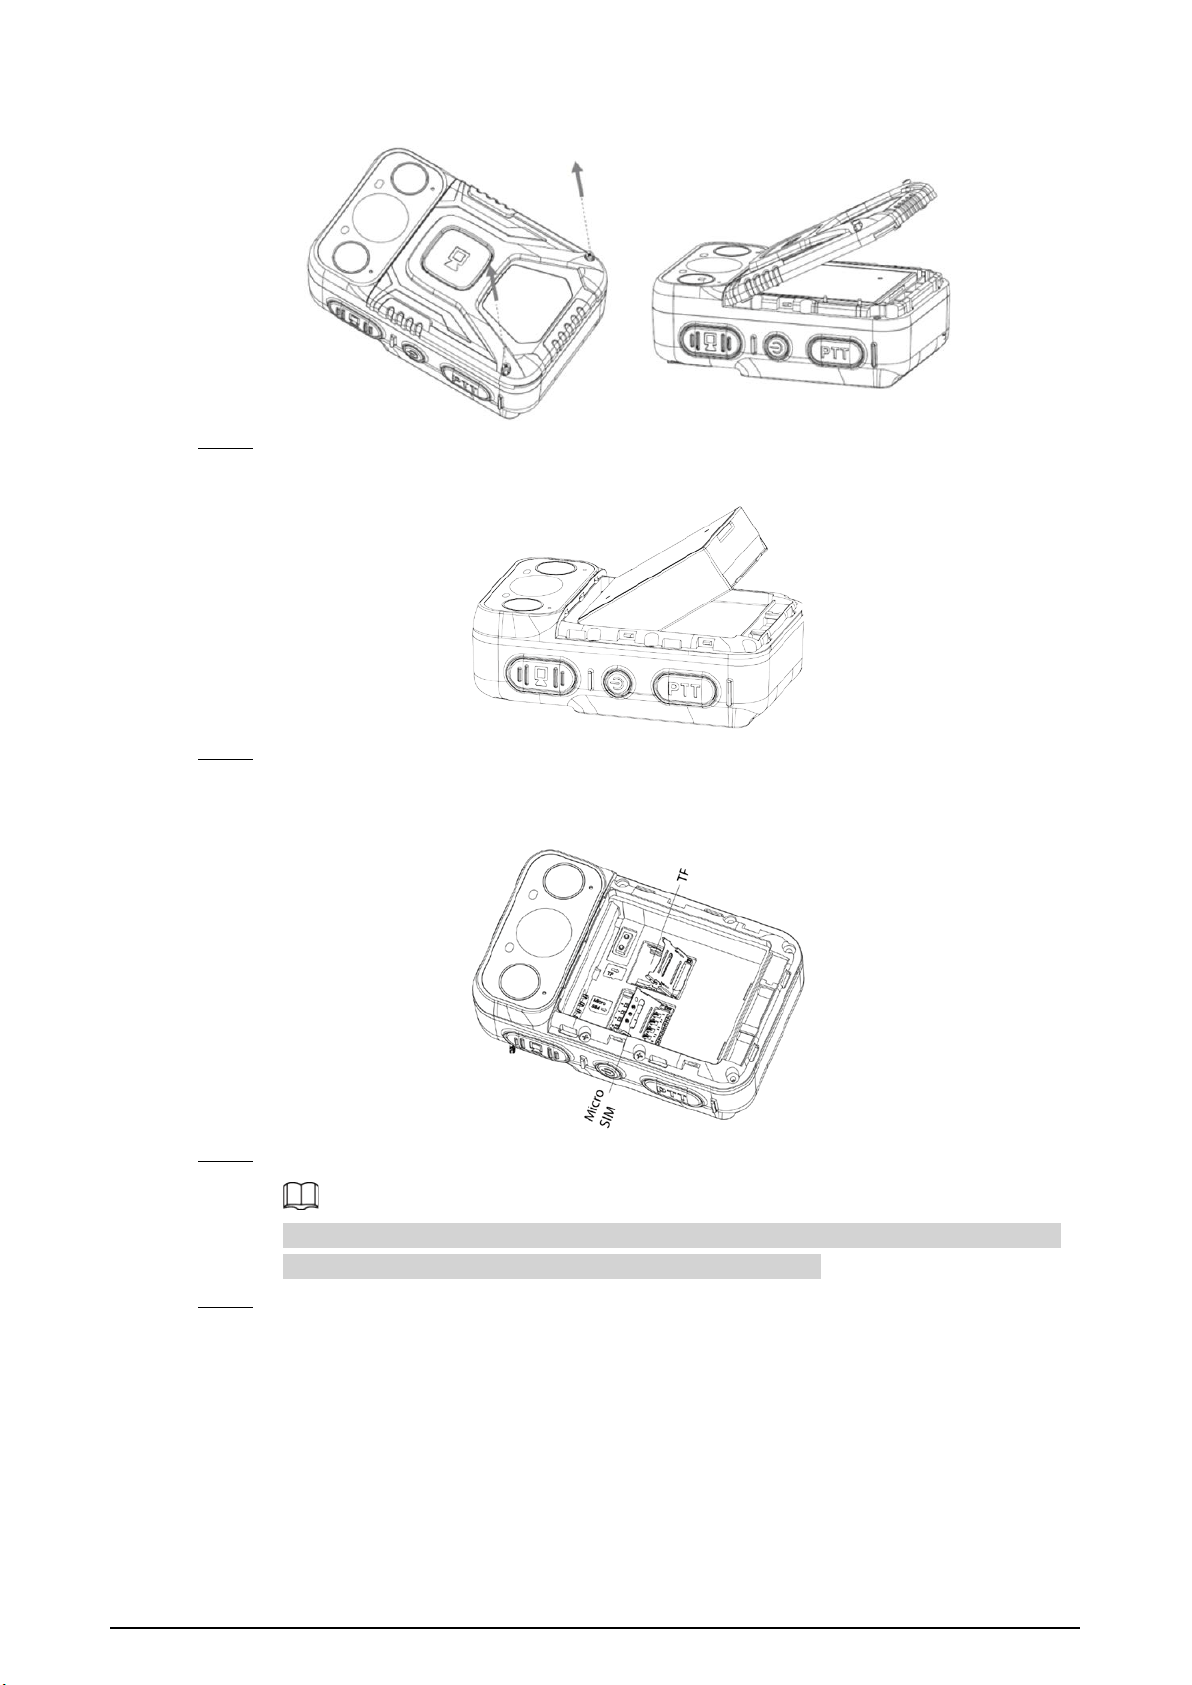
52
Figure 6-2 Remove the battery cover (2)
Step 2 Take out the main battery.
Figure 6-3 Take out main battery
Step 3 Make sure that the metal side of the SIM card is facing down. Push the SIM card to the tray
until SIM card is firm.
Figure 6-4 Install SIM card
Step 4 Install the main battery.
Make sure that the SIM card installation is complete before installing the main battery in
case the battery might jam the tray and result in tray damage.
Step 5 Install the battery cover.
●
For the model without a recording button on the back, re-attach the battery cover, and
then move the slider on the back of the Device right.
●
For the model with a recording button on the back, re-attach the battery cover, and
then tighten the screws on the back.


54
7 FAQ
1.
How can I add, delete user or change password?
●
The operations might vary with the version and model. For details, see the corresponding
user's manual.
●
Only the admin account has the permission to add user.
●
To change the password, go to >
User management
, or tap on the home screen,
depending on the version you are using.
●
Only the admin account has the permission to view and change the information of other
users. Other users can only view the information and change the password of their own
account.
2.
How can I restore the Device to factory settings or clear the password?
Factory resetting will clear all data stored in your device, including system and app data and
settings. The Device still retains certain parameters, including audio, video, picture data, and the
serial number. Only the admin account can reset the Device.
3.
Where can I configure VPN?
Go to >
Network
>
Mobile Data
>
VPN
.
4.
Where can I configure APN?
Select >
Network
>
Mobile Data
>
Mobile Network
, and then tap
Access Point Names
.
5.
How long can the battery last during normal use?
●
With screen off, local recording turned on using the default settings, 4G used to acquire
stream (main stream), and GPS enabled, the battery lasts 7–8 hours.
●
With screen on for half an hour, local recording turned on using the default settings, 4G used
to acquire stream (main stream), GPS enabled, and voice talk used for half an hour, the battery
runs out in 6–7 hours.
●
With screen on for half an hour, local recording turned on using the default settings, 4G used
to acquire stream (main stream) for an hour, and GPS enabled, the battery life is 8–9 hours.
The listed battery life is for reference only. The actual battery life might vary with the operating
conditions, environment, battery usage and other factors.

55
Appendix 1 Cybersecurity Recommendations
Mandatory actions to be taken for basic device network security:
1.
Use Strong Passwords
Please refer to the following suggestions to set passwords:
●
The length should not be less than 8 characters.
●
Include at least two types of characters; character types include upper and lower case letters,
numbers and symbols.
●
Do not contain the account name or the account name in reverse order.
●
Do not use continuous characters, such as 123, abc, etc.
●
Do not use overlapped characters, such as 111, aaa, etc.
2.
Update Firmware and Client Software in Time
●
According to the standard procedure in Tech-industry, we recommend to keep your device
(such as NVR, DVR, IP camera, etc.) firmware up-to-date to ensure the system is equipped with
the latest security patches and fixes. When the device is connected to the public network, it is
recommended to enable the“auto-check for updates” function to obtain timely information
of firmware updates released by the manufacturer.
●
We suggest that you download and use the latest version of client software.
"Nice to have" recommendations to improve your device network security:
1.
Physical Protection
We suggest that you perform physical protection to device, especially storage devices. For
example, place the device in a special computer room and cabinet, and implement well-done
access control permission and key management to prevent unauthorized personnel from
carrying out physical contacts such as damaging hardware, unauthorized connection of
removable device (such as USB flash disk, serial port), etc.
2.
Change Passwords Regularly
We suggest that you change passwords regularly to reduce the risk of being guessed or cracked.
3.
Set and Update Passwords Reset Information Timely
The device supports password reset function. Please set up related information for password
reset in time, including the end user’s mailbox and password protection questions. If the
information changes, please modify it in time. When setting password protection questions, it is
suggested not to use those that can be easily guessed.
4.
Enable Account Lock
The account lock feature is enabled by default, and we recommend you to keep it on to
guarantee the account security. If an attacker attempts to log in with the wrong password several
times, the corresponding account and the source IP address will be locked.
5.
Change Default HTTP and Other Service Ports
We suggest you to change default HTTP and other service ports into any set of numbers between
1024–65535, reducing the risk of outsiders being able to guess which ports you are using.
6.
Enable HTTPS
We suggest you to enable HTTPS, so that you visit Web service through a secure communication
channel.
7.
MAC Address Binding
We recommend you to bind the IP and MAC address of the gateway to the device, thus reducing

56
the risk of ARP spoofing.
8.
Assign Accounts and Privileges Reasonably
According to business and management requirements, reasonably add users and assign a
minimum set of permissions to them.
9.
Disable Unnecessary Services and Choose Secure Modes
If not needed, it is recommended to turn off some services such as SNMP, SMTP, UPnP, etc., to
reduce risks.
If necessary, it is highly recommended that you use safe modes, including but not limited to the
following services:
●
SNMP: Choose SNMP v3, and set up strong encryption passwords and authentication
passwords.
●
SMTP: Choose TLS to access mailbox server.
●
FTP: Choose SFTP, and set up strong passwords.
●
AP hotspot: Choose WPA2-PSK encryption mode, and set up strong passwords.
10.
Audio and Video Encrypted Transmission
If your audio and video data contents are very important or sensitive, we recommend that you
use encrypted transmission function, to reduce the risk of audio and video data being stolen
during transmission.
Reminder: encrypted transmission will cause some loss in transmission efficiency.
11.
Secure Auditing
●
Check online users: we suggest that you check online users regularly to see if the device is
logged in without authorization.
●
Check device log: By viewing the logs, you can know the IP addresses that were used to log in
to your devices and their key operations.
12.
Network Log
Due to the limited storage capacity of the device, the stored log is limited. If you need to save the
log for a long time, it is recommended that you enable the network log function to ensure that
the critical logs are synchronized to the network log server for tracing.
13.
Construct a Safe Network Environment
In order to better ensure the safety of device and reduce potential cyber risks, we recommend:
●
Disable the port mapping function of the router to avoid direct access to the intranet devices
from external network.
●
The network should be partitioned and isolated according to the actual network needs. If
there are no communication requirements between two sub networks, it is suggested to use
VLAN, network GAP and other technologies to partition the network, so as to achieve the
network isolation effect.
●
Establish the 802.1x access authentication system to reduce the risk of unauthorized access to
private networks.
●
Enable IP/MAC address filtering function to limit the range of hosts allowed to access the
device.