Loading ...
Loading ...
Loading ...
36
I. Startup
WARNING
All parts are factory-adjusted. Improper adjustments may adversely affect safety,
performance, component life, and warranty coverage.
NOTICE
• If the icemaker is turned off, wait for at least 3 minutes before restarting the
icemaker to prevent damage to the compressor.
• To prevent damage to the water pump seal, do not leave the control switch in the
"WASH" position for extended periods when the water tank is empty.
• At startup, conrm that all internal and external connections are free of leaks.
Additional Notice for Remote Models
• The icemaker must have power for a minimum of 4hours prior to startup to
prevent compressor damage.
1) Open the water supply line shut-off valve(s).
2) Remove the front panel.
3) Move the control switch on the control box to the "ICE" position.
4) Replace the front panel in its correct position.
5) Turn on the power supply, and allow the icemaker to operate for a total of 10 minutes.
6) Turn off the power supply, then remove the front panel.
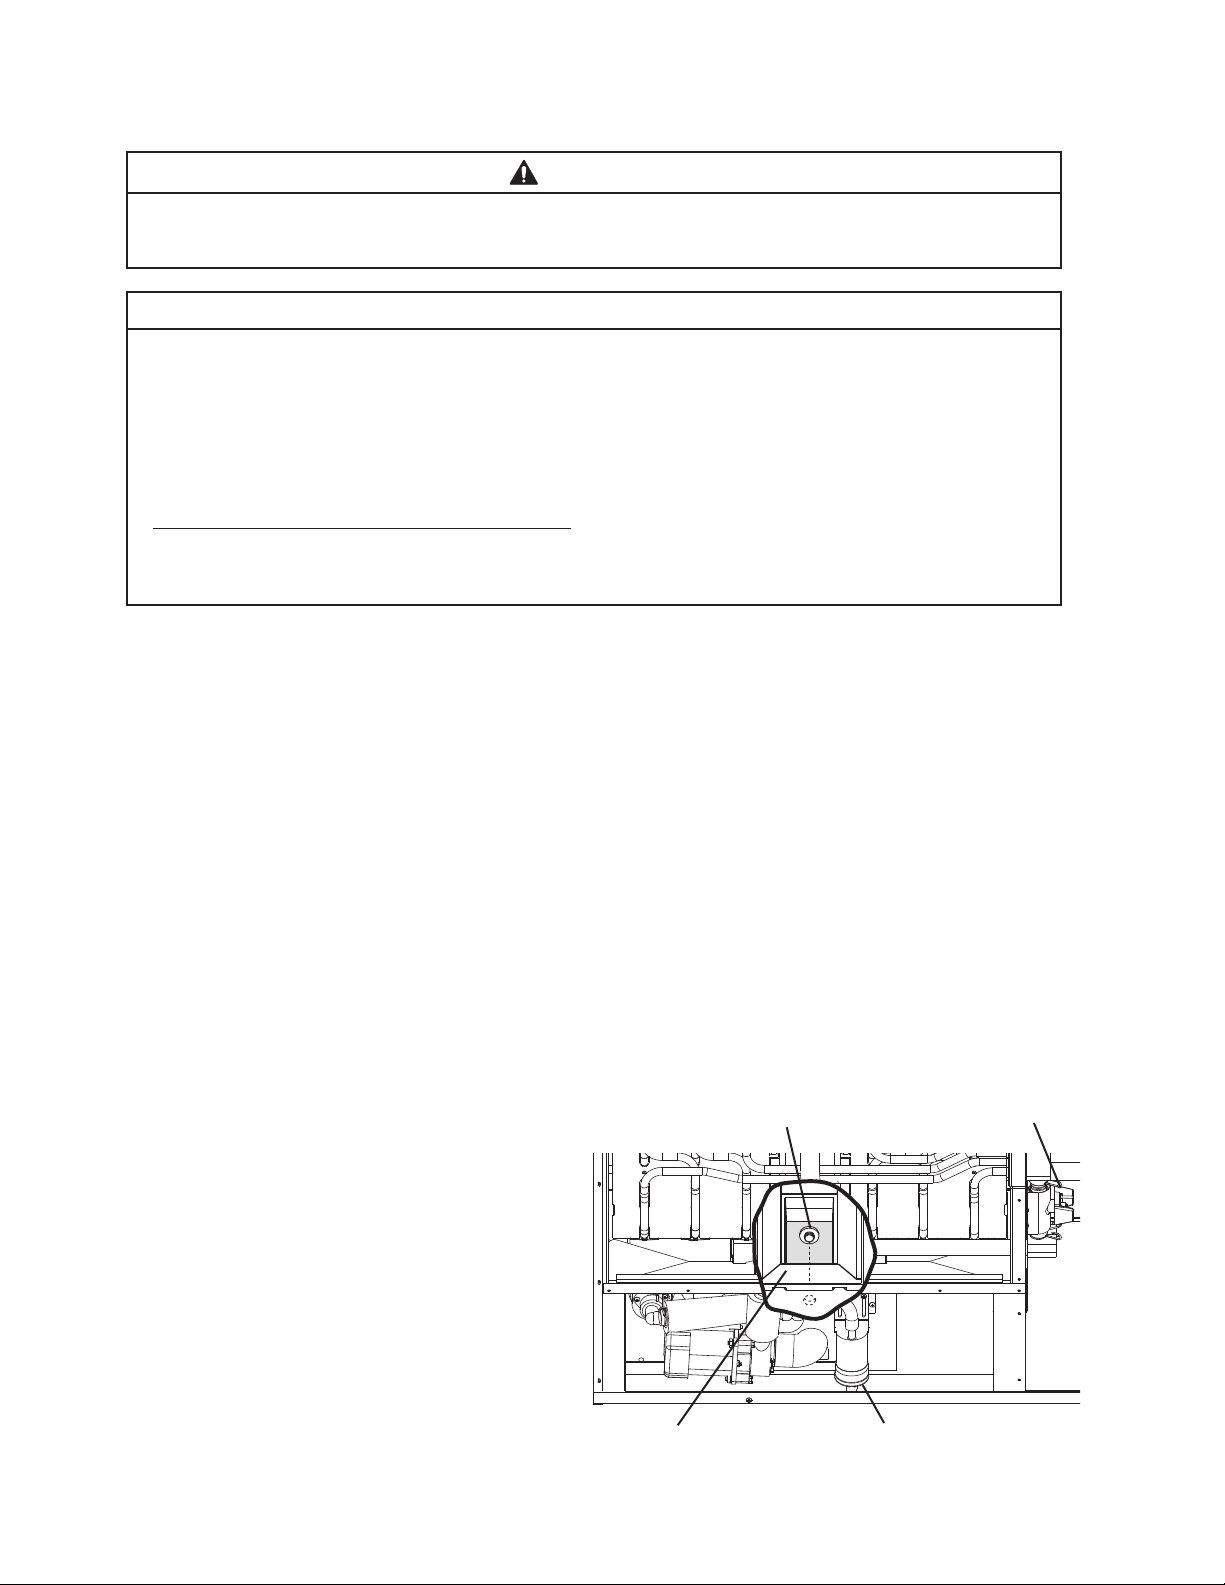
7) Remove the insulation panel. Remove the drain plug located on the lower front part of
the ice chute. See Fig. 19. Allow the water tank to drain.
8) Replace the drain plug, insulation panel, and front panel in their correct positions. Be
careful not to cross thread the drain plug.
9) Clean the dispenser unit/ice storage bin liner using a neutral cleaner. Rinse thoroughly
after cleaning.
10) Turn on the power supply to start the automatic icemaking process.
11) During the rst 5 minutes of the freeze
cycle, conrm bin control operation by
pressing and holding the bin control's
actuator paddle until the icemaker shuts
down. The icemaker should shut down in
approximately 15 seconds.
12) On water-cooled models, conrm
proper condenser drain outlet/return
outlet temperature as outlined in
"II.F.2.Water-Cooled Condenser."
Drain Plug
Ice Chute
Float Switch Assembly
Cleaning Valve
Fig. 19
Loading ...
Loading ...
Loading ...