Loading ...
Loading ...
Loading ...
Before First Use
Important: Coee grinder will stop automatically if parts are not correctly aligned on
the machine.
1. Unpack the grinder and remove all packaging materials.
2. Clean all loose parts with a dry cloth. NEVER clean any parts of the grinder in the
dishwasher. NEVER get the burrs wet.
3. To remove any dust that may have accumulated on the removable parts during
packing, wash the ground coee container, its lid, and coee bean container lid
with a warm water and a mild liquid soap solution. Rinse and dry.
Important: Do not use harsh or abrasive agents to clean these parts.
4. Allow parts to dry completely before use.
Warning: Putting wet parts back onto the grinder can damage the machine.
Caution: Do not immerse grinder or the removable upper burr in water.
Important: Do not place the ground coee container, its lid, or the bean container
lid in the dishwasher.
5. Check the bean container for presence of foreign objects before using.
6. Make sure the bean container is completely clean and dry before using.
7. Ensure upper burr is locked into place by turning it counterclockwise.
8. Always operate the grinder with the coee bean container lid, ground coee
container and lid in place.
9. Do not place your hand in or near the burrs.
10. Any servicing other than cleaning and user maintenance should be performed by
an authorized Capresso service representative.
Important: Burr grinder will not operate if the coee bean container lid, ground coee
container or ground coee container lid are not properly in place.
Grinding
1. Place your Burr Grinder on a at, level surface.
2. Ensure all parts are locked into place as described in
Before First Use.
3. Plug the grinder into an outlet.
4. Fill the bean container with coee beans and replace the lid. The bean container
can hold up to 10 ounces of coee beans.
Note: Only coee beans should be lled into the bean container. Never ll any
of the following into the bean container: sugar-coated beans, syrups or other
coatings, and instant coee. Never ll water or any other liquid into the bean
container.
5. Set the cup selector dial to the number of cups of coee you want to grind by
turning the dial to the number of cups you will brew.
Note: These numbers are to be used as a guide. The amount of ground coee
varies quite a bit depending on how coarse or ne you grind and whether you use
light, dry beans or dark, oily beans. After grinding a few times, you will nd the
correct grind amount position for the amount of coee you want to grind.
Note: Never grind more coee then indicated by the “MAX” ll line of the ground
coee container. Over lling the ground coee container can cause clogging in
the grinder chute, and can damage the machine.
6. Set the neness selector to the desired setting (see Section “Guidelines for
Fineness Selector Settings”).
Caution: Never change the neness selector setting while grinding!
7. Push the On/O button down to start your Capresso grinder. The grinder will
begin grinding the whole bean coee directly into the ground coee container.
It will stop automatically.
Attention: Beans may stick to the wall of the bean container, preventing them
from falling into the burrs. You will hear a high-pitched noise from the motor when
this happens. Gently shake the grinder so that the beans slide down into the
burrs.
Note: If you need to turn the grinder o before the grinding cycle is nished,
simply push the On/O button.
8. Be sure to unplug the appliance after every use.
Note: Coee beans can stay in the bean container for up to 1 week before they
will start to lose their aroma.
Guidelines for Fineness Selector Settings
Grind Brewing Method
Fine Pump Espresso Machines
Medium / Fine Drip Coee Makers / Steam Espresso
Medium Manual Pour-Over Coee Brewing
Medium / Coarse Percolator
Coarse French Press
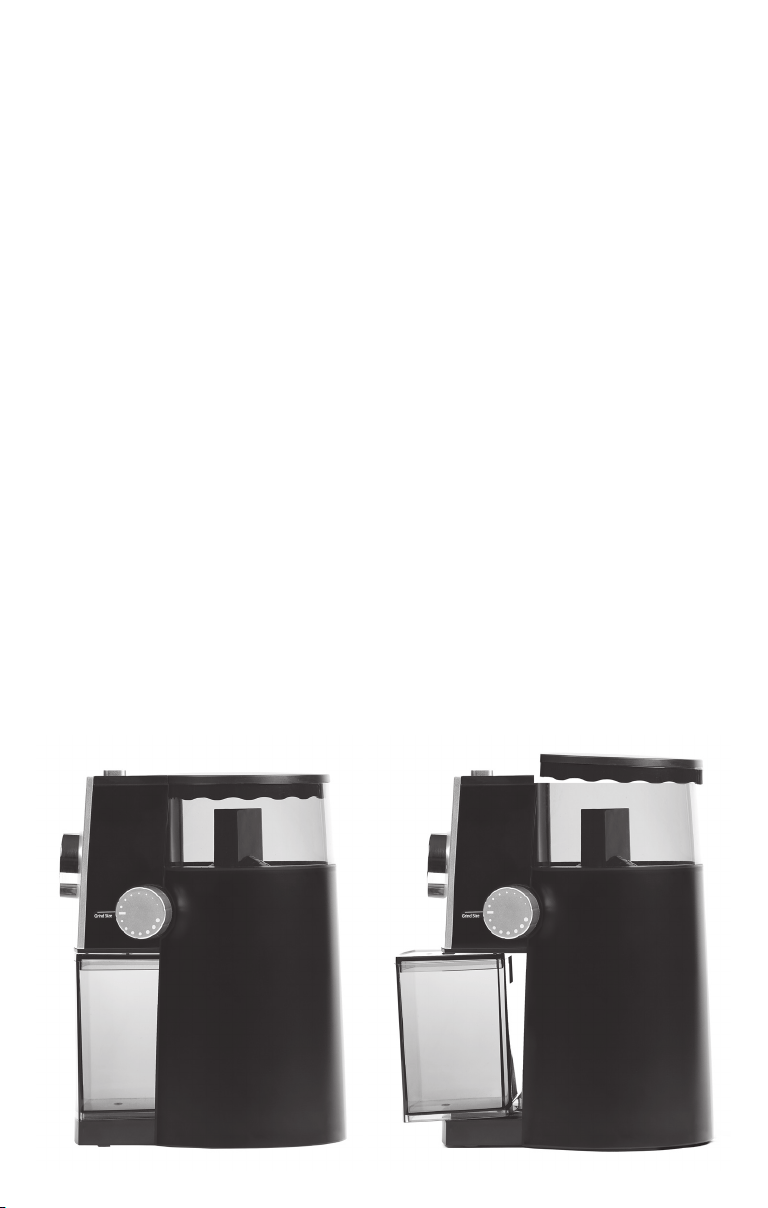
Proper placement of
removeable parts
Removable parts not in
place - machine won’t turn on
Loading ...
Loading ...
Loading ...