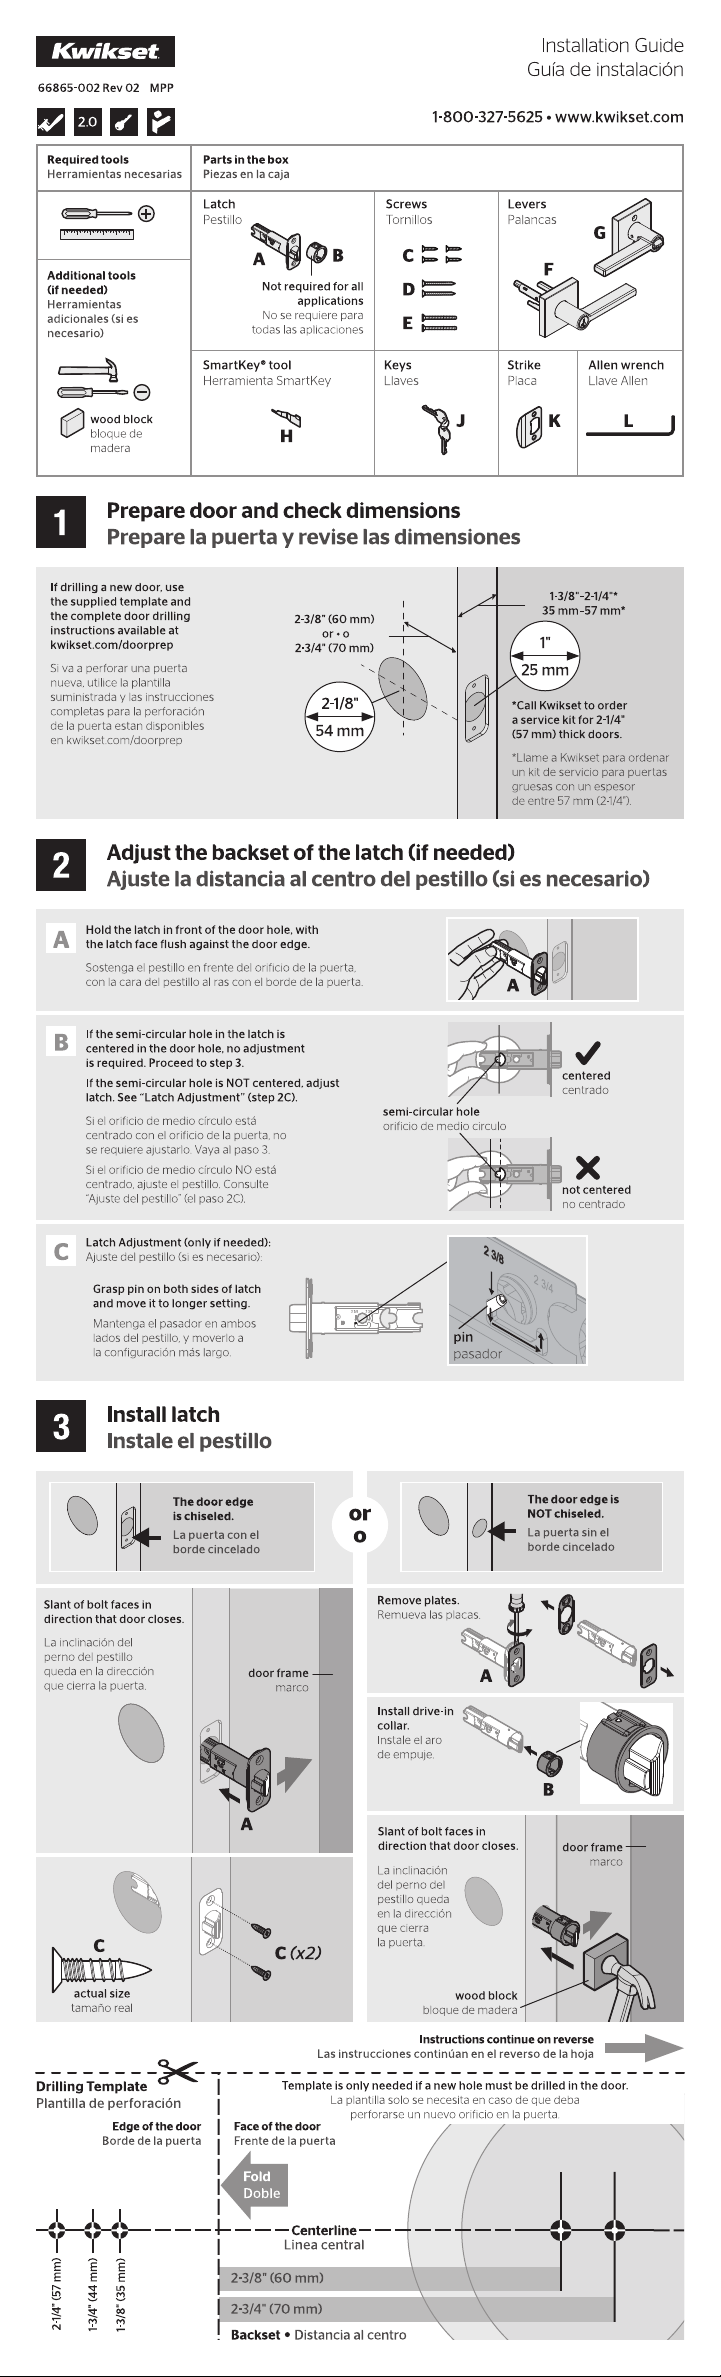
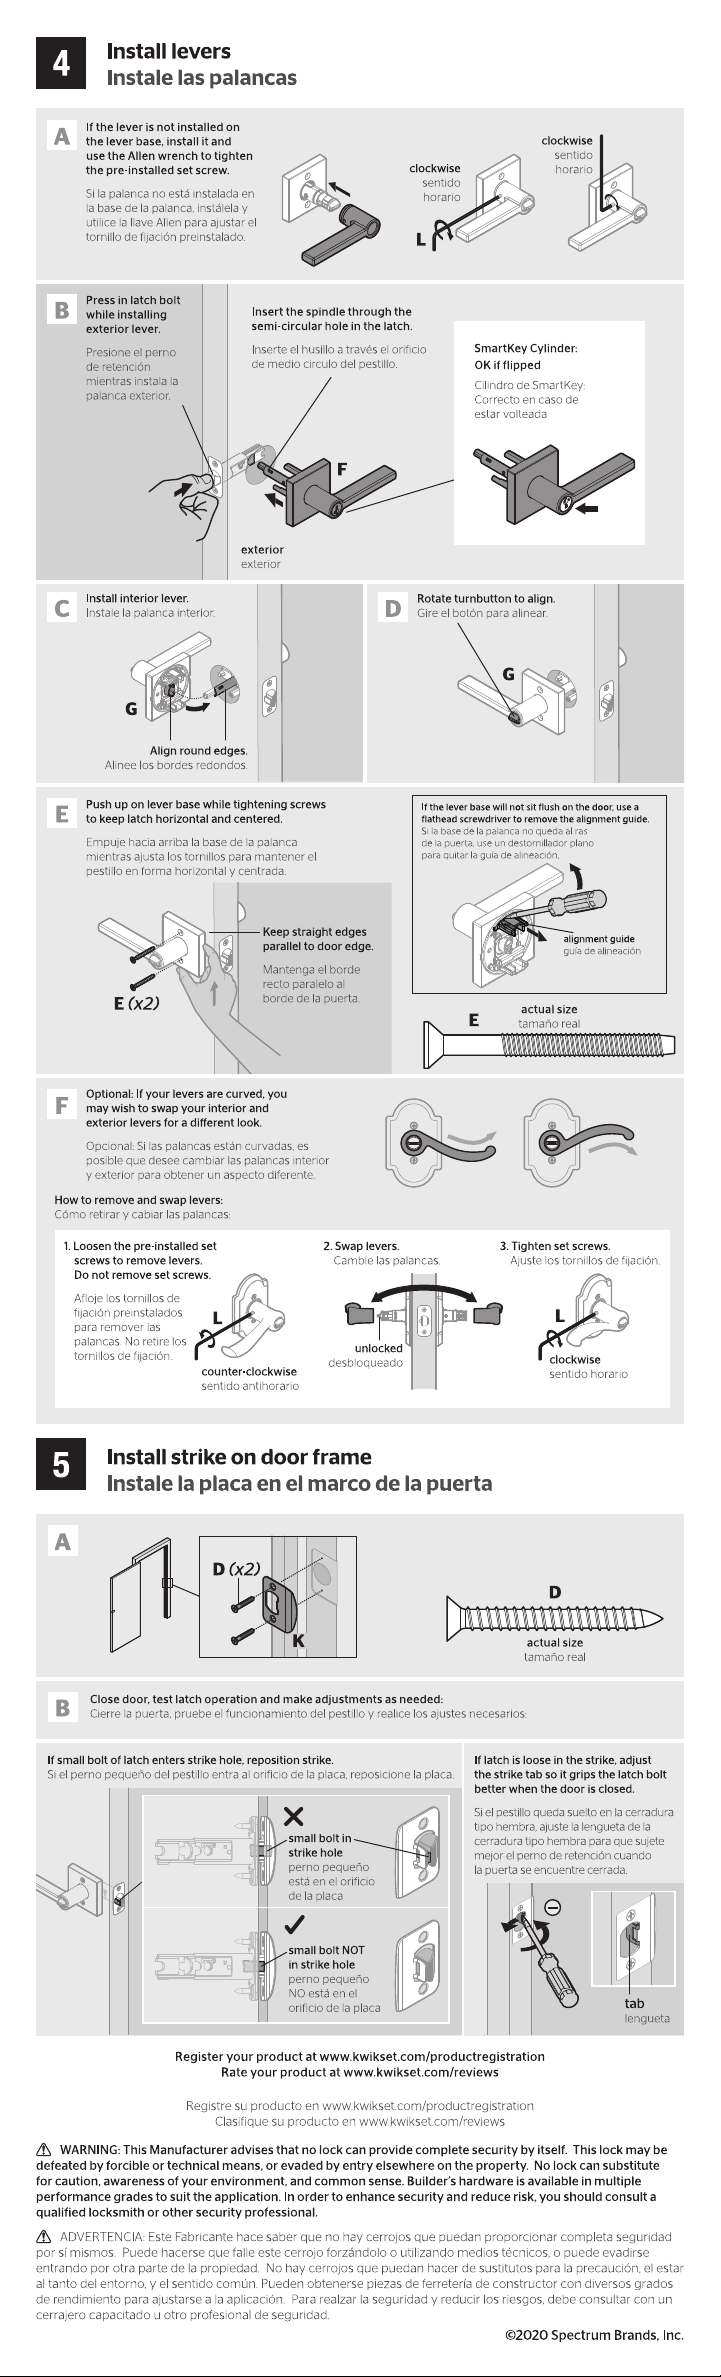
Search
Home
Bookmarks
Brands
Articles
About us
Home
Kwikset
Kwikset 740SEL 15 SMT User Manual
User Manual Kwikset 740SEL 15 SMT Sedona Lever - Keyed - featuring SmartKey
Documents for Kwikset 740SEL 15 SMT
The following documents are available:
Installation Instruction
INSTALLATION GUIDE - (English, Spanish)
Read Online
|
Download pdf
Photos
Photos:
View Photos
INSTALLATION GUIDE
For 740SEL 15 SMT.
Page 1/2
Page 1
Page 2
Contents
Table of Contents
Search
Previous
Next
Bookmarks
Loading ...
1
2
>
Summary of Contents for Kwikset 740SEL 15 SMT:
ENGLISH
1
Required Tools
1
Parts In The Box
1
Prepare Door And Check Dimensions
1
Adjust The Backset Of The Latch (if Needed)
1
Install Latch
1
Install Levers
2
Install Strike On Door Frame
2
SPANISH
1
Herramientas Necesarias
1
Piezas En La Caja
1
Prepare La Puerta Y Revise Las Dimensiones
1
Adjuste La Distancial Al Centro Del Pestillo (si Es Necesario)
1
Instale El Pestillo
1
Instale Las Palancas
2
Instale La Placa En El Marco De La Puerta
2
File type: PDF
File name: 89627064_740phl-15-smt.pdf
File size: 2.65 MB
File Language: English, Spanish
Pages: 2
Author: Kwikset
File created: 2023-12-03
Published: 2023-12-06
Updated: 2023-12-27
Verified by
Ramona Nikolaus
on 2023-12-27
Download File
Specifications
Brand:
Kwikset
Model: 740SEL 15 SMT
Category:
Tools - Home Improvement
See other models:
971PHL 15
740TDL 15 SMT
730SEL 15
730TDL 15
740PHL 15 SMT
Photos
Download User Manual
Related Products
Kwikset 740J 15 SMT
Kwikset 740H 15 SMT
Kwikset 740L 15 SMT
Kwikset 740SYL RDT 15 SMT
Kwikset 740SAL SQT 15 SMT
Kwikset 740AUL 15 SMT
Kwikset 740AVL 15 SMT
Kwikset 740BRL 15 SMT
Kwikset 740CHL 15 SMT
Kwikset 740PML 15 SMT
Kwikset 740TNL 15 SMT
Kwikset 740PHL 15 SMT
Kwikset 740HFL SQT 15 SMT
Kwikset 740LSL SQT 15 SMT
Kwikset 740MIL RDT 15 SMT
Table of Contents
×
ENGLISH
1
Required Tools
1
Parts In The Box
1
Prepare Door And Check Dimensions
1
Adjust The Backset Of The Latch (if Needed)
1
Install Latch
1
Install Levers
2
Install Strike On Door Frame
2
SPANISH
1
Herramientas Necesarias
1
Piezas En La Caja
1
Prepare La Puerta Y Revise Las Dimensiones
1
Adjuste La Distancial Al Centro Del Pestillo (si Es Necesario)
1
Instale El Pestillo
1
Instale Las Palancas
2
Instale La Placa En El Marco De La Puerta
2
Search:
×
Search