Loading ...
Loading ...

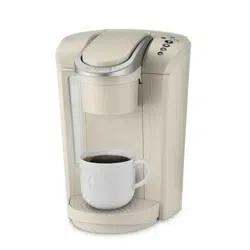
Brewer Exterior
Keep your Keurig® brewer looking its
best by cleaning the exterior from
time to time. Just clean with a damp,
soapy, lint-free, non-abrasive cloth.
Never immerse the brewer in water or
other liquids.
Drip Tray
The drip tray can hold up to 8 ounces
of overflow and should be emptied
and cleaned occasionally. To remove,
slide it toward you, keeping it level
to avoid spilling. Clean in dishwasher
(top rack only) or rinse and clean with
a damp, soapy, lint-free, non-abrasive
cloth.
Water Reservoir & Reservoir Lid
The water reservoir lid and water
reservoir should be cleaned
periodically. Clean in a dishwasher
(top rack only) or hand wash. To
hand wash, use a damp, soapy, non-
abrasive cloth. Rinse the reservoir
thoroughly after cleaning. This will
ensure that no cleaning solutions
remain in the area as they may
contaminate the water supply. After
rinsing, fill the reservoir with clean water and return it to the
brewer. Do not dry the inside of the water reservoir with a
cloth as lint may remain. If needed, repeat above procedures.
NOTE: If you are using a water filter inside the water reservoir, remove it before cleaning.
Caring for your Brewer
K-Cup® Pod Holder
To remove the K-Cup® pod holder from
the brewer, lift the handle and grasp
the top of the K-Cup® pod holder
with one hand while pushing up on
the bottom of the K-Cup® pod holder
from underneath with the other until
it releases. After cleaning, align the
K-Cup® pod holder with the opening
using the two front ribs as a guide
and snap into place from the top.
CAUTION: There are sharp needles that puncture the K-Cup® pod above the K-Cup® pod holder and in the
bottom of the K-Cup® pod holder. To avoid risk of injury, do not put your fingers in the K-Cup® pod holder.
Funnel
The funnel can be removed from the
K-Cup® pod holder by pulling on it until
it pops off. To replace it, just snap it
back onto the K-Cup® pod holder.
Exit Needle
Remove the pod holder assembly and
detach the funnel. Locate the exit
needle on the inside bottom of the
K-Cup® pod holder. Insert a straightened
paper clip into the exit needle to loosen
the clog and push it out.
Entrance Needle
Lift the brewer handle and locate the entrance needle on the
underside of the lid. To clean both holes in the needle, hold
the brewer handle in the upward position and with your other
hand, carefully insert a straightened paper clip into both
holes. Gently move it around to loosen any coffee grounds.
Lower the handle completely and run two water-only brew
cycles. Do not insert a K-Cup® pod.
TIP: Refer to support.Keurig.com for video instructions on cleaning the entrance/exit needles.
Regular cleaning keeps your brewer running smoothly. Always be sure to turn off and unplug your brewer before cleaning.
Strong
Auto Off
Add Water
D
escale
Strong
MAX.
Strong
Auto Off
Add Water
Descale
Strong
Auto Off
Add Water
Descale
Loading ...
Loading ...
Loading ...