Loading ...
Loading ...
Loading ...
Draining and Flushing
The water heater should be drained if being shut down
during freezing temperatures. It is recommended that
the tank be drained, and flushed every 6 months to
remove sediment which may buildup during operation.
To drain the tank perform the following steps:
1. Turn off the power to water heater.
2. Close the cold water inlet valve and open a nearby
hot water faucet.
3. Connect a hose to the drain valve and terminate it
to an adequate drain.
Important: Drain hose should be rated for at least 200°F.
If the drain hose does not have this rating, open the cold
water inlet valve and anearby hot faucet until water is no
longer hot
4. Open the water heater drain valve and the nearest
hot water faucet. Allow all the water to drain from the
tank. Flush the tank with water as needed to remove
sediment.
5. Close the drain valve, refill the tank, and restore
power.
If the water heater is going to be shut down for an
extended period, the drain valve should be left open.
NOTE: When draining Table Top models, remove the screw
securing the drain access cover. Remove the cover by pulling
down and away from the water heater.
Heating Element
Replacement
Electrical Shock Hazard
Disconnect power before
servicing.
Replace all parts and panels
before operating.
Failure to do so can result in
death or electrical shock.
Replacement heating elements must be of the same
style and voltage/wattage rating as the ones presently
in the water heater. This information can be found on
the flange or terminal block of the element or on the
water heater data plate.
1. Shut-off the electric power to the water heater.
2. Drain the water heater as directed under "Draining
and Flushing".
3. Remove the access cover(s). Fold the insulation
outward and away from the heater element(s).
Remove the plastic thermostat cover from the
thermostat(s) making sure to disengage the
attachment point from the thermostat.
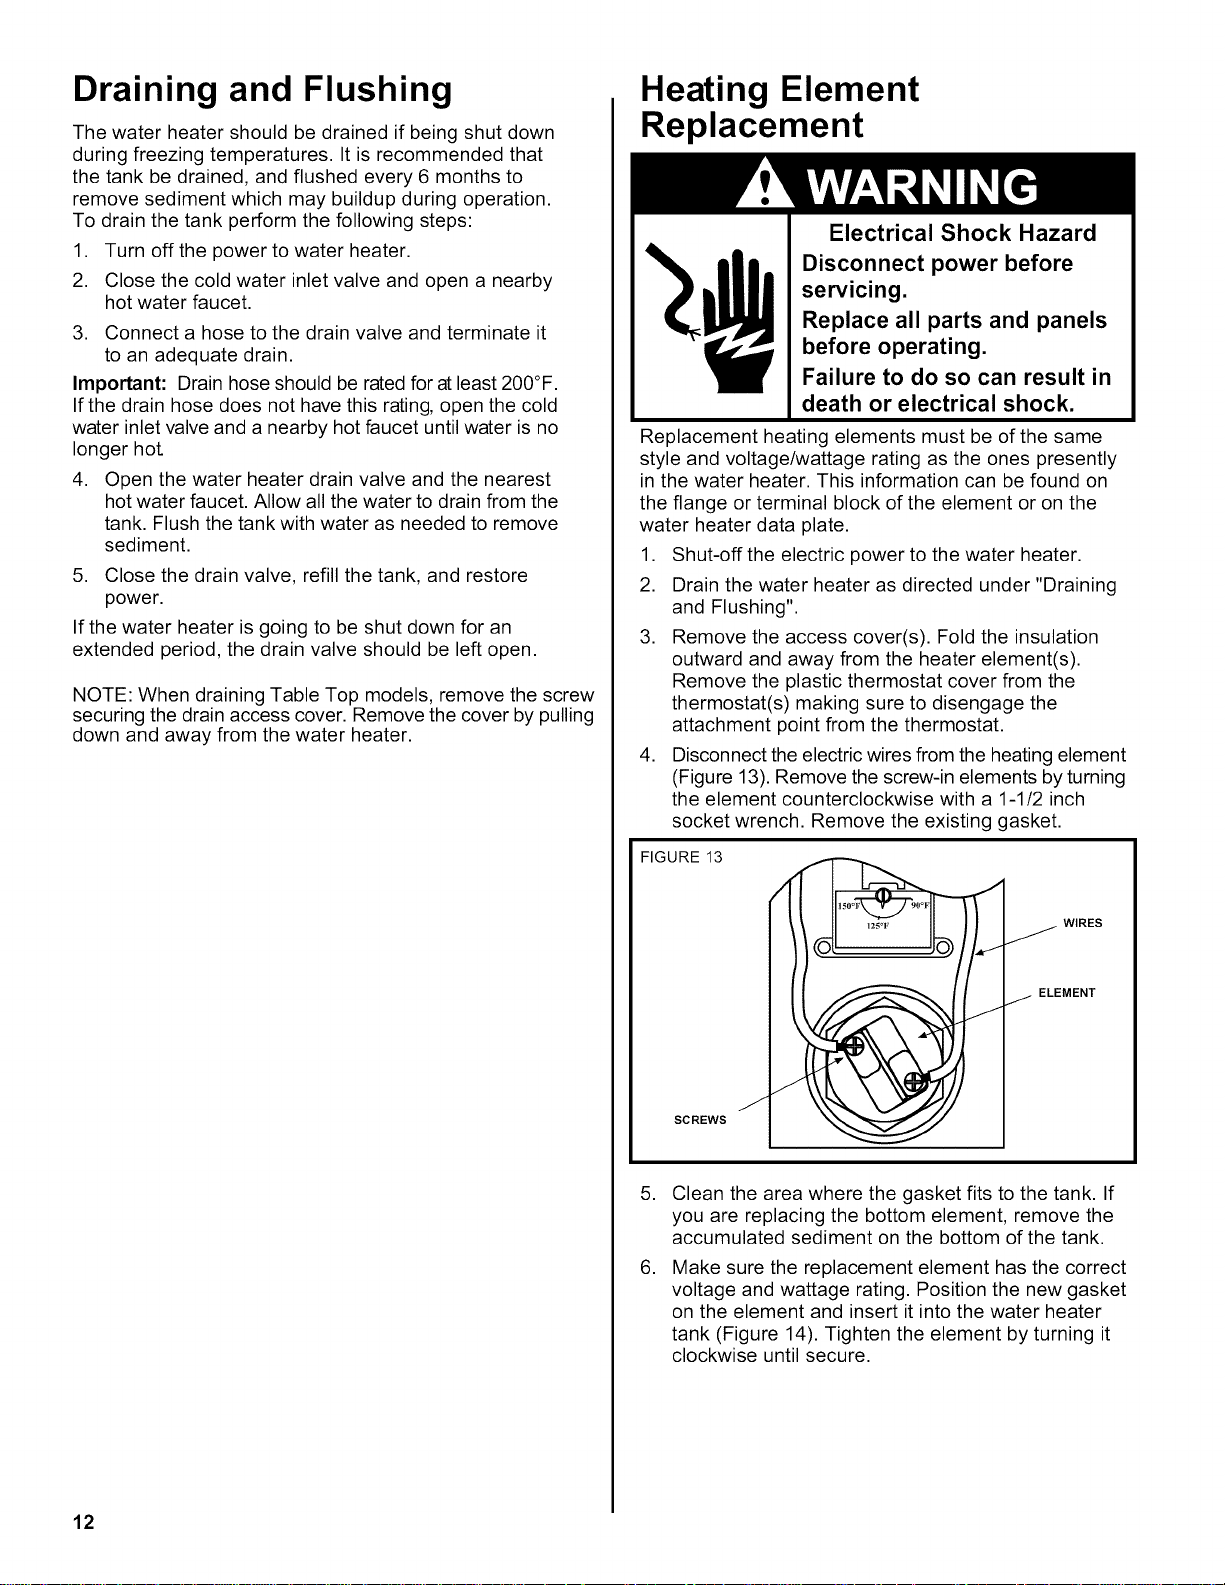
4. Disconnect the electric wires from the heating element
(Figure 13). Remove the screw-in elements by turning
the element counterclockwise with a 1-1/2 inch
socket wrench. Remove the existing gasket.
FIGURE 13
WIRES
ELEMENT
SCREWS
,
,
Clean the area where the gasket fits to the tank. If
you are replacing the bottom element, remove the
accumulated sediment on the bottom of the tank.
Make sure the replacement element has the correct
voltage and wattage rating. Position the new gasket
on the element and insert it into the water heater
tank (Figure 14). Tighten the element by turning it
clockwise until secure.
12
Loading ...
Loading ...
Loading ...