Loading ...
Loading ...
Loading ...

Installation instructions en
15
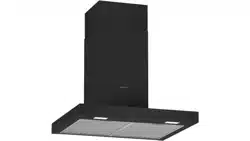
Installing the appliance
1.
Attach and align the appliance.
2.
Mark the hole for the safety screw.
3.
Remove the appliance again.
4.
Drill an 8 mm diameter hole to a depth of 80 mm
for the safety screw and press the wall plug flush
into the wall.
5.
Remove the protective film from the rear.
‒ Once the appliance is installed, fully remove the
protective film.
6.
Attach the appliance.
7.
Screw in the safety screw with the washer.
Piping
Note:If you are using an aluminium pipe, smooth the
connection area beforehand.
We recommend the piping with an exhaust air pipe dia-
meter of 150mm.
Establishing the exhaust air connection (exhaust
pipe, 150mm diameter)
1.
Secure the exhaust pipe to the air pipe connector.
2.
Establish the connection to the exhaust air opening.
3.
Seal the joints.
Establishing the exhaust air connection (exhaust
pipe, 120mm diameter)
1.
Secure the reducing connector to the air-pipe con-
nector.
2.
Secure the exhaust air pipe to the reducing con-
nector.
3.
Seal the joints.
Installing the flue duct
WARNING‒Risk of injury!
Components inside the appliance may have sharp
edges.
▶ Wear protective gloves.
1.
Screw the retaining bracket for the flue duct to the
wall.
2.
To separate the flue ducts, remove the adhesive
tape or the flue duct from the protective packaging.
3.
Remove any protective foil from both flue ducts.
4.
Note:The slots on the flue duct should point down-
wards.
Push one flue duct section into the other.
5.
Note:To prevent scratches, lay soft towels over the
edges of the outer flue duct to protect the surface.
Place the flue duct sections on the appliance.
Loading ...
Loading ...
Loading ...