Loading ...
Loading ...
Loading ...
12 ENGLISH
CAUTION: Do not take hand o from the rod
handle. Otherwise the grease pops out vigorously.
NOTICE: Keep dust away from inside of the
barrel. Dust may get clogged in the tool.
NOTICE: Clean the inside of the barrel once
every three months.
OPTIONAL
ACCESSORIES
CAUTION: These accessories or attachments
are recommended for use with your Makita tool
specied in this manual. The use of any other
accessories or attachments might present a risk of
injury to persons. Only use accessory or attachment
for its stated purpose.
If you need any assistance for more details regard-
ing these accessories, ask your local Makita Service
Center.
• Adapter
• Flexible hose
• Barrel
• Cartridge barrel
• Shoulder strap
• Lock on adapter
• Angle adapter
• Makita genuine battery and charger
NOTE: Some items in the list may be included in the
tool package as standard accessories. They may
dier from country to country.
Replacing of the adapter
Loosen and remove the old adapter with two wrenches
as illustrated and then tighten the new adapter securely.
NOTE: If grease leaks from the joint between the
hose and the adapter, wrap thread seal tape around
the thread part of the hose before connecting the
adapter.
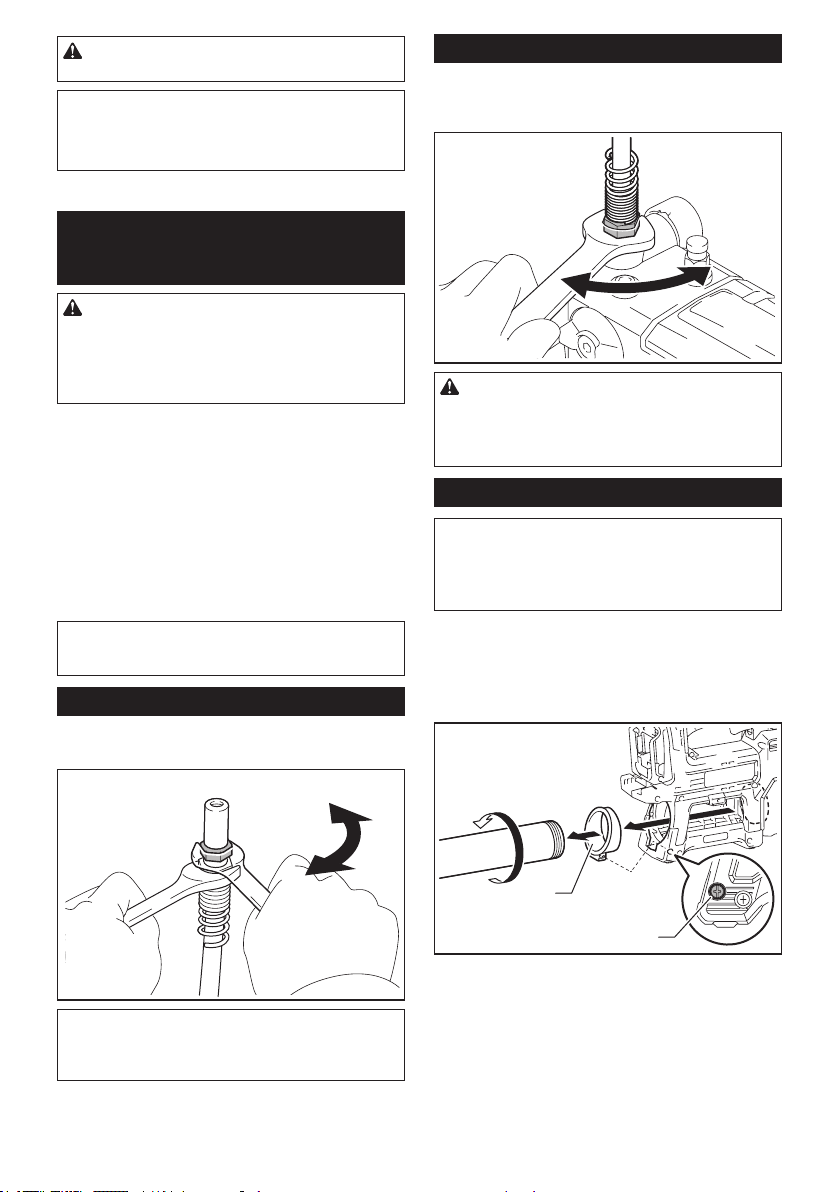
Replacing of the exible hose
Loosen and remove the old exible hose with a wrench
as illustrated and then tighten the new exible hose
securely.
CAUTION: Replace the rubber ring attached
to the connection part of the new exible hose at
the same time. If you replace the exible hose with-
out the rubber ring or with the old rubber ring, grease
may leak and cause an injury.
Changing the barrel
NOTE: The barrel type varies depending on the
country.
NOTE: To install a barrel of dierent type, additional
parts described below are required depending on the
type of the barrel.
Changing the barrel from A-type to
B-type
1. Remove A-type barrel.
2. Remove the screw and then the sleeve.
1
2
► 1. Sleeve 2. Screw
3. Insert the joint with the rubber packing while align-
ing the tab with the groove on the mounting part
and then secure it with screws.
Loading ...
Loading ...
Loading ...