Loading page 1...
Loading page 2...
Loading page 3...
Loading page 4...
Loading page 5...

Contents
System message.............................................................................................................................. 40
Using Parental Control..................................................................................................................... 41
Reset to Factory Default.................................................................................................................. 42
Entertainment
Game................................................................................................................................................ 43
SoundBar Settings............................................................................................................................44
Sports................................................................................................................................................44
Media................................................................................................................................................ 45
Accessibility Features
Accessibility Menu Setup................................................................................................................. 49
Troubleshooting
FAQ...................................................................................................................................................50
Picture Issues................................................................................................................................... 56
Sound Issues....................................................................................................................................57
Network Issues................................................................................................................................. 57
Channel and Broadcast Issues........................................................................................................ 58
External Device Connection Issues................................................................................................. 58
HDMI & CEC Issues........................................................................................................................ 59
Application Issues.............................................................................................................................59
Media Files....................................................................................................................................... 59
Voice Service Issues........................................................................................................................ 60
Other Issues..................................................................................................................................... 60
2
Loading page 7...

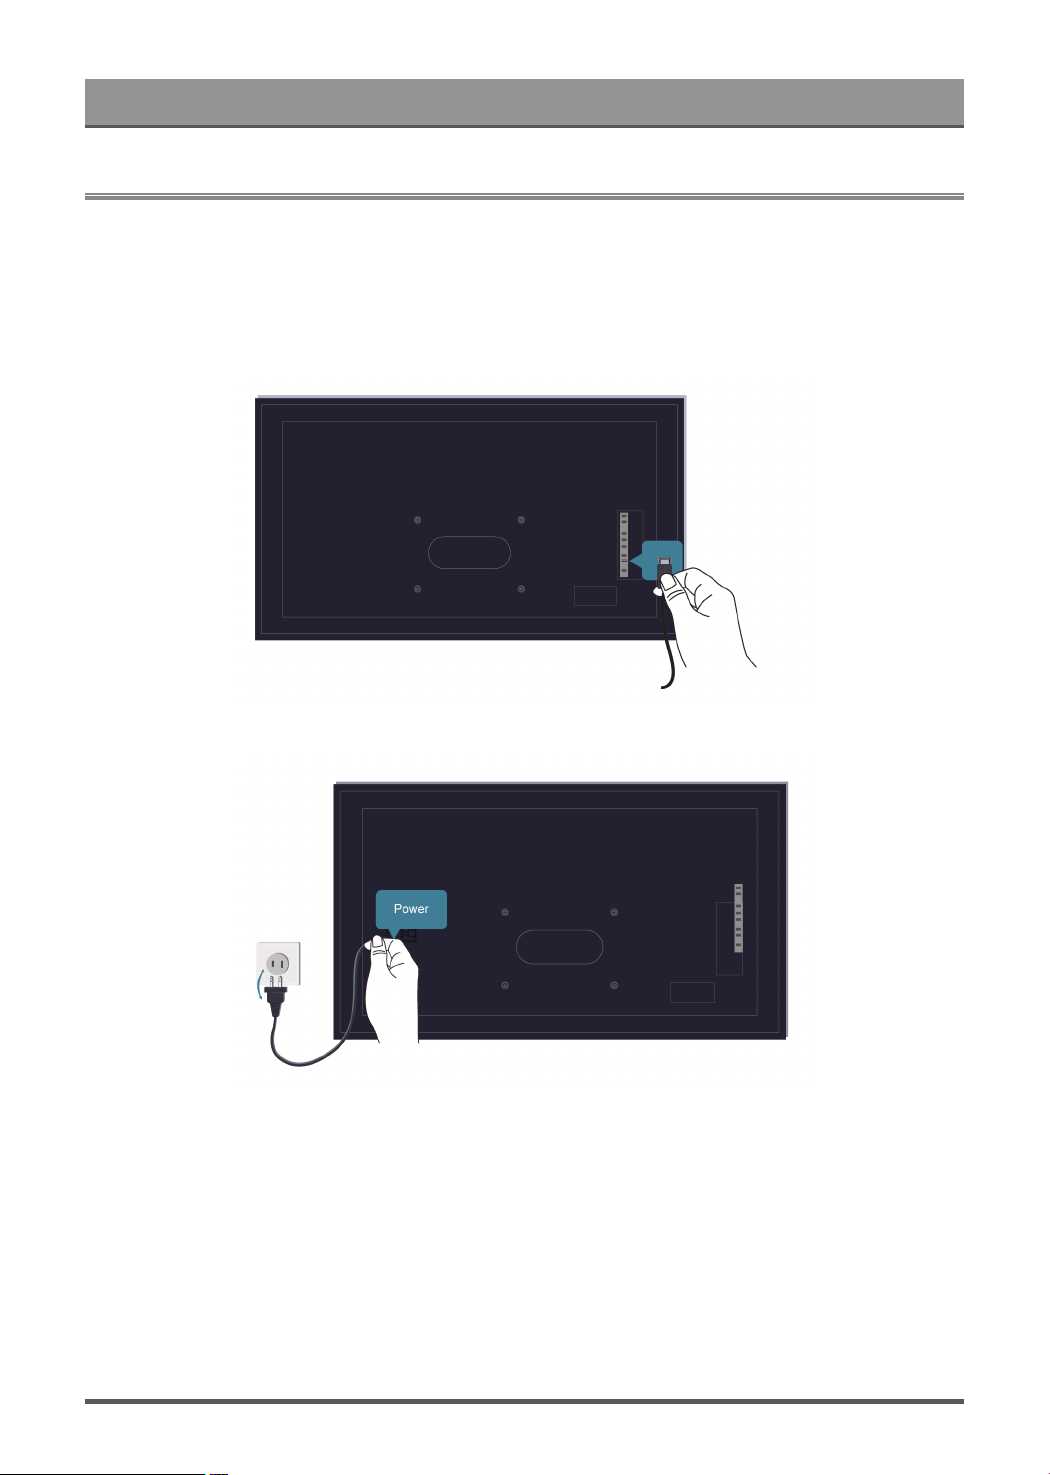
First-Time Use
After connecting to a wired (Ethernet) network:
Press button on your remote control to select Settings > Network & Internet.
Go to ETHERNET section, and set the TV network by pressing button to enter the submenu.
• Connection Type
Show whether the Ethernet is connected.
• Proxy settings
You can set the proxy server.
• IP settings
Configure the IP setting for your network connection.
Related information
Network & Internet on page 37
Network Issues on page 57
My TV cannot connect to the network. on page 52
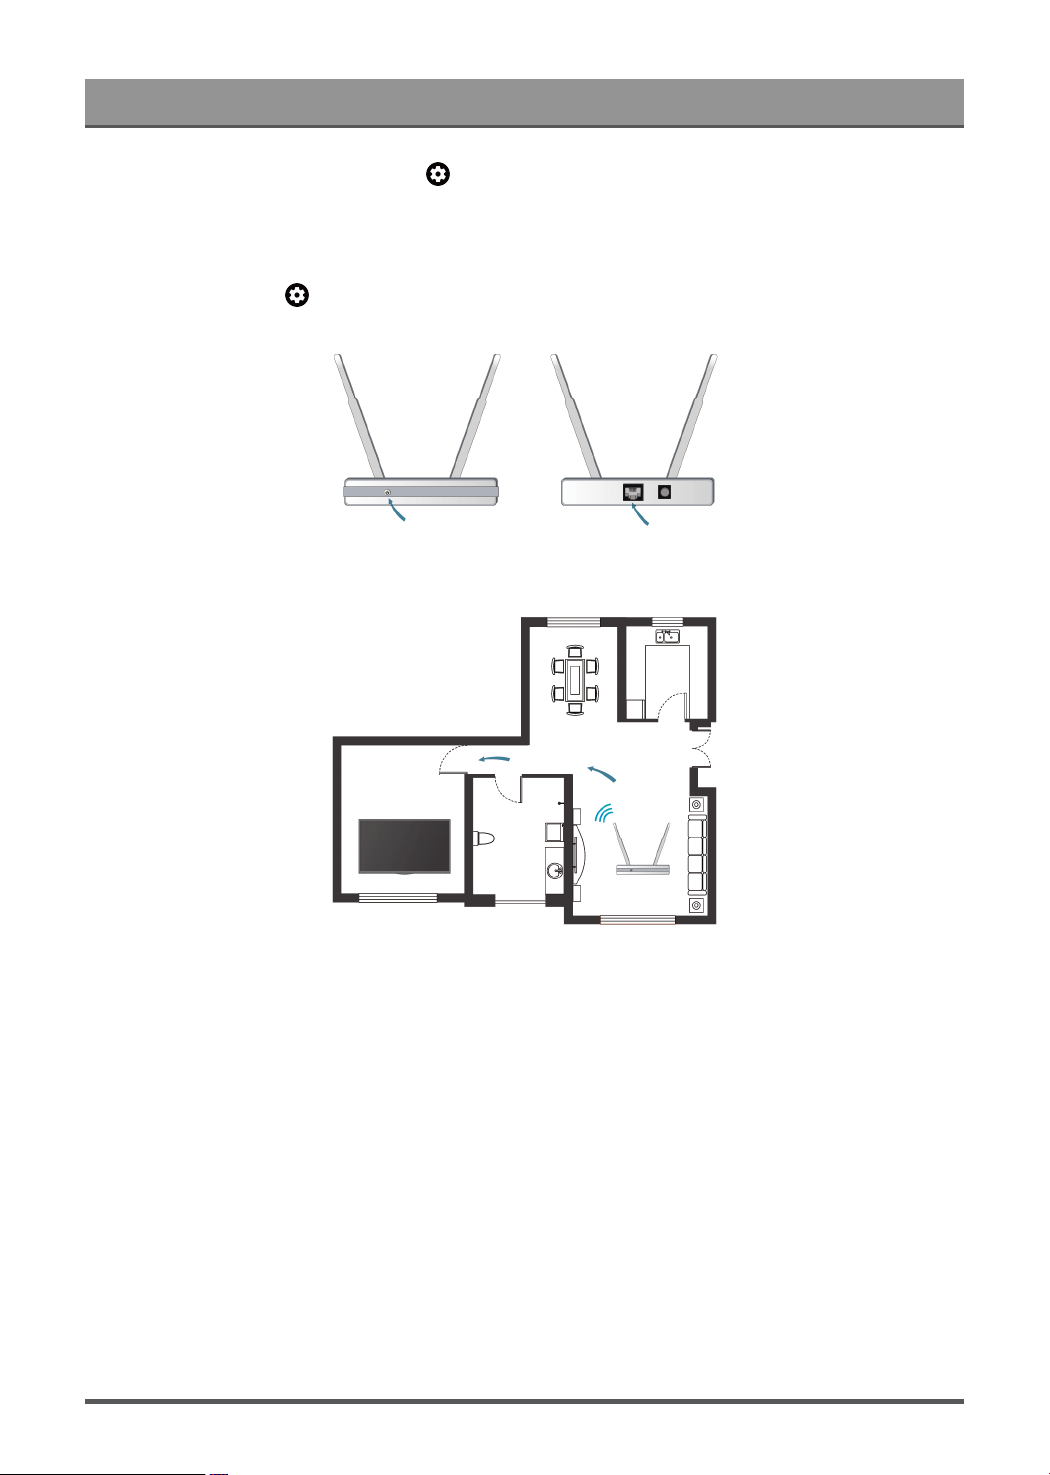
Connect to a Wireless Network
To connect to an available wireless network, make sure that you turn on your wireless router and have the
wireless router's SSID and password before attempting to connect.
To get access to the Internet using a wireless connection:
Press button on your remote control to select Settings > Network & Internet > Wi-Fi.
To get access to the Internet in a wireless way:
1. Turn on your Wi-Fi.
2. The list of networks will display automatically.
3. Select a wireless network from the list, and input the password.
4. If the network connection does not appear in the list, select See all to display all the list, or select Add new
network to input a wireless network name, select the type of security mode, and enter password.
4
Loading page 9...
Loading page 10...
Loading page 11...
Loading page 12...
Loading page 13...
Loading page 14...
Loading page 15...
Loading page 16...
Loading page 17...
Loading page 18...
Loading page 19...
Loading page 20...
Loading page 21...
Loading page 22...
Loading page 23...
Loading page 24...
Loading page 25...
Loading page 26...
Loading page 27...
Loading page 28...
Loading page 29...
Loading page 30...
Loading page 31...
Loading page 32...
Loading page 33...
Loading page 34...
Loading page 35...
Loading page 36...
Loading page 37...
Loading page 38...

Settings Overview
Bass Boost
Hear and feel rich bass response with the TV's subwoofer speaker.
This function may not be applicable in some models/countries/regions.
Enable Wall Mount Setup
Press button on your remote control to select Settings > Display & Sound > Sound > Wall Mount
Setup.
Automatically optimize the sound based on the position of the TV.
Wall Mount Setup is only available when you select TV speaker as audio output.
Auto Acoustic Tuning
Optimise the sound output acoustics according to the listening environment.
Note:
• The menu may vary, depending on the actual display of the TV.
Related information
Sound Issues on page 57
Configure Advanced Settings
Press button on your remote control to select Settings > Display & Sound > Sound > Advanced
Settings.
Tune the audio settings and quality of the TV.
Balance
Adjust the left and right speaker strength to optimize audio for a specific location.
Volume Level
Balance the sound volume of each source.
Auto Volume Control
Activate to prevent the volume from changing when you switch TV channels.
Lip Sync
Synchronize the displayed image with the audio output.
Equalizer
Boost the volume at different frequencies.
Resetting the sound settings
Press button on your remote control to select Settings > Display & Sound > Sound > Reset.
Reset current audio settings to factory mode.
35

Settings Overview
Audio Output
Select speakers and adjust the audio output settings.
Note:
• This function may vary depending on the version of the software.
Select Speakers
Press button on your remote control to select Settings > Display & Sound > Audio Output > Audio
Output Selection.
Select the speakers which you want to use.
Configuring WiSA Speaker Settings
Press button to select icon, and select Settings > Display & Sound > Audio Output > WiSA
Speaker Settings.
Wireless audio transmission can be available with Dongle provided by WiSA Ready and sound system
certified by WiSA Ready.
Note:
• WiSA Speaker Settings may not be applicable in some models/countries/regions.
Related information
Connecting Speakers or Other Audio Receivers on page 27
Connecting a Digital Audio System with ARC on page 27
Adjust the Audio Output settings
Enable eARC
Press button on your remote control to select Settings > Display & Sound > Audio Output > eARC.
Connect an audio device that supports eARC via HDMI-eARC, and set eARC to On to enjoy premium sound
quality.
Digital Audio Out
Select the digital audio output format that best suits the audio device type.
Note:
• When using optical connection, PCM and Dolby Digital are suggested.
• If your external audio device does not support Dolby or DTS, PCM is suggested.
Digital Audio Delay
Adjust the digital audio output delay time to sync sound from an external speaker with the images on the TV.
Note:
• Digital Audio Out and Digital Audio Delay functions are only applicable when Audio Output is set to ARC or
when external audio players are connected via DIGITAL AUDIO OUT jack.
36
Loading page 41...

Settings Overview
Scanning always available
Press button on your remote control to select Settings > Network & Internet > Scanning always
available.
Let Google's location service and other apps scan for networks, even when Wi-Fi is off.
Related information
My TV cannot connect to the network. on page 52
Connect to a Wired (Ethernet) Network on page 3
Connect to a Wireless Network on page 4
General
You can set up system settings.
Note:
• The menus displayed vary depending on models/countries/regions.
Set Time
Press button on your remote control to select Settings > System > Date & Time.
• Automatic date & time
Set to use network-provided time.
You can also set the current time manually when Off is selected.
When Off is selected, the TV Network may not be working properly.
• Set date
Set the date.
• Set time
Set the time.
• Set time zone
Select your time zone.
• Use 24-hour format
Set the time to display in a 12 or 24-hour format.
Use Timer
Press button on your remote control to select Settings > System > Power & Energy > Power & Energy
Saving.
• Sleep Timer
Set the sleep timer to automatically turn the TV off within a specified time: off, 10 Minutes, 20 Minutes, 30
Minutes, 40 Minutes, 50 Minutes, 60 Minutes, 90 Minutes and 120 Minutes.
• Power On Timer Type
Set the type: Off, Daily, Once.
• Power On Timer
Set the clock for the time you want the TV to turn on automatically.
38

Settings Overview
• Power Off Timer Type
Set the type: Off, Daily, Once.
• Power Off Timer
Set the clock for the time you want the TV to turn off automatically.
Set Language
Press button on your remote control to select Settings > System > Language.
Adjust the default Language settings for the TV.
Configure Device Preferences Settings
Related information
Use Timer on page 38
Keyboard
Press button on your remote control to select Settings > System > Keyboard.
Adjust the default settings for the keyboard.
Storage
Press button on your remote control to select Settings > System > Storage.
View the TV storage.
Ambient mode
Press button on your remote control to select Settings > System > Ambient mode.
Activate a screensaver when your TV displays a still image for a period of time. Set the time according to your
preference.
Power & Energy
Press button on your remote control to select Settings > System > Power & Energy.
Power on behavior
Select the screen to start when powering on the TV.
You can select Home screen or Last input.
Energy saver
Turn off display after 15 minutes, 30 minutes, 1 hour, 4 hours, 8 hours, 12 hours, 24 hours, Never.
Power & Energy Saving
You can set Power LED ON or OFF, set Power On Mode to Remember, Standby, On, Sleep Timer, Auto
Sleep, and Power On Timer Type.
System sounds
This is a switch for system sounds.
39

Settings Overview
Camera Smart Functions
Configure Advanced System Settings
Press button on your remote control to select Settings > System > Advanced System.
Screenless Mode
If your models support Hands-free Voice Control function,when the Screenless Mode is set to Off, the Google
Assistant will not available when the screen is off, you also will not be able to remotely wake up the TV
through external devices. In screenless Mode, the Google Assistant is always available to help even when the
screen is not on. Just say "OK Google/Hey Google".
This feature will affect standby power consumption when it is set to On.
Note:
• The Google Assistant and some features are available on limited country/region/language.
• This function may not be applicable in some models.
Wake on Cast
You can enable or disable Wake on Cast function which is able to remotely wake up the TV through external
devices.
Note:
• This function may not be applicable in some models/countries/regions.
Product Registration
Visit https://www.hisense-usa.com/support/register or scan the QR code with another device (cellphone,
tablet..) to complete your registration.
Note:
• The website and the QR code may be different in some countries/regions.
E-Manual
Scan QR code to display E-Manual.
Using the E-Manual
Clear Cache
Clear cache of applications and system.
System message
Press button on your remote control to select Settings > System > Advanced System > Help > System
message.
View system message, including: Serial Number, Service Code, Software Version, etc.
System message
Press button on your remote control to select Settings > System > Help > System message.
View system message, including: Serial Number, Service Code, Software Version, etc.
40

Settings Overview
Support information
Press button on your remote control to select Settings > System > Help > Support information.
View Support URL, Support Number, Email, etc.
Signal Information
Press button on your remote control to select Settings > System > Help > Signal Information.
Perform self diagnosis to test Video Format, Audio Format, Color Depth, etc.
Check Software Version
To check the current software version of your TV:
Press button on your remote control to select Settings > System > Help > System message.
System Update
Press button on your remote control to select Settings > System > About > System update.
Set your TV to receive the latest firmware. Provide software updates to continuously enhance your TV
and correct any issues that may impact your user experience; therefore, recommend you to keep your TV
connected to the Internet to automatically receive updates when they are available.
Set Usage Mode
Set the TV to use in Home or Store mode.
Home Mode
Select Home Mode for normal TV usage.
If you want to switch to Store Mode when the TV is in Home Mode, turn on Store Mode at > Settings >
System > Advanced System.
Store Mode
Select Store Mode to setup the TV in a retail setting. This mode enables E-Pos and other demo functions and
is only intended for use in retail stores.
When Store Mode is selected, press / button on your remote control to enter store mode settings.
If you want to switch to Home Mode when the TV is in Store Mode, press / button on your remote
control to enter Store Mode Settings and choose Home Mode. Alternatively, turn off Store Mode at >
Settings > System > Advanced System.
Note:
• Enabling Store Mode could increase energy consumption.
• How to exit Store Mode varies depending on models/countries/regions.
Using Parental Control
Press button to select Settings > System > Advanced System > Parental Control.
41

Settings Overview
The Parental Control setting allows you to block content that is not appropriate for children to watch.
• Locks
Turning Parental Control On
1. Turn on Locks to enable the Parental Control function.
2. Create PIN window displays. Using the D-pad on your remote control, create the password.
3. You will see other Parental Control settings change from a greyed out state to highlighted. When this
occurs, begin adding other settings to the Scheduled Blocking, Channel Blocking, Program Blocking,
Input Blocking, Change PIN and Reset features.
• Scheduled Blocking
Block certain channels, programs and inputs during certain periods of time.
• Channel Blocking
Block selected channels.
• Program Blocking
Block programs by ratings.
• Input Blocking
Block selected inputs.
• Change PIN
Change the PIN that you use to access Parental Control.
Note:
If you forget your password, call the Consumer Electronics Care Centre.
• Reset
Reset Parental Control back to the factory setting.
Reset to Factory Default
Press button on your remote control to select Settings > System > About > Reset > Factory reset.
Restore your device to default settings and erase all data, accounts, files, and downloaded apps.
42
Loading page 47...
Loading page 48...
Loading page 49...
Entertainment
• Some options in the above table may not be available in some models/countries/regions.
• The image is only for reference and may differ from the actual product.
Media format list
Due to differences in programming tools and other factors, some of the file formats that are listed may not be
supported.
The listed formats may not be supported depending on the model.
Video Format
Container Video Codec File Extension Name Resolution and Frame Rate
MPG MPEG1
720 x 576 @ 30fps
MPEG2
.mpg .mpeg
3840 x 2160 @ 30fps
MPEG1 720 x 576 @ 30fps
MPEG2 3840 x 2160 @ 30fps
MPEG4 1920 x 1080 @ 60fps
MPEG program
stream
H.264
.DAT, .VOB, .MPG,
.MPEG
3840 x 2160 @ 60fps
HEVC/H.265 3840 x 2160 @ 60fps
MPEG4 1920 x 1080 @ 60fps
H.264 3840 x 2160 @ 60fps
VC1 1920 x 1080 @ 60fps
MPEG1 720 x 576 @ 30fps
MPEG transport
stream
MPEG2
.ts, .trp, .tp
3840 x 2160 @ 30fps
VP8 1920 x 1080 @ 60fps
AV1
HEVC/H.265
3840 x 2160 @ 60fps
MPEG1
720 x 576 @ 30fps
MPEG2 3840 x 2160 @ 30fps
MPEG4
H.263
WMV3
VC1
1920 x 1080 @ 60fps
H.264 3840 x 2160 @ 60fps
MP4
Motion JPEG
.mp4, .mov
1920 x 1080 @ 60fps
VP9
HEVC/H.265
3840 x 2160 @ 60fps
MPEG1
720 x 576 @ 30fps
MKV
MPEG2
.mkv
3840 x 2160 @ 30fps
46
Loading page 51...
Entertainment
Container Audio Codec File Extension Name
MPEG1/2/2.5
Layer3
AAC-LC, HEAAC
DTS, DTS HD
LPCM
MPEG1/2
Layer1
MPEG1/2
Layer2
MP3
MPEG1/2/2.5
Layer3
.mp3
AAC AAC-LC, HEAAC .aac
WMA7, WMA8, WMA9
WMA Pro
WMA
WMA9 Pro
.wma, .wmv
FLAC FLAC .flac
Photo Format
Image Photo Resolution
.jpg .jpeg 65535 x 65535JPEG
Progressive 1920 x 1080
PNG
BMP
GIF
8192 x 4320
WebP 3840 x 2160
THIS PRODUCT IS LICENSED UNDER THE AVC PATENT PORTFOLIO LICENSE FOR THE PERSONAL
USE OF A CONSUMER OR OTHER USES IN WHICH IT DOES NOT RECEIVE REMUNERATION TO (i)
ENCODE VIDEO IN COMPLIANCE WITH THE AVC STANDARD (“AVC VIDEO”) AND/OR (ii) DECODE AVC
VIDEO THAT WAS ENCODED BY A CONSUMER ENGAGED IN A PERSONAL ACTIVITY AND/OR WAS
OBTAINED FROM A VIDEO PROVIDER LICENSED TO PROVIDE AVC VIDEO. NO LICENSE IS GRANTED
OR SHALL BE IMPLIED FOR ANY OTHER USE. ADDITIONAL INFORMATION MAY BE OBTAINED FROM
MPEG LA, L.L.C. SEE HTTP://WWW.MPEGLA.COM
48

Accessibility Features
Accessibility Menu Setup
Press button on your remote control to select Settings > System > Accessibility.
Accessibility function provides menu options and audio descriptions to aid the visually or hearing impaired.
Captions
Displays and sets the closed captions. You can set display options and select caption style.
• Closed Captioning
• Captions
High contrast text
Improves contrast for the visually impaired.
Text to speech
Let you specify text-to-speech engine details and speech rate.
Accessibility shortcut
When the shortcut is on, you can press both the back and down buttons for 3 seconds to start an accessibility
feature.
TalkBack
Controls spoken feedback for visually impaired users.
Switch Access
Switch Access can collect all of the text you type, except passwords. This includes personal data such as
credit card numbers.
Note:
• Some options in the above table may not be available in some models/countries/regions.
• The menu is only for reference and may differ from the actual product.
Related information
Video Description on page 12
49
Troubleshooting
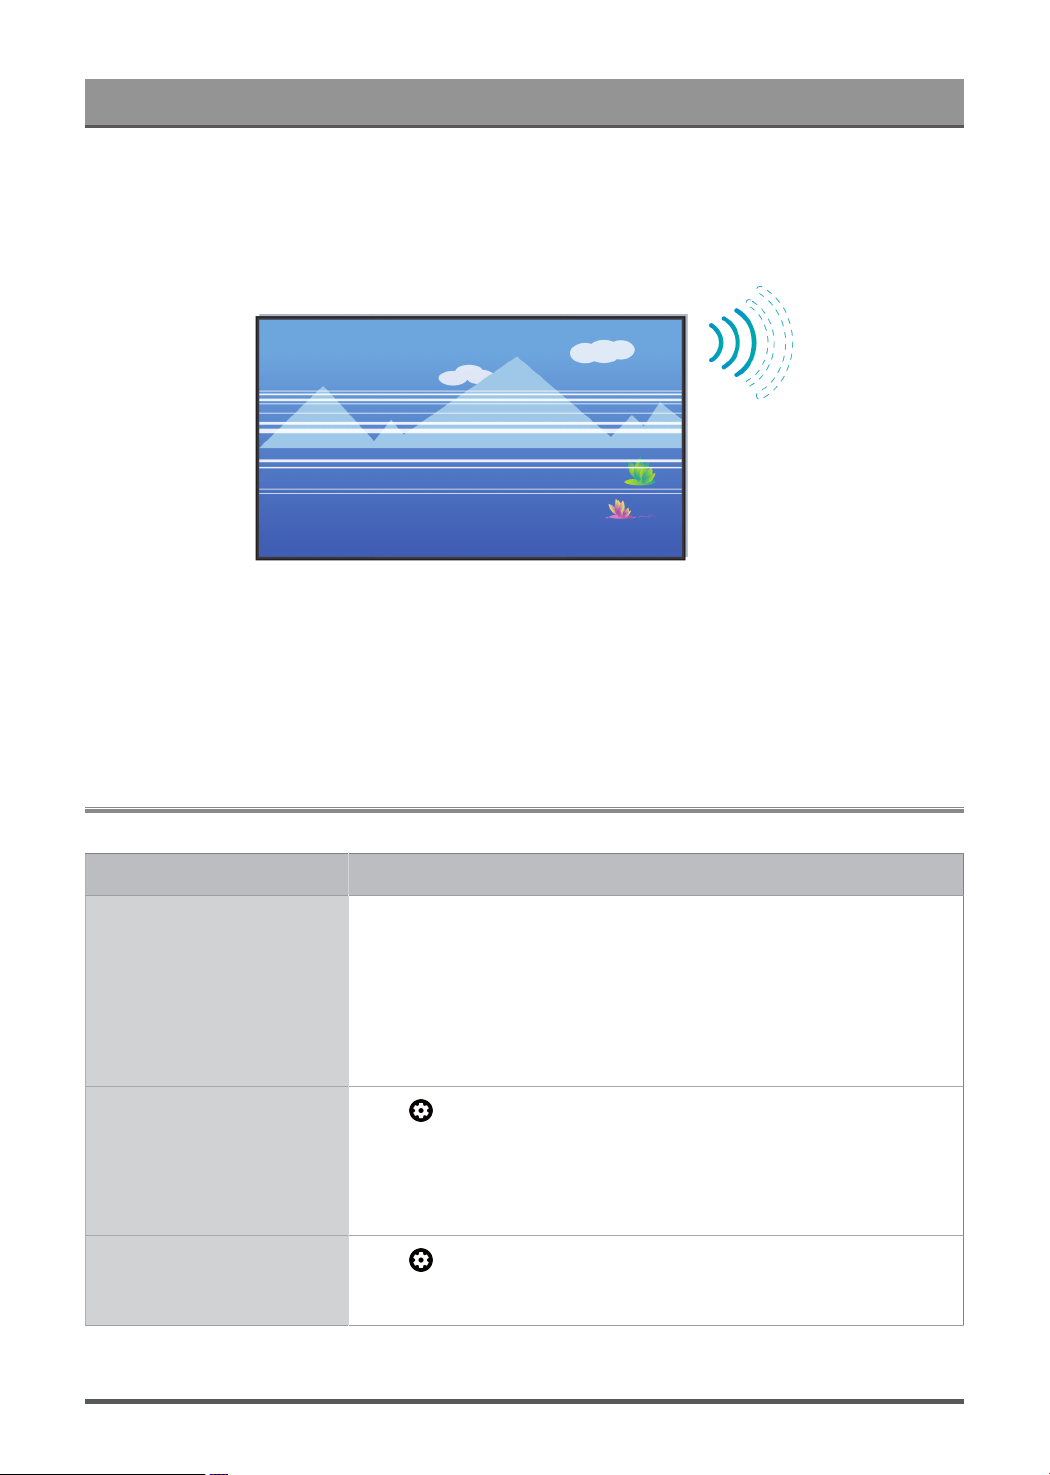
FAQ
In this section you will find the answers to the most frequently asked questions.
Note:
• The images are only for reference and may differ from the actual product.
There is no picture, or the picture is black and white.
Check input cable connections.
Unplug the TV power cord from AC outlet and re-plug after 60 seconds.
There is no sound or the sound is too low.
There is no sound or the sound is too low at maximum volume.
50

Troubleshooting
Check if Mute mode is set to on.
Check the volume settings.
Check the volume control of the device (cable or satellite box, DVD, Blu-ray, etc.) connected to your TV.
Make sure that the audio cable is connected to the correct audio output connector on the external device.
51
Troubleshooting
Check whether TV Speaker is selected at > Settings > Display & Sound > Audio Output > Audio
Output.
My TV cannot connect to the network.
Check network status at > Settings > System > About > Status.
Make sure your modem/wireless router is on and connected to the Internet.
Position your wireless router, modem router, or access point in a central location. Avoid putting it in a corner.
External source connected but no picture or sound.
I have connected an external source to my TV but I get no picture and/or sound.
52
Loading page 57...

Troubleshooting
When devices are connected with HDMI cables
•
If there is always no signal, or the signal cannot be restored after plugging and unplugging, you can press
/ button to select HDMI Format in HDMI source, to confirm whether the signal can be recognised.
• Change to another HDMI port.
• Change to another HDMI cable.
The remote control does not work.
Confirm that TV still has power and is operational. Press the power button on the TV to determine if the
problem is with the remote control or not.
If the TV is not responding to the remote control, then please check if the small light on the remote control
flashes when any button is pressed (some remote controls do not support this function).
If the small light does not flash when the remote control button is pressed, the battery power may be low,
please replace the batteries with new ones.
Check that the orientation of each battery matches the positive (+) and negative (-) symbols in the battery
compartment.
Keep the remote control sensor area clear from obstacles.
54
Troubleshooting
For Bluetooth remote controls
If the TV does not respond with the Bluetooth remote control, try pairing the remote control to the TV by
pressing and holding the and button at the same time.
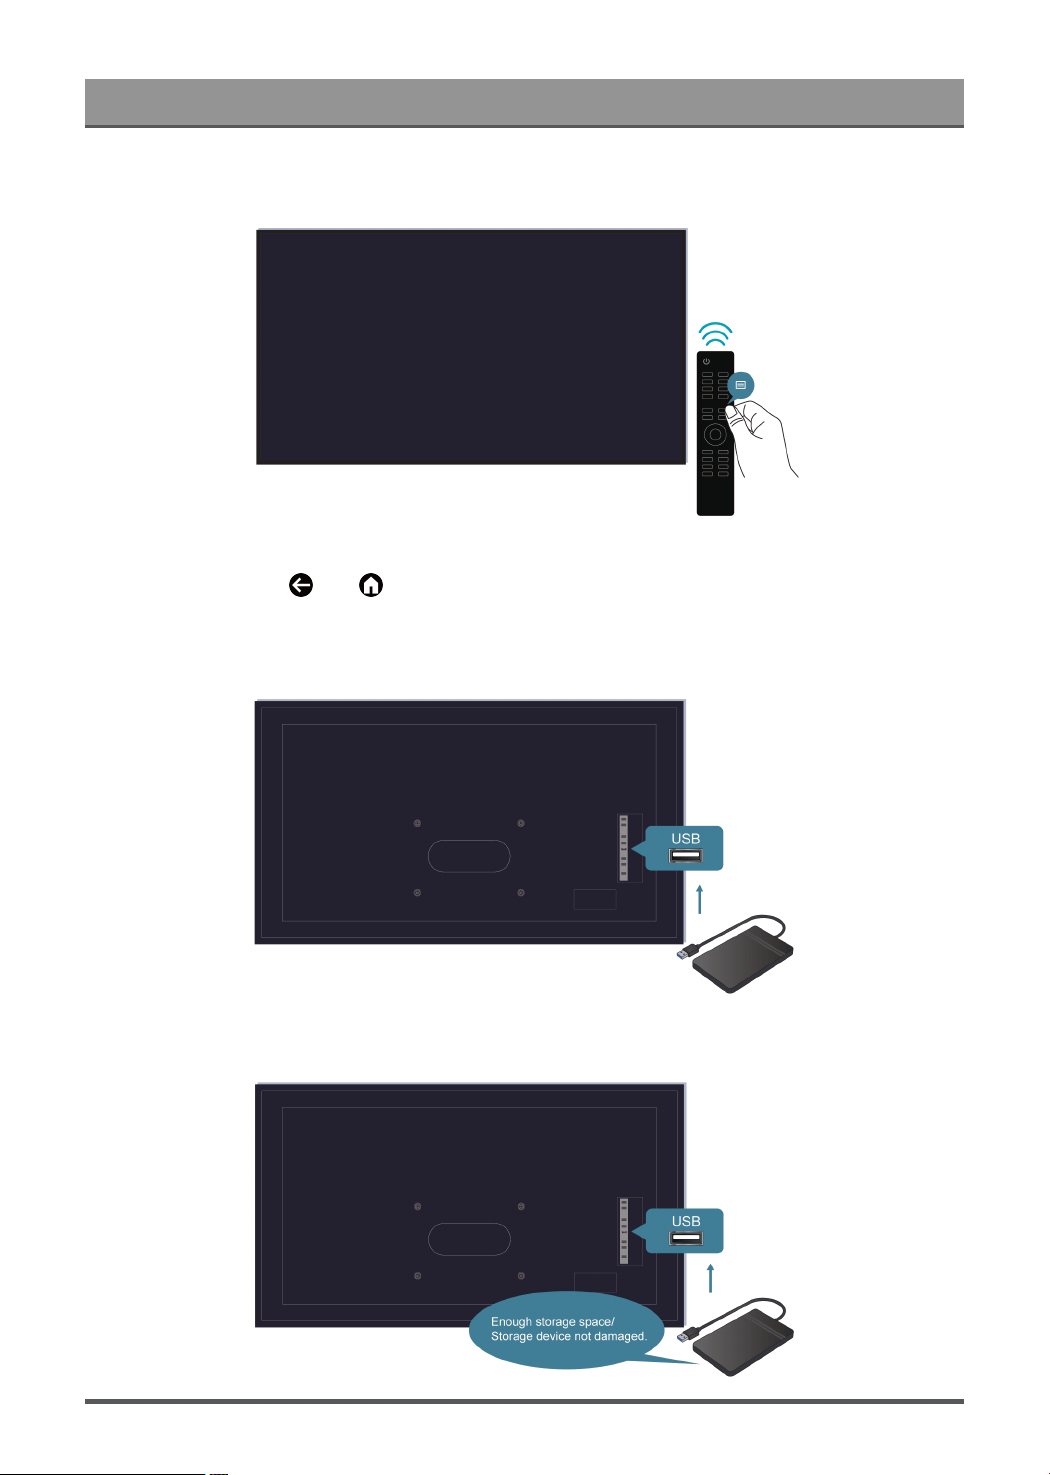
Schedule Recording cannot be used.
Check if there is a storage device connected to the TV.
55
Troubleshooting
Check the free space of the storage device. The function will not work if there is not enough storage space on
the device.
Check whether your storage device is damaged. If so, it is suggested to format your storage device.
Recording will automatically stop if the signal becomes too weak.
Note:
• Recording function may not work if the read/write speed of the USB device is too slow.
• Recording function may not work because the storage format of your device is unsupported.
• The Recording functions may not be applicable in some models/countries/regions.
Picture Issues
When the TV has a picture problem, these steps may help resolve the problem.
Problems Possible Solutions
The picture is distorted.
• The compression of video content may cause picture distortions,
especially in fast moving pictures from sports programs and action
movies.
• If the signal reception is weak or poor, screen distortion may be visible but
it is not a malfunction.
• Mobile phones used close to the TV (within 1m) may cause noise on
analogue and digital channels.
The picture is blurry or
flickering, or cuts out
momentarily.
•
> Settings > Display & Sound > Picture > Sharpness. You can try
to increase or decrease the Sharpness.
• If you use an external antenna, check the direction, position and
connection of the antenna.
• Adjust the direction of your antenna, or reset or fine tune the channel.
The picture appears red,
purple, pink and other
colors.
•
> Settings > Dispaly & Sound > Picture > Calibration Settings >
White Balance. You can try to increase or decrease the White Balance.
56
Troubleshooting
Problems Possible Solutions
Picture distorted or appears
wavy.
• Some electrical appliances may affect the TV. If you turn off the appliance
and the interference goes away, then move it further away from TV.
• Insert the power plug of the TV into another power outlet.
Related information
There is no picture, or the picture is black and white. on page 50
Sound Issues
When the TV has a sound problem, these steps may help resolve the problem.
Problems Possible Solutions
Picture is normal, but no
sound.
• Check the volume settings.
• Check if 'Mute' mode is set to on.
• Check the volume control of the device (cable or satellite box, DVD, Blu-
ray, etc.) connected to your TV.
The speakers are making an
odd sound.
• Make sure that the audio cable is connected to the correct audio output
connector on the external device.
• For antenna or cable connections, check the signal information.
• A low signal level may cause sound distortions.
Sound distorted or appears
wavy.
• Some electrical appliances may affect the TV. If you turn off the appliance
and the interference goes away, then move it further away from TV.
• Insert the power plug of the TV set into another power outlet.
Sound is blurry or cuts out
momentarily.
• If you use an external antenna, check the direction, position and
connection of the antenna.
• Adjust the direction of your antenna or reset or fine tune the channel.
Note:
• This product does not support decoding of DTS CD bitstreams. Playback of this format may produce
undesirable noise.
Related information
There is no sound or the sound is too low. on page 50
Network Issues
If the TV network is connected, the screen will display that it is connected successfully.
Problems Possible Solutions
The TV cannot connect to
apps.
• Make sure the TV has a network connection.
• Contact your Internet service provider.
The wireless network
connection fails.
• Make sure your wireless modem/router is on and connected to the
Internet.
57
Troubleshooting
Problems Possible Solutions
The wireless network signal
is too weak.
• Position your wireless router, modem router, or access point in a central
location. Avoid putting it in a corner.
Related information
My TV cannot connect to the network. on page 52
Channel and Broadcast Issues
For problems while watching live TV or scanning for new services, these suggestions might help to resolve
them.
Problems Possible Solutions
In Live TV, there is no
signal, or a weak signal,
or you cannot find any
channels.
• Make sure that the antenna cable is connected to the correct port.
• Make sure that the antenna cable is not loose or disconnected.
• If "no signal or weak signal" occasionally happens, disconnect antenna
cable and reconnect it.
• Run Reset to Factory Default or scan channels again.
> Settings > System > Restart
> Settings > Channels & Inputs > Channels > Manual Scan
Related information
Prepare Live TV on page 5
Channel Scan on page 7
External Device Connection Issues
When the TV has difficulties with external device connection, these solutions may help resolve the problem.
Problems Possible Solutions
The TV is having trouble
receiving a signal in the
cable box.
• If there is no signal occasionally, unplug cable from TV and re-plug after
60 seconds.
•
If there is always no signal, or the signal cannot be restored after
plugging and unplugging, you can press / button to select HDMI
Format if you select HDMI as input, to confirm whether the signal can be
recognized.
• Change to another HDMI port.
• Change to another HDMI cable.
58
Troubleshooting
Problems Possible Solutions
There is no sound.
•
Check whether ARC is selected at > Settings > Display & Sound
> Audio Output > Audio Output. If not, you need to check whether the
external power amplifier device is connected to the ARC port or optical
port of the TV.
•
> Settings > Display & Sound > Audio Output > Digital Audio
Out. You can try to select Auto, Pass Through, PCM, Dolby Audio -
Dolby Digital, or Dolby Audio - Dolby Digital Plus.
• Whether the power amplifier device port is connected correctly.
•
If you select HDMI as input, you can try / > HDMI Format.
Related information
External source connected but no picture or sound. on page 52
HDMI & CEC Issues
When HDMI & CEC is not working, these steps may help resolve the problem.
Problems Possible Solutions
HDMI & CEC does not work.
• Confirm that the device is a HDMI & CEC compatible device.
• Check if the power cable of the HDMI & CEC device is properly
connected.
• Check the cable connection of the HDMI & CEC device is secure.
•
Check HDMI & CEC feature of your TV is turned on.
> Settings > Channels & Inputs > Inputs > HDMI control
• Check HDMI & CEC feature of the connected device is turned on.
• Depending on the connected HDMI device, the HDMI & CEC control
feature may not work.
Application Issues
When some apps do not play, this may help resolve the problem.
Problem Possible Solutions
Netflix cannot be played.
•
> Settings > Apps > See all apps > Netflix > Force stop, then
reopen to try again.
•
You can try to restart the TV at > Settings > System > Restart.
Media Files
When files do not play, this may help resolve the problem.
59
Troubleshooting
Problem Possible Solutions
Some files cannot be played.
• Most files can be played back, but you might experience problems
with corrupted files or files with high-bitrate, unsupported resolution,
unsupported container or codec formats.
Related information
Media on page 45
Voice Service Issues
When some Voice service will not function, this may help resolve the problem.
Problems Possible Solutions
Alexa cannot be heard.
• You can try to log into your Amazon account.
• If you hear "I don't understand" from the voice recognition, please change
account or log out of the account.
• For more information about Alexa, please refer to Benefits of Smart TV
>Using Voice Control > Alexa Setup in this manual.
Other Issues
Use these procedures to resolve other issues that may occur.
Problems Possible Solutions
The TV is hot.
• Watching TV for an extended period of time causes the panel to generate
heat. The heat from the panel is dissipated through internal vents running
along the top of the TV.
• After extended use, you may feel heat when touching it. This heat is not a
defect and does not affect the TV's functionality.
The TV smells of plastic.
• This smell is normal and will dissipate over time.
The plastic cabinet makes a
"clicking" type of sound.
• The "clicking" sound can be caused when the temperature of the TV
changes. This change causes the TV cabinet to expand or contract, which
makes the sound. This is normal and the TV is OK.
When I turn on my TV, there
is a delay for a few seconds
before the picture appears.
Is this normal?
• Yes, this is normal. The TV is initializing and searching for the previous
setting information.
60