Loading ...
Loading ...
Loading ...

ENGLISH
4
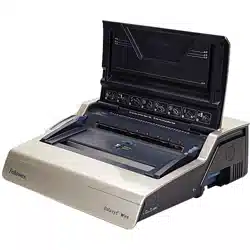
Galaxy includes two methods of wire comb closure, for all sizes of wire comb diameters between 6 and 14mm.
1– Visual scale. – ideal for binding single documents.
The moving closing jaw includes an easy to read scale
6mm 1/4”
8mm 5/16”
10 mm 3/8”
12mm 1/2”
14mm 9/16”
2– Selectable lock control. – ideal for multiple documents of the same sizes.
Set the red STOP bar to the preferred position. Turn the control wheel towards MAX
or MIN positions as required.
The red stop bar moves up and down within the central window.
BEFORE YOU BIND
4
2. Hang the selected wire
comb onto wire comb support.
3. Test punch scrap sheets to
check edge guide setting.
3
2
4. Punch sheets in small batches
that do not overload the machine
or user.
1. Select the correct wire comb
diameter using the storage
tray guide.
1
STEPS TO BIND – SINGLE DOCUMENT
3. Lift the wire comb upwards off
the hooks. Carefully place into the
open wire closing jaws. Ensure the
wire comb is open and touching the
bottom of the mechanism.
3
1. Starting with the rear cover.
Load punched sheets directly onto
the hanging open wire comb.
2. Punch and hang the front
cover. Punch and hang the
remaining sheets.
2
1
4. Lift the wire closing lever
forwards. The closing scale guide is
on the moving jaw. Close the jaws
until the wire gauge shows the size
of wire being closed.
4
6mm 1/4”
Max
niMxaM
14mm 9/16”
STOP
Min
Max 20
(80gsm)
17
PASOS PARA LA ENCUADERNACIÓN: VARIOS DOCUMENTOS
1. Pruebe el cierre del peine de
alambre seleccionado. Coloque
el dispositivo de cierre según sea
necesario. Verifique que el cierre
de la junta de alambre sea total.
1
4. Levante el peine de alambre
para quitarlo de los ganchos.
Colóquelo con cuidado en las
mordazas abiertas de cierre de
alambre. Asegúrese de que el
peine de alambre esté abierto
y que toque la parte inferior
del mecanismo.
2. Comience por la tapa trasera.
Cargue las hojas perforadas
directamente en el peine de
alambre abierto colgante.
3. Perfore y coloque la tapa
delantera. Perfore y coloque
las hojas restantes.
TERMINACIÓN DE LA ENCUADERNACIÓN
1. Verifique la junta cerrada.
Si la junta no está cerrada
correctamente, es posible
colocar el documento
en las mordazas y
cerrarlo nuevamente.
2. Para ocultar la junta,
coloque la tapa trasera atrás.
Ahora se ve la tapa delantera.
La junta está oculta dentro
del documento.
1 2
3. Verifique que el cierre de la
junta de alambre sea total. Si
la encuadernación está abierta,
pueden perderse hojas. Un buen
cierre retiene todas las hojas.
3
5. Levante la palanca de cierre
de alambre. Las mordazas se
cerrarán en la posición de parada
seleccionada previamente.
4
3
2
5
Loading ...
Loading ...
Loading ...