
Loading ...
Loading ...
Loading ...
ENGLISH
8
The bit rotates clockwise when the tool is in the forward
position and counterclockwise when the tool is in the
reverse position. If the bit binds, the tool will slow to a
manageable level. Using proper hand position, brace the
side handle
14
or tool body against a stud for better
support (Fig.D).
REVERSE
FORWARD
Fig. D
14
14
Clutch
The DCD460 is equipped with a mechanical slip clutch. The
clutch is active when the low speed (1) is selected. When
the bit or cutter bites into the workpiece, the clutch will slip
and a ratcheting sound will be heard. Release the trigger.
Continued clutching of the tool will reduce the life of this
feature.
E-Clutch® System (Fig. 1)
The DCD460 is equipped with the
DEWALT
E-Clutch®
system. This feature senses the motion of the tool and
reduces the motor torque to a manageable level if
necessary. The E-Clutch® indicator
7
will illuminate to
indicate status.
INDICATOR DIAGNOSIS SOLUTION
OFF Tool is
functioning
normally
Follow all warnings and
instructions when operating
the tool.
SOLID E-Clutch®
System has
been activated
(ENGAGED)
With the tool properly
supported, release trigger.
The tool will function
normally when the trigger
is depressed again and the
indicator light will go out
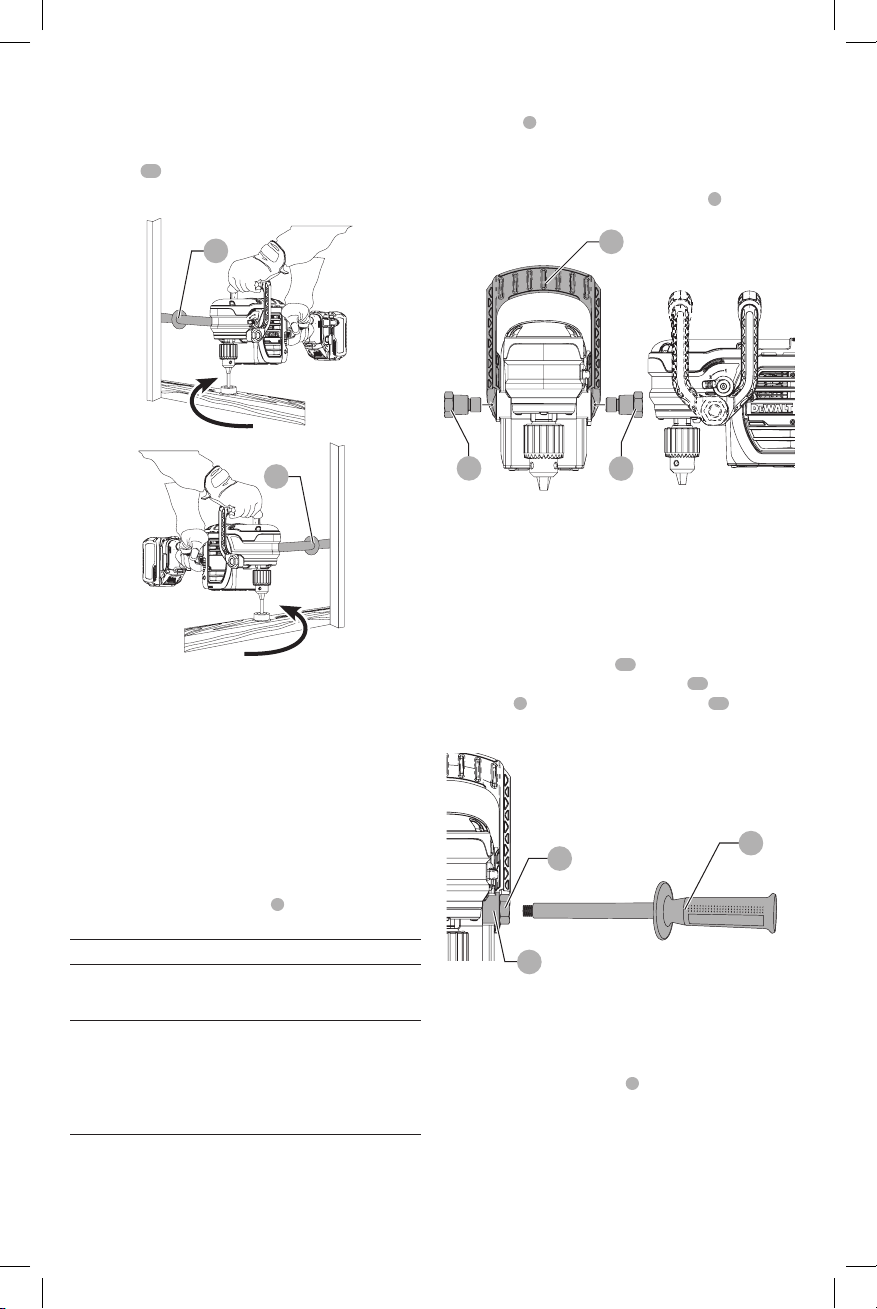
Bail Handle (Fig. E)
A bail handle
1
is provided for carrying the tool and for
use as an additional handle. Assemble the bail handle in
one of the positions shown in FigureE. When changing the
location of the bail handle from one position to the other,
completely remove the two bail handle bolts
5
securing it.
Flip the handle over and reinstall.
Fig. E
1
5
5
Side Handle (Fig. F)
WARNING: To reduce the risk of personal injury,
always operate the tool with the side handle properly
installed and tightened. Failure to do so may result
in the side handle slipping during tool operation and
subsequent loss of control. Hold tool with both hands
to maximize control.
The two position side handle
14
can be assembled into
either side of tool. Thread the side handle
14
into the bail
handle bolt
5
or directly into threaded holes
15
on desired
side. Tighten securely by hand.
Fig. F
5
14
15
Speed Selector (Fig. A)
NOTICE: Risk of tool damage. Do not rotate the speed
selector lever while the drill is running or coasting,
damage may occur to the tool.
Rotate the speed selector lever
2
to the desired speed:
1 = low speed
2 = high speed
NOTE: The first time the tool is run after changing speeds,
you may hear a click on start up. This is normal and does not
indicate a problem.
Loading ...
Loading ...
Loading ...