Loading ...
Loading ...
Loading ...
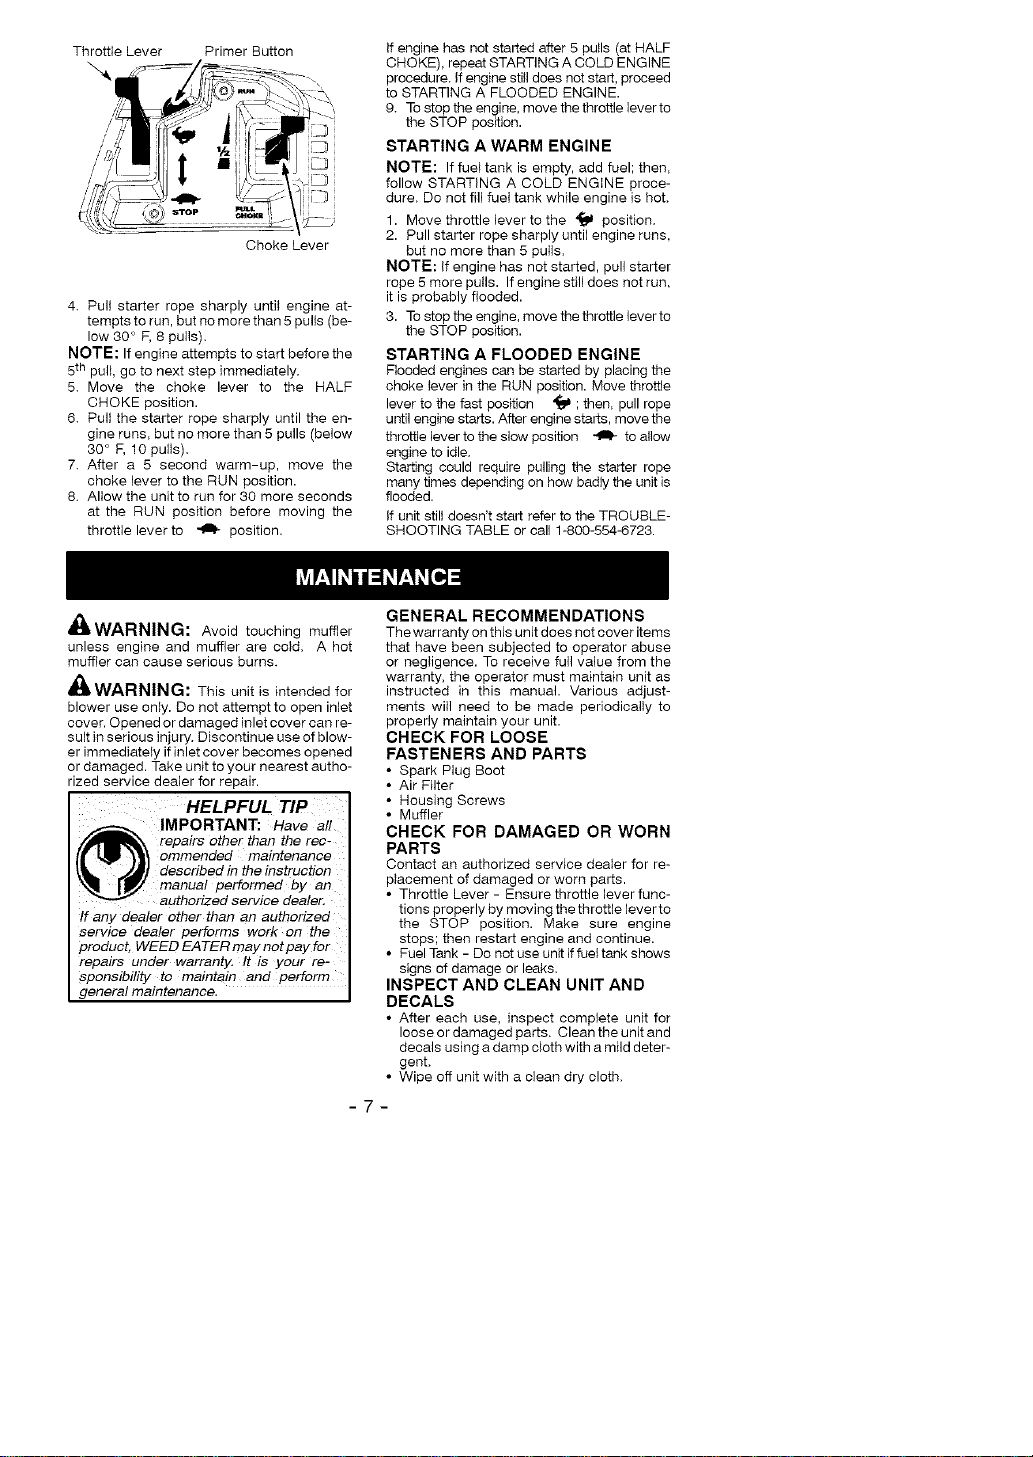
Throttte Lever Primer Button
Choke Lever
4. Pull starter rope sharply until engine at-
tempts to run, but no more than 5 pulls (be-
low 30 ° F, 8 pulls).
NOTE: If engine attempts to start before the
5th pull go to next step immediately.
5. Move the choke lever to the HALF
CHOKE position.
6. Pull the starter rope sharply until the en-
gine runs, but no more than 5 pulls (below
30 ° F, 10 pulls).
7. After a 5 second warm-up, move the
choke lever to the RUN position.
8. Allow the unit to run for 30 more seconds
at the RUN position before moving the
throttle lever to _ position.
If engine has not started after 5 pulls (at HALF
CHOKE), repeat STARTING A COLD ENGINE
procedure. If engine still does not start, proceed
to STARTING A FLOODED ENGINE.
9. To stop the engine, move the throttle lever to
the STOP position.
STARTING A WARM ENGINE
NOTE: If fuel tank is empty, add fuel; then,
follow STARTING A COLD ENGINE proce-
dure. Do not fill fueI tank while engine is hot.
1. Move throttle lever to the '_ position.
2. Pull starter rope sharply until engine runs,
but no more than 5 pulis.
NOTE: If engine has not started, pull starter
rope 5 more pulls. If engine still does not run,
it is probably flooded.
3. To stop the engine, move the throttle lever to
the STOP position.
STARTING A FLOODED ENGINE
needed engines can be started by placing the
choke lever in the RUN position. Move throttle
lever to the fast position _ ; then, pull rope
until engine starts. After engine starts, move the
throttle lever to the slow position _ to allow
engine to idle.
Starting could require pulling the starter rope
many times depending on how badly the unit is
flooded.
If unit still doesn't start refer to the TROUBLE-
SHOOTING TABLE or call 1-800-554-6723.
,&
aWARNING: Avoid touching muffler
unless engine and muffler are cold. A hot
muffter can cause serious burns.
_WARNING: This unit is intended for
blower use only. Do not attempt to open inlet
cover. Opened or damaged inlet cover can re-
sult in serious injury. Discontinue use of blow-
er immediately ifinlet cover becomes opened
or damaged. Take unit to your nearest autho-
rized service dealer for repair.
HELPFUL TIP
IMPORTANT: Have all
repairs Other than the rec-
ommended maintenance
described in the instruction
_nanual performed by an
authorized service dealer.
If any dealer other than an authorized
service dealer performs work on the
product, WEED EATER may not pay for
repairs under warranty. It is your re-
sponsibility to maintain and perform
general maintenance.
GENERAL RECOMMENDATIONS
The warranty on this unit does not cover items
that have been subjected to operator abuse
or negligence. To receive full value from the
warranty, the operator must maintain unit as
instructed in this manual. Various adjust-
ments will need to be made periodically to
properly maintain your unit.
CHECK FOR LOOSE
FASTENERS AND PARTS
• Spark Plug Boot
• Air Filter
• Housing Screws
• Muffler
CHECK FOR DAMAGED OR WORN
PARTS
Contact an authorized service dealer for re-
placement of damaged or worn parts.
• Throttle Lever - Ensure throttle lever func-
tions properly by moving the throttle lever to
the STOP position. Make sure engine
stops; then restart engine and continue.
• Fuel Tank - Do not use unit if fuel tank shows
signs of damage or leaks.
INSPECT AND CLEAN UNIT AND
DECALS
• After each use, inspect complete unit for
loose or damaged parts. Clean the unit and
decals using a damp cloth with a mild deter-
gent.
• Wipe off unit with a clean dry cloth.
-7-
Loading ...
Loading ...
Loading ...