Loading ...
Loading ...
Loading ...
12
STEP 4 Use Your Remote
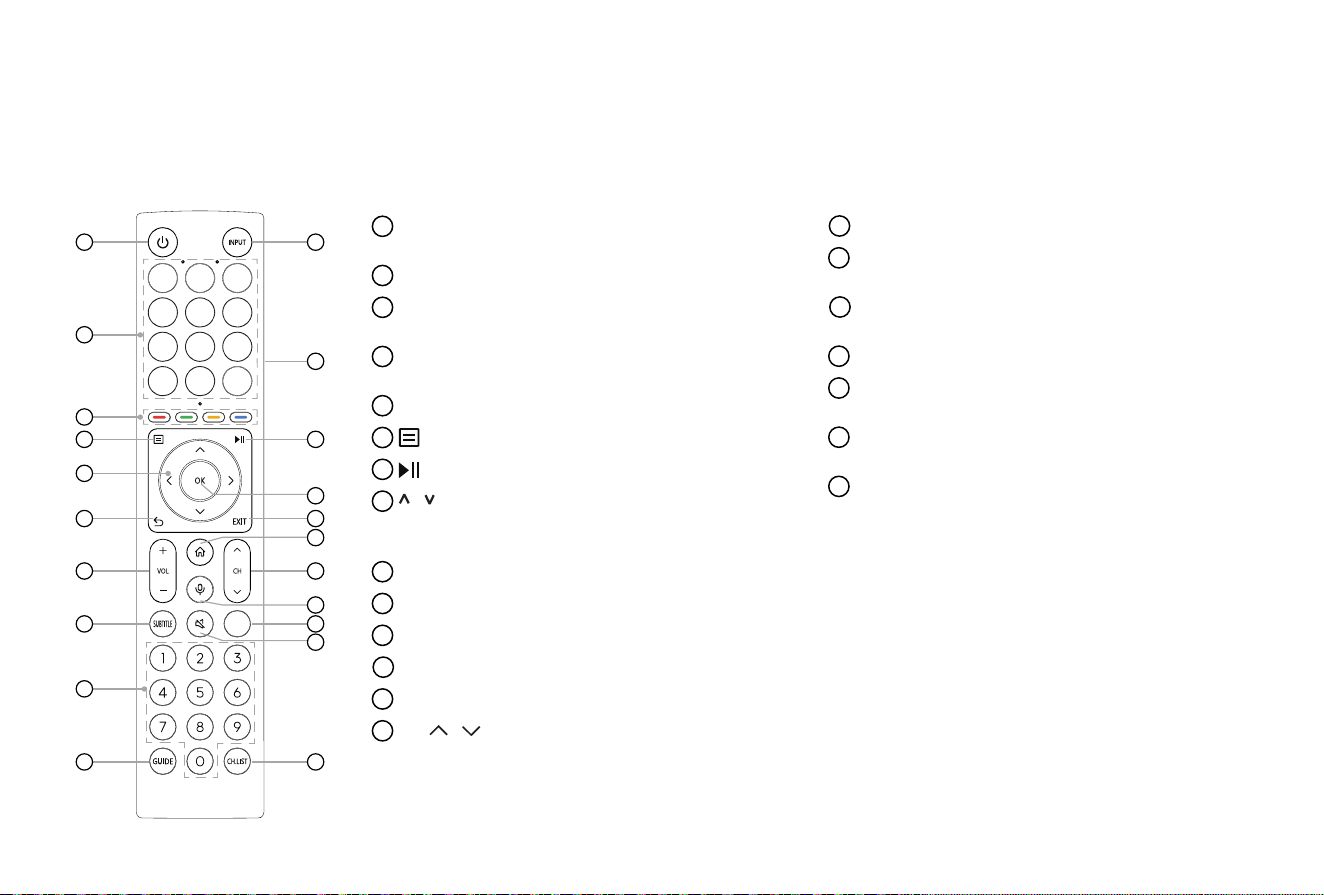
BUTTONS ON YOUR LASER CINEMA REMOTE
NOTE: The button labels are provided as a reference. The actual appearance of the remote that is included with the Laser Cinema, may differ from
this diagram.
1
POWER: Switch the Laser Cinema on or into
standby mode
2
INPUT: Select input sources
3
APP: Quick access buttons to apps
EDIT: Custom to launch input or app
4
Physical Switch (Side view): Turn on to activate
hands-free wake-up feature
*
5
Special function buttons
6
: Display the Quick setup menu
7
: Media content control function button
8
/ / < / >
: Allow you to navigate the on-screen
menus and adjust the system settings to your
preference
9
OK: Confirm the selection in the on-screen menus
10
BACK: Return to previous menu
11
EXIT: Exit the menu
12
HOME: Enter the Home screen
13
VOL
+
/
-
: Adjust the volume
14
CH / : Switch channel
1 2
3
4
5
6 7
8
9
10
11
13
14
15
12
16
17
19
18
20
21
*
When you do not use hands-free wake-up, please turn
off the physical switch to lengthen the battery life.
15
MIC: Activate the microphone
16
SUBTITLE: Activate or deactivate the subtitle
mode
17
INFO: Display the present programme information
TEXT: Turn on/off the teletext function
18
MUTE: Mute or restore the Laser Cinema sound
19
Number buttons: Direct channel selection or
numbers input
20
GUIDE: Display the Electronic Programme Guide
(DTV mode)
21
CH.LIST: Display the Channel List on the screen
NOTE: The included remote control will vary depending on models, countries/regions. Check information ac-
cording to the actual remote control in the accessory bag.
Loading ...
Loading ...
Loading ...