
Loading ...
Loading ...
Loading ...
16
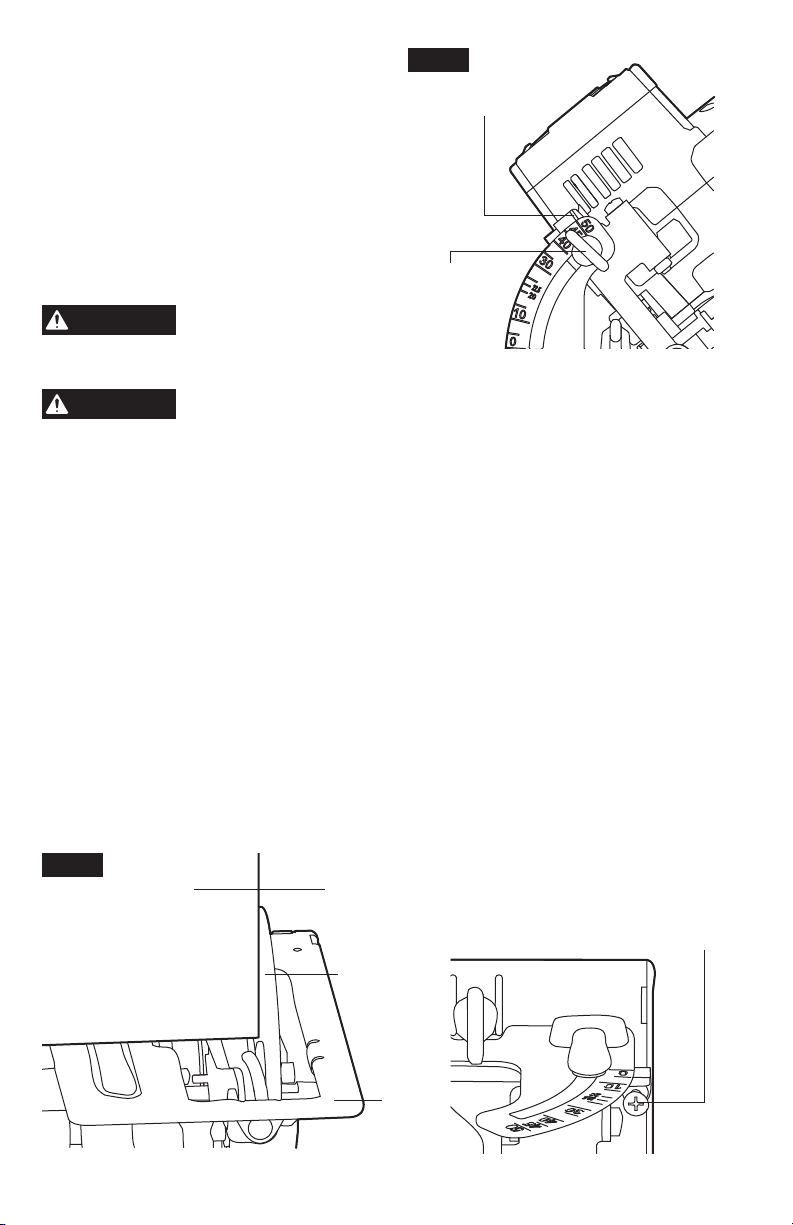
Bevel Adjustment (Fig. 6)
The bevel-adjustment knob adjusts the cutting
angle.
a. Detach the battery pack from the tool.
b. Loosen the bevel-adjustment knob by
rotating the knob counterclockwise.
c. Tilt the foot until the bevel-indicator mark
reaches the desired setting on the bevel
gauge.
d. Securely tighten the bevel-adjustment knob
by rotating the knob clockwise.
WARNING
Attempting to make bevel
cuts without the bevel-
adjustment knob securely tightened can
result in serious injury.
WARNING
Because of the increased amount of blade engagement in the work
while bevel cutting and decreased stability of the foot, blade binding
may occur. Keep the saw steady and the foot firmly on the workpiece.
NOTICE:
When bevel cutting, the depth of cut does not correspond with value on the depth of
cut gauge.
NOTICE:
Since the blade thicknesses vary and different angles require different settings,
always make a trial cut in scrap material along a guideline to determine how much you should
offset the guideline on the workpiece to be cut.
0° Bevel Check and Adjustment (Fig. 7)
Your tool has a 0° bevel stop, which has been adjusted before shipment to assure that the
blade is vertical to the foot at 0°bevel cutting.
To check and adjust to 0
°
Bevel:
a. Detach the battery pack from the tool.
b. Set the foot to the maximum depth-of-cut setting. Loosen the bevel-adjustment knob, set the
saw to 0° bevel on the bevel gauge, retighten the bevel-adjustment knob.
c. Turn the saw upside down and place it on a stable surface. Check for an angle of 90°
between the blade and the underside of the foot with a square.
d. If adjustment is necessary, loosen the bevel-adjustment knob. Place the saw in an upside-
down position on a workbench. Use a Philips-screwdriver to turn the 0° bevel-stop-
adjustment screw until the foot is square with the saw blade.
Fig. 7
Carpenter’s
Square
Blade
Foot
Bevel-Stop-
Adjustment Screw
Fig. 6
Indicator Mark
Bevel-
Adjustment
Knob
Loading ...
Loading ...
Loading ...