Loading ...
Loading ...
Loading ...
ENGLISH
4
Assembly tools required
• Phillips Screwdriver (not supplied)
Installing the guard
WARNING: NEVER OPERATE appliance
WITHOUT GUARD FIRMLY IN PLACE. The guard
must always be properly attached on the appliance to
protect the user.
1. Remove the screw from the guard.
2. Turn the trimmer upside down so that you are looking
down at the spool cap
9
.
3. Turn the guard
8
upside down and slide it fully onto the
motor housing
6
. Make sure the tabs
11
on the guard
engage the ribs
12
on the trimmer head as shown.
4. Continue to slide the guard on until you hear it “snap”
into place. The locking tab
13
should snap into the
housing slot
14
(figure C).
Figure C
9
11
8
11
12
13
14
5. Using a phillips screwdriver, insert the guard screw and
tighten securely as shown in figure D to complete the
guard assembly.
6. Once the guard is installed, remove the covering from
the line cut-off blade, located on the edge of the guard
Figure D
Attaching the auxiliary handle
1. To attach the handle
4
, press in on the buttons
15
on
both sides of the upper housing as shown in figure E.
2. Position the handle as shown in figure F, matching up
the grooved side of the handle with the grooved button.
Partially push the handle on so that it will hold the
buttons in when you release them with your hand.
3. Push the handle completely onto the housing and
position it slightly until it “snaps” into place.
4. To adjust the handle up or down, press in on the button
16
and raise or lower the handle (figure G).
5. The handle should be adjusted so that your front arm is
straight when the trimmer is in the working position.
Figure E
15
Figure F
Figure G
16
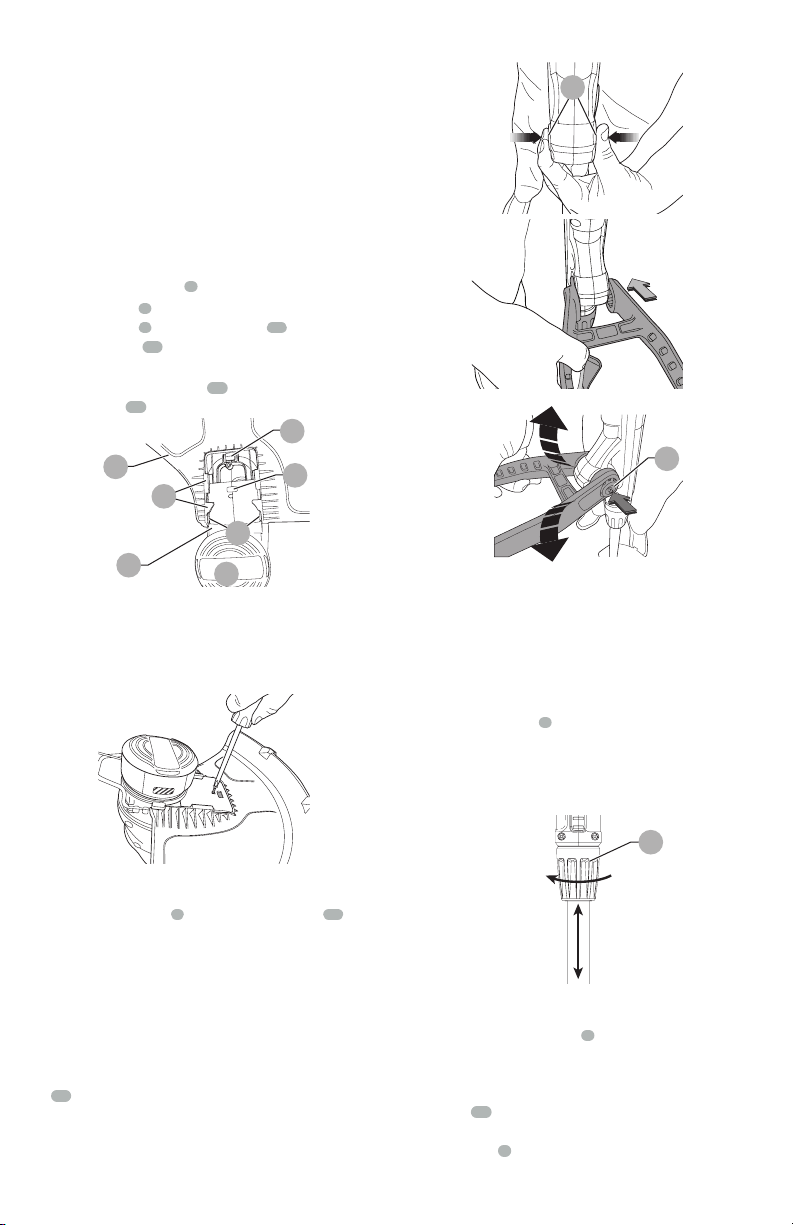
Height adjustment
CAUTION: Adjust the length of the
trimmer to obtain proper working positions as
shown in figures K and L.
• The overall height of the trimmer can be adjusted by
loosening the collar
5
and rotating it in the direction of
the arrow shown in figure H.
• Move the upper housing straight up or down. When the
desired height is achieved, tighten the collar by rotating it
opposite of the direction shown in figure H.
Figure H
5
Attaching extension cord
• An extension cord retainer
2
is built into the switch
handle that prevents the cord from coming unplugged.
To use this feature, simply double the extension cord
about 8 inches (203mm) from the end, and insert it into
the slot
17
in the end of the handle area as shown in
figure H. Hook the loop formed by doubling the cord
over the tab
2
. Gently tug on the cord to insure that
it is firmly retained in the trimmer’s handle. Plug the
Loading ...
Loading ...
Loading ...