User Manual
Fire Up the Good Life!
CBO HYBRID OV ENS
Commercial
A MAJOR CAUSE OF OVEN-RELATED FIRES IS FAILURE TO MAINTAIN REQUIRED CLEARANCES (AIR SPACES) TO
COMBUSTIBLE MATERIALS. IT IS OF UTMOST IMPORTANCE THAT THIS OVEN BE INSTALLED ONLY IN ACCORDANCE
WITH THESE INSTRUCTIONS.
TO INSTALLER: LEAVE THESE INSTRUCTIONS WITH THE CONSUMER
TO CONSUMER: RETAIN THESE INSTRUCTIONS FOR FUTURE USE
• D
O
NOT STORE OR USE GASOLINE OR OTHER FLAMMABLE LIQUIDS OR VAPORS IN THE VICINITY OF THIS OR ANY
O
THER APPLIANCE
• A
N LP CYLINDER NOT CONNECTED FOR USE SHALL NOT BE STORED IN THE VICINITY OF THIS OR ANY APPLIANCE
• DO NOT USE THIS APPLIANCE UNDER EXTENDED AWNINGS. FAILURE TO COMPLY COULD RESULT IN A FIRE OR
PERSONAL INJURY
• IF YOU SMELL GAS, 1) SHUT OFF GAS TO THE APPLIANCE, 2) EXTINGUISH ANY OPEN FLAME, 3) REMOVE DOOR, 4) IF
ODOR CONTINUES, KEEP AWAY FROM THE APPLIANCE AND IMMEDIATELY CALL YOUR GAS SUPPLIER OR YOUR FIRE
DEPARTMEN
• PLEASE USE EXTREME CAUTION AROUND THE OVEN. THE OVEN DOME, HEARTH, ARCH AND DOOR WILL BE
EXTREMELY HOT WHEN IN USE AND FOR HOURS AFTER USE. KEEP CHILDREN, CLOTHING AND FURNITURE AWAY
• CONTACT MAY CAUSE SKIN BURNS
• TO ENSURE THE STABILITY AND SAF
E OPERATION OF THE OVEN, DO NOT USE MAKESHIFT MATERIALS IN ITS
ASSEMBLY OR THE CONSTRUCTION OF ITS SUPPORT BASE OR DECORATIVE
SURROUND. USE ONLY THE MATERIALS
SUPPLIED OR RECOMMENDED BY CHICAGO BRICK OVEN.
• TO PREVENT DIRT, DEBRIS AND SPILLS FROM CONTAMINATING THE SPLASH ZONE AROUND THE MOUTH OF THE
OVEN, THE SURFACE OF THE OVE
N FACE MUST BE CONSTRUCTED OF A SMOOTH AND CLEANABLE MATERIAL
IMPORTANT
WARNINGS
1. THE HYBRID COMMERCIAL OVENS MAY BE OPERATED IN A COMMERCIAL SETTING INDOORS or OUTDOORS
2. ELECTRICAL DIAGRAM IS LOCATED BEHIND FRONT PANEL
3. Register your product to activate your warranty. Register here: https://chicagobrickoven.com/pages/register
W
ARNING - Users of this appliance are hereby warned that the burning of wood, natural gas or LP fuel can result
in low level exposure to some of the list substances, including formaldehyde, benzene, soot and carbon monoxide. The
California Safe Drinking Water and Toxic Environment Act of 1986 (Proposition 65) requires the Governor of California to publish
a list of substances known to the State of California to cause cancer or birth defects or other reproductive harm. In addition,
businesses must warn customers of potential exposure to such substances. This is caused primarily from the incomplete
combustion of natural gas or LP fuel. Properly adjusted burners will minimize incomplete combustion. Exposure to these
substances can also be minimized by properly venting the burners by opening a window or using a ventilating hood or fan. For
more information, visit www.P65Warnings.ca.gov.

1
CBO-750 HYBRID
Table of Contents
Welcome Message…………………………... 2
Design Ideas………………………………… 3
Installation Prep……………………………... 4
Assembly Overview………………………….. 5
Assembly Instructions………………………... 6 -7
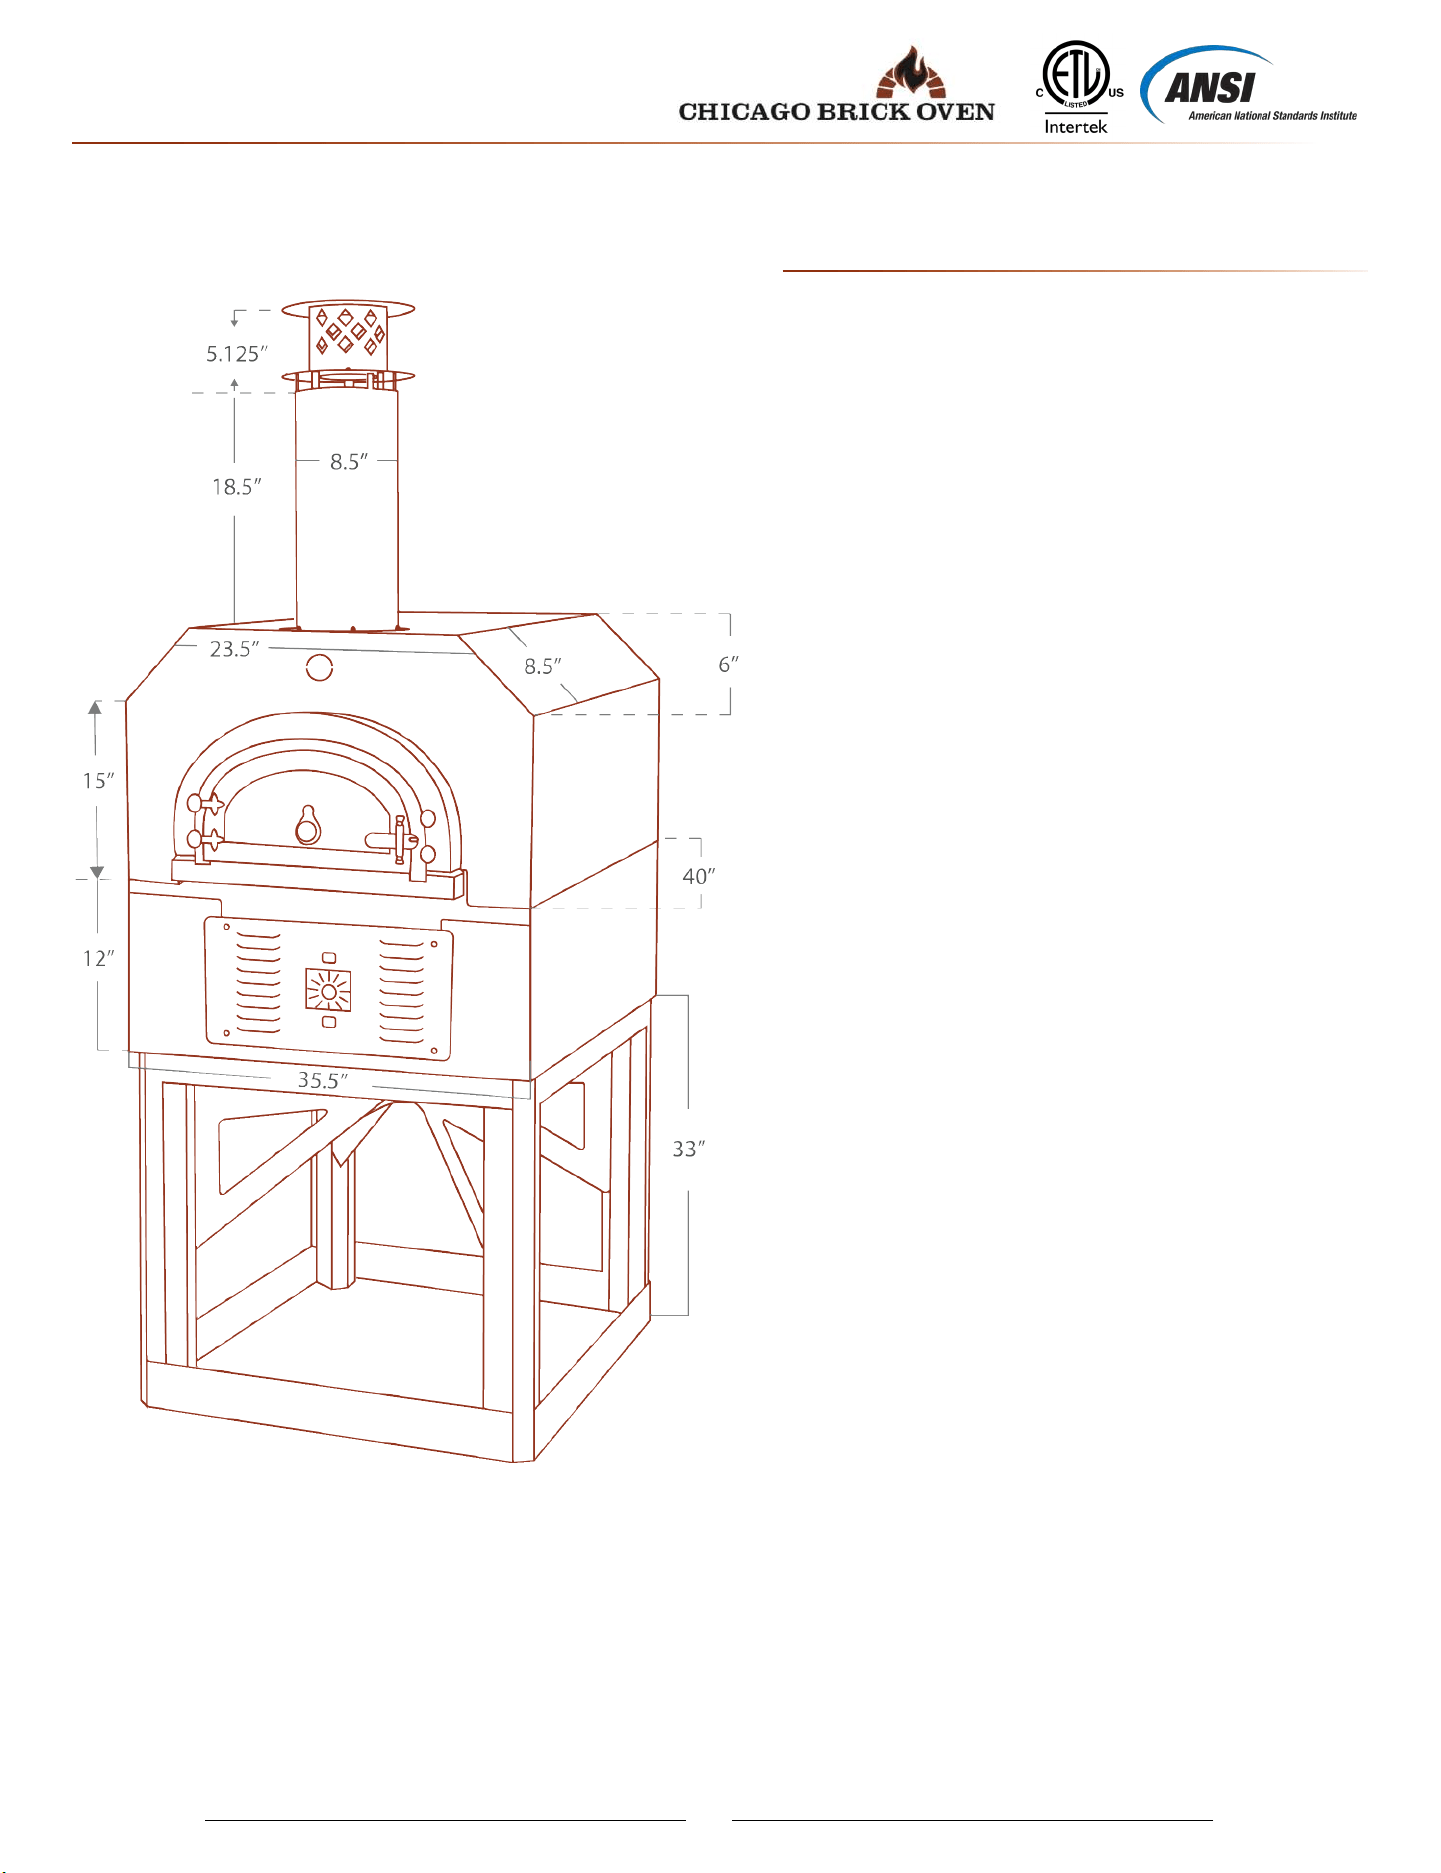
Detailed Specs
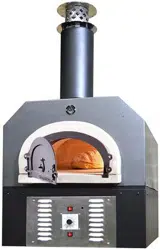
• CBO 750 Hybrid DIY Kit……………...… 8
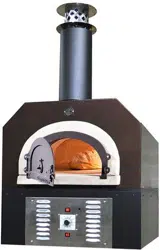
• CBO 750 Hybrid Countertop……………. 9
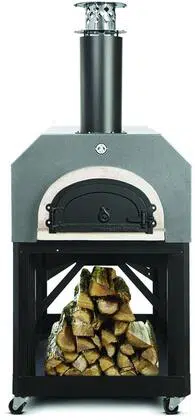
• CBO 750 Hybrid Stand…………………... 10
Gas/Electric Installation & Overview…………... 11 - 16
Operational Instructions……………………..... 17
Best Practices………………………………... 18
Curing Your Oven
• Cure with Gas………………………..… 19
• Cure with Charcoal……………………. 20
Firing with Wood ……………………………. 21
How the Oven Works ……………………...… 22
Cooking In Your Oven ………………………... 23
Using Flavored Woods………………………..
24
Frequently Asked Questions………………….. 25
Limited Warranty ………………………….... 26
Welcome To The Family
• READ ALL INSTRUCTIONS BEFORE INSTALLING AND USING THIS OVEN
• BEFORE INSTALLATION, CONTACT LOCAL AUTHORITIES HAVING JURISDICTION (MUNICIPAL BUILDING DEPARTMENT, FIRE
PREVENTION BUREAU, ETC.) ABOUT REQUIRED PERMITS, RESTRICTIONS AND INSTALLATION INSPECTION IN YOUR AREA.
• INSTALL AND USE THE OVEN ONLY IN ACCORDANCE WITH CHICAGO BRICK OVEN’S INSTALLATION AND OPERATING
I
NSTRUCTIONS (OR EQUIVALENT)
• SAVE THESE INSTRUCTIONS
Certifications & Standards:
• Conforms to UL STD 2162 & NSF STD 4. Certified to ULC STD S627
• Conforms to ANSI STD Z83.11 Certified to CSA STD 1.8
• For Commercial Indoor Installation of any CBO Hybrid Oven model, the Oven is required to meet ventilation system
Standard NFPA 96 or UL 710.
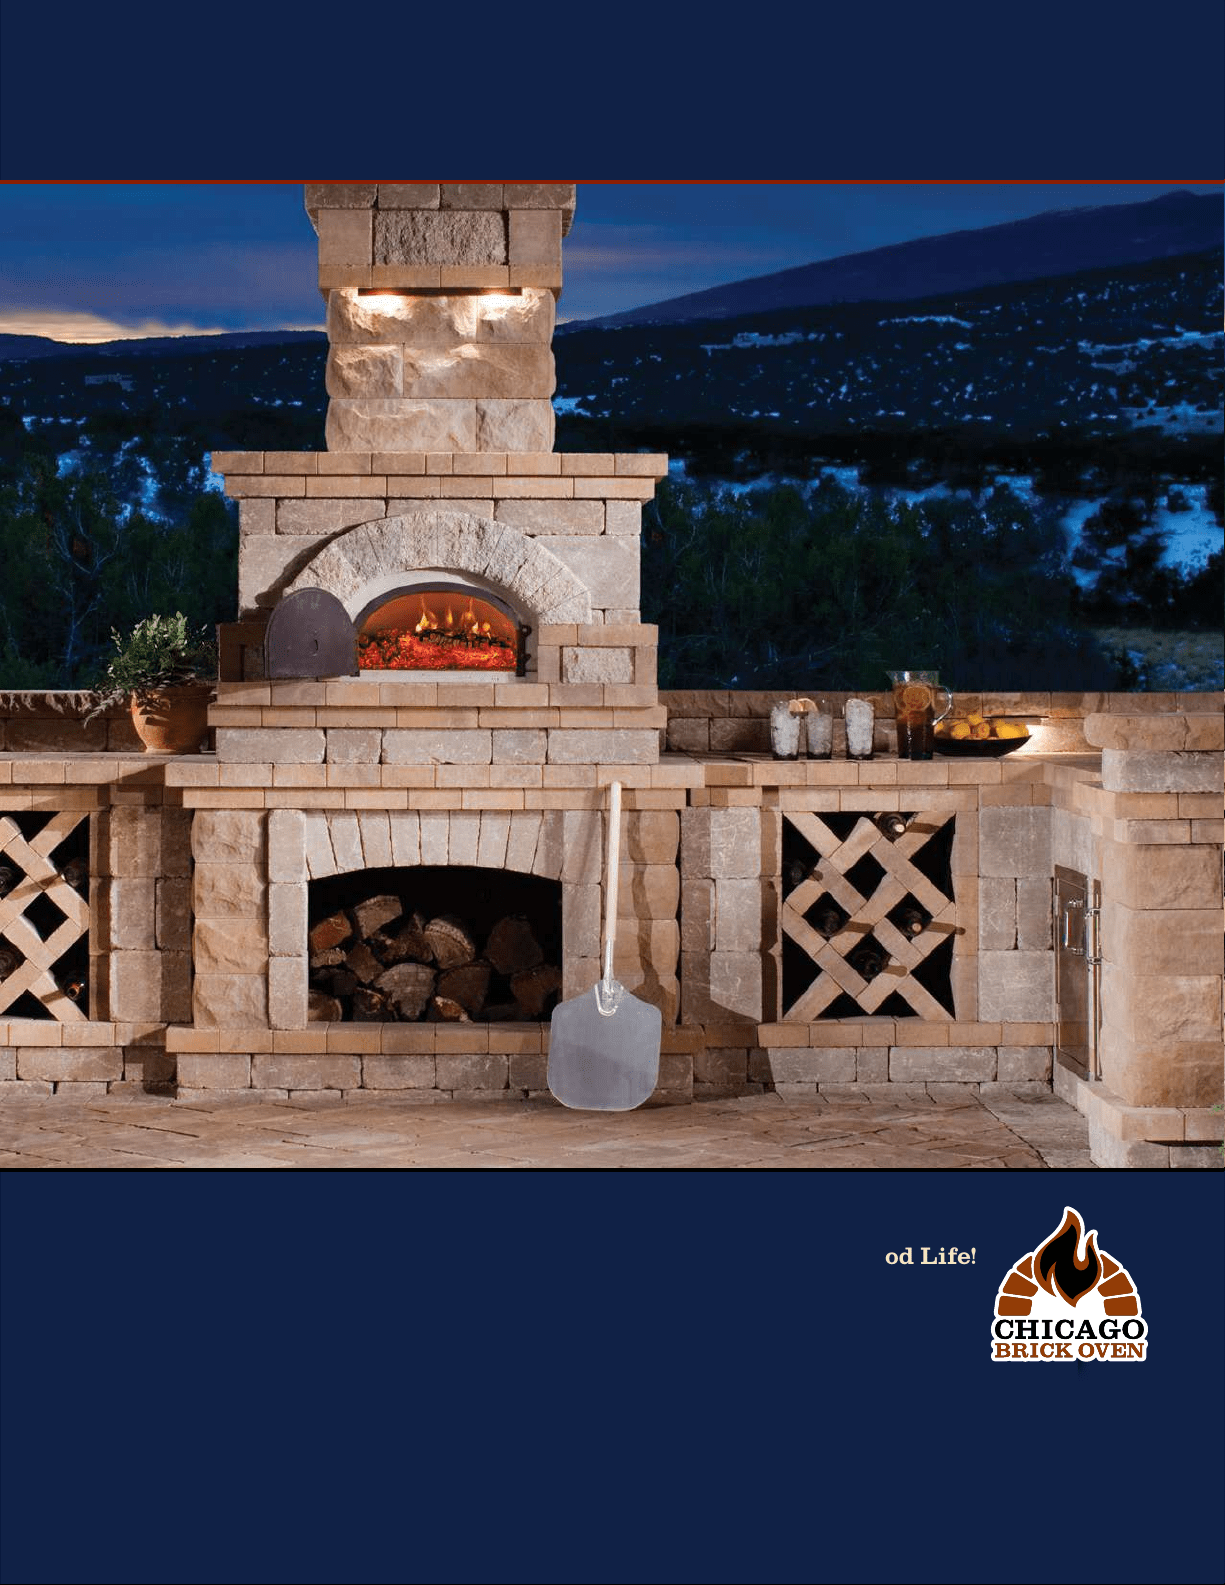
Welcome to a whole new dimension of indoor and outdoor cooking and entertaining with
your new hybrid brick oven from Chicago Brick Oven!
We invite you to visit (and frequent) our website, chicagobrickoven.com. It’s a great
source of information and suggestions that will help you enjoy your new oven to the
fullest:
Choose from dozens of mouthwatering recipes for everything from appetizers and breads
to main courses and desserts, and of course, pizzas.
Shop for accessories, like professional-grade griddles, skillets, pizza racks and
more.
View dozens of photos of creative outdoor
living spaces other owners across
the country
have created around their ovens.
Check out our blog and follow us on Facebook, Twitter and YouTube for the l
atest news.
We, and your fellow owners and fans of Hybrid ovens from Chicago Brick Oven,
appreciate hearing from you. We encourage you to share your experiences, special
recipes, entertaining ideas and more. Send us your photos and success stories of how
you've used your oven to create your favorite foods, entertain friends or design a great
outdoor dining space. Photos and stories can be sent to to us at
support@chicagobrickoven.com.
Fire Up the Good Life! www.chicagobrickoven.com
IMPORTANT
2
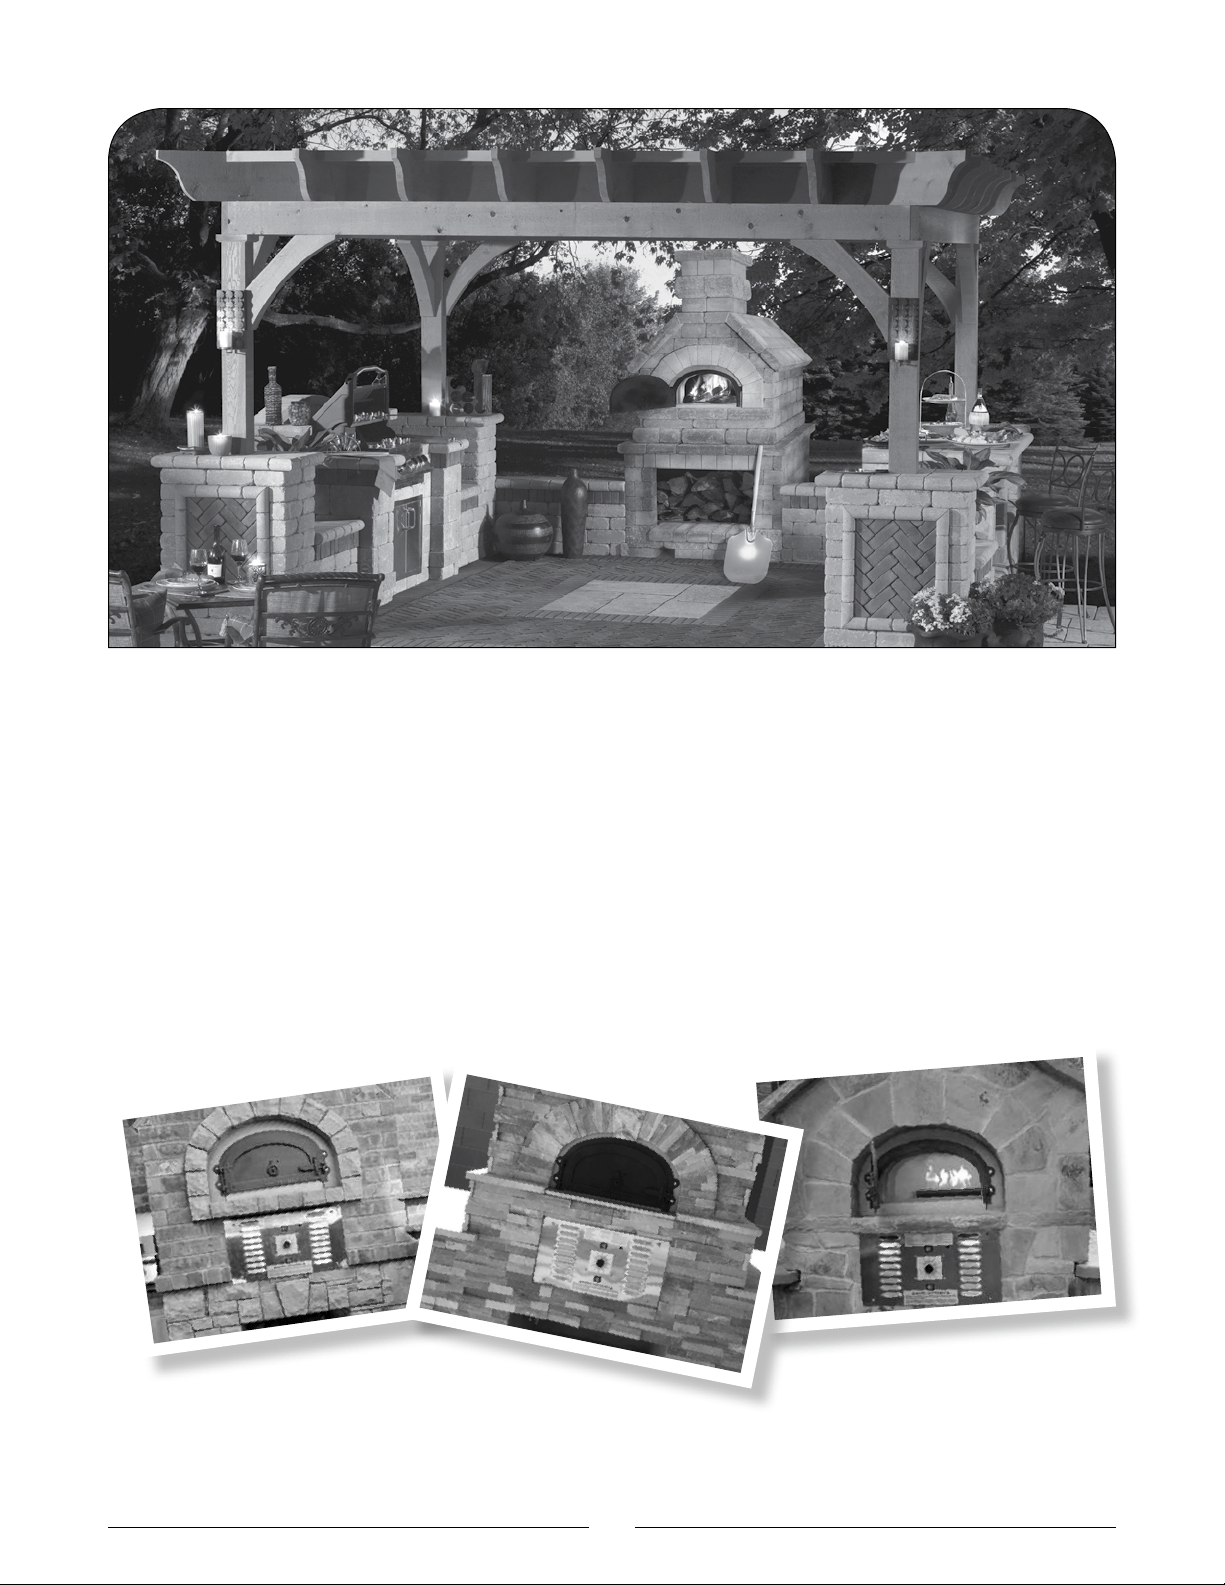
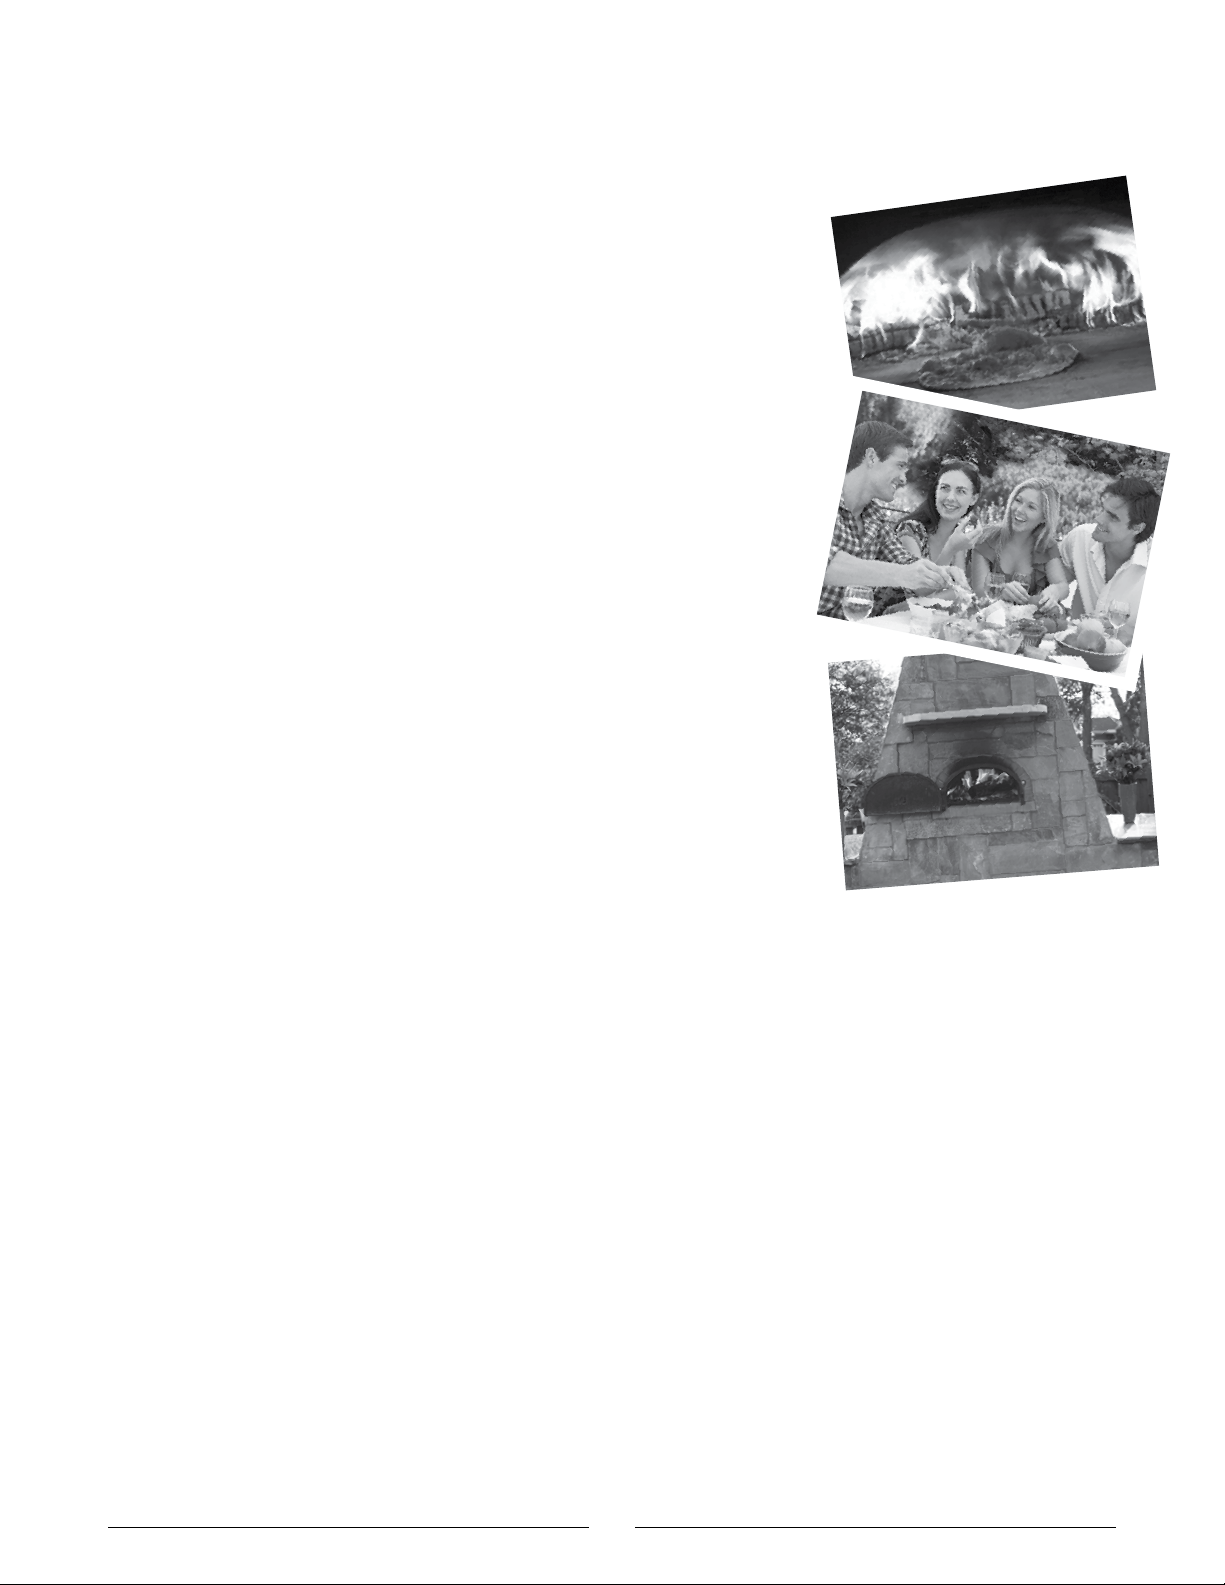
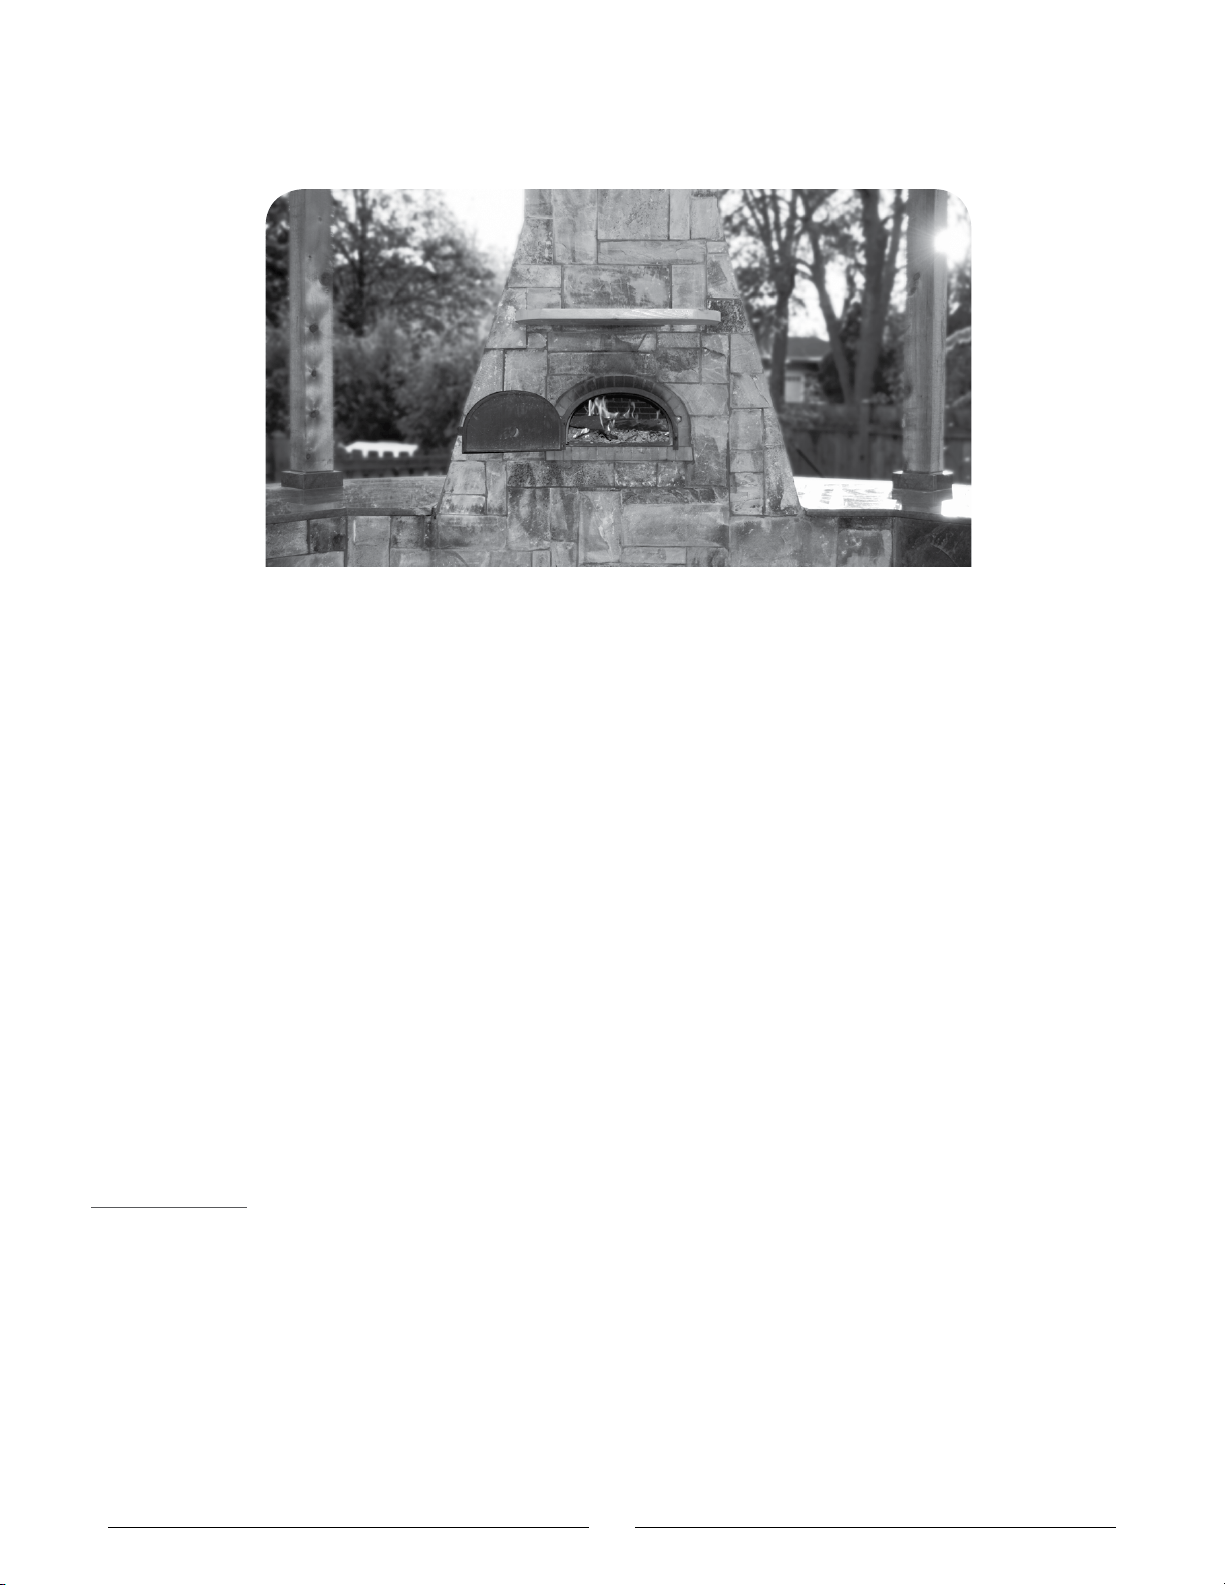
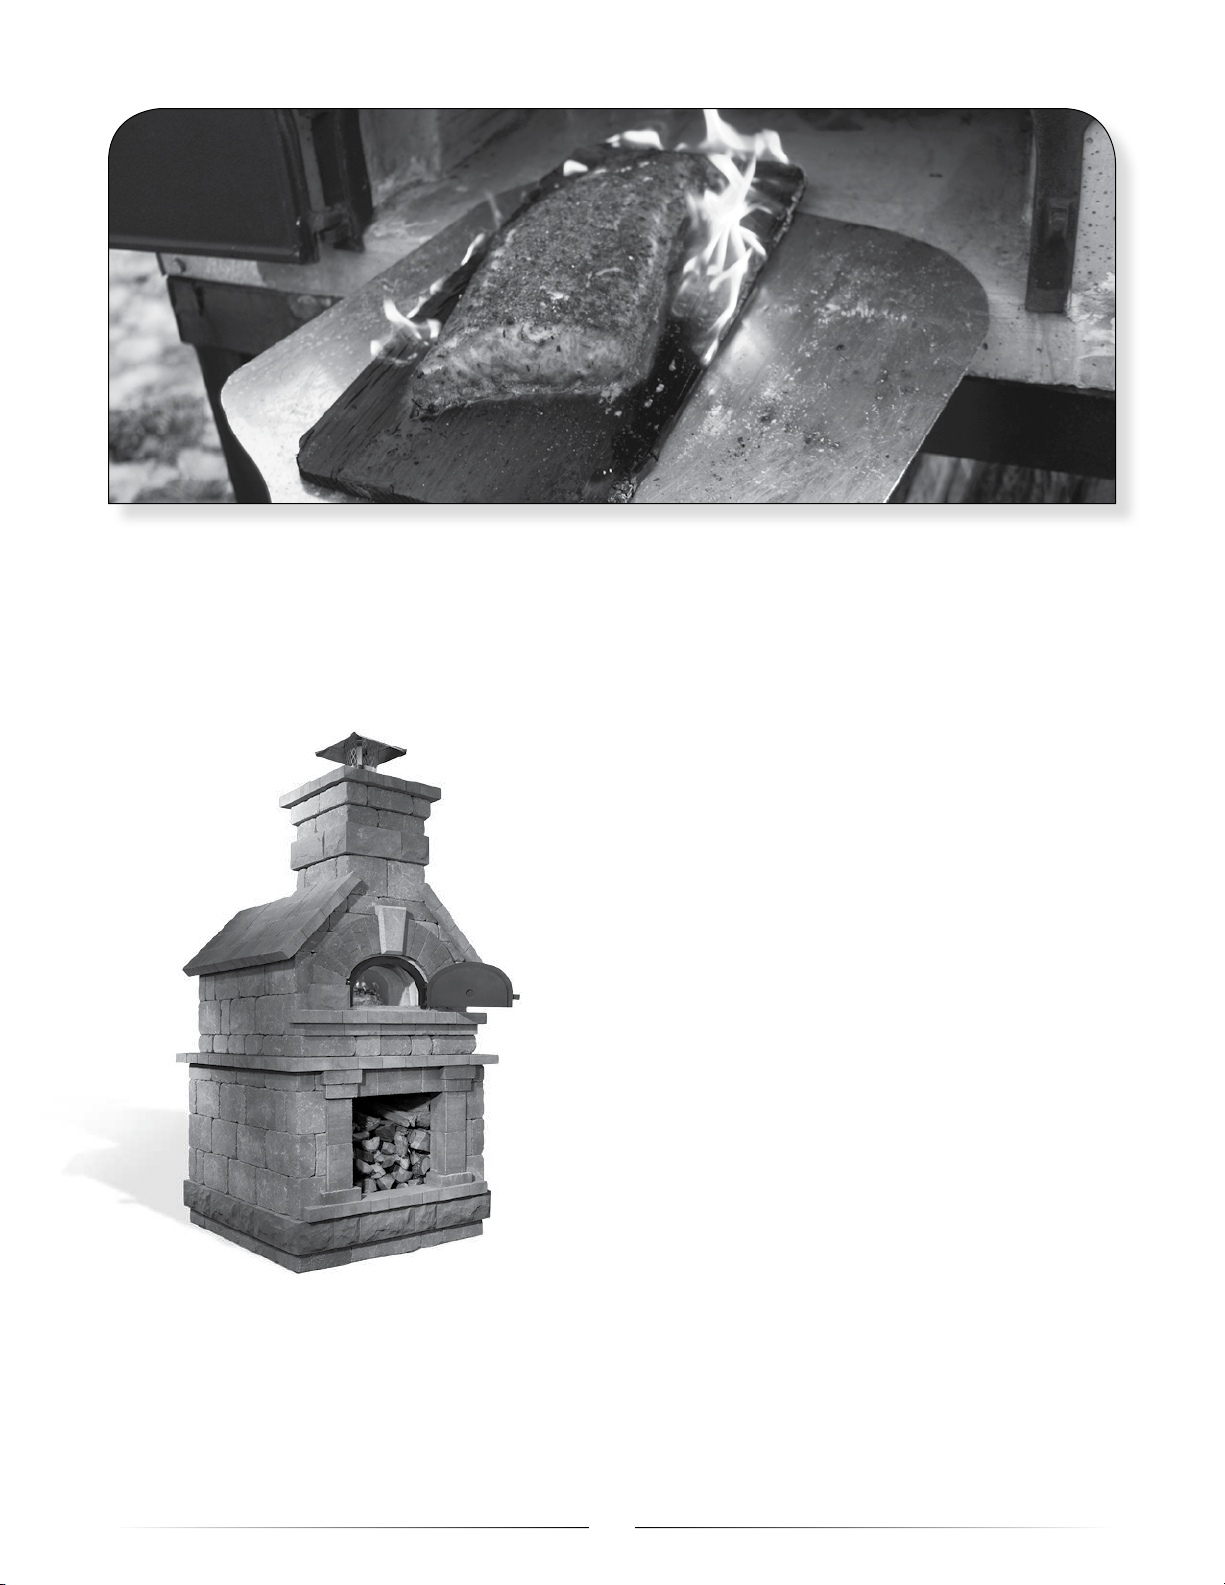
Customized Enclosure Designs
However you plan to install your CBO Oven—as a
stand-alone unit or as part of a complete outdoor
kitchen—and whatever your material preference—
stone, brick, stucco, etc.—your design choices for
creating a customized enclosure are as limitless as
your imagination.
Here are just a few examples of how others have
customized their CBO Hybrid ovens and created
their ultimate outdoor cooking, dining and entertaining
spaces.
Visit chicagobrickoven.com and view our gallery for
more inspiration.
3
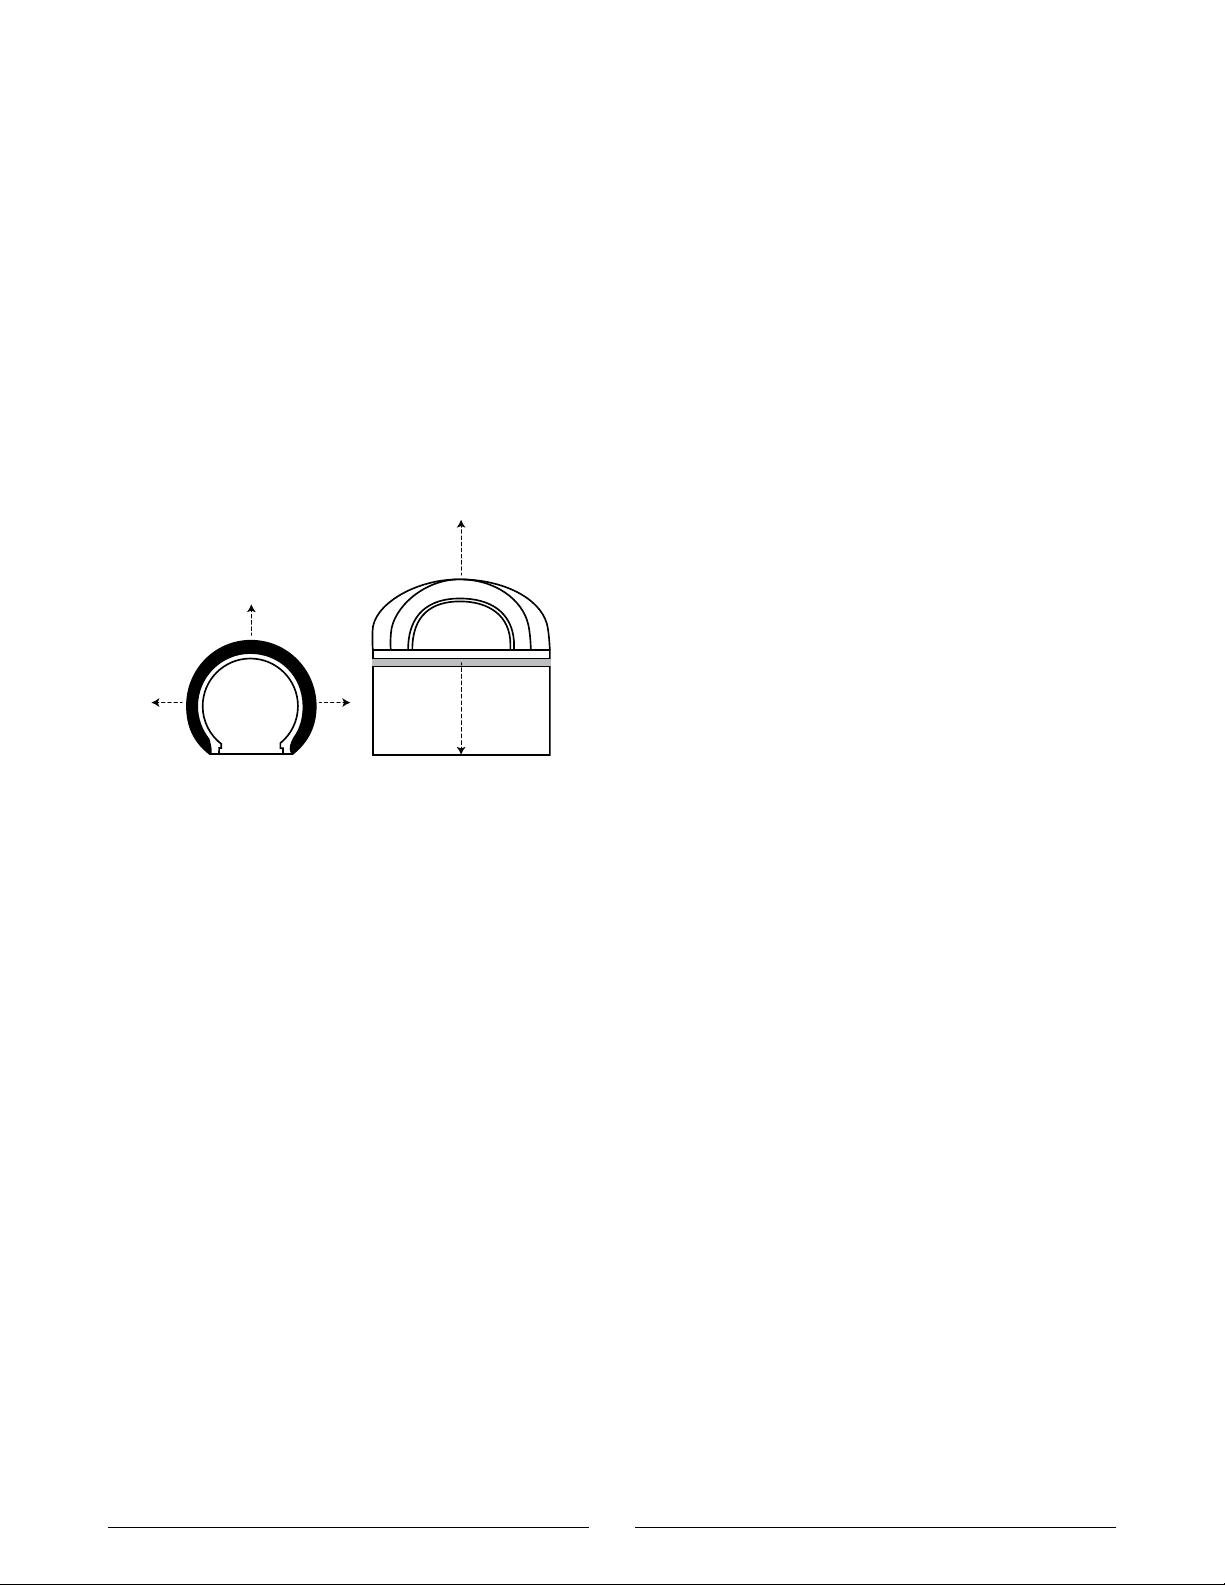
Requirements for Clearance from
Combustible Materials
To avoid the possibility of a fire, when installing your Chicago
Brick Oven Hybrid Oven, you must adhere to the following
requirements for minimum clearance between your Oven and any
combustible materials.
• Clearance Around the Oven: The sides and back of the
Oven must be at least 10 inches away from combustible
materials (See Aerial View below). The top of the Oven must
have at least an 18-inch clearance and the bottom a 30-inch
clearance from combustible materials (See Front View below).
• Clearance Around the Door Opening: A minimum 30-inch
clearance from combustible materials is required on each side
of the Door opening and 36 inches from the front of the Door
opening.
• Clearance From Wood Storage Area: There must be
a 7-inch clearance between the bottom Insulation Boards of
the Oven and any wood storage areas that are under the Oven
installation. To ensure the 7-inch clearance, it
is recommended that you incorporate a noncombustible
physical barrier or some other indicator of the distance within
the wood storage area.
THE FACE OF THE ENCLOSURE MUST BE CONSTRUCTED
OF A NONCOMBUSTIBLE MATERIAL. THE SURFACE OF
THE SPLASH ZONE AROUND THE MOUTH OF THE OVEN
MUST BE SMOOTH AND CLEANABLE.
WARNING: DO NOT PACK THE REQUIRED CLEARANCE
AREAS WITH INSULATION OR OTHER MATERIALS. A
MAJOR CAUSE OF OVEN-RELATED FIRES IS FAILURE TO
MAINTAIN REQUIRED CLEARANCES (AIR SPACES) TO
COMBUSTIBLE MATERIALS. IT IS OF UTMOST
IMPORTANCE THAT THIS OVEN BE INSTALLED ONLY IN
ACCORDANCE WITH THESE INSTRUCTIONS.
Requirements for Outdoor
or Indoor Chimney
Installations
When building the Chimney, it is important to refer to your local
building code standards.
The CBO-750 models come with a DuraTech 6" Anchor Plate (Model
#6DT-AP) that works with a Class A Stainless Steel DuraTech 6"
Double Wall Pipe (model #6DT-24SS to meet Standard HT103). You
can buy this pipe from any building or hearth manufacturer.
A minimum 24-inch pipe section is required. If you are assembling your
Chimney at 90,° you can add additional 24-inch sections as required.
(The Chimney Pipe cannot have a total bend of more than 30.°) The
taller the Flue Stack is, the further away the exhaust is from the cook!
Note: The Chimney Connector shall not pass through an attic, roof
space, closet or similar concealed space, or a floor or ceiling. Where
passage through a wall or partition of combustible construction
is desired, the installation must conform to the CAN/CSA-B365
installation code for Solid-Fuel-Burning Appliances and Equipment.
Note: For indoor installations that utilize a combustible enclosure,
only a Class A Chimney should be used from the Anchor Plate on
the Oven to the termination point outside of the building/structure.
For outdoor noncombustible enclosures, a stainless steel connector
can be used.
Note: Please refer to the Exhaust Hood manufacturer’s
recommendations for inspection, maintenance and cleaning.
WARNING: THE CHIMNEY MUST BE OF A TYPE SUITABLE
FOR A SOLID FUEL GAS HYBRID UNIT. THE CHIMNEY AND
THE REQUIRED CHIMNEY CONNECTOR MUST BE IN GOOD
CONDITION AND KEPT CLEAN.
CAUTION: NEVER USE ANY COMBUSTIBLE MATERIALS
NEAR THE ANCHOR PLATE OR FLUE STACK. WE
RECOMMEND A MINIMUM 6 INCHES OF AIR SPACE
BETWEEN THE ANCHOR PLATE AND FLUE AND ANY
COMBUSTIBLE MATERIAL. AGAIN, CHECK WITH YOUR
LOCAL BUILDING DEPARTMENT TO ENSURE YOU ADHERE
TO LOCAL BUILDING CODES!
Arch Dome Insulating Blanket
Very important for correct functioning and life of the
CBO Oven!
Your Hybrid Oven comes pre-assembled. Please note the Oven Dome
must be covered with the supplied Insulating Blanket. The Blanket,
which withstands high temperatures, should cover the entire surface
area of the Dome. You can cut the Insulating Blanket to insulate
around the Metal Anchor Plate. Since most heat loss will occur at
the Metal Anchor Plate and top of the Oven, you should ensure
these spots are well-insulated.
Note: All orders are FOB factory. Inspect all components for
damage at time of delivery. Reject delivery if goods are damaged
and note on the carrier’s paperwork. If damages are discovered
after delivery, contact your carrier for recourse.
Note: Any variance from the Chicago Brick Oven installation instructions
or alterations made to prefabricated Ovens without written
approval from Chicago Brick Oven, will void your warranty.
Note: Your Oven is designed for burning solid, dried wood only. Do not
burn scrap wood, compressed logs, coal or other materials. Failure to
follow this instruction may damage your Oven and void your warranty.
CBO-750 Hybrid Installation-Prep
INSTALL AND USE ONLY IN ACCORDANCE WITH CHICAGO BRICK OVEN’S INSTALLATION AND
OPERATING INSTRUCTIONS (OR EQUIVALENT). CONTACT LOCAL BUILDING OFFICIALS OR FIRE
OFFICIALS ABOUT RESTRICTIONS AND INSTALLATION INSPECTION IN YOUR AREA.
Aerial View Front View
10"10"
10"
18"
30"
4
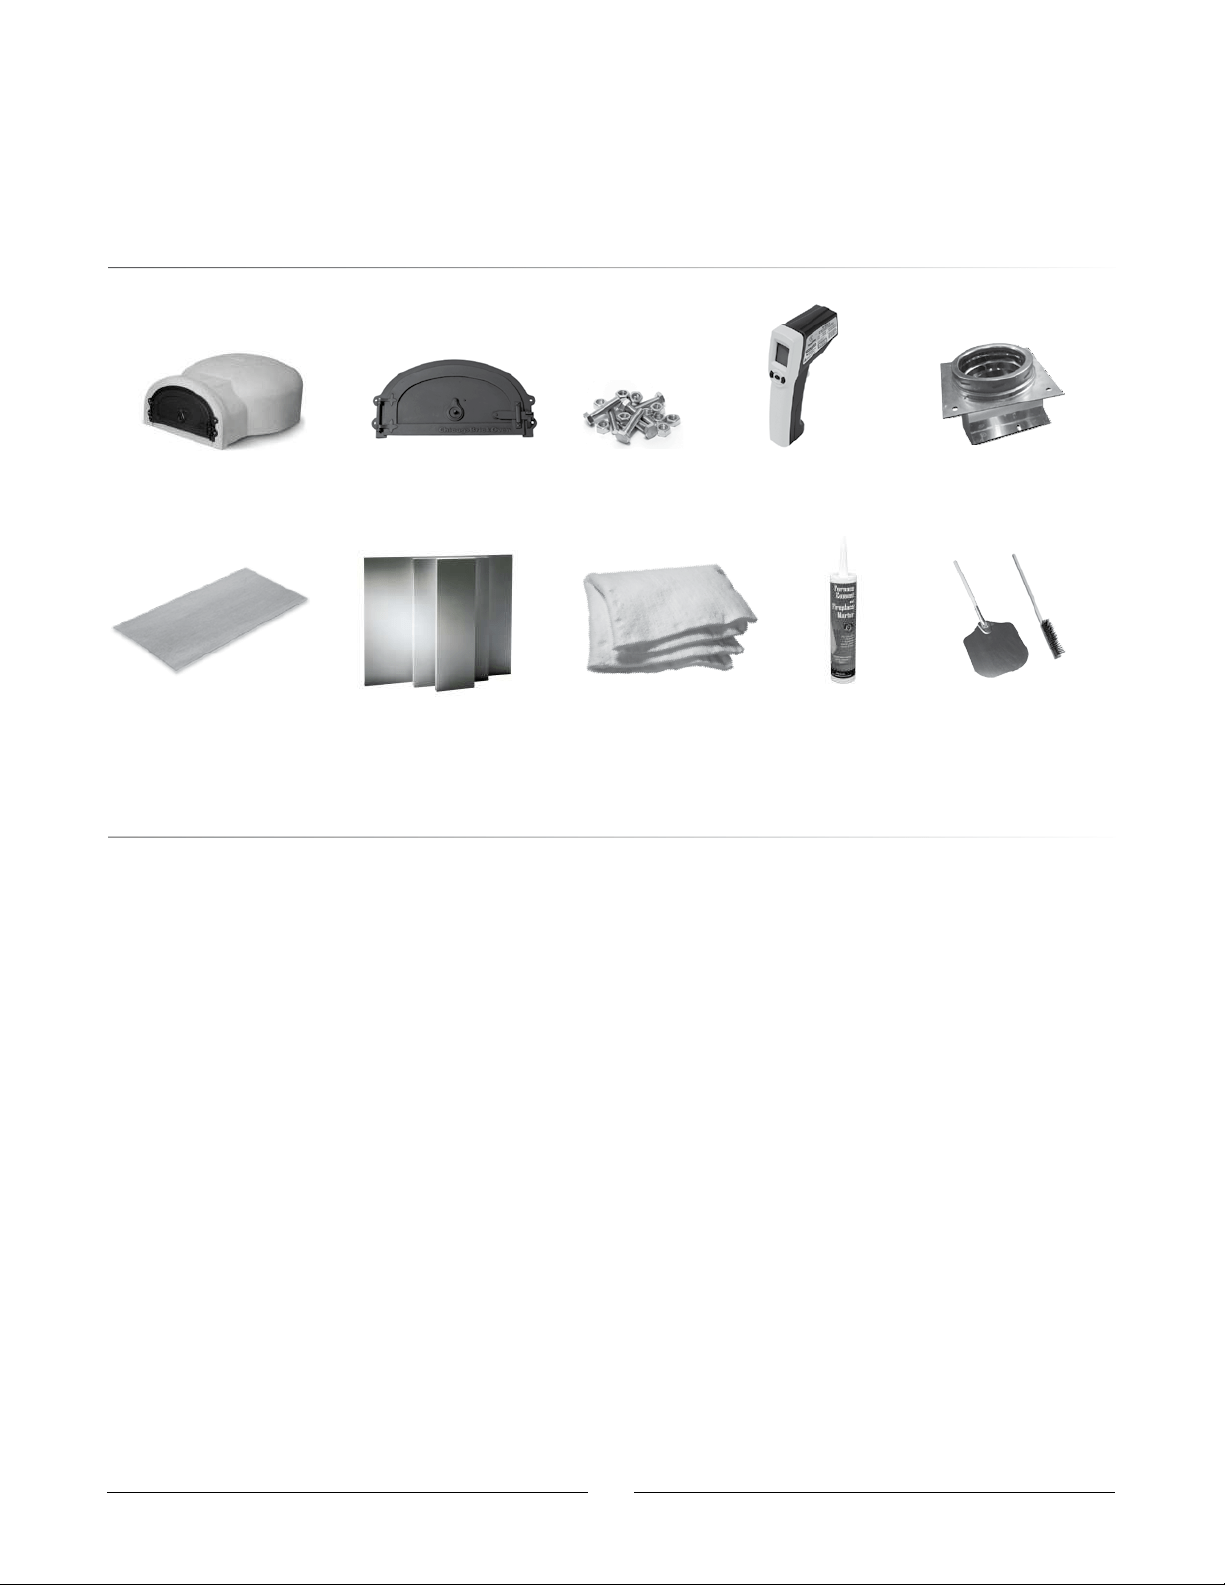
Parts and Components
The CBO-750 Oven Support Base must:
• be constructed of masonry or metal
• have at least the same area dimensions as the
external footprint of the Oven
You must check with your local Building Department to determine
the amount of clearance required by local building codes between
the Oven and Decorative Cover. Rating plate conforms to ANSI Cert
CSA 750 HYB C Label. CBO recommends clearance of 10 inches on
each side, 10" for the back, and 18" above. Also see the Clearances
to Combustible Construction section on Page 11 of this manual.
CAUTION: DO NOT USE ANY COMBUSTIBLE MATERIALS IN
THE CONSTRUCTION OF THE COVERING (SHROUD) OF THE
OVEN. ALL BUILDING MATERIALS USED NEAR THE OVEN,
METAL ANCHOR PLATE AND FLUE PIPE SHOULD BE
NONCOMBUSTIBLE AND NEVER MADE OF WOOD.
The Support Base surface must be flat, level and strong enough to
support the total combined weight of the Oven (Hybrid Countertop:
980 lbs | Hybrid DIY: 890 lbs | Hybrid Mobile: 1051 lbs) and the
Decorative Cover design you choose.
The two vertical support feet of the Support Base are typically made
of concrete block. The horizontal Support Base is typically made of a
4-inch-thick, steel-reinforced concrete slab. The standard height of
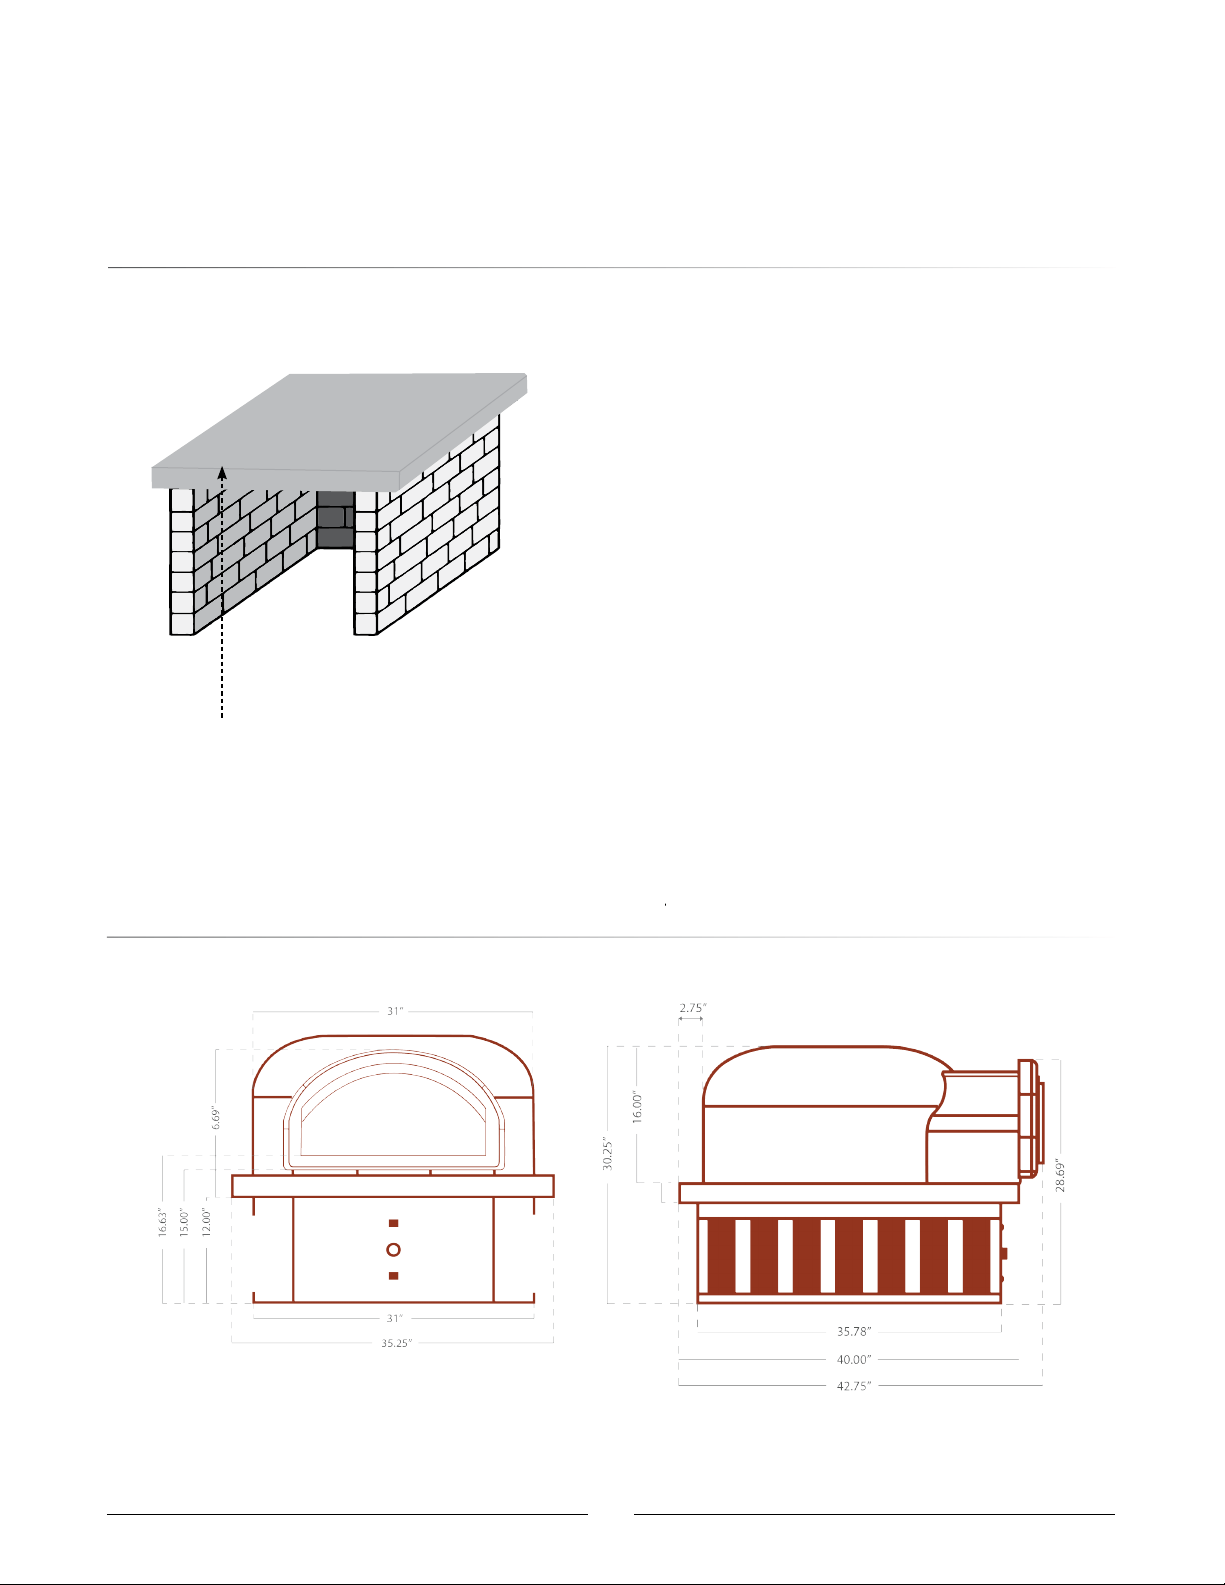
the horizontal part of the Support Base is 42 inches.
Note: Imagine the Oven’s Support Base as a table. The table’s
legs are concrete blocks and the tabletop is a 4-inch-thick concrete
slab. To build the Support Base, you build the support legs out
of concrete block, then on top of that leg base, you build a frame to
pour a concrete slab (the tabletop).
CAUTION: TO AVOID THE POSSIBILITY OF A FIRE,
NONCOMBUSTIBLE MATERIALS MUST BE USED IN
THE CONSTRUCTION OF THE SUPPORT BASE AND ANY
FRAMING USED AROUND THE OVEN.
Support Base
CBO-750 Hybrid Assembly Overview
CBO-750 OVENS SHOULD BE INSTALLED BY A PROFESSIONAL OR
SUITABLY QUALIFIED INDIVIDUAL.
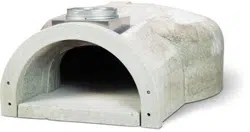
Anchor Box with DuraVent
Anchor Plate
Bolts
Decorative Door
Insulating Blanket
Dome, Hearth (3 pieces)
& Arch
Thermometer
18-Gauge Galvannealed
Steel Plate
Cooking Accessories:
Pizza Peel & Brush
Mortar
I
nsulation Boards
* Note: Most components come pre-assembled in Hybrid units.
5
CBO-750 Hybrid Assembly Instructions
Oven Support Base Installation
Shown is the final assembly of the five-piece CBO-750 Oven.
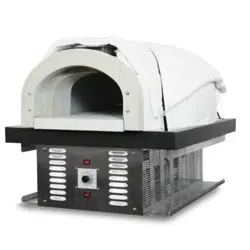
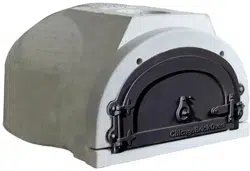
Pre-Assembled Hybrid Oven
Your CBO-750 Hybrid Oven comes Pre-Assembled with Insulation Boards
that are placed under both pieces of the Hearth—inside steel tray box.
Place the Hybrid Unit on the Support Base. The Hybrid louvered
stainless-steel front panel should never be covered or enclosed.
Recessing the Hybrid frame and burner below the countertop surface
and into an enclosed area should never be done.
The Oven's decorative finish should be built on top of the 42" Support
Base, not on top of oven dome. Oven should not be exposed to the
elements and should not get wet.
Note: It is important that you use all of the insulation supplied to avoid a
possible fire. The sub-hearth insulation should not be exposed to the
elements and should never get wet.
Support
Base
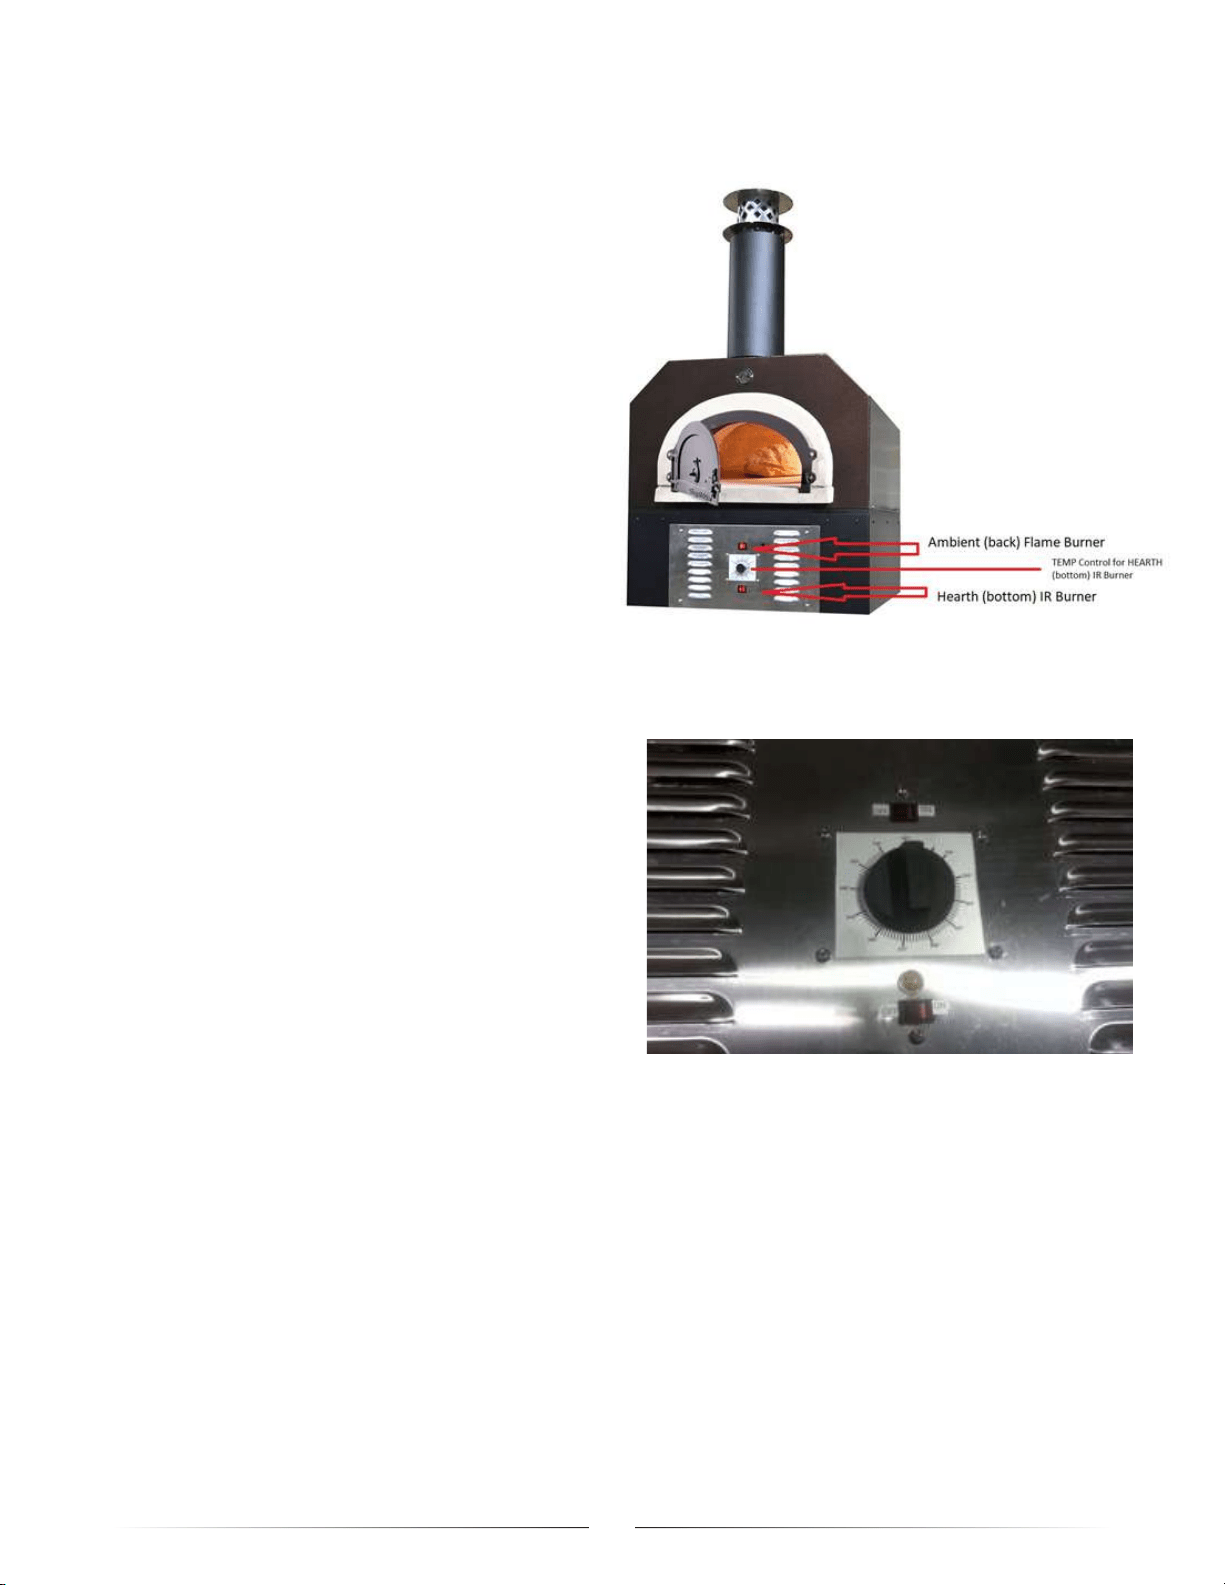
Ambient Burner Switc
Hearth Burner Switch
6
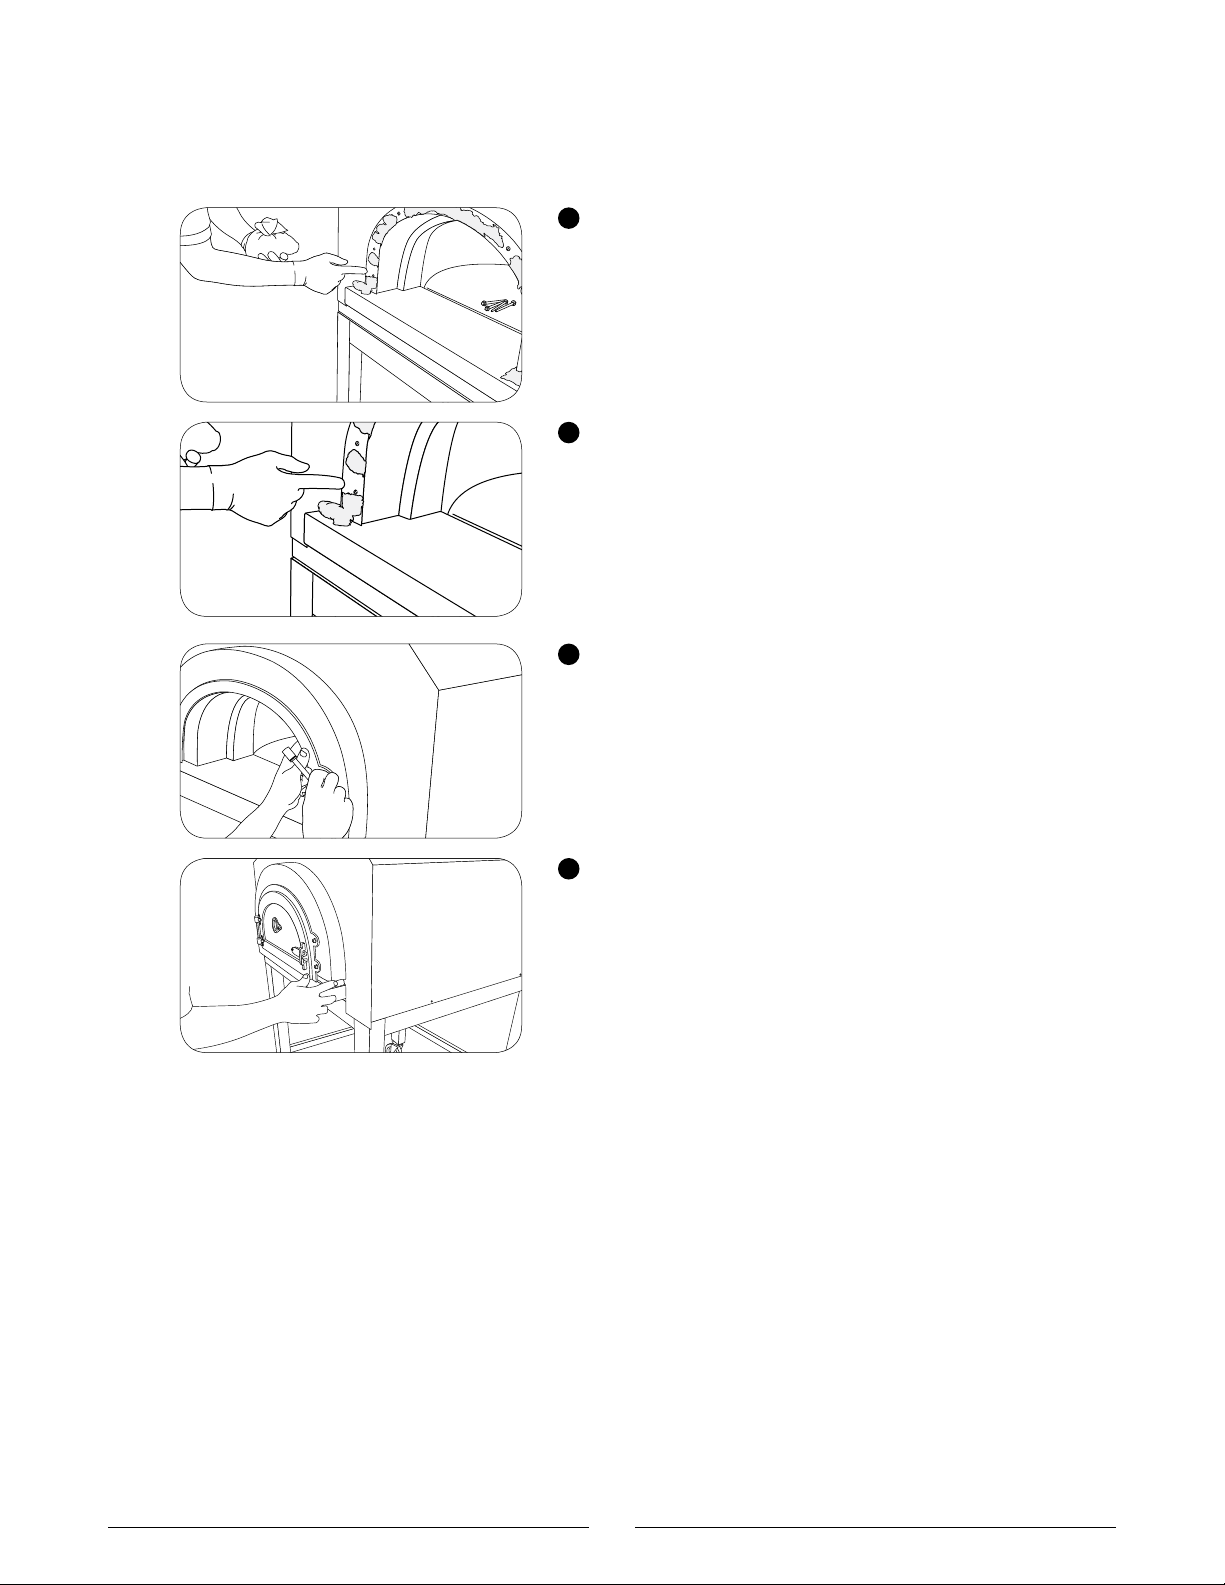
CBO-750 Hybrid Assembly Instructions
1
You are now ready to mortar the Arch to the Dome. Use the
refractory mortar provided to completely seal the space
between the Arch and Dome. You will also put some mortar
on the Front Hearth under the Arch.
You don’t need a lot of mortar; just enough to make a seal.
Place the mortar all the way around the Arch and on the
Hearth on both sides under the Arch.
2
Note: Be very careful to not get any mortar in the mounting
holes for the Arch and Door. If you do get mortar in the holes,
attempt to clean it out immediately; the bolts will not go in all
the way if mortar is present.
4
Use some mortar to finish off the install. If the Shroud
is brick or stone, you should also use mortar around the
top of the Arch. If you are using a Metal Shroud, use a
high-temperature resistant silicone on the top of the Arch
to seal the joint with the Shroud.
Note: Each year you will need to touch-up the mortar and/or
silicone for cosmetic reasons.
3
Attach the Metal Door and insert the bolts to hold it in place
(ss 1/4 - 20 x 2 1/2").
Once you have all four bolts in place, you should tighten
them, but do not force it. You should create a nice seal
between the Arch and the Dome with the mortar you used.
Note: Do not over-torque bolts or you may dislodge the
threaded inserts!
7
Details
Base SKU CBO-O-KIT-HYB
•
Pre-assembled 6-Piece Oven (Dome, 3-piece and Hearth) *Arch and
Decorative Door not installed.
•
Gas Package (Available in Natural or Propane Gas Specify
Altitude)
•
Pre-Assembled Install Kit (Anchor Plate, Insulating Board &
Blanket, Steel Plate, Mortar)
•
Commercial (C) - Certified for Indoor & Outdoor Commercial Use
•
Accessory Package (Pizza Peel, Brush, IR Thermometer)
•
Hearth Cooking Serface 38" x 28"
•
Oven Weight: 890 lbs.
CBO-750 Hybrid DIY Kit Specications
Ambient Burner Switch
Hearth Burner Switch
8
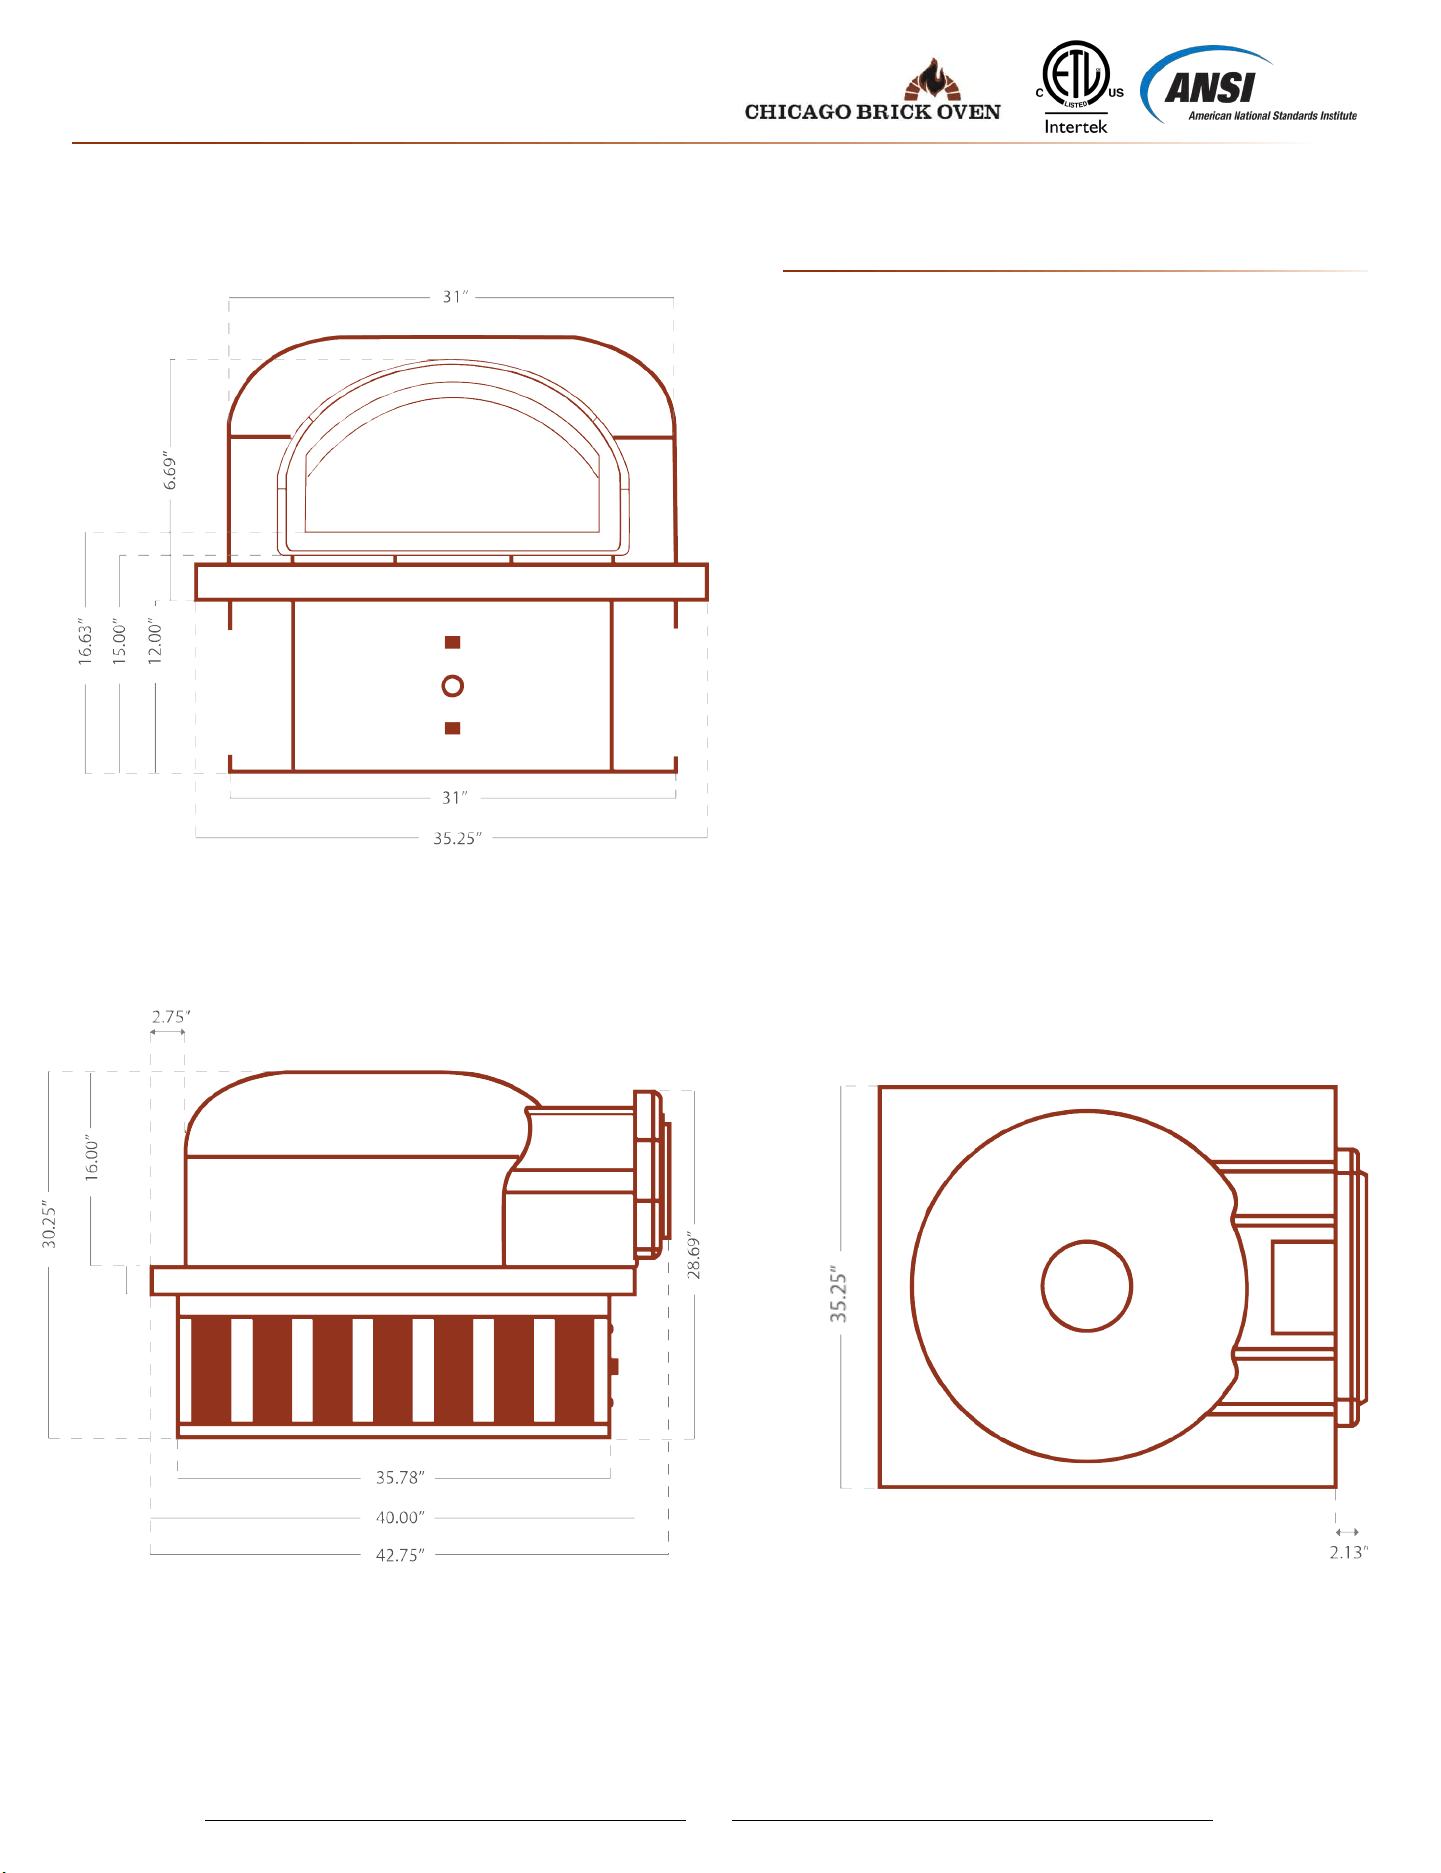
Details
Base SKU CBO-O-CT-750-HYB
• Preassembled
• Metal Insulated Hood
• Gas Package (Available in Natural or Propane Gas;
Specify Altitude)
• Commercial (C) - Certified for Indoor & Outdoor Use
• Accessory Package (Pizza Peel, Brush, Infrared
Thermometer)
• Hearth Cooking Surface 38” x 28”
• Oven Weight: 980 lbs
CBO-750 Hybrid Countertop Specications
Ambient Burner Switch
Hearth Burner Switch
9
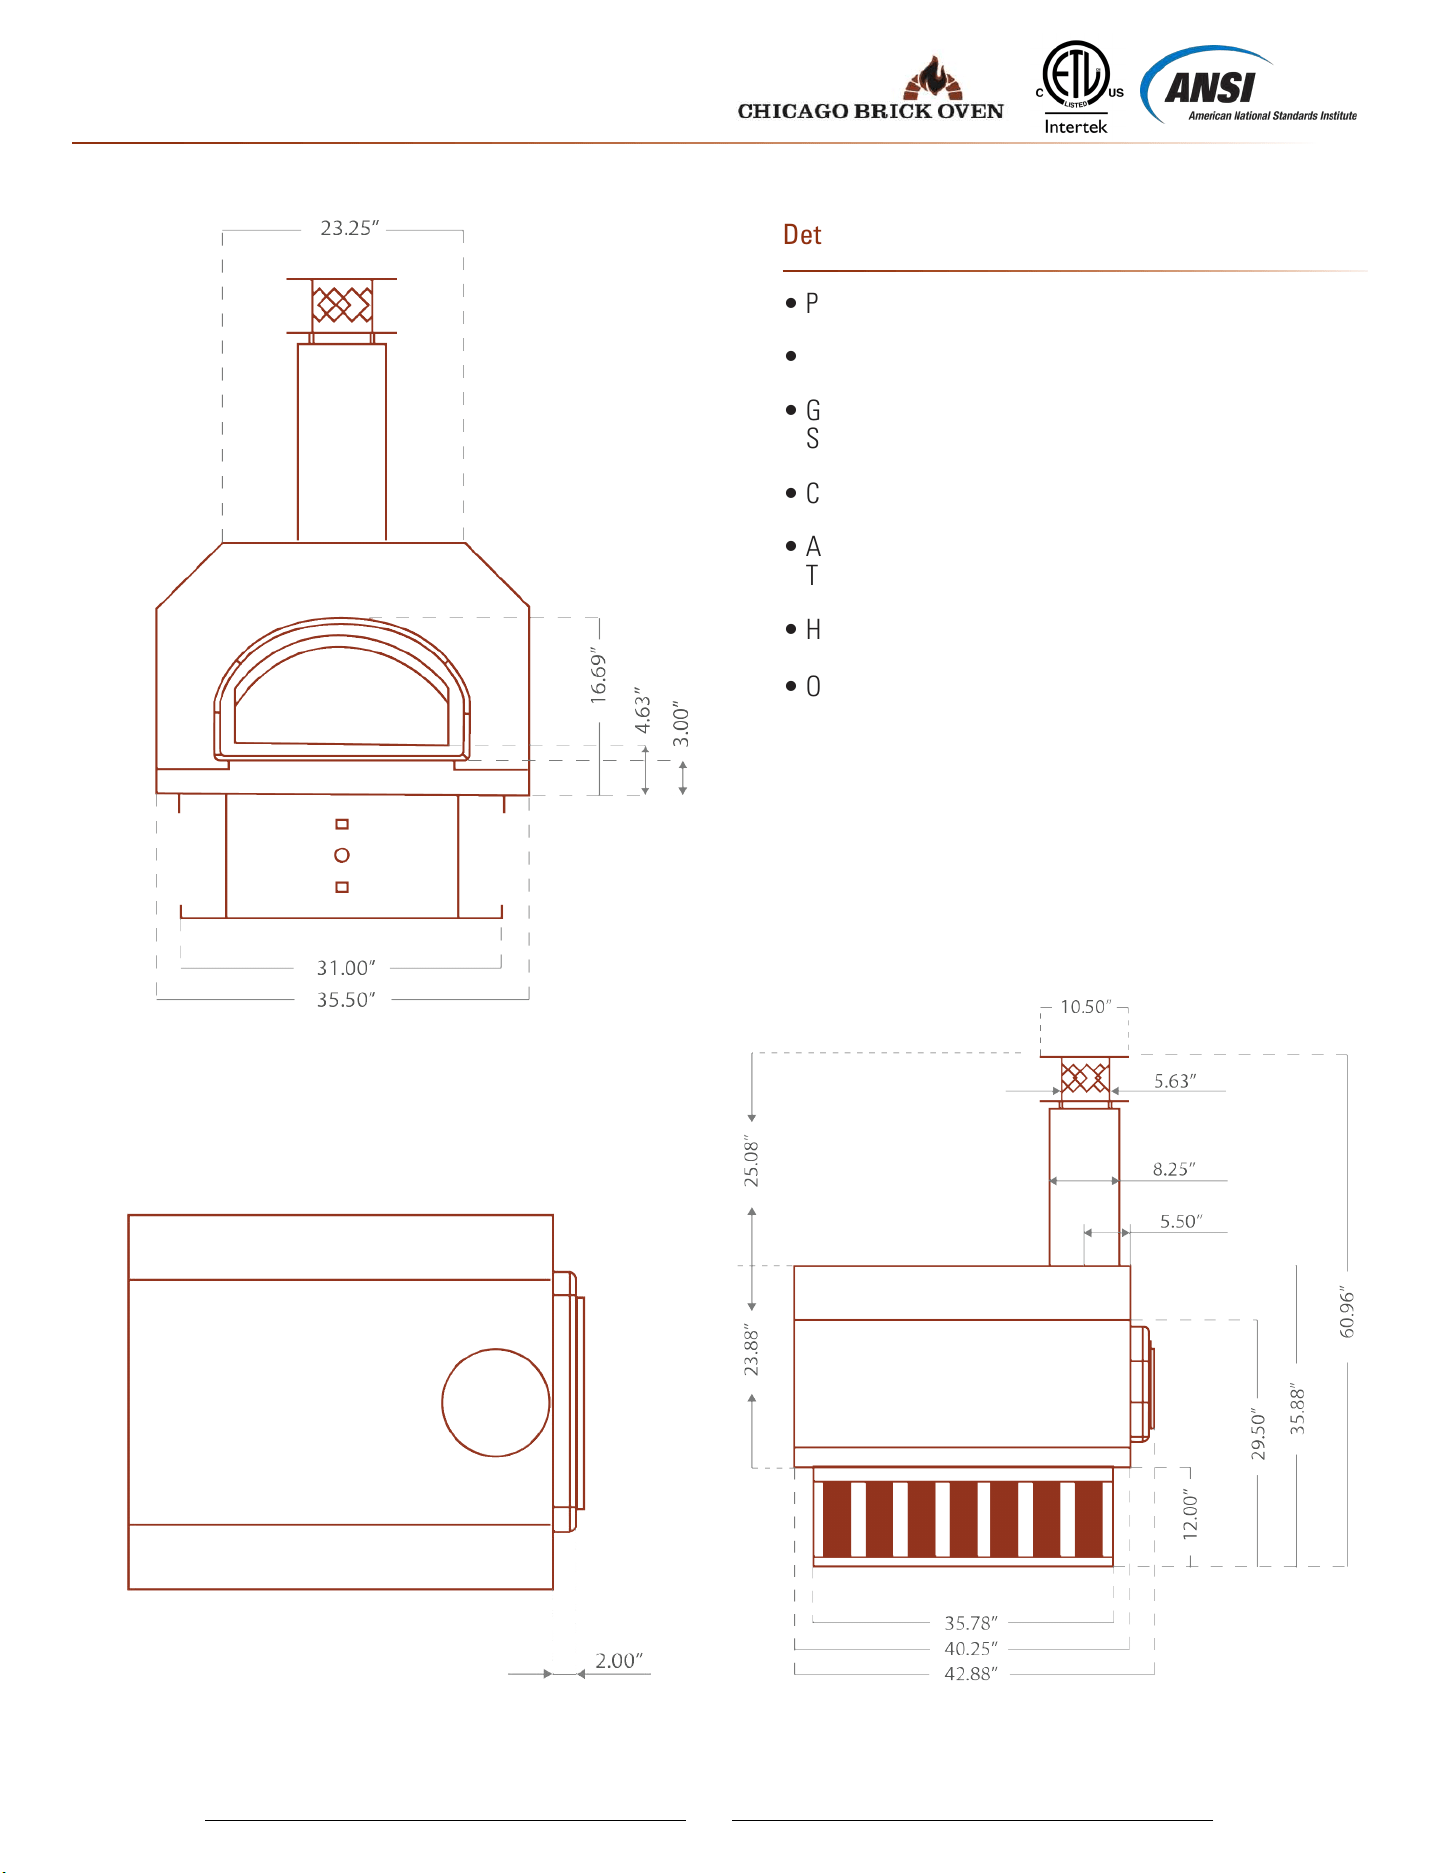
Details
Base SKU CBO-O-STD-750-HYB
CBO-750 Hybrid Stand Specications
• Pre-assembled
• Custom-Built, Heavy-Duty Stand
• Metal Insulated Hood
• Gas Package (Available in Natural or Propane Gas;
Specify Altitude)
• Accessory Package (Pizza Peel, Brush, Infrared
Thermometer)
• Commercial (C) - Certified for Indoor & Outdoor Use
• Hearth Cooking Surface 38” x 28”
Oven with Stand Weight: 1,051 lbs.
Ambient Burner
Switch
Hearth Burner Switch
10

11
Gas/Electric Installation
I. General
• Upon receipt of your oven, thoroughly inspect for
any damage. If damage is observed, contact the
delivery agency immediately.
•
Safe and satisfactory operation of your oven
depends to a great extent on its proper
installation. Installation must conform to local
codes or in the absence of local codes, with the
National Fuel Gas Code, ANSI Z223.1/NFPA 54, or
the Natural Gas and Propane Installation Code,
CSA B149.1, as applicable.
• Keep any electrical supply cord and the fuel
supply hose away from any heated surface.
• Keep oven area free and clear from combustibles,
gasoline and other flammable vapors or liquids.
• Provide adequate clearances for air opening into
combustion chamber.
• Provide adequate clearance for servicing and
proper operation.
• The area in front
of and above the oven must be
clear to avoid any obstruction of flow of
combustion and ventilation air. Means must be
provided f
or adequate air supply and adequate
clearance for air openings into the combustion
chamber.
• For counter and freestanding installations the
oven is completely assembled as shipped. Do not
make any modifications to the oven or stand. Any
modifications can cause injury or property damage
and void warranty.
• For installation under ventilation hood when
installed indoors. The Hybrid Commercial oven is
not intended to be installed in residential
households, on boats or recreational vehicles.
II. Clearances to Combustible and
Noncombustible Construction
Sides = 10 inch (25.4 cm) Back =10 inch (25.4
c
m) Top = 18 inch (47.72 cm)
For use only on noncombustible floors or counters.
III. Gas Piping for Fixed Gas Supply
• Connect oven to gas supply line. For NG, the gas
pi
pe line used should be 1" pipe unless otherwise
stipulated by local code. The line used to attach
from the 1" pipe to the Hybrid should be reduced
to 3/4' or 1/2" to fit the inlet pipe on the oven.
Under no circumstances should the gas supply
line be smaller than the inlet pipe on the oven.
Use pipe sealant on all joints. Sealant must be
resistant to the action of LP gases.
• A 1/8-inch (3.175 mm) pressure tap is provided on
the gas control for checking the gas pressure. The
gas control is equipped with a pressure regulator.
The outlet pressure setting is 4-inch (101.6 mm)
water column on natural gas and 10-inch (254
mm) water column on propane gas.
*LP Gas: Infrared Burner 36,000 BTU | Ambient Burner
18,000 BTU
*NAT Gas: Infrared Burner 36,000 BTU | Ambient Burner
27,000 BTU
• Level oven and its individual shut-off valve must
be
disconnected from the gas supply piping
system
during any pressure testing of the system
at test pressures in excess of ½ psig (3.45kPa).
•
Hybrid oven must be isolated from the gas supply
piping system by closing the individual manual
shut-off valve during any pressure testing of the
gas supply piping system at test pressures equal
to or less than ½ psig (3.45kPa).
To check for leaks, use a soap and water solution.
DO NOT USE OPEN FLAME
12
IV. Information for Use with a Self-
Contained LP-Gas Supply System
D
O NOT STORE A SP
ARE LP GAS CYLINDER UNDER OR
N
E
AR THIS APPLIANCE.
NEVER FILL THE CYLINDER BEYOND 80% FULL. IF
THESE TWO STATEMENTS ARE NOT FOLLOWED
EXACTLY, A FIRE CAUSING DEATH OR SERIOUS
INJURY MAY OCCUR.
• If your oven is factory-built for LP (Propane)
the regulator supplied is set for 11" W.C. and is
for use with LP gas only. The factory-supplied
regulator and hose must be used with a 20 LB LP
cylinder.
• The LP-gas supply cylinder must be constructed
and marked in accordance with the Specifications
for LP-gas Cylinders of the U.S. Department of
Transportation (D.O.T.) or the National Standards
of Canada CAN/CSA-B339, Cylinders, Spheres
and Tubes for the Transportation of Dangerous
Goods, and Commission, as applicable; and
1. Provided with a listed overfilling prevention
device
2. Provided with a cylinder connection device
compatible with the connection for outdoor
cooking appliances
3. Marked with a 20 LB LPG capacity
It must be provided with a shut-off valve terminating
in gas tank valve outlet. It must include a collar
to protect the cylinder valve. The cylinder supply
system must be arranged for vapor withdrawal.
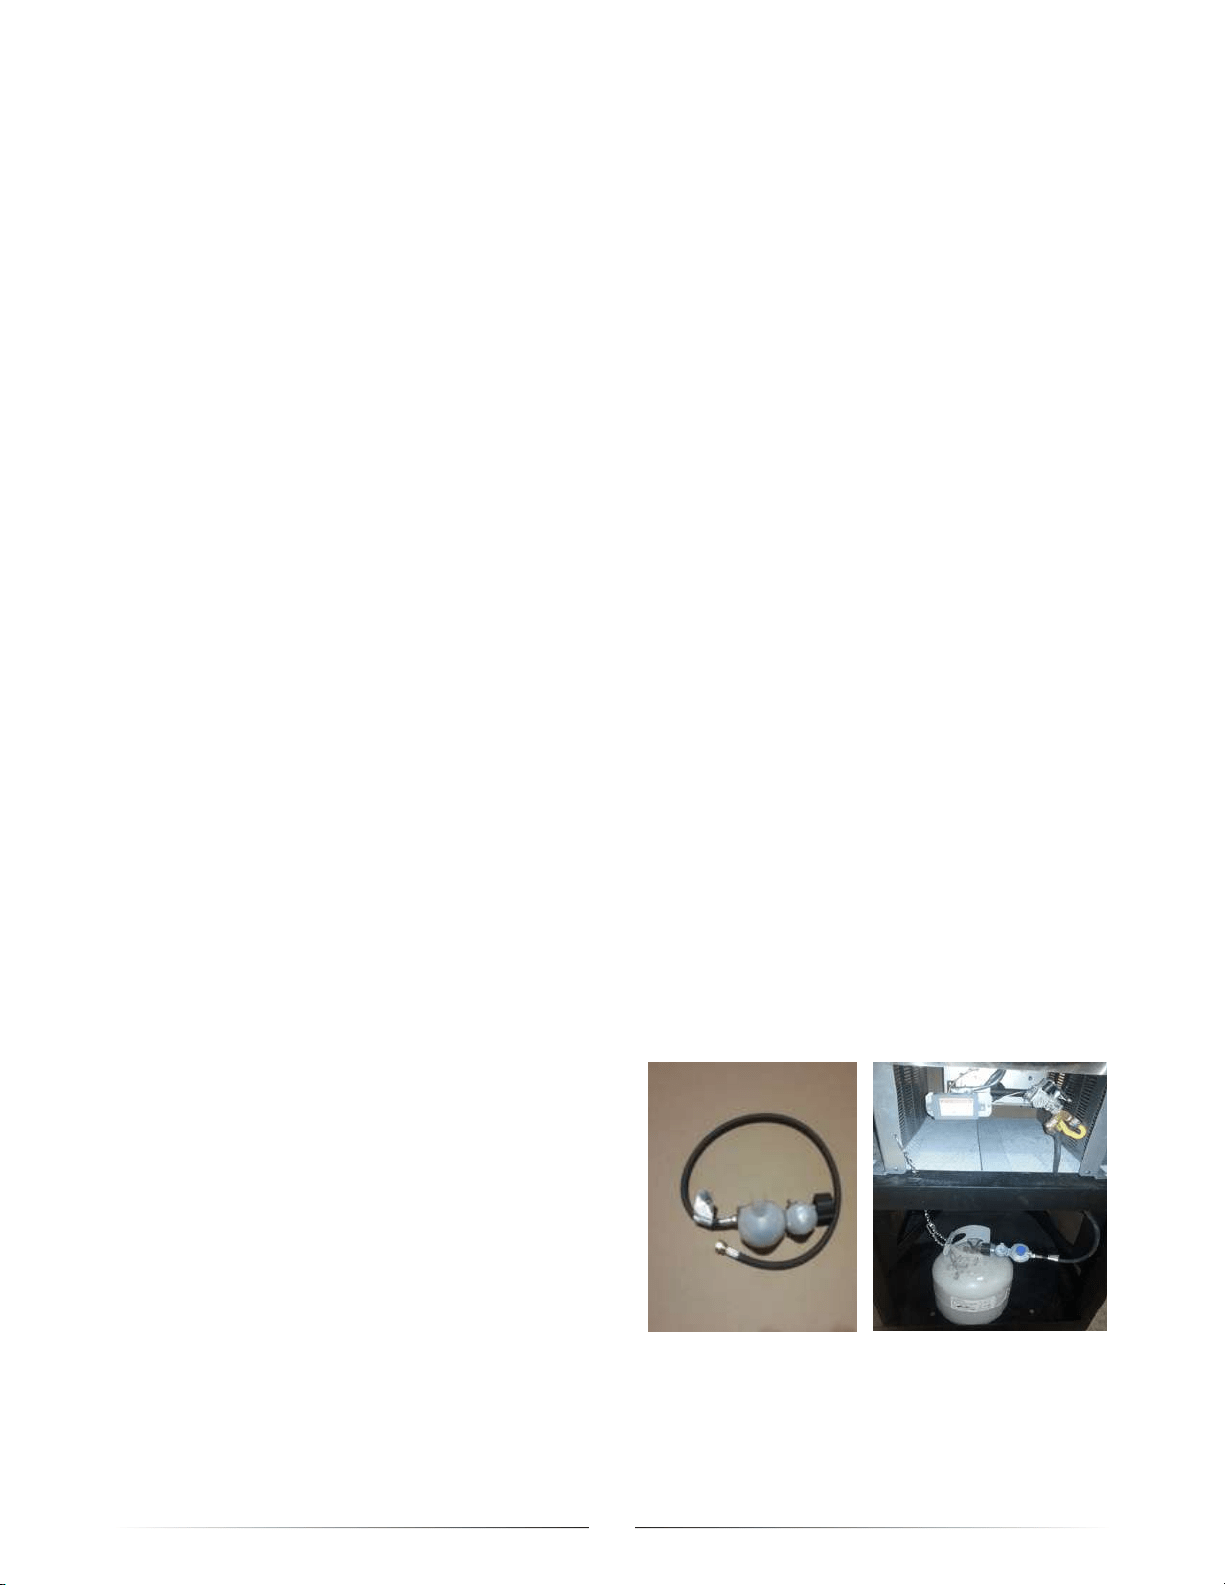
• Install the factory-supplied hose and regulator
assembly as shown in illustration. Connect the
3/8" flare end of the hose to the oven piping
outlet coupling using a ¾" open wrench. Do not
apply pipe sealant to the ¾" flare connection.
Gas/Electric Installation Continued
Locate and orient the LP cylinder to provide proper
vapor withdrawal. Connect the regulator to the
LP cylinder. Hand tighten it. Do not use a wrench.
Check for leaks using a leak detection solution.
NEVER USE OPEN FLAME TO CHECK FOR GAS
LEAK.
Note: Any 20 LB LPG cylinder can be used provided it
is compatible with the retention means as shown in
photo.
• If the oven is not in use, the gas must be turned
“OFF” at the supply cylinder. The cylinder must be
disconnected from the oven and stored outdoors,
out of the reach of children and must not be stored
in building, garage or any other enclosed area.
• Always inspect the hose before each use of the
oven. If it is evident there is excessive abrasion or
wear, or the hose is cut, it must be replaced prior to
the oven being put in operation. Replacement hose
assemblies will be specified by the manufacturer.
• The pressure regulator and hose assembly
supplied with to the oven must be used.
Replacement of pressure regulator and hose
assembly must be those specified by the oven
manufacturer. UL 21, Model 726 and 426, Rated
for 350 psi max work pressure.

13
• To protect against electric shock, do not immerse
cord or plugs in water or other liquid;
• Unplug from the outlet when not in use and before
cleaning. Allow to cool before putting on or taking
off parts;
•
Do not operate any outdoor cooking gas appliance
with a damaged cord, plug, or after the appliance
malfunctions or has been damaged in any manner.
Contact the manufacturer for repair;
• Do not let the cord hang over the edge of a table or
touch hot surfaces;
• Do not use an outdoor cooking gas appliance for
purposes other than intended;
• When connecting, first connect plug to the outdoor
cooking gas appliance then plug appliance into the
outlet;
• Use only a Ground Fault Interrupter (GFI) protected
circuit with this outdoor cooking gas appliance;
• Never remove the grounding plug or use with an
adapter of 2 prongs; and
• Plan accordingly as to whare to install the electrical
outlet. Avoid the use of extension cord.
• Use only cord with 3-prong grounding plug, rated
for the power of the equipment, and approved for
outdoor use with a W-A marking.
Gas/Electric Installation Continued
V. Electrical Connections
When installed, the oven must be electrically
grounded in accordance with local codes or in the
absence of local codes, with the National Electrical
Code, ANSI/NFPA 70, or the Canadian Electrical Code
Part 1, CSA C22.1.
Electrical Rating
Volts Amps Frequency
120 1.50 60
ELECTRICAL DIAGRAM IS LOCATED BEHIND FRONT PANEL
14
Note: Do not use ambient burner as a wood starter
to avoid clogging the burner orifices
VIII. Shutting Down Instructions
To shut down the burner control systems for a period of
time, turn “OFF” the main electrical supply and place
the main panel ON/OFF switch and ambient burner
circuit ON/OFF switch to the “OFF” position.
To shut down the burner control systems for longer
than a week, turn “OFF” and “LOCK OUT” the main
electrical supply to the burner systems and turn “OFF”
and “LOCK OUT” the incoming gas supply gas cock.
Gas/Electric Installation Continued
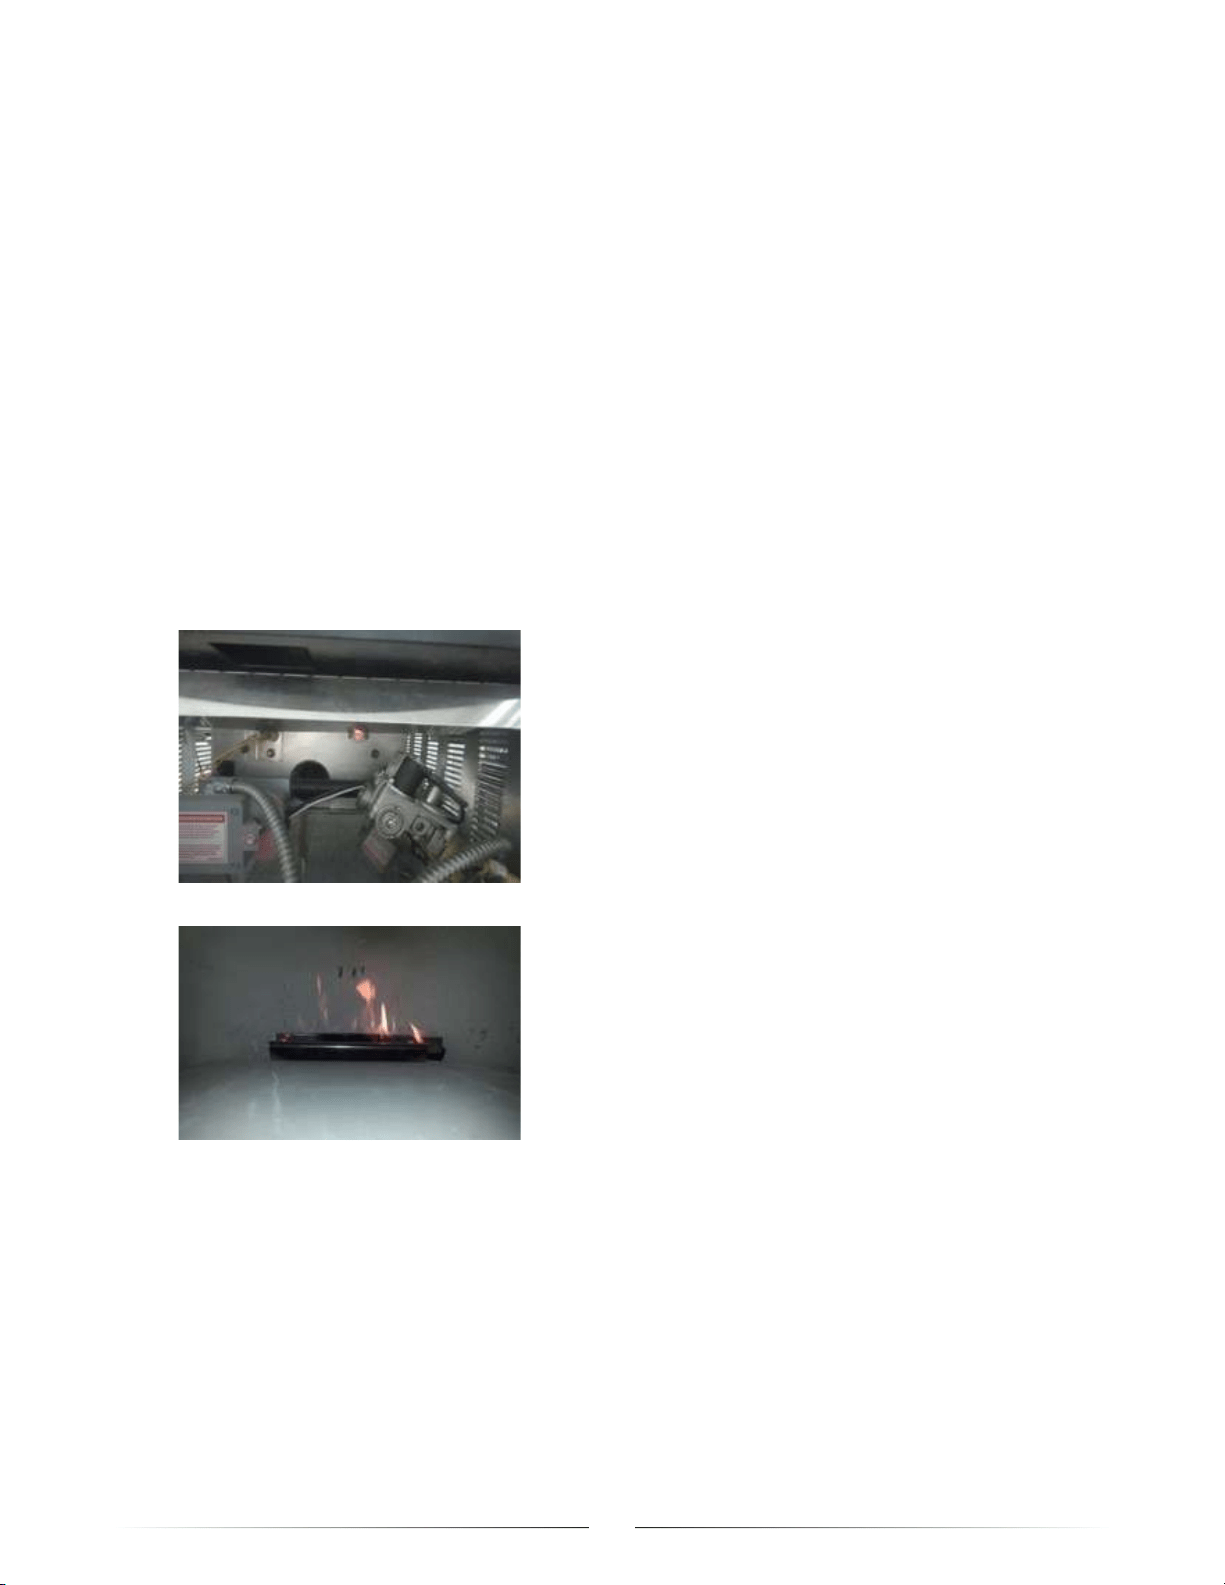
VI. Hearth Burner Lighting Instructions READ
INSTRUCTIONS BEFORE LIGHTING
First, confirm the area is clear of excess gas
• Set main gas supply cock in “OFF” position.
• Turn main electrical supply “OFF.”
• Wait at least (5) five minutes.
Next:
• Set main gas supply cock in “ON” position.
• Turn main electrical supply “ON.”
• Set temperature control to desired settings
• Place Hearth burner ON/OFF switch in “ON”
position.
• **If burner does not light, repeat above steps.
Note: The hearth burner system is controlled by
the thermostat.
VII. Ambient Burner Lighting
Instructions
• Set main gas supply cock in “ON” position.
• Turn main electrical supply “ON.”
• Place Ambient burner ON/OFF switch in “ON”
position.
• If burner does not light, repeat steps 1-3.

15
WARNING
NEVER COVER SLOTS, HOLES, OR PASSAGES IN THE OVEN BOTTOM OR COVER THE ENTIRE DECK WITH MATERIAL
SUCH AS ALUMINUM FOIL.
DOING SO BLOCKS AIR FLOW THROUGH THE OVEN AND MAY CAUSE CARBON MONOXIDE POISONING.
ALUMINUM FOIL LININGS MAY TRAP HEAT CAUSING A FIRE HAZARD.
Operation
IX. CAUTION: In the event of power
failure, do not attempt to operate oven
until power is resumed.
NOTE: Inspect the gas hose (if used) before each use of the oven.
If it is evident there is excessive abrasion or wear, or
the hose is cut, it must be replaced prior to the oven
being put in operation. The replacement hose assembly
shall be that specified by the manufacturer.
Lighting & Shutting down Instructions: Refer to
related section in Installation portion of this manual
and label located on oven front panel.
Never operate a Hybrid oven with the gas while the
door is closed. When the gas is on (NG or LP) all
cooking should be done with the door open.
Note: Due to thermal expansion, small cracks may
appear in the dome or hearth during the curing process.
This is normal and the quality of your oven will not be
compromised.
This oven can be operated as a gas oven or as a hybrid
oven:
• For gas operation, follow Lighting & Shutting down
Instructions.
• For hybrid operation, wood can be inserted on the
cooking surface after oven temperature reaches
thermostat setting.
Note: Use only small amounts of wood to enhance the
flavor of foods. NEVER place wood on top of or direct
contact with the ambient burner at the back of the
oven.
Caution when using the brush for cleaning be careful not
to come in contact with ambient burner. Gas
connections and ignition wire can be damaged.
16
X. CAUTION: Oven must be “OFF” and
cool before any cleaning is done.
Disconnect the power supply to the appliance before
cleaning and servicing the oven.
• Clean the oven cooking surface after each use with
a cleaning brush.
• Periodically check and clean hearth burner venturi
tube for insects and insect nests.
A CLOGGED VENTURI TUBE CAN LEAD TO A FIRE
INSIDE THE OVEN
• Visually check burner flames for proper operation.
• Keep outdoor oven area clear and free from
combustible materials, gasoline and other flammable
vapors and liquids.
• Do not obstruct the flow of combustion and
ventilation air.
• Keep the ventilation openings of the cylinder
enclosure free and clear from debris.
Maintenance
• For service and repairs, contact factory, factory
representative or local service company.
• All maintenance and/or repair MUST be performed
by someone trained/qualified to work on gas/
electrical equipment. For additional information or
assistance, contact Chicago Brick Oven Customer
Assistance at 630.359.4793
• In dirty/dusty/wet atmospheres, it may be necessary
to examine/perform maintenance at additional times
depending on usage.
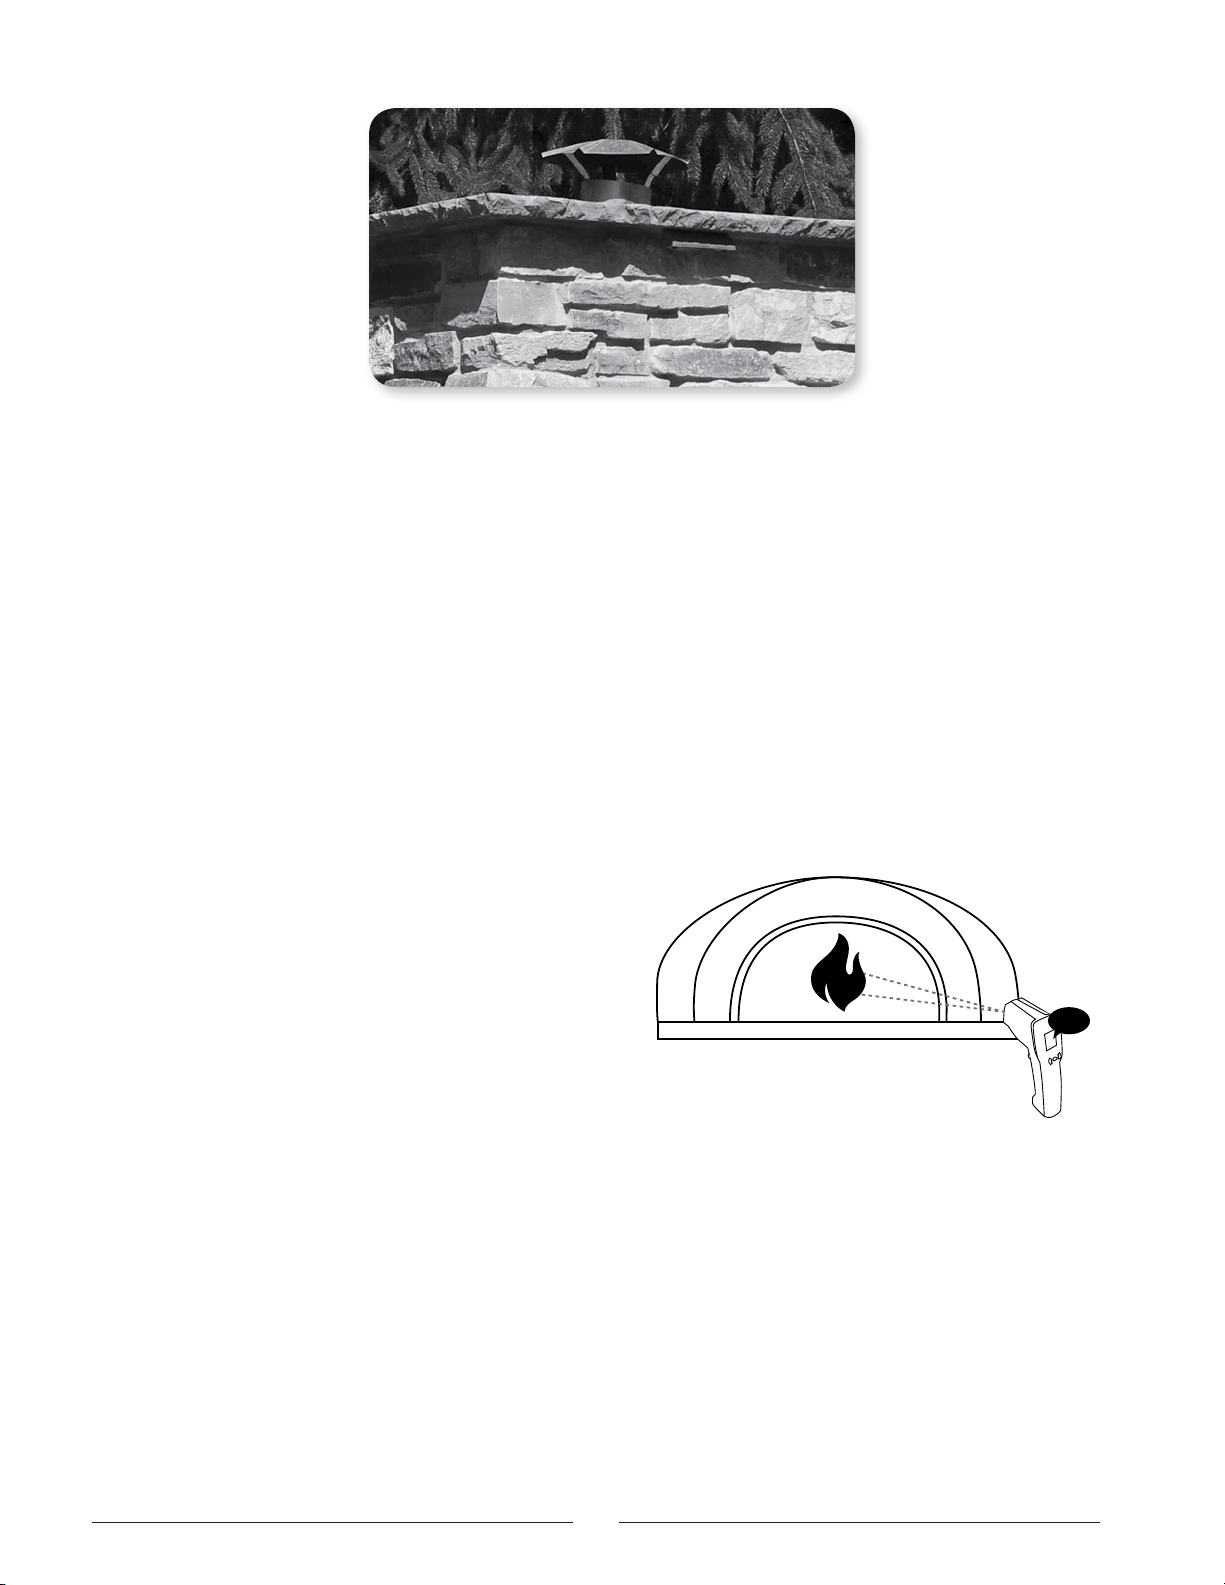
After you have cured your Oven and are ready to start cooking.The
interior Dome of the Oven will at first turn black from the fire
smoke. You will know the Oven temperature has reached 700°F
when the inner walls turn from black to a whitish grey. This is a
perfect temperature for many types of cooking. Use the included
thermometer to check temperatures inside your Oven. You can just
point and shoot to get a reading in any place in the Oven.
Note: Please refer to the manufacturer’s instructions for proper
use of the thermometer that is included with your Oven.
Note: You should re-cure your Oven if it has not been used for an
extended period of time or if the Oven has been exposed to
excessive amounts of moisture.
Note: Your Oven is designed for burning solid, dried wood only.
Do not burn scrap wood, compressed logs, coal or other
materials. Failure to follow this instruction may damage your
Oven and void your warranty.
C
AUTION: NEVER OBSTRUCT THE FLUE PIPE WHILE
OPERATING THE OVEN.
CBO Oven Operating Instructions
Operating Instructions
Please follow these instructions exactly as written.
Failure to follow instructions may cause permanent
damage to your Oven and your warranty may be void.
Although your Oven may seem dry once you complete the
installation process, there are small amounts of moisture pockets
that need to work their way out. If you build a large fire in your
Oven from the onset, you could compromise your Oven’s longevity
and cooking efficiency, and can ultimately cause permanent
damage, which may void the manufacturer’s warranty.
When lighting the first fire, keep the flames low so the moisture
can be slowly released from the Oven and surrounding masonry
work. This curing process should be conducted at a temperature
as close to 212°F (100°C) as possible (do not exceed that
temperature) over a 2- to 3-day period.
CAUTION: NEVER USE GASOLINE, GASOLINE-TYPE
LANTERN FUEL, KEROSENE, CHARCOAL LIGHTER FLUID,
OR SIMILAR LIQUIDS TO START OR FRESHEN UP A FIRE IN
THIS OVEN. KEEP ALL SUCH LIQUIDS WELL AWAY FROM
THE OVEN WHEN IT IS IN USE.
Note: Refer to “Curing Your Oven” on page 23.
Due to thermal expansion, small cracks will appear in the Dome or
Hearth during the curing and cooking process. Do not worry; this is
normal and the quality of your Oven will not be compromised.
TO PROTECT THE INTERIOR OF YOUR OVEN FROM RAIN AND OTHER
MOISTURE, A PROTECTIVE RAIN CAP MUST BE INSTALLED ON TOP OF THE
FLUE PIPE TO ENSURE THAT MOISTURE DOES NOT GET INTO YOUR OVEN.
700
°
17

CBO Oven Best Practices
Other Precautions and Instructions
• LOCAL REGULATIONS ABOUT WOOD-BURNING
EQUIPMENT SHOULD BE CONSULTED.
• CBO OVENS SHOULD BE INSTALLED BY A PROFESSIONAL
OR SUITABLY QUALIFIED INDIVIDUAL.
• FOR COMMERCIAL INDOOR INSTALLATIONS, A SOURCE
OF FRESH AIR INTO THE ROOM SHALL BE PROVIDED
WHEN REQUIRED. CHECK WITH LOCAL BUILDING
OFFICIALS REGARDING VENTILATION REQUIREMENTS.
• DO NOT USE PRODUCTS NOT SPECIFIED FOR USE WITH
THIS OVEN.
• DO NOT INSTALL IN A MOBILE HOME.
• DO NOT CONNECT TO OR USE IN CONJUNCTION WITH
ANY AIR DISTRIBUTION DUCTWORK. UNLESS
SPECIFICALLY APPROVED FOR SUCH INSTALLATIONS.
•
DO NOT USE CHEMICALS OR FLUIDS TO START THE FIRE.
• DO NOT BURN GARBAGE OR FLAMMABLE FLUIDS, SUCH
AS GASOLINE, NAPHTHA OR ENGINE OIL.
• NEVER ALLOW ANYONE UNDER THE AGE OF 18 TO
OPERATE THE OVEN.
• Do not throw chunks of wood violently into the Oven.
• Each time you light a wood fire, make sure the fire covers as
much of the Hearth surface as possible.
• Always use dry hard woods (dried for at least two years)! If you
see moisture coming from the logs while they are on the fire, the
wood is not dry. Using wood that is not dry will cause the Oven to
throw off a considerable amount of smoke and can also cause
damage to the Oven because of the high moisture content.
• The first two times you cook in your new Oven, cook something
simple (for example, a pizza shell) then throw it away without
actually eating what you have cooked. The third time, you can
begin enjoying what you have cooked in your new Oven.
• Always pre-warm any cooking accessory (the CBO Grill, a cast
iron pot, etc.) before you put it in the Oven. If you place a cold
accessory on a hot Hearth, the thermal shock may cause the
Hearth to crack. You can also add an Oven Rack so the pot or
pan doesn’t sit directly on the Hearth.
• The manufacturer is not responsible for eventual environmental
damages, nuisance or smoke and carbon particles.
• In cold temperatures, bring your Oven up to temperature slowly.
• Never use frozen foods directly on the Hearth.
• Never use water, marinades or other liquids directly on the Hearth.
• With the exception of bread or pizza, always cook foods on or in
a cooking accessory (the CBO Grill, a cast iron pot, etc.) to
prevent spillage onto the Hearth surface.
• DO NOT OVER-FIRE! When flame spills out of the Oven, you are
over-firing.
• A protective rain cap must be installed on top of the Flue Pipe to
ensure that moisture does not get into your Oven.
• Ash Disposal: Brush out the ashes after each use with your
CBO Wire Brush. Ashes should be placed in a metal container
with a tight-fitting lid. The closed container of ashes should be
placed on a noncombustible floor or on the ground, well
away from all combustible materials, pending final disposal.
When the ashes are disposed of by burial in soil or otherwise
locally dispersed, they should be kept in the closed container
until all cinders have thoroughly cooled.
Regular Maintenance
Your CBO Oven will last years if you follow these simple,
regular maintenance tips:
• Never use any cleaning products inside the Oven! Heat the
Oven properly to clean it.
• Clean the splash zone around the mouth of the Oven with hot
water and soap after each use.
• The CBO-750 models come with a cast aluminum Door that is
primarily for decorative purposes. Never close the Decorative
Door during oven operation.
• Lubricate the Decorative Door hinges on a regular basis. When
the Door shows signs of wear, rub it lightly with a piece of steel
wool and repaint the Door with black Stove Pipe Spray Paint
available at your local hardware store.
• Creosote Formation and the Need for Removal. When wood
is burned slowly, it produces tar and other organic vapors that
combine with expelled moisture to form creosote. The creosote
vapors condense in a relatively cool Oven Flue and Exhaust Hood of
a slow-burning fire. As a result, creosote residue accumulates on
the Flue Lining and Exhaust Hood. When ignited, this creosote
makes an extremely hot fire. To reduce the risk of a creosote fire,
inspect the Flue Connection/Anchor Plate on a regular basis. Make
sure it is free from any buildup. If you have buildup, use a wire
brush to clean it. Contact your local municipal or provincial fire
authority for information about how to handle a chimney fire. Have
a clearly understood plan for how to handle a chimney fire.
• Inspect the Flue Pipe on a regular basis. Make sure it is in
good repair and is seated securely into the Flue Connection/
Anchor Plate.
• Inspect your Flue Cap to ensure there is no buildup blocking
the flow of air. If you have any buildup, you can use a wire
brush to clean it.
• Touch-up the mortar around the Arch to maintain a nice
finished look. You can use any refractory mortar found at your
local hardware store.
• If you use the CBO Metal Shroud in your install, cover the
Shroud with an inexpensive grill cover to help protect the Oven
from the elements when not in use. The Oven must be cool to
the touch before it can be covered.
•
When using any CBO accessory, please do not allow any type of
liquid to touch the Hearth or Dome. For example: When cooking
steak on the Grill Grate, you need to place a Griddle underneath the
Grill Grate to “catch” the drippings.
If you have any questions about the use and care of your CBO Oven,
please send us an email to info@chicagobrickoven.com
18

Curing Your CBO 750 Hybrid Oven (using GAS only)
This curing process is critical to the longevity of your oven.
Although your Oven may seem dry once you complete the
installation process, there are small amounts of moisture pockets
that need to work their way out.
Rules of thumb for curing:
1. The longer you cure your oven at a LOW temperature the
better.
2. Do not cook with high temperatures until you feel confident
all the moisture within the oven has evaporated.
3. If your oven has been exposed to rain during the installation
process or you are in a high precipitation area; double the
below recommendations.
Below are guideline/steps to cure your Hybrid oven with gas.
Step 1: Run Hearth (bottom) IR Burner at 200°F for 3 hours
Step 2: Run Hearth (bottom) IR Burner at 300°F for 3 hours
Step 3: Run both burners at the same time for 4 additional hours
NOTES:
• Due to thermal expansion, small cracks ma
y appear in the
Dome or Hearth during the curing process. Don’t worry; this
is normal and the quality of your Oven will not be
compromised.
• Not following curing guidelines will void the
manufacturer’s warranty.
Note: You should re-cure your Oven if it has not been used for an
extended period of time or if the Oven has been exposed to
excessive amounts of moisture.
Friendly Reminders:
NEVER use the CBO 750 Hybrid with the door closed. If you would
like to bake, you
must buy an insulated door and use WOOD only.
The GAS feature of this oven can only be used while the doorway
is completely open.
BEST PRACTICE: After extreme cold or heavy rains, it is always
best to slowly bring your CBO oven to cooking temperature.
Top Switch: Ambient (Back) Burner Switch
Bottom Switch: Hearth (Bottom) Burner Switch
Middle Knob: Temperature Control for Hearth (bottom) IR Burner
19
Curing Your CBO 750 Hybrid Oven (using CHARCOAL)
This curing process is critical to the longevity of your oven.
Although your Oven may seem dry once you complete the
installation process, there are small amounts of moisture pockets
that need to work their way out.
Rules of thumb for curing:
1. The longer you cure your oven at a LOW temperature the
better.
2. Do not cook with high temperatures until you feel confident
all the moisture within the oven has evaporated.
3. If your oven has been exposed to rain during the installation
process or you are in a high precipitation area; double the
below recommendations.
Below are guideline/steps to cure your Hybrid oven with
CHARCOAL:
What you will need:
1. Charcoal chimney starter
2. 15 LB bag of charcoal
3. Paper
4. Lighter/match
How to cure your oven:
• Place paper under chimney
• Fill chimney to the top with charcoal and ignite paper
• When charcoal turns into ash white, start to transfer
ignited coals to our oven
• Pour coals on to steel peel and start to spread the coals in
your oven evenly, this may take a few pours on to your
steel peel to transfer the ignited coal into your oven
• Let the charcoal burn until the fire is out
• Repeat the steps above until your 15 LB bag of charcoal is
used up
This may take more than a day
Once the process is completed, clean your oven with an oven
brush
• Due to thermal expansion, small cracks may appear in the
Dome or Hearth during the curing process. Don’t worry; this
is normal and the quality of your Oven will not be
compromised.
• Not following curing guidelines will void the
manufacturer’s warranty.
Note: You should re-cure your Oven if it has not been used for an
extended period of time or if the Oven has been exposed to
excessive amounts of moisture.
Friendly Reminders:
NEVER use the CBO 750 Hybrid with the door
closed. If you would
like to bake, you must buy an insulated door and use WOOD only.
The GAS feature of this oven can only be used while the doorway
is completely open.
BEST PRACTICE: After extreme cold or heavy rains, it is always
best to slowly bring your CBO oven to cooking temperature.
20
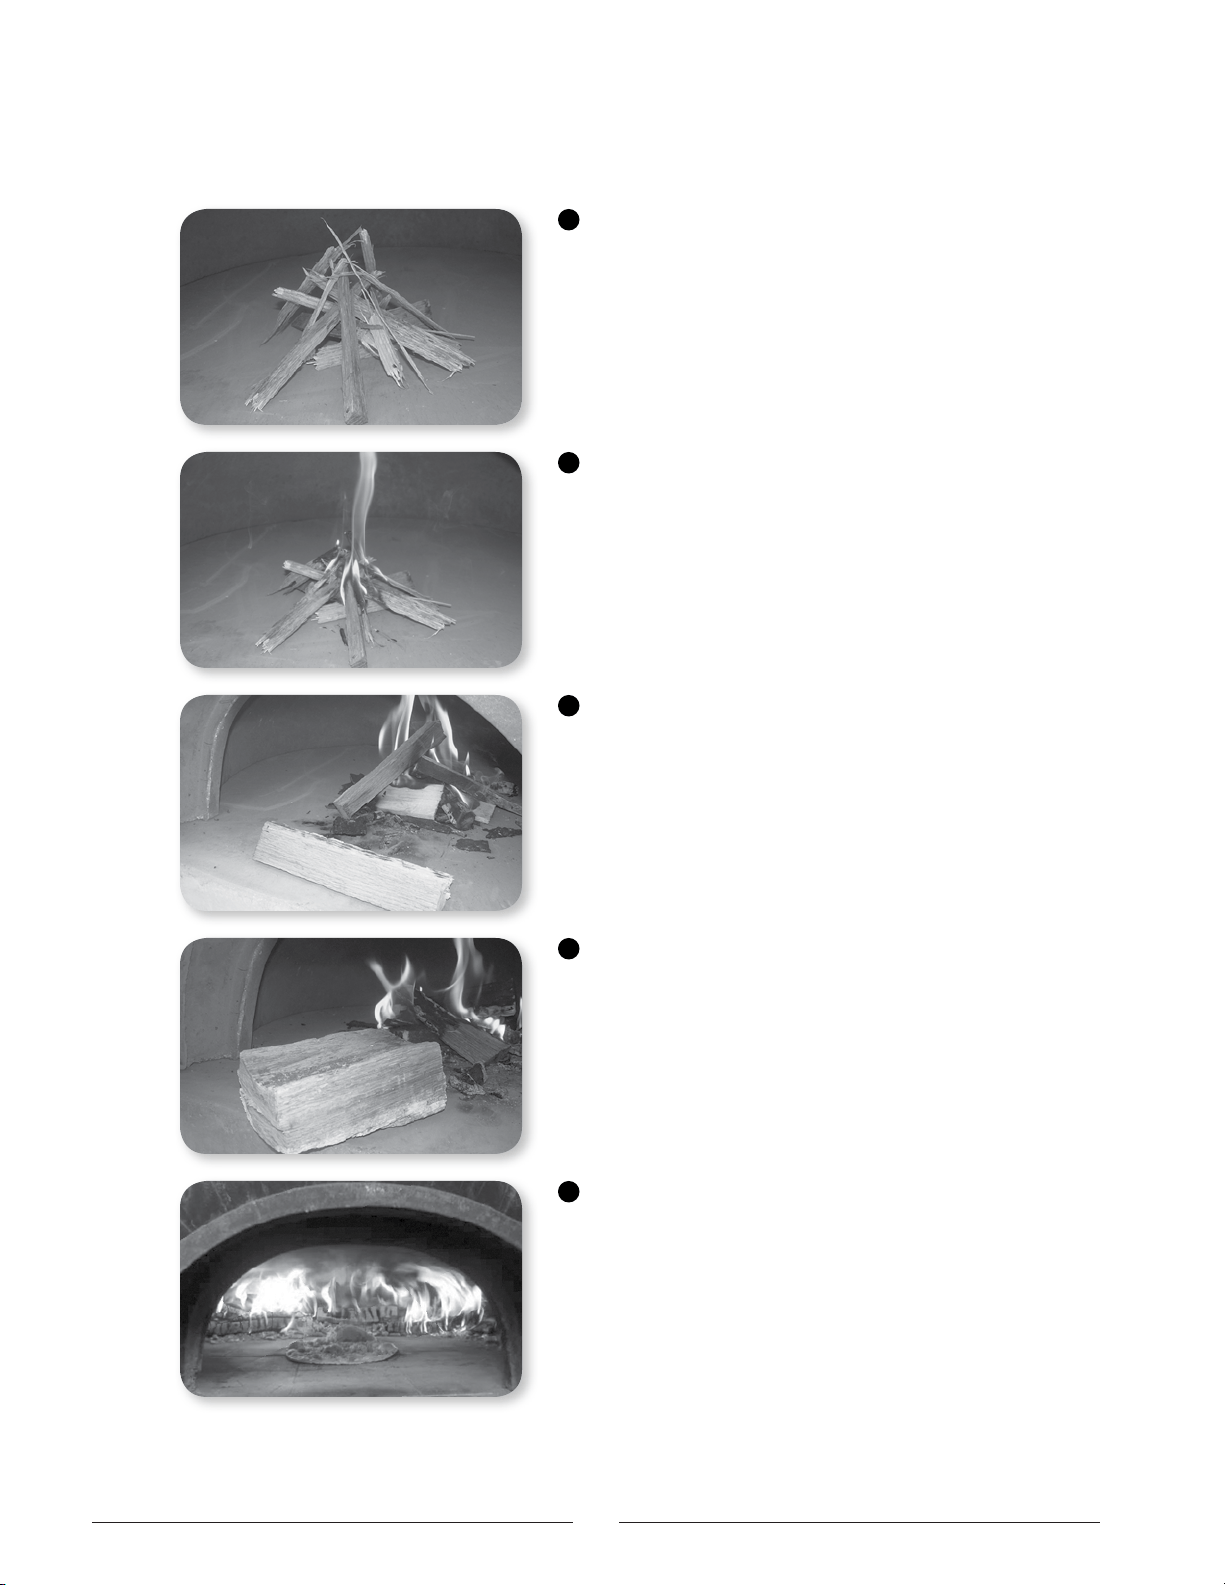
Firing Your Hybrid Oven with Wood Only
Once you’ve properly cured your Oven, you’re ready to fire it
for cooking.
A
Always start with dry kindling placed 10 inches from the
front of the Oven.
CAUTION: NEVER USE CHEMICALS OR STARTER
FLUIDS; YOU WILL NOT NEED THEM.
B
Once the fire is going, add small pieces of wood to build
the fire. You want to raise the temperature slowly, so avoid
building a huge fire that pours out of the mouth of the Oven.
C
We recommend adding large chunks of wood to the fire once
it’s going strong. Add these chunks and start moving the fire to
the back of the Oven—about 20 minutes after the fire is going.
D
You’ll notice the Oven Dome turning black. As the
temperatures rise and more heat is stored in the Dome, it
will turn a whitish grey. Your goal is to heat the Oven in a
way that the entire Dome turns whitish grey.
E
21
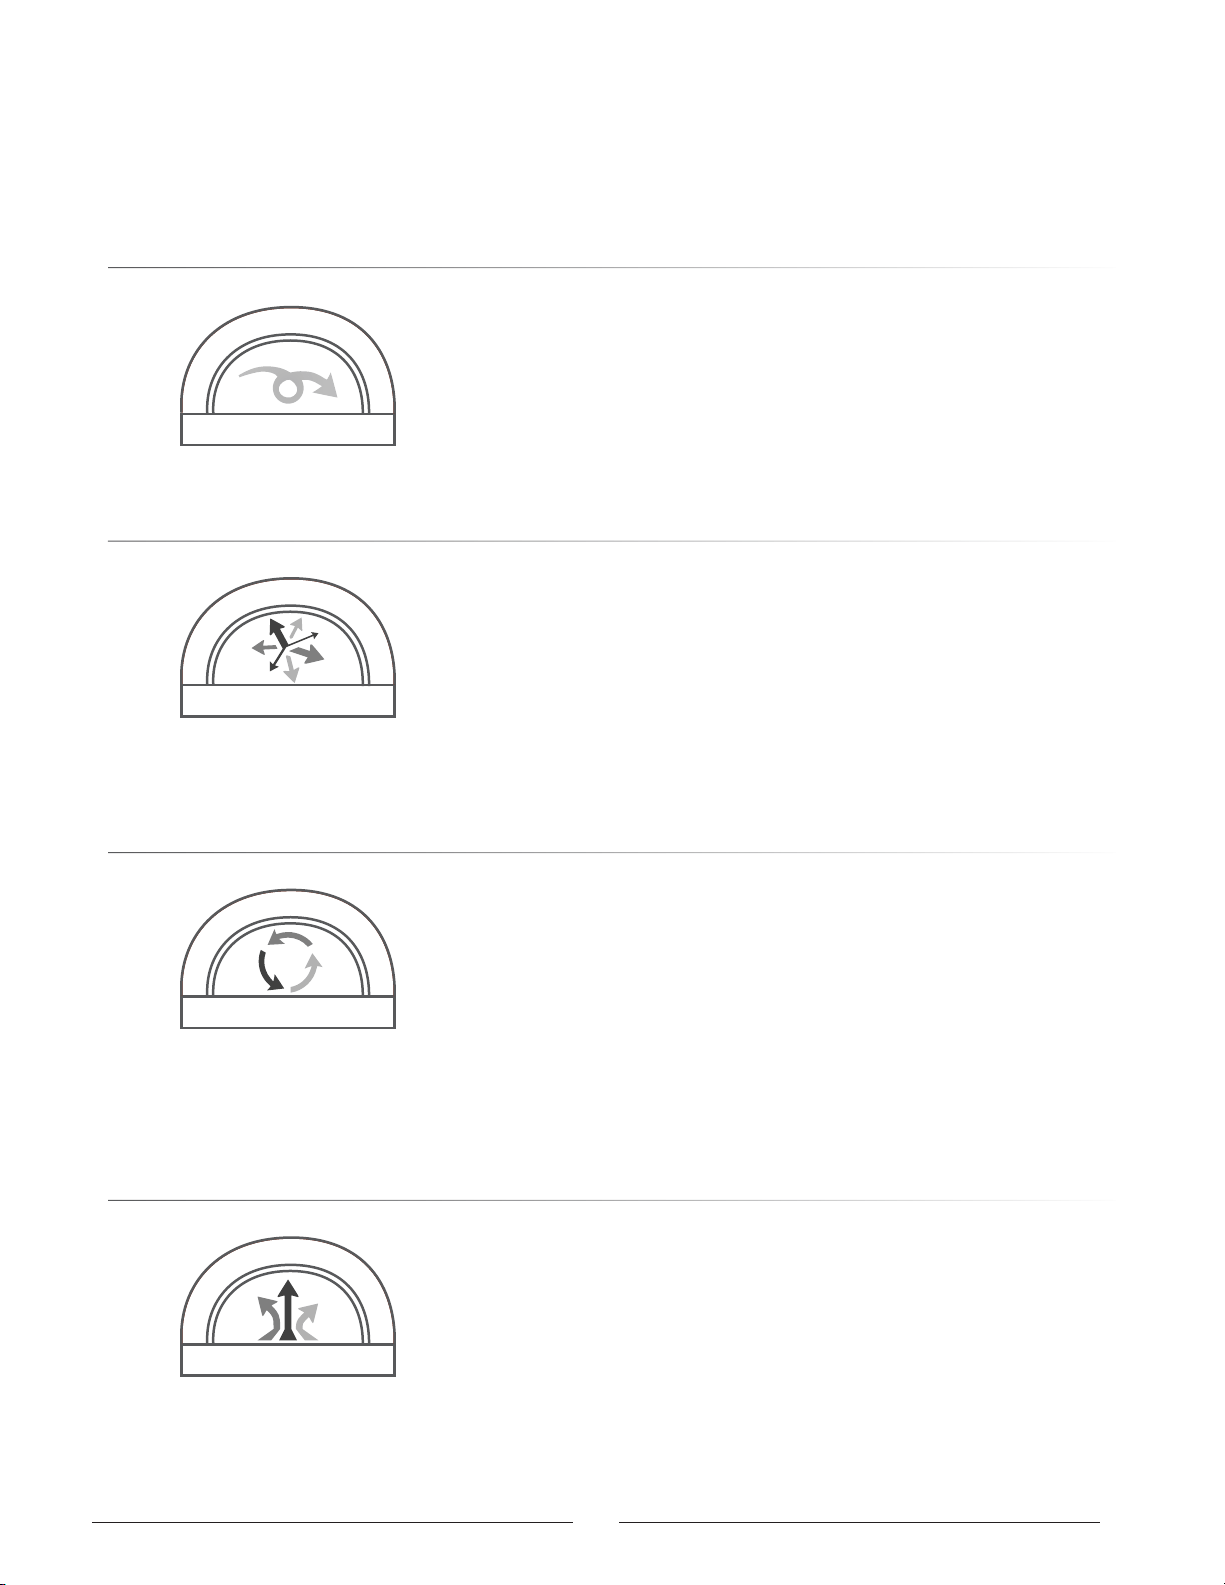
How the Oven Works
WOOD/GAS BRICK OVENS ARE SPECIALLY DESIGNED TO TAKE FULL ADVANTAGE OF ALL
THREE COOKING METHODS—RADIANT HEAT, CONVECTION AND CONDUCTION.
Only our proprietary low-dome construction creates the perfect FlameRoll
™
from front
to back. In this unique cooking method, the vent pulls the flame horizontally across the
top of the Dome and then vertically back down the side. Not only does this “funnel
effect” create higher temperatures for superior cooking, the rolling flames being drawn
across the Dome are aesthetically beautiful, giving you a full wood-fired cooking
experience. In competitive high-dome brick ovens, the flames get trapped in the upper
portion of the Dome, too far away from the food to properly cook it.
FlameRoll
™
Radiant heat comes from a direct source. In a gas/wood-fired oven, radiant heat can
come from two direct sources—the fire and the heat that’s stored in the Oven walls and
Hearth. Radiant heat is very even and will cook food from all directions. The special
shape of your CBO Oven reduces all cold spots and ensures that the stored radiant
heat is used efficiently. By slowly building the Oven’s stored heat, you’ll be able to
take advantage of the radiant heat for longer periods of time. You’ll also be able to use
radiant heat by leaving a fire or hot coals in the Oven. Use this method of cooking if you
want high heat and a short cooking time, especially for pizzas.
Radiant Heat
**Applicable when cooking with WOOD only.** Convection is heated air circulating in an
Oven. Cool air is drawn into the Oven through the access hole (when the exterior door is
closed) or the Oven opening (when the Door is open). As the cool air is drawn into the
Oven, it’s rapidly heated by the fire and the stored heat in the Oven. This heated air
passes over the food evenly. As the air continues to heat, it passes to the back of the
Oven and rises. The heated air now again passes over the food on the way out of the
Oven Flue. This draw causes a steady flow of heat to pass over the food, causing
convection.
You can also take advantage of convection with closed-door cooking. For example, when
you add cool dough to the hot Oven, convection will take place through the moisture in
the dough. As the hot air comes in contact with the dough, the heat is transferred. The air
comes off the dough cooler, and then is heated again by the Oven.
**Reminder - Never use the gas (NG or LP) features of this oven with the door closed.
Convection
The third method of cooking in your gas/wood-fired brick oven is through conduction.
Conduction occurs when a cooler object comes in contact with a warmer object and heat
is transferred. The amount of conduction that takes place depends on two things—the
temperature difference of the two items and the material (if any) that’s between them.
For example, you may want to sear a steak by placing a cast iron grill in a very hot Oven.
Make sure any cooking device you put into your Oven is at 75°F or above to avoid thermal
shock to the Hearth. Once the grill is at temperature, you’ll place room-temperature
steaks on the grill. This contact will cause conduction to take place and sear the steaks.
Another example of conduction is putting a pizza directly on the Oven’s heated Hearth.
The heat transferred from the Hearth to the pizza will cause an excellent crust to form.
Conduction
22

Open-Door Cooking
Open-door cooking is used to cook pizzas and other foods that require medium to high
temperatures. Keep the fire going in the back of the Oven. Sweep out the front of the
Hearth with a wire brush and you’re ready to cook. The Oven will become hot enough
and the small fire on top will generate radiant heat. For pizzas, the purpose of the
flame is to melt the cheese and crisp the top.
WARNING: NEVER CLOSE DOOR WHILE BURNER IS ON.
Closed-Door Cooking **applicable when using WOOD only**
Spread the fire throughout the Oven. You will store heat in the Hearth and Dome by burning
your fire hot for at least one hour. The longer you burn your fire, the more heat will be
stored in the Hearth and Dome and the longer you’ll be able to cook.
The entire Dome of the Oven should turn a whitish grey. Once the fire has burned down,
remove all coals and ashes into your ash bin. Sweep the Hearth and you’re ready to go.
Load your Oven with breads, roasts or casseroles and seal the Oven with the Insulating
Door.
Note: Closed-door cooking should only be done at temperatures below 400°F and
without a fire in the chamber. Never use the Decorative Door for closed-door cooking.
Close the Oven by inserting the Insulating Door that comes optional for the CBO-750
model.
Maximize Your ‘Real Estate’
After you have fired your Oven to the proper temperature, it’s time to maximize your
cooking “real estate.” Do this by removing the ashes and keeping just enough of the
embers to create a small ember bed—about 4 inches wide by 8 inches long—on the
Hearth along the side of your Oven.
Cooking in Your Oven
ONCE THE OVEN HAS BEEN HEATED TO THE POINT THE ENTIRE DOME HAS TURNED A WHITISH GREY,
YOU’RE READY TO COOK.
Ambient Burner
4"
Ember
8"
Bed
23
24
Using Flavored Wood
JUST IMAGINE THE AROMA AND MOUTHWATERING TASTE OF APPLE WOOD
TURKEY, ORANGE WOOD DUCK OR MAPLE WOOD STEAK!
To maximize your cooking experience, there’s nothing better than
using a fine cooking wood—alder, apple, apricot, cherry, grape,
hickory, lemon, maple, mesquite, nectarine, orange, peach, pear,
pecan, plum, white oak.
Which Kind of Wood to Use
Hard, dry, aged wood burns hotter and cooks faster. The best
burning hardwoods are arbor, ash, beech, bower, maple and
oak. Soft woods, such as linden or poplar, create about 50%
less heat than oak. The energy that comes from combustion
doesn’t depend on the type of wood you use, but on its degree of
dryness. The ideal stacking period for wood is six months in the
open and two years (up to three years for oak) in a dry, protected
spot. The wood can also be dried in the oven after you make sure
there are no coals or embers left, so the wood will not ignite.
Which Wood Not to Use
Resinous and treated woods are not recommended and can be
dangerous to your health. Waste wood should also not be used
because your wood burning oven is a cooking instrument.

Frequently Asked Questions
What besides pizza can I cook in my gas/wood
burning brick oven?
There is no limit to what you can cook in your CBO gas/wood brick
oven. Anything you can cook in your home oven, you can cook in
your CBO Oven—whole turkeys, bread, grinders, chicken, steaks,
chops, vegetables, stews, empanadas, desserts and more.
When using any CBO accessory, please do not allow any type of
liquid to touch the Hearth or Dome. For example: When cooking
steak on the Grill Grate, you need to place a Griddle underneath
the Grill Grate to “catch” the drippings.
Can the oven be used in all climates?
Yes, you can use the Oven year-round. The structure you build
around the Oven must keep the elements out and the Oven dry.
Can I install my own oven?
Yes, it can be a do-it-yourself project. You’ll need to have some
skill in concrete and masonry in order to keep your Oven safe from
the elements. (Check out our Assembly Instructions section for
more details.)
Why would I use two different doors with my oven?
Most of our competitors have either no doors or just one. The CBO-500
and CBO-750 models come with a Decorative Door to seal off the
Oven and keep the elements out when it’s not in use. The CBO-1000
model comes with an Insulating Door for when you want to control
the internal temperature and hold it for long periods of time,
especially when you’re baking. You can purchase the Insulating
Door, to use with the CBO-750 model from the CBO online store. We
recommend it for low-temperature baking and cooking.
REMINDER - never close the door (any door) while using the GAS
feature of Hybrid ovens.
Is the oven safe around children?
Any time you have fire there is some potential danger. The outside
of the Oven will be hot to touch; just how hot depends on your
design and use of insulation. If installed properly, the Oven should
not pose any more danger than a BBQ grill.
How long does it take to heat the oven?
We always recommend bringing the temperature of an oven up
slowly. This ensures a balanced hearth and dome readiness.
Typically 45 minutes is a good expectation for 700° to 800°
cooking. Your environment (wind and outside temp) can be a factor
that extends the process to about an hour. Once it’s hot, you can
use your Oven for hours.
What types of ovens are better—
refractory concrete, clay or brick?
We’re partial to refractory and brick ovens because of their look
and durability. The first oven I owned was made of clay and in the
first harsh Chicago winter, it cracked!
How much do the ovens weigh?
The raw weight of the CBO-750 Hybrid DIY Kit Oven is 890 lbs. The
CBO-750 Hybrid Countertop Oven weighs 980 lbs. The CBO-750
Hybrid Stand Oven weighs 1051 lbs. Every CBO Oven requires a
properly poured foundation.
How do I shut down my oven?
Let the flames burn down, and when the Oven cools down to
below 200°F it is safe to close the Decorative Door on the
CBO-500 and CBO-750 models. The Oven will slowly cool down
over sever
al hours.
Can I have a Commercial Hybrid CBO Oven
indoors?
CBO 750 Commercial Hybrid ovens are certified for Commercial
Indoor and Outdoor applications (i.e. yes to restaurants). The
Commercial Hybrid ovens should not be used in a residential
setting.(i.e. no to household/residential use). Hybrid ovens are
intended for commercial usage other than house hold use. You
must check your local building codes to find out all of the permits,
restrictions and inspection requirements. You must also install and
use the Oven only in accordance with Chicago Brick Oven’s
installation and operating instructions (or equivalent).
Do I need a venting pipe on my oven?
Yes. You will need to install a Venting Pipe that meets your local
building code. The Pipe serves as an airflow regulator, which is
essential for controlling the temperature and convection. Your
Venting Pipe should always be a minimum of 24 inches high.
Have more questions? Give us a call at +1 (877) 730-7758 or
email us [email protected].
25

Limited Warranty
Chicago Brick Oven, a manufacturer of wood-fired gas ovens, warrants the products to be free from
defects in materials and workmanship for a period of one (1) year from the date of shipment.
Local regulations about wood burning equipment should be consulted.
Qualifications to the Warranty
The complete Warranty is further subject to the
following qualifications:
1. The oven must be installed in accordance with CBO
installation instructions and local building codes.
2. Moisture can cause significant damage to the oven/hearth.
Therefore, the enclosure/shroud (stone, brick, stucco,
etc.) that surrounds the oven/hearth must be sealed and
waterproof. Failure to do so will void this Warranty.
3. The oven is subjected to normal use, including burning
such natural wood fuels as non-treated wood. Fuel
products with abnormal burning characteristics including,
but not limited to, fuel such as driftwood, coal or
plywood and wood products using a binder, may burn at
excessive temperatures and may cause damage to the
oven or may cause it to function improperly. CBO does not
warrant the oven when such fuels have been used.
4. This Warranty does not apply to normal wear and tear. Note
that all refractory materials will form small cracks over time.
These cracks will not affect the performance of the oven.
5. This Warranty does not apply to any cracking caused by
over-firing or the failure to follow a proper curing schedule
as outlined in the User Manual supplied with your oven or
found online at www.chicagobrickoven.com.
6. All CBO ovens are shipped FOB Factory by a third-party
carrier. It is the recipient’s responsibility to inspect the
product(s) for damage before accepting/signing for the
delivery. Damages incurred during shipment must be
addressed with the carrier at the time of delivery.
7. A certain amount of pitting naturally occurs during
the vibration and screeding (leveling and smoothing)
techniques used in manufacturing refractory precast
shapes. Also, due to the blending of minerals used to
create refractory and the high temperatures used to kiln-
fire the oven’s dome, hearth and arch, some color variation
may occur. These cosmetic variations are not detrimental
to the function of the oven.
8. Any alterations made to prefabricated ovens without written
approval from Chicago Brick Oven, will void Warranty.
Limitation on Liability
It is expressly agreed and understood that CBO’s sole obligation
and purchaser’s exclusive remedy under this Warranty, under
any other warranty, expressed or implied, otherwise, shall be
limited to replacement, repair, or refund, as specified above.
In no event shall CBO be responsible for any incidental or
consequential damages caused by defects in its products,
whether such damage occurs or is discovered before or after
replacement or repair, and whether or not such damage is
caused by CBO’s negligence. Some states do not allow the
exclusion or limitation of incidental or consequential damages,
so the above limitation or exclusion may not apply to you. The
duration of any implied warranty with respect to this oven is
limited to the duration of the foregoing warranty. Some states
do not allow limitations on how long an implied warranty lasts,
so the above may not apply to you.
Investigation of Claims Against Warranty
CBO reserves the right to investigate any and all claims against
this Warranty and to decide upon the method of settlement.
Dealers Have No Authority to Alter
this Warranty
CBO employees and dealers have no authority to make any
warranties, nor to authorize any remedies in addition to or
inconsistent with those stated above.
How to Register a Claim Against Warranty
In order for any claim under this Warranty to be valid,
CBO must be notified of the claimed defect in writing
and emailed to [email protected]. Claims against
this Warranty in writing should include the date of installation
and a description of the defect.
To register your oven visit:
https://chicagobrickoven.com/pages/register
26
For more information, visit
www.chicagobrickoven.com
Chicago Brick Oven
1020 Davey Road
Suite 300
Woodridge, IL 60517
(877) 730-7758
© 2018 Chicago Brick Oven. All rights reserved.
V.22819